😸
ChatGPTのAPIを利用してChatアプリを作ろう④ 15日目
ChatGPTのAPIを利用してChatアプリを作ろう(ChatGPT APIとの連携編)
はじめに
この記事では、ChatGPT APIを利用して、ユーザーが入力したメッセージをChatGPTに送信し、その応答を表示する方法を解説します。これにより、前回構築したチャット画面が実際にChatGPTと対話できるようになります。
ステップ1: ChatGPT API連携の準備
1. APIキーの管理
前回の記事で説明したとおり、APIキーは appsettings.json に保存されています。このキーを使用して、ChatGPT APIを呼び出します。
appsettings.json の例:
{
  "ChatGPT": {
    "ApiKey": "your_api_key_here"
  }
}
ステップ2: ChatGPTService クラスの作成
1. サービスクラスの概要
ChatGPT APIとの通信を行うクラスを作成します。このクラスでは、以下の機能を実装します:
- APIエンドポイントへのリクエストを送信。
- レスポンスの処理。
2. サービスクラスの実装
ファイル: Services/ChatGPTService.cs
using System.Net.Http;
using System.Text;
using System.Text.Json;
using Microsoft.Extensions.Configuration;

namespace OnecaratWebApp.Services
{
    public class ChatGPTService
    {
        private readonly string _apiKey;
        private readonly HttpClient _httpClient;

        public ChatGPTService(IConfiguration configuration)
        {
            _apiKey = configuration["ChatGPT:ApiKey"] ?? throw new ArgumentNullException(nameof(configuration), "API Key is missing");
            _httpClient = new HttpClient();
        }

        public async Task<string> GetResponseAsync(string userMessage)
        {
            var requestBody = new
            {
                model = "gpt-4",
                messages = new[]
                {
                    new { role = "system", content = "You are a helpful assistant." },
                    new { role = "user", content = userMessage }
                }
            };

            var requestContent = new StringContent(JsonSerializer.Serialize(requestBody), Encoding.UTF8, "application/json");

            _httpClient.DefaultRequestHeaders.Authorization = new System.Net.Http.Headers.AuthenticationHeaderValue("Bearer", _apiKey);

            var response = await _httpClient.PostAsync("https://api.openai.com/v1/chat/completions", requestContent);

            if (!response.IsSuccessStatusCode)
            {
                return $"Error: {response.StatusCode}";
            }

            var responseContent = await response.Content.ReadAsStringAsync();
            using var jsonDoc = JsonDocument.Parse(responseContent);
            var botResponse = jsonDoc.RootElement.GetProperty("choices")[0].GetProperty("message").GetProperty("content").GetString();

            return botResponse ?? "No response received.";
        }
    }
}
ステップ3: ChatController でのサービス利用
1. サービスの登録
Program.cs にサービスを登録します。
Program.cs の例:
using OnecaratWebApp.Services; // ←追加1行 ChatGPTServiceの参照

var builder = WebApplication.CreateBuilder(args);

// Add services to the container.
builder.Services.AddControllersWithViews();
builder.Services.AddSingleton<ChatGPTService>(); // ←追加2行 ChatGPTServiceの登録

var app = builder.Build();
(省略)
2. ChatController の更新
ChatGPTService を利用して、ユーザーの入力をAPIに送信し、応答を取得します。
ファイル: Controllers/ChatController.cs
using Microsoft.AspNetCore.Mvc;
using OnecaratWebApp.Models;
using OnecaratWebApp.Services;

namespace OnecaratWebApp.Controllers
{
    public class ChatController : Controller
    {
        private readonly ChatGPTService _chatGPTService;

        public ChatController(ChatGPTService chatGPTService)
        {
            _chatGPTService = chatGPTService;
        }

        [HttpGet]
        public IActionResult Index()
        {
            return View(new ChatMessage());
        }

        [HttpPost]
        public async Task<IActionResult> Index(ChatMessage model)
        {
            if (string.IsNullOrEmpty(model.UserMessage))
            {
                model.BotResponse = "Error: Message cannot be empty.";
                return View(model);
            }

            model.BotResponse = await _chatGPTService.GetResponseAsync(model.UserMessage);
            return View(model);
        }
    }
}
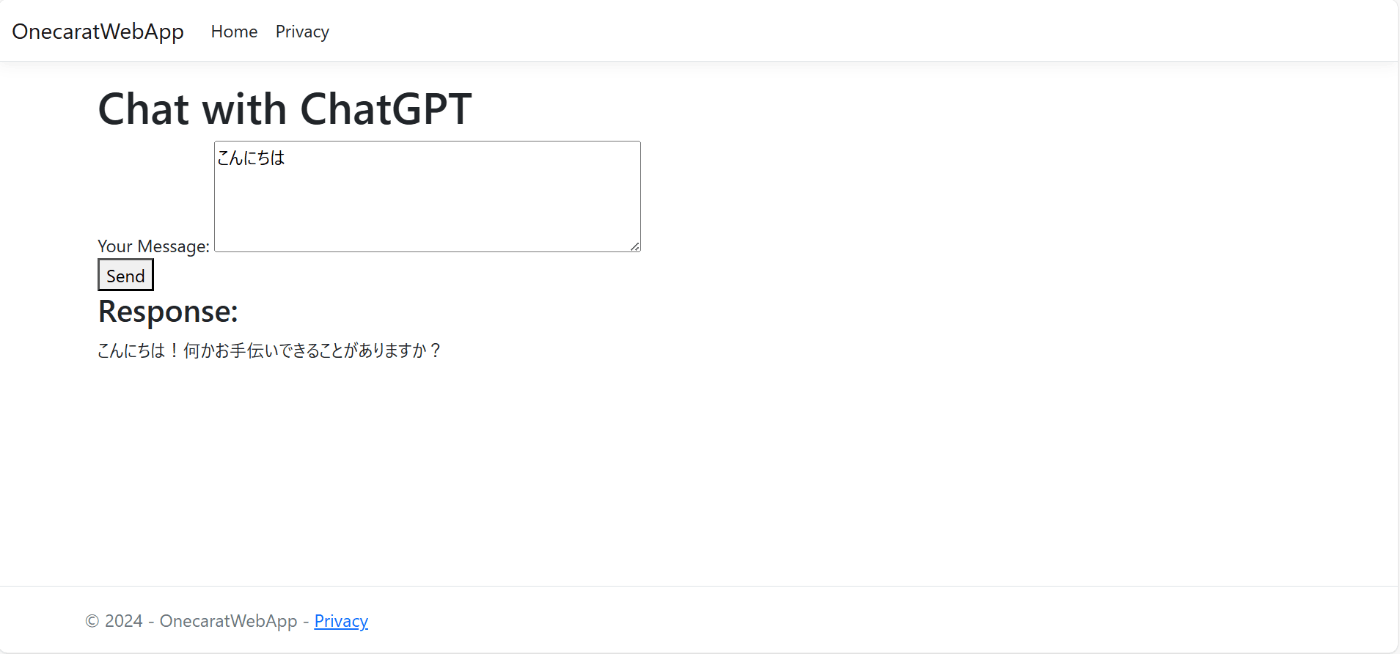
ステップ4: テスト実行
- アプリケーションを起動します:
dotnet watch run - ブラウザで
http://localhost:XXXX/Chatにアクセスします。 - メッセージを入力し、「Send」ボタンを押して、ChatGPTの応答が表示されることを確認します。

まとめ
この記事では、ChatGPT APIを利用してユーザー入力に対する応答を表示する方法を解説しました。この実装により、シンプルなチャットアプリケーションがChatGPTと連携するようになりました。
繰り返し会話をしていくと、連続性がないことに気が付くと思います。対話の履歴を連携できていないからです。
次回の記事では、履歴連携の実装について解説します。
Discussion