Code MagicでiOSのアプリをアップするテストだけを行う
Codemagicを使用してFlutterアプリをApp Storeに公開する完全ガイド
前提条件
macOSが搭載されたPC
Apple Developer Programのメンバーシップ(年間99ドル)
Flutterの開発環境がセットアップされていること
GitHubアカウント
初回のみ必要な以下の工程は完了しているものとする
初回のみ必要な設定
-
Codemagicアカウントの作成
- Codemagicのウェブサイトでアカウントを作成
- GitHubアカウントと連携
-
Apple Developer Program への登録(まだの場合)
- Apple Developer Programに登録(年間99ドル)
-
App Store Connect API キーの作成
- App Store Connectにログイン
- Users and Access > Keys で新しいAPIキーを生成
- キー名を設定し、App Managerの権限を付与
- 生成されたキーID、Issuer ID、.p8ファイルを安全に保管
-
CodemagicでのApple Developer Portal統合の設定
- Codemagicダッシュボードで Teams > Personal Account > Integrations に移動
- Developer Portalの「Connect」ボタンをクリック
- API key name、Issuer ID、Key ID、API Key(.p8ファイル)を入力
- 保存
1. Flutterプロジェクトの作成とGitHubへのプッシュ
ターミナルを開き、以下のコマンドを実行してFlutterプロジェクトを作成:
mkdir codemagicdemoproject
cd codemagicdemoproject
flutter create --org jp.co.caen --platforms=android,ios .
GitHubで新しいリポジトリを作成します(例:codemagic_demo_project)。
ローカルのプロジェクトをGitHubにプッシュします:
git init
git add .
git commit -m "Initial commit"
git remote add origin [https://github.com/YOURSELF_NAME/codemagic_demo_project.git]
git push origin main -f
2-A. App Store Connectでのアプリ登録
App Store Connectでの作業
-
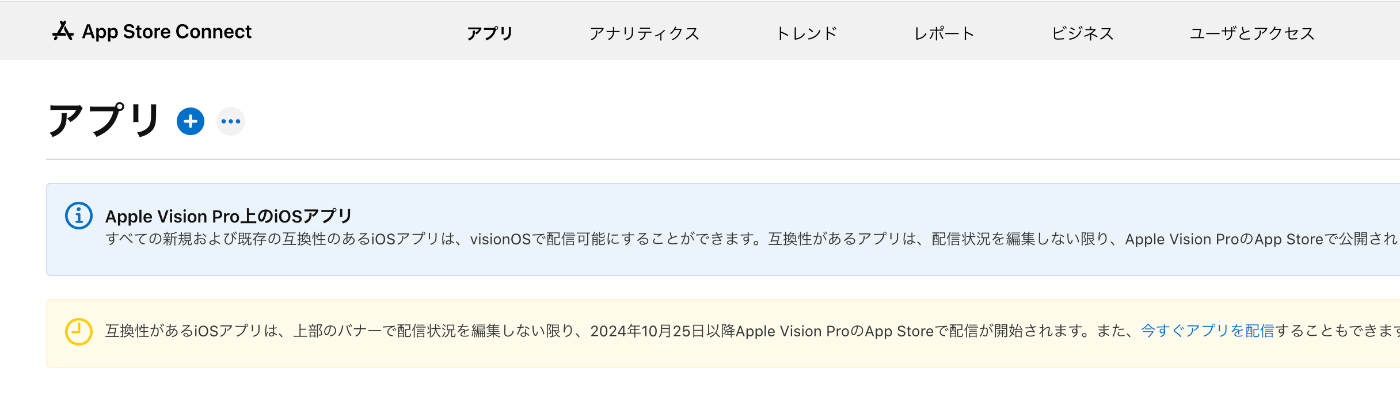
App Store Connectにログイン。
https://appstoreconnect.apple.com/apps
-
「アプリ」ページで「+」ボタンをクリックし、「新規アプリ」を選択します。
-
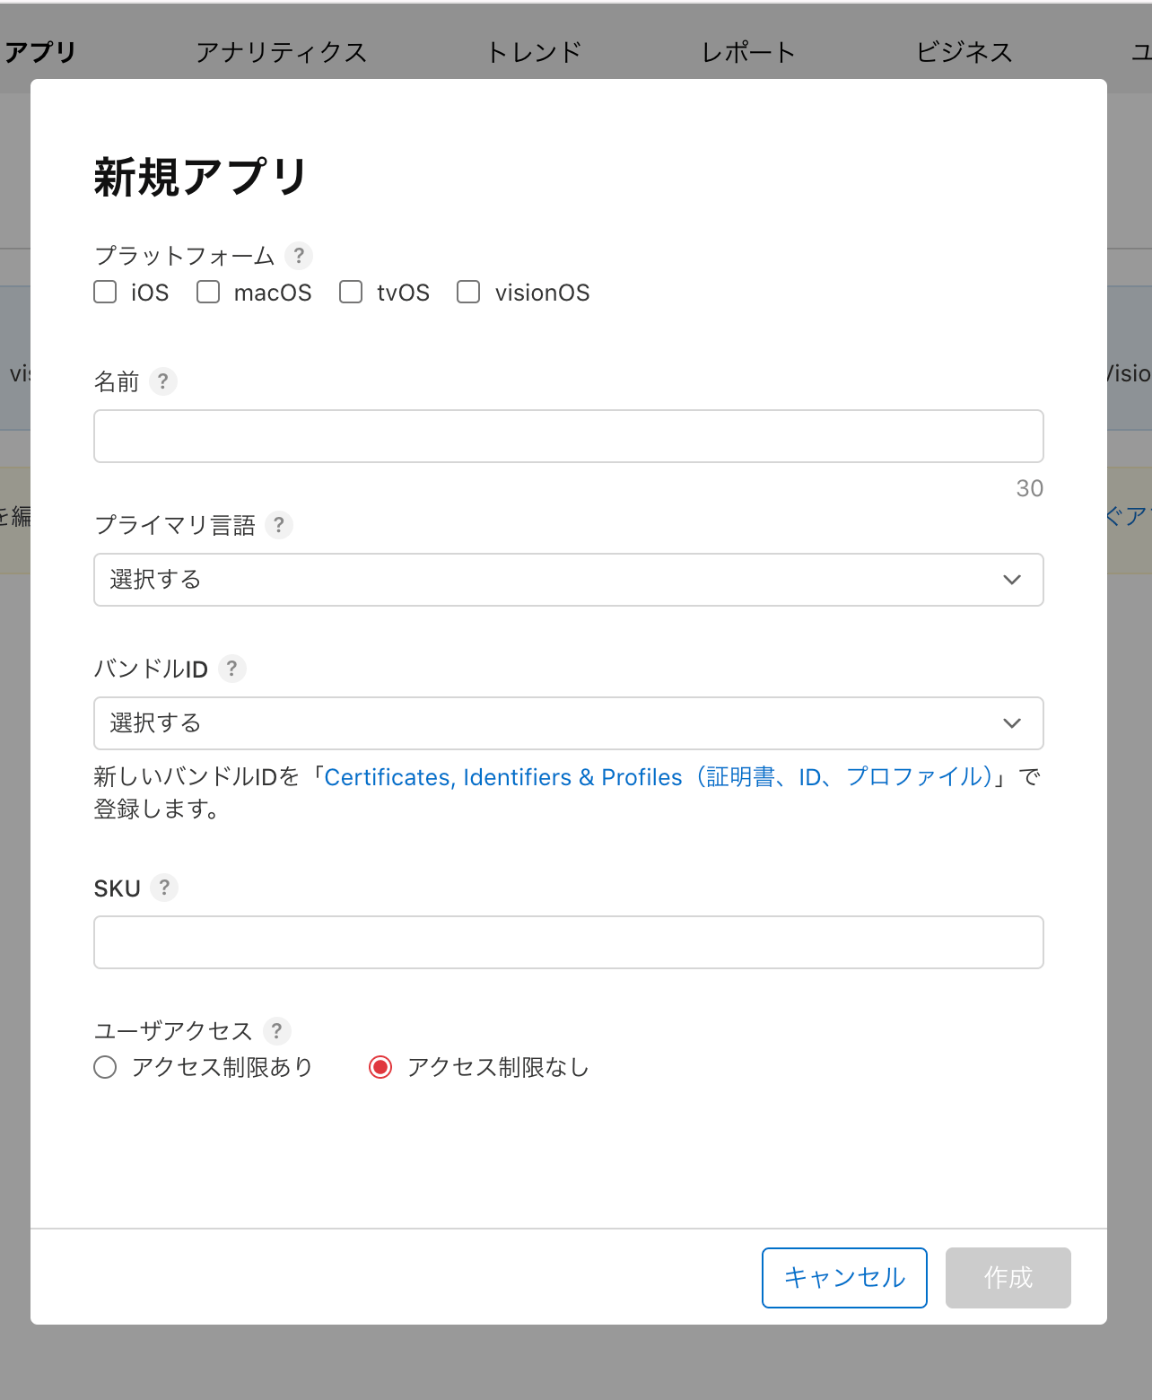
「新規アプリ」モーダルにて以下の情報を入力:
- プラットフォーム: iOS
- アプリ名: CodemagicDemoProject
- 主言語: 英語(または希望の言語)
-
バンドルID:
COM.YOURDOMAIN.codemagicdemoproject(一意である必要があります)
(俺ルール)バンドルIDの命名規則としてcodemagicdemoproject部分はすべて小文字で繋げることにする -
SKU: ComYourdomainCodemagicdemoproject(一意の識別子)
(俺ルール)SKUの命名規則にはバンドルIDをPascalCaseで表したものにする - ユーザアクセス: アクセス制限なし
また、同モーダルの「バンドルID」の箇所に下線青文字で「 新しいバンドルIDを「Certificates, Identifiers & Profiles(証明書、ID、プロファイル)」で登録します。 」という案内がある。
なのでそのリンクを踏み「Certificates, Identifiers & Profiles」ページ(https://developer.apple.com/account/resources/identifiers/bundleId/add/bundle) に遷移する
2-Bの工程へ
- 2-Bの工程が終わったのちに、新規アプリ追加モーダルへ戻り、2-Bで登録した「Identifiers」を選択し、アプリ作成
2-B. Apple Developer PortalでのApp ID作成
Apple Developer Portalにログイン
- Apple Developer Portalにログインする。(https://developer.apple.com/account)

2. 「プログラムのリソース」 -> 「証明書、ID、プロファイル」 -> 「証明書」 をクリックし、「Certificates, Identifiers & Profiles」ページへ遷移する(https://developer.apple.com/account/resources/certificates/list)
Certificates, Identifiers & Profilesページでの操作
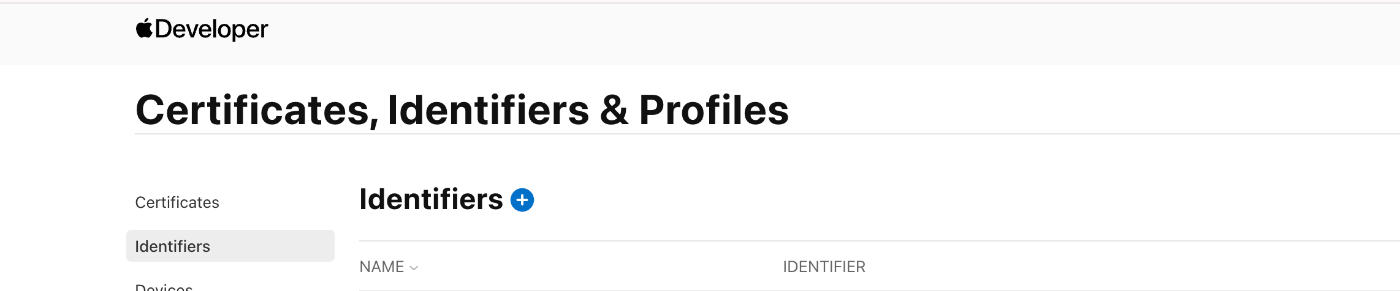
1.「Identifiers」を選択し、「+」ボタンをクリック。
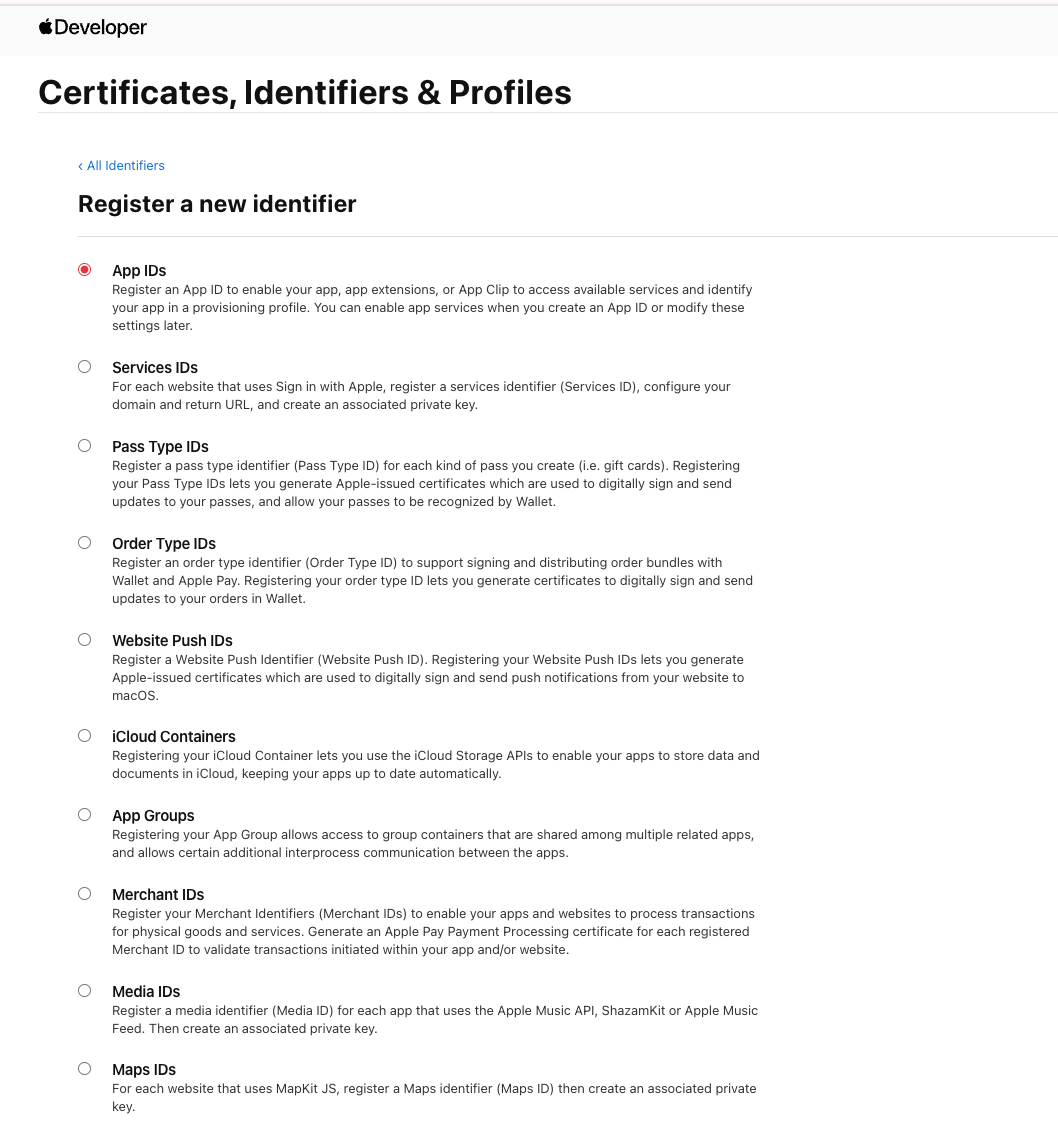
2. 「App IDs」を選択し、「Continue」をクリック。

3. 「App」を選択し、「Continue」をクリック。
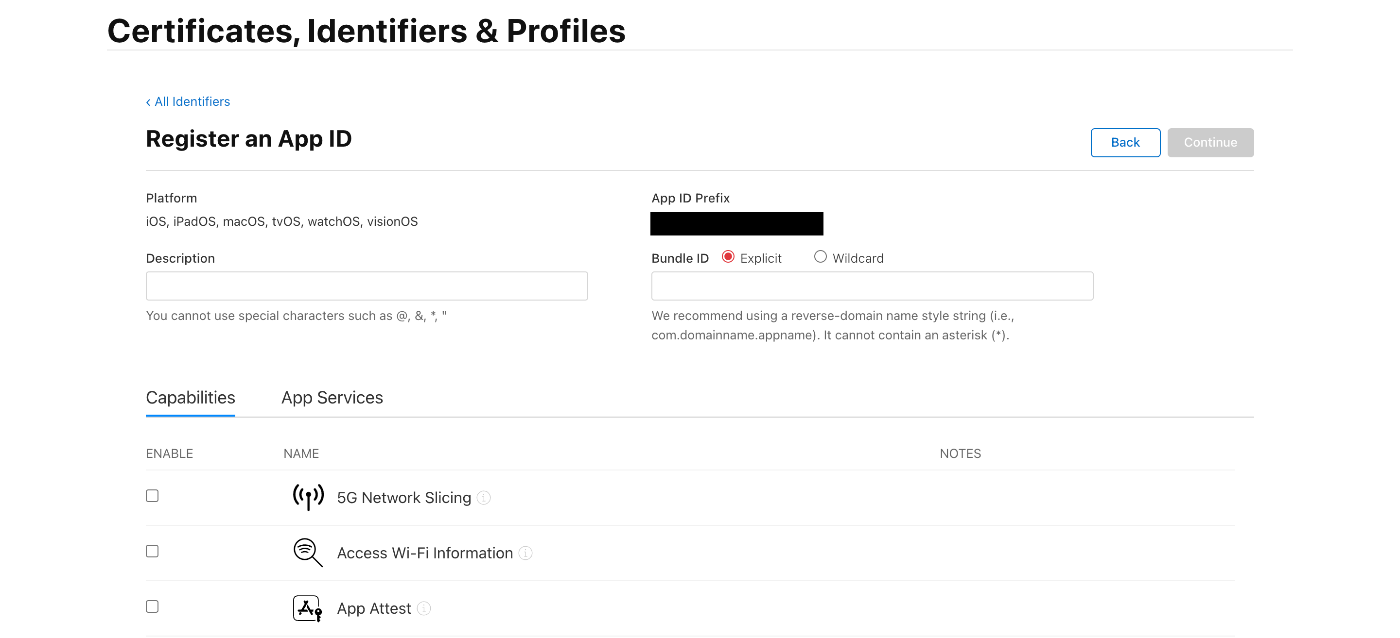
4. 以下の情報を入力し、決定。
    - **Description**: CodemagicDemoProject
    - **Bundle ID**: Explicit
    - **Bundle ID**: COM.YOURDOMAIN.codemagicdemoproject(2-A、App Store Connectで使用したものと同じ)
- 「Continue」をクリックし、確認後「Register」をクリック。

Identifiersに登録されたことを確認し、2-Aの工程4に戻る
3. Codemagicでの新規プロジェクト追加
- Codemagicダッシュボードページ(https://codemagic.io/apps) を表示。

2. ページ内、右上部にある「Add application」をクリック

3. 「GitHub」を選択

4. 特定のGitレポジトリを選択。「Flutter(cia Workflow Editor)」を選択し、「Finish: Add application」をクリック・

5. Codemagicのプロジェクトが作成された。
4. Codemagicワークフローの設定
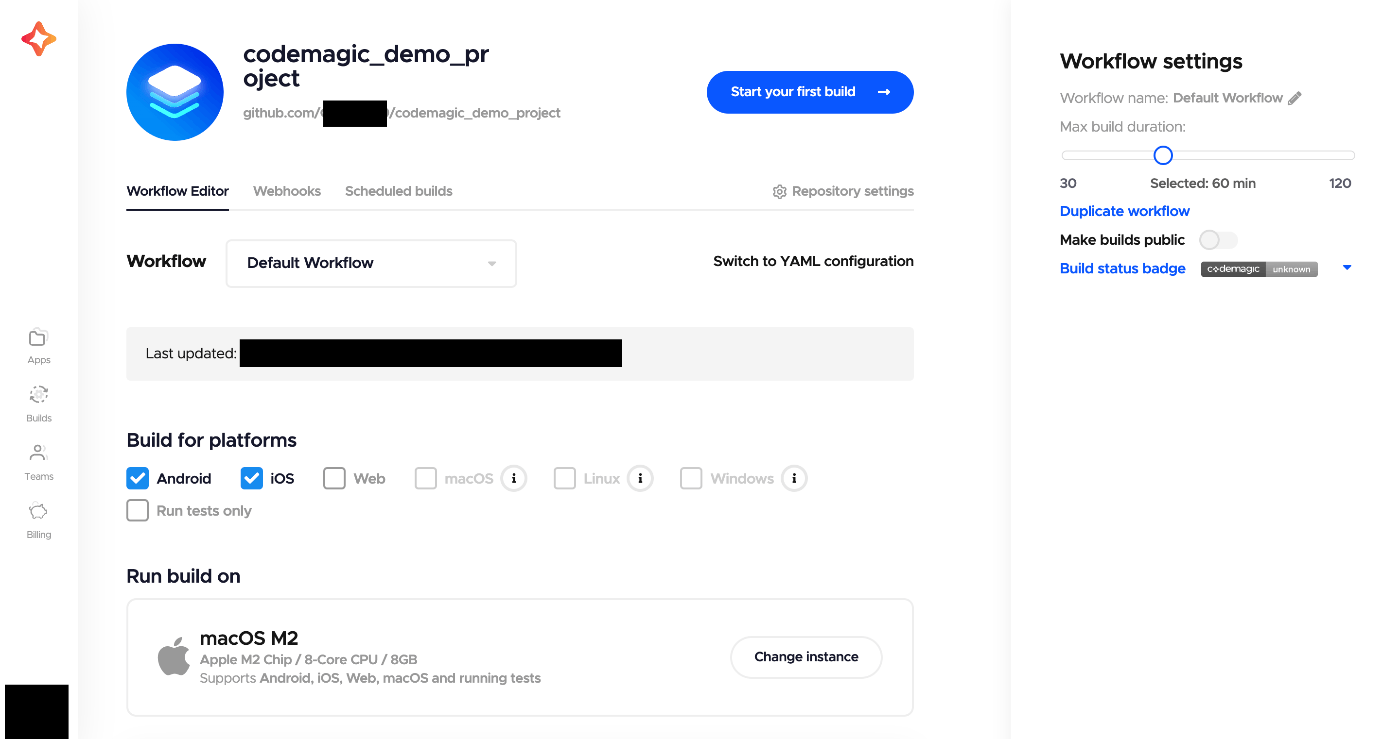
- 先ほど作ったCodemagicプロジェクトの「Workflow Editor」を開く

2. (今回はiOSに絞ったチュートリアルなので)ビルドプラットフォームとして「iOS」のみを選択
- Workflow Editorの他の設定を見ていく。
-
Build triggers:何も選択しない
-
Environment variables:何も選択しない
-
Dependency caching:何も選択しない
-
Tests:何も選択しない(disabled状態)
-
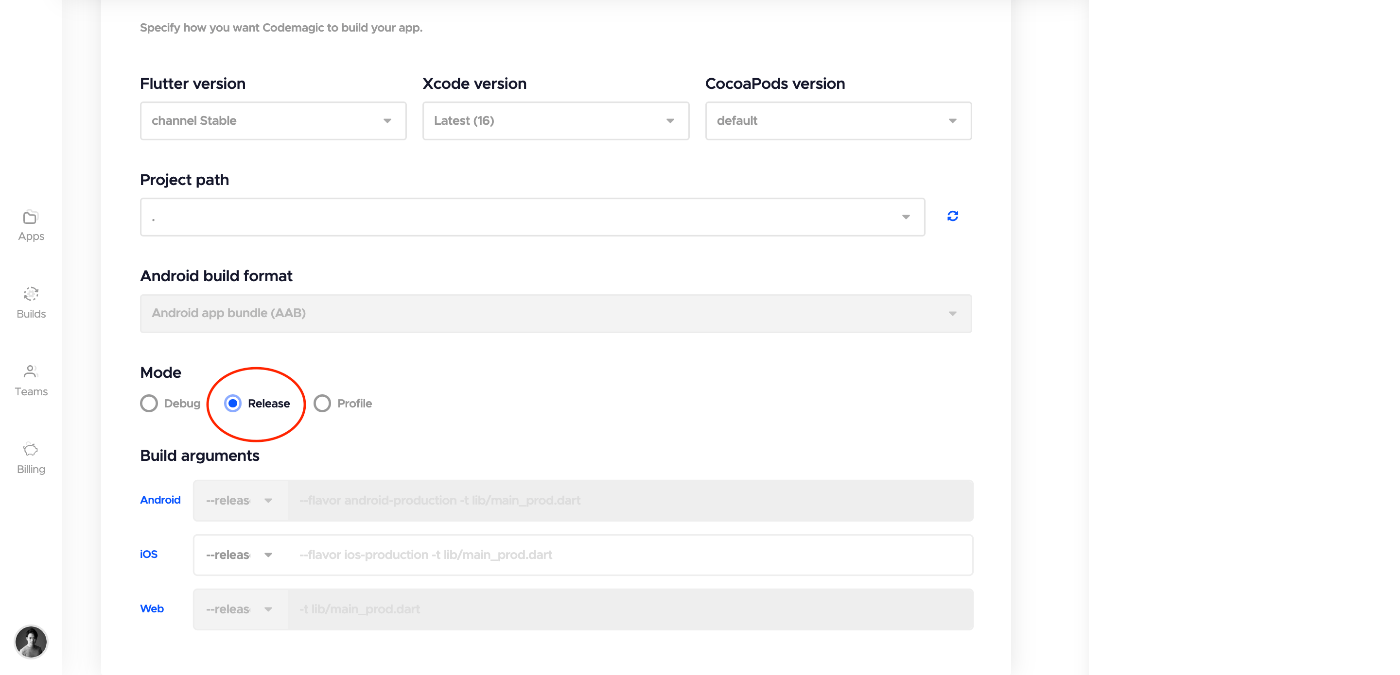
Build:「Mode」項目を「Release」に変更。
-
Distribution:以下のように設定を行なっていく。
-
4-1. ワークフロー中「Distribution」の設定

初期状態はこう
4-1-1.「iOS code signing」項目の設定
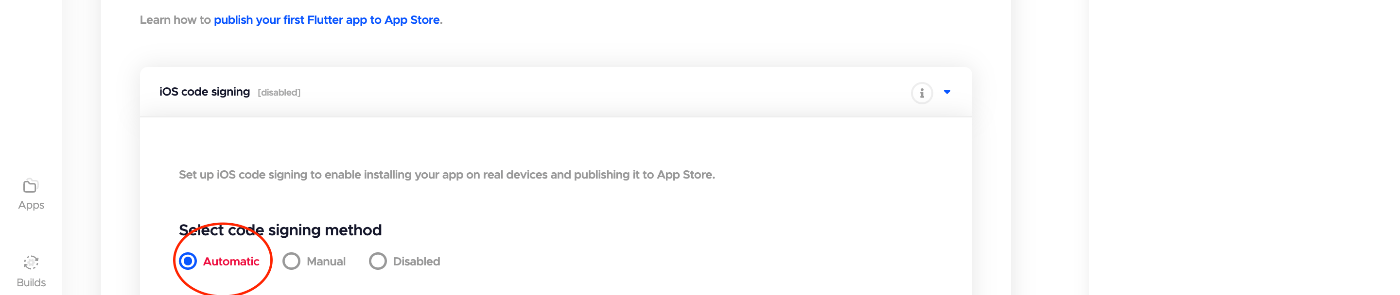
- 「Select Code signing method」:「Automatic」を選択

2. 「App Store Connect API key (using keys from user settings)」:Codemagicに追加済みのAPI Keyが表示されているはずなのでそれを選択。
(表示されない場合は、https://zenn.dev/codemagic/articles/3ade99d0485de4#ios-code-signing この記事を参照)

3. 「Provisioning profile type」: 「App Store」を選択

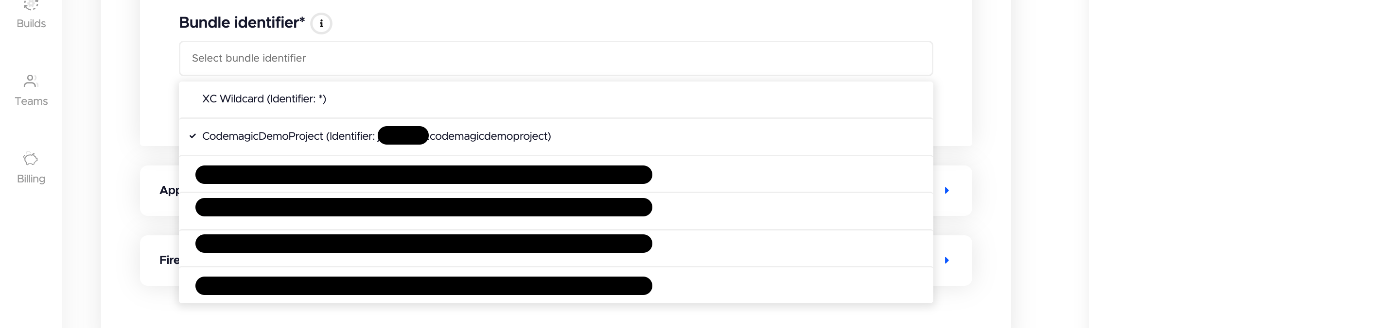
4. AppleStoreConnectで今回作成したアプリ名バンドルID(CodemagicDemoProject(Identifier:COM.YOURDOMAIN.codemagicdemoproject)
がプルダウンに表示されるのでそれを選択。
(初期値は XC Wildcard(Identifier:*))
4-1-2. 「App Store Connect API key(using keys from user settings)」項目の設定
初期状態。

- 「Enable App Store Connect publishing」にチェックを入れる。

2. AppStoreConnectAPI keyがプルダウンにあるのでそれを選択(iOS code signingのものと同一)
3. その他の項目は一旦触らない
- 画面右上の緑色ボタン「Save Change」で変更を保存。
Codemagicでのビルド

今回作成したアプリケーション(codemagic_demo_project)のワークフロー画面から、画面右上「Start your fisrt build」ボタンを押してビルドの実行
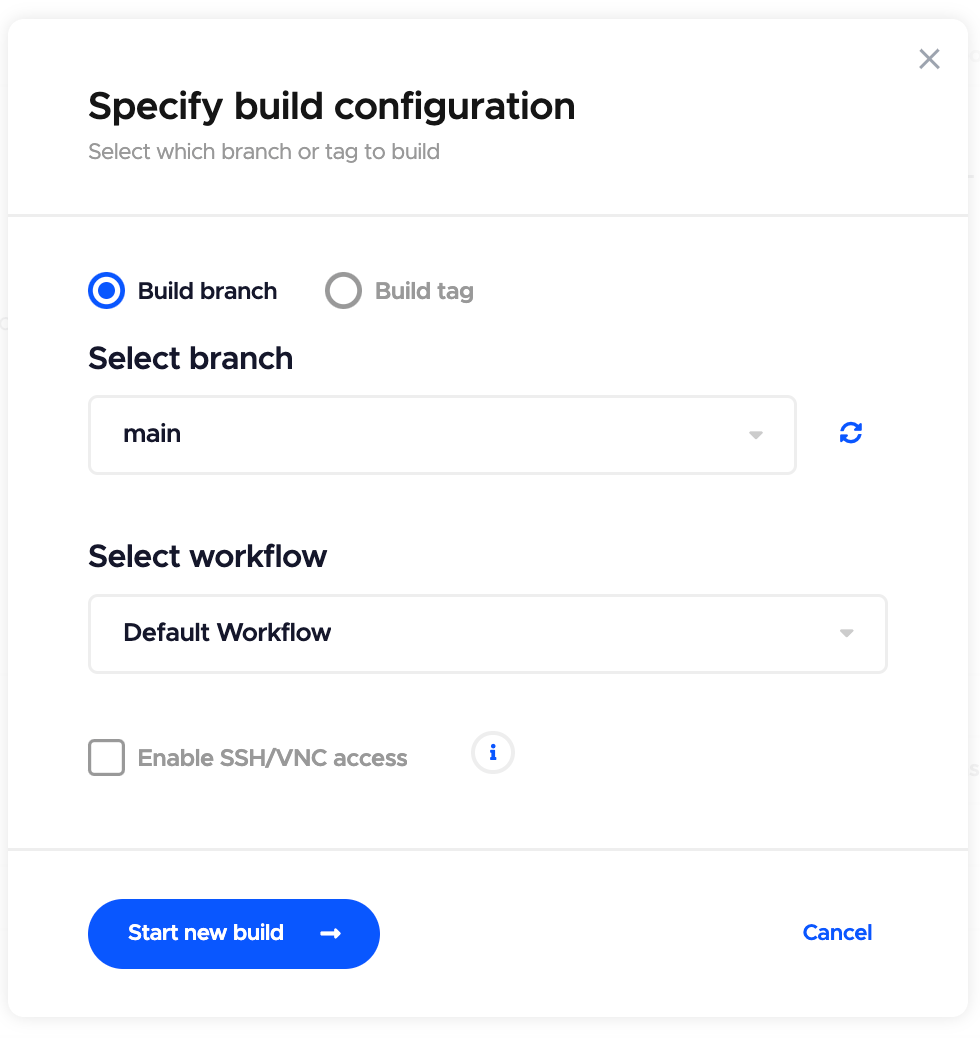
ブランチは初期状態からmainブランチが選択されているのでそのまま「Start new build」ボタンを押す。
ビルド画面でエラーが出た。
Searching for files matching /Users/builder/clone/ios/**/*.xcodeproj
Completed configuring code signing settings
Did not find matching provisioning profiles for code signing!
Generated options for exporting the project
 - Method: ad-hoc
 - Provisioning Profiles: []
 - Signing Certificate:
 - Signing Style: manual
 - Team Id:
Saved export options to /Users/builder/export_options.plist

> flutter build ipa --release --export-options-plist /Users/builder/export_options.plist
Resolving dependencies...
Downloading packages...
  collection 1.18.0 (1.19.0 available)
  flutter_lints 4.0.0 (5.0.0 available)
  leak_tracker 10.0.5 (10.0.7 available)
  leak_tracker_flutter_testing 3.0.5 (3.0.8 available)
  lints 4.0.0 (5.1.0 available)
  material_color_utilities 0.11.1 (0.12.0 available)
  meta 1.15.0 (1.16.0 available)
  stack_trace 1.11.1 (1.12.0 available)
  string_scanner 1.2.0 (1.3.0 available)
  test_api 0.7.2 (0.7.3 available)
  vm_service 14.2.5 (14.3.0 available)
Got dependencies!
11 packages have newer versions incompatible with dependency constraints.
Try `flutter pub outdated` for more information.

Archiving com.example.codemagicDemoProject...
Automatically signing iOS for device deployment using specified development team in Xcode project: RZ4Q66N5HA
Running Xcode build...
Xcode archive done.                                          2.9s
Failed to build iOS app
Error (Xcode): No profiles for 'com.example.codemagicDemoProject' were found: Xcode couldn't find any iOS App Development provisioning profiles matching 'com.example.codemagicDemoProject'. Automatic signing is disabled and unable to generate a profile. To enable automatic signing, pass -allowProvisioningUpdates to xcodebuild.
/Users/builder/clone/ios/Runner.xcodeproj


It appears that there was a problem signing your application prior to installation on the device.

Verify that the Bundle Identifier in your project is your signing id in Xcode
  open ios/Runner.xcworkspace

Also try selecting 'Product > Build' to fix the problem.
Encountered error while archiving for device.


Build failed :|
Failed to build for iOS
どうやらバンドルIDが違うよと言われた。
今回、AppStoreで設定したバンドルIDは、jp.co.caen.codemagicdemoproject
一方、エラー文章の中で言われているのは com.example.codemagicDemoProject
この違い。
つまり、
mkdir codemagic_demo_project
cd codemagic_demo_project
flutter create  .
で作成したflutterプロジェクトにデフォルトでバンドルIDがcom.example.codemagicDemoProjectに設定されており、それとAppStoreで登録した希望のバンドルIDと異なるようだ。
ちなみに、プロジェクトのソースコードを見ると、Androidでは
namespace = "com.example.codemagic_demo_project"
のように設定されていた。
まとめると、現時点では
希望するバンドルID:jp.co.caen.codemagicdemoproject
AppStore : jp.co.caen.codemagicdemoproject
コード中のバンドルID(iOS):com.example.codemagicDemoProject
コード中のバンドルID(Android):com.example.codemagic_demo_project
解決策
まず、今後flutterプロジェクトを作成する際には
flutter create --org jp.co.caen codemagicdemoproject
バンドルIDがすべて小文字+記号の入らない形でこのコマンドを打つことにする。(もちろんjp.co.caen部分は任意)
または、
mkdir codemagicdemoproject
cd codemagicdemoproject
flutter create --org jp.co.caen .
さらにいうと、ios,androidだけでいいので
flutter create --org jp.co.caen --platforms=android,ios .
とりあえず諸々のバンドル IDを小文字表記に書き換えた