AWS CDK+localstackを使ってよくあるRESTなWebアプリ構成を作ってみる
以前出した下記の記事をさらに発展させて、AWS CDKとlocalstackでSPAなWebアプリを作ってみます。いろんなところで同じような事をやられている方が多いと思いますが、自分のアウトプットのため+もしかしたら誰かの役に立つと思ってまとめてみます。
構成

こんなのを作ってみます。処理としては、S3上にdeployされたwebサイトからMySQLに登録されたデータが参照・登録できるようになることが目標です。
今回の構成についての注意点は下記のとおりです。
- localstack でのRDSはPro版じゃないと使用できなさそうなので、適当にMySQLのDBを作って、そこに接続しにいく。
- docker-composeを使ってlocalstackとMySQLコンテナを動かしているので、Lambdaから外部DBに出るのは簡単になっている。
- 権限周りについては実際の本番環境では適切に絞る必要があるが、そこは面倒なので適当担っている。
検証環境
今回は下記の環境で試しています。
- Windows10 10.0.19044のWSL2環境
- Docker version 20.10.17
- docker-compose version 1.29.2
- npm: 8.10.0
- node: v16.14.2
localstack+MySQLの環境作り
dockerでlocalstackを実行させるのは以前の記事を見てもらって、、
今回は、docker-composeを使ってlocalstackとMySQLのcontainerを建てていきます。同じdocker network上でcontainerを建てるので、lambdaからcontainer名でMySQL DBに接続できるようになるかなと理解していますが、実際にLambdaから外部DBに接続しようと思うと、必要なpermissionが増えたりVPCの設定を行わないといけないので要注意です。
参考
- https://openupthecloud.com/can-aws-lambda-access-database/
- https://developer.genesys.cloud/blueprints/lambda-premise-blueprint/
- https://docs.aws.amazon.com/lambda/latest/dg/configuration-vpc.html
docker-compose.yamlのサンプルは下記の通りです。あとついでにmysqlについては適当なデータで初期化されるようにしています。
version: "3.8"

services:
  mysql:
    platform: linux/x86_64
    image: mysql:latest
    restart: always
    container_name: mysql

    environment:
      MYSQL_ROOT_PASSWORD: test_admin
      MYSQL_DATABASE: test_db
      MYSQL_USER: test_admin
      MYSQL_PASSWORD: test_admin
      MYSQL_ALLOW_EMPTY_PASSWORD: "yes"
    ports:
      - 3306:3306
    volumes:
      - ./docker-entrypoint-initdb.d:/docker-entrypoint-initdb.d
      - ./db:/var/lib/mysql
    command: mysqld --character-set-server=utf8mb4 --collation-server=utf8mb4_unicode_ci
初期化のためのSQLサンプル
CREATE DATABASE IF NOT EXISTS test_db;
USE test_db;

CREATE TABLE IF NOT EXISTS test_table (id int, name text);
INSERT INTO test_table (id, name) VALUES (1, 'one'), (2, 'two');
準備ができたらとりあえずdocker-compose up -dして、cdkもbootstrapしておきます。
CDKの定義
先ほどlocalstackとMySQLの環境を作ったので、いよいよCDKを定義していきます。
ひとまず最初に紹介した構成から最低限必要になるresourceを定義していきましょう。
Lambda
とりあえず動作確認したいので、Lambdaの処理をインラインで書いちゃいます。
const testLambdaRole = new iam.Role(this, "TestLambdaRole", {
  assumedBy: new iam.ServicePrincipal("lambda.amazonaws.com"),
});
testLambdaRole.addManagedPolicy(
  iam.ManagedPolicy.fromAwsManagedPolicyName(
    "service-role/AWSLambdaBasicExecutionRole"
  )
);

const testLambda = new lambda.Function(this, "TestLambda", {
  runtime: lambda.Runtime.NODEJS_16_X,
  handler: "index.handler",
  code: lambda.Code.fromInline(`
  exports.handler = async (event) => {
    console.log('event: ', event);
    return {
      statusCode: 200,
      body: JSON.stringify({"event": event}),
    };
  };
  `),
  role: testLambdaRole,
});
API Gateway
Lambdaと同様に、APIをキックした時のlambdaのhandlerの処理を適当にインラインで定義しちゃいます。
const testApiGW = new apigw.LambdaRestApi(this, "TestApiGW", {
  handler: new lambda.Function(this, "TestRootLambda", {
    runtime: lambda.Runtime.NODEJS_16_X,
    handler: "index.handler",
    code: lambda.Code.fromInline(`
    exports.handler = async (event) => {
      console.log('event: ', event);
      return {
        statusCode: 200,
        body: JSON.stringify({"event": event}),
      };
    };
    `),
    role: testLambdaRole,
  }),
});
S3
静的WebアプリのためのS3バケットです。本当はAWS CDK s3deployのBucketDeploymentを使って後々作る静的webアプリをデプロイしたいところですが、BucketDeploymentは裏でLambda Layerを使っているっぽく、無料のlocalstackではLambda Layerが使えないので仕方なく後からCLIでdeployしていきます。
ついでにS3のwebアプリのURLも吐き出すようにしておきます。(後で確認が楽なので、、)
const websiteBucket = new s3.Bucket(this, "WebsiteBucket", {
  websiteIndexDocument: "index.html",
  publicReadAccess: true,
});
new CfnOutput(this, "S3WebSite", {
  value: websiteBucket.bucketWebsiteUrl,
});
ひとまずこの状態でサンプルとしてdeployしてあげましょう。deployするとoutputとしてAPI Gatewayのエンドポイントが出てくるので、こいつを試しにキックしてみると、だら〜っとLambdaに渡されたeventの情報が返ってきます。これは、API Gatewayへのリクエストのデフォルト処理がlambdaで受け取ったeventをそのままreturnするってCode.fromInlineで書いているからですね。
Outputs:
InfraStack.S3WebSite = http://infrastack-websitebucket75c24d94-150307ed.s3-website.localhost.localstack.cloud
InfraStack.TestApiGWEndpointF4D06F73 = https://vyedkk2c0a.execute-api.localhost.localstack.cloud:4566/prod/
Stack ARN:
arn:aws:cloudformation:ap-northeast-1:000000000000:stack/InfraStack/53b751ed

✨  Total time: 15.15s

$ curl https://vyedkk2c0a.execute-api.localhost.localstack.cloud:4566/prod/
{"event":{"path":"/","headers":{"Remote-Addr":"172.24.0.1","Host":"vyedkk2c0a.execute-api.localhost.localstack.cloud:4566","User-Agent":"curl/7.81.0","accept":"*/*","X-Forwarded-For":"172.24.0.1, vyedkk2c0a.execute-api.localhost.localstack.cloud:4566, 127.0.0.1, vyedkk2c0a.execute-api.localhost.localstack.cloud:4566","x-localstack-edge":"https://vyedkk2c0a.execute-api.localhost.localstack.cloud:4566","Authorization":"","x-localstack-tgt-api":"apigateway","__apigw_request_region__":"ap-northeast-1"},"multiValueHeaders":{"Remote-Addr":["172.24.0.1"],"Host":["vyedkk2c0a.execute-api.localhost.localstack.cloud:4566"],"User-Agent":["curl/7.81.0"],"accept":["*/*"],"X-Forwarded-For":["172.24.0.1, vyedkk2c0a.execute-api.localhost.localstack.cloud:4566, 127.0.0.1, vyedkk2c0a.execute-api.localhost.localstack.cloud:4566"],"x-localstack-edge":["https://vyedkk2c0a.execute-api.localhost.localstack.cloud:4566"],"Authorization":[""],"x-localstack-tgt-api":["apigateway"],"__apigw_request_region__":["ap-northeast-1"]},"body":"","isBase64Encoded":false,"httpMethod":"GET","queryStringParameters":null,"multiValueQueryStringParameters":null,"pathParameters":{},"resource":"/","requestContext":{"accountId":"000000000000","apiId":"vyedkk2c0a","resourcePath":"/","domainPrefix":"vyedkk2c0a","domainName":"vyedkk2c0a.execute-api.localhost.localstack.cloud","resourceId":"qtjyiyknmj","requestId":"72f58eca-5826-4da1-9d64-9af142f9746c","identity":{"accountId":"000000000000","sourceIp":"127.0.0.1","userAgent":"curl/7.81.0"},"httpMethod":"GET","protocol":"HTTP/1.1","requestTime":"18/Jun/2022:07:46:47 +0000","requestTimeEpoch":1655538407472,"authorizer":{"context":{},"identity":{}},"path":"/prod/","stage":"prod"},"stageVariables":{}}}
データ参照Lambdaの作成
Lambdaについてはどういう方法で作ってもいいのですが、今回はMySQLを叩くための外部のライブラリをインストールする必要があるので、そのライブラリも管理できるように作り込んでいきます。
なんとなく簡単なLambdaの処理はPythonで書く癖があるので、今回はPythonでLambdaを実装していきます。Pythonの外部ライブラリを使うとき、本当ならLambda Layerとかでまとめたいのですが、無料版のlocalstackではLambda Layerは使えないので、Lambdaのパッケージに外部ライブラリの依存関係も全てbundlingする方式で対応していきます。
ということで、まずはpoetry newでプロジェクトを作って、MySQLに接続できるように外部ライブラリを追加していきましょう。
poetry new show_tables;
cd show_tables;
poetry add mysql-connector-python;
適当にMySQLのtableに登録されているデータを見るLambdaを作ります。
実際のlambdaの中身はこんな感じ
show_tables.py
import mysql.connector
import json
import os
from datetime import datetime

import logging
logger = logging.getLogger()
logger.setLevel(logging.INFO)

DB_HOST = os.environ['DB_HOST']
DB_PORT = os.environ['DB_PORT']
DB_USER = os.environ['DB_USER']
DB_NAME = os.environ['DB_NAME']
DB_PASS = os.environ['DB_PASS']
DB_TABLE = os.environ['DB_TABLE']

def lambda_handler(event, context):
    conn = None
    results = None
    logger.info(event)
    try:
        conn = mysql.connector.connect(
            user=DB_USER,
            password=DB_PASS,
            database=DB_NAME,
            host=DB_HOST,
            port=DB_PORT
        )

        if conn.is_connected:
            logger.info("Connected!")

        cur = conn.cursor()
        cur.execute(f"SELECT * FROM {DB_TABLE}")
        results = cur.fetchall()
        logger.info(results)

    except Exception as e:
        logger.info(f"Error Occurred: {e}")

    finally:
        if conn is not None and conn.is_connected():
            conn.close()

    return {
        "statusCode": 200,
        "body": json.dumps({
            "res": results,
            "event": event
            }),
    }
poetry export -f requirements.txt --output requirements.txtでrequirements.txtを吐き出して、外部ライブラリをbundleするためにpip install -r requirements.txt --target ./packagesで適当なディレクトリにインストールします。
poetryのpythonプロジェクトのディレクトリで、Lambdaをbundleしたpackage.zipを作っていきましょう。
poetry export -f requirements.txt --output requirements.txt;
pip install -r requirements.txt --target ./packages;
cd packages/;
zip -r ../package.zip .;
cd ..;
cp show_tables/app.py app.py; zip -g package.zip app.py; rm -rf app.py;
https://docs.aws.amazon.com/ja_jp/lambda/latest/dg/python-package.html
CDKでデータ参照LambdaとAPI Gatewayをdeploy
最初にdeployしたCDKを書き換えて、API GatewayからLambdaをキックできるようにしていきます。
API Gatewayのエンドポイントのroot pathに、今回は/dataとかいうpathを適当に追加して、そこにGETリクエストが飛んできたらLambdaがキックされるようにします。
const showTableLambda = new lambda.Function(this, "ShowTableLambda", {
  runtime: lambda.Runtime.PYTHON_3_9,
  handler: "app.lambda_handler",
  code: lambda.Code.fromAsset("./lambda/show_tables/package.zip"),
  environment: {
    DB_HOST: "mysql", // docker
    DB_PORT: "3306",
    DB_USER: "test_admin",
    DB_NAME: "test_db",
    DB_PASS: "test_admin",
    DB_TABLE: "test_table",
  },
  role: testLambdaRole,
});

const testApiGW = new apigw.LambdaRestApi(this, "TestApiGW", {
  handler: new lambda.Function(this, "TestRootLambda", {
    runtime: lambda.Runtime.NODEJS_16_X,
    handler: "index.handler",
    code: lambda.Code.fromInline(`
    exports.handler = async (event) => {
      console.log('event: ', event);
      return {
        statusCode: 200,
        body: JSON.stringify({"event": event}),
      };
    };
    `),
    role: testLambdaRole,
  }),
  proxy: false,
});
const data = testApiGW.root.addResource("data");
data.addMethod("GET", new apigw.LambdaIntegration(showTableLambda));
では、これで実際にdeployして動作確認していきます。
# root対してGET
$ curl https://vyedkk2c0a.execute-api.localhost.localstack.cloud:4566/prod/
{"event":{"path":"/","headers":{"Remote-Addr":"172.24.0.1","Host":"vyedkk2c0a.execute-api.localhost.localstack.cloud:4566","User-Agent":"curl/7.81.0","accept":"*/*","X-Forwarded-For":"172.24.0.1, vyedkk2c0a.execute-api.localhost.localstack.cloud:4566, 127.0.0.1, vyedkk2c0a.execute-api.localhost.localstack.cloud:4566","x-localstack-edge":"https://vyedkk2c0a.execute-api.localhost.localstack.cloud:4566","Authorization":"","x-localstack-tgt-api":"apigateway","__apigw_request_region__":"ap-northeast-1"},"multiValueHeaders":{"Remote-Addr":["172.24.0.1"],"Host":["vyedkk2c0a.execute-api.localhost.localstack.cloud:4566"],"User-Agent":["curl/7.81.0"],"accept":["*/*"],"X-Forwarded-For":["172.24.0.1, vyedkk2c0a.execute-api.localhost.localstack.cloud:4566, 127.0.0.1, vyedkk2c0a.execute-api.localhost.localstack.cloud:4566"],"x-localstack-edge":["https://vyedkk2c0a.execute-api.localhost.localstack.cloud:4566"],"Authorization":[""],"x-localstack-tgt-api":["apigateway"],"__apigw_request_region__":["ap-northeast-1"]},"body":"","isBase64Encoded":false,"httpMethod":"GET","queryStringParameters":null,"multiValueQueryStringParameters":null,"pathParameters":{},"resource":"/","requestContext":{"accountId":"000000000000","apiId":"vyedkk2c0a","resourcePath":"/","domainPrefix":"vyedkk2c0a","domainName":"vyedkk2c0a.execute-api.localhost.localstack.cloud","resourceId":"qtjyiyknmj","requestId":"76aacbaf-ff35-44a7-a4e8-479cba6c24fa","identity":{"accountId":"000000000000","sourceIp":"127.0.0.1","userAgent":"curl/7.81.0"},"httpMethod":"GET","protocol":"HTTP/1.1","requestTime":"18/Jun/2022:09:40:01 +0000","requestTimeEpoch":1655545201499,"authorizer":{"context":{},"identity":{}},"path":"/prod/","stage":"prod"},"stageVariables":{}}}
# ↑ defaultのlambda handlerが実行される(最初にトライした時と同じ)

# /dataに対してGET
$ curl https://vyedkk2c0a.execute-api.localhost.localstack.cloud:4566/prod/data
{"res": [[1, "one"], [2, "two"]], "event": {"path": "/data", "headers": {"Remote-Addr": "172.24.0.1", "Host": "vyedkk2c0a.execute-api.localhost.localstack.cloud:4566", "User-Agent": "curl/7.81.0", "accept": "*/*", "X-Forwarded-For": "172.24.0.1, vyedkk2c0a.execute-api.localhost.localstack.cloud:4566, 127.0.0.1, vyedkk2c0a.execute-api.localhost.localstack.cloud:4566", "x-localstack-edge": "https://vyedkk2c0a.execute-api.localhost.localstack.cloud:4566", "Authorization": "", "x-localstack-tgt-api": "apigateway", "__apigw_request_region__": "ap-northeast-1"}, "multiValueHeaders": {"Remote-Addr": ["172.24.0.1"], "Host": ["vyedkk2c0a.execute-api.localhost.localstack.cloud:4566"], "User-Agent": ["curl/7.81.0"], "accept": ["*/*"], "X-Forwarded-For": ["172.24.0.1, vyedkk2c0a.execute-api.localhost.localstack.cloud:4566, 127.0.0.1, vyedkk2c0a.execute-api.localhost.localstack.cloud:4566"], "x-localstack-edge": ["https://vyedkk2c0a.execute-api.localhost.localstack.cloud:4566"], "Authorization": [""], "x-localstack-tgt-api": ["apigateway"], "__apigw_request_region__": ["ap-northeast-1"]}, "body": "", "isBase64Encoded": false, "httpMethod": "GET", "queryStringParameters": null, "multiValueQueryStringParameters": null, "pathParameters": {}, "resource": "/data", "requestContext": {"accountId": "000000000000", "apiId": "vyedkk2c0a", "resourcePath": "/data", "domainPrefix": "vyedkk2c0a", "domainName": "vyedkk2c0a.execute-api.localhost.localstack.cloud", "resourceId": "gow7v7ah1g", "requestId": "a8752ce0-f324-4fa2-a3b3-de44b9897502", "identity": {"accountId": "000000000000", "sourceIp": "127.0.0.1", "userAgent": "curl/7.81.0"}, "httpMethod": "GET", "protocol": "HTTP/1.1", "requestTime": "18/Jun/2022:09:41:46 +0000", "requestTimeEpoch": 1655545306875, "authorizer": {"context": {}, "identity": {}}, "path": "/prod/data", "stage": "prod"}, "stageVariables": {}}}
# ↑ "res"にMySQLの中身の内容が、"event"にはlambdaがAPI Gatewayから受け取ったeventが出ている

# /dataに対してPOST
curl -X POST  https://vyedkk2c0a.execute-api.localhost.localstack.cloud:4566/prod/data
{"Type": "User", "message": "Unable to find integration for: POST /data (/prod/data)", "__type": "NotFoundException"}
# ↑ POSTについては実装していないのでerror
ということで、ここまででAPI Gateway使ってlambdaからMySQLを叩けるようになりましたね。
ついでにMySQLにデータを登録できるようにLambdaをもう一つ作っていきます。
データ登録Lambdaを作成
今度はPOSTでデータ登録するLambdaを作っていきます。
下記register_data.pyの例
import mysql.connector
import json
import os
from datetime import datetime

import logging
logger = logging.getLogger()
logger.setLevel(logging.INFO)

DB_HOST = os.environ['DB_HOST']
DB_PORT = os.environ['DB_PORT']
DB_USER = os.environ['DB_USER']
DB_NAME = os.environ['DB_NAME']
DB_PASS = os.environ['DB_PASS']
DB_TABLE = os.environ['DB_TABLE']

def lambda_handler(event, context):
    conn = None
    results = None
    logger.info(event)
    try:
        conn = mysql.connector.connect(
            user=DB_USER,
            password=DB_PASS,
            database=DB_NAME,
            host=DB_HOST,
            port=DB_PORT
        )

        if conn.is_connected:
            logger.info("Connected!")

        body = json.loads(event["body"])
        logger.info(body)
        key = body["key"]
        value = body["value"]
        cur = conn.cursor()
        cur.execute(f"INSERT INTO {DB_TABLE} VALUES ({int(key)}, '{value}')")
        results = conn.commit()
        logger.info(results)

    except Exception as e:
        logger.info(f"Error Occurred: {e}")

    finally:
        if conn is not None and conn.is_connected():
            conn.close()

    return {
        "statusCode": 200,
        "body": json.dumps({
            "res": results,
            "event": event
            }),
    }
CDKでデータ登録LambdaとAPI Gatewayをdeploy
さっきのLambdaはAWSのドキュメント通りにbundlingして、そのassetをCDKで読み込むように定義してdeployしていましたが、別の方法としてCDKのLambda Python moduleを使ってbundlingしていきます。
const registerDataLambda = new PythonFunction(this, "RegisterDataLambda", {
  entry: "./lambda/register_data",
  runtime: lambda.Runtime.PYTHON_3_9,
  index: "register_data/app.py",
  handler: "lambda_handler",
  environment: {
    DB_HOST: "mysql", // docker
    DB_PORT: "3306",
    DB_USER: "test_admin",
    DB_NAME: "test_db",
    DB_PASS: "test_admin",
    DB_TABLE: "test_table",
  },
  role: testLambdaRole,
});

~
// POSTのLambdaIntegration追加
data.addMethod("POST", new apigw.LambdaIntegration(registerDataLambda));
執筆現在絶賛開発中のモジュールなのでExperimentalな機能ですが、Dockerを使って勝手にbundlingしてくれるのでめちゃ便利ですね。poetry以外にもpipenvとかも対応しているので、PythonでLambdaを作るときは簡単に依存ライブラリを使えるようになって便利です。(Lambda Layerも同じ感じですね)
Lambda Python moduleを使ってdeployすると、初回は勝手にbundling用のdocker imageをダウンロードしていい感じにやってくれます。
$ ../node_modules/.bin/cdklocal deploy --profile=localstack
Sending build context to Docker daemon  57.34kB
Step 1/8 : ARG IMAGE=public.ecr.aws/sam/build-python3.7
Step 2/8 : FROM $IMAGE
latest: Pulling from sam/build-python3.9
56cc4977f64d: Downloading  28.08MB/71.45MB
0b3631ac19e1: Download complete
c06abc27cb52: Downloading  37.14MB/60.39MB
cbfa877b4189: Download complete
9ebef54bafa1: Downloading  18.38MB/523.3MB
e19b5603c14a: Waiting
02e5eceef9ee: Waiting
5660a3e8ee55: Waiting
aedc4bd4710e: Waiting

~

Successfully built 7a1555311bd5
Successfully tagged cdk-ffe8903f44b9b2c8de047df365ee938647efc9403920fccbc4e0617c42e4f48c:latest
それでは早速deployしたデータ登録Lambdaの動作を確認していきます。
# /dataに対してPOST
$ curl -X POST https://vyedkk2c0a.execute-api.localhost.localstack.cloud:4566/prod/data -d '{"key": "3", "value": "hogehoge"}'
{"res": null, "event": {"path": "/data", "headers": {"Remote-Addr": "172.24.0.1", "Host": "vyedkk2c0a.execute-api.localhost.localstack.cloud:4566", "User-Agent": "curl/7.81.0", "accept": "*/*", "Content-Length": "33", "Content-Type": "application/x-www-form-urlencoded", "X-Forwarded-For": "172.24.0.1, vyedkk2c0a.execute-api.localhost.localstack.cloud:4566, 127.0.0.1, vyedkk2c0a.execute-api.localhost.localstack.cloud:4566", "x-localstack-edge": "https://vyedkk2c0a.execute-api.localhost.localstack.cloud:4566", "Authorization": "", "x-localstack-tgt-api": "apigateway", "__apigw_request_region__": "ap-northeast-1"}, "multiValueHeaders": {"Remote-Addr": ["172.24.0.1"], "Host": ["vyedkk2c0a.execute-api.localhost.localstack.cloud:4566"], "User-Agent": ["curl/7.81.0"], "accept": ["*/*"], "Content-Length": ["33"], "Content-Type": ["application/x-www-form-urlencoded"], "X-Forwarded-For": ["172.24.0.1, vyedkk2c0a.execute-api.localhost.localstack.cloud:4566, 127.0.0.1, vyedkk2c0a.execute-api.localhost.localstack.cloud:4566"], "x-localstack-edge": ["https://vyedkk2c0a.execute-api.localhost.localstack.cloud:4566"], "Authorization": [""], "x-localstack-tgt-api": ["apigateway"], "__apigw_request_region__": ["ap-northeast-1"]}, "body": "{\"key\": \"3\", \"value\": \"hogehoge\"}", "isBase64Encoded": false, "httpMethod": "POST", "queryStringParameters": null, "multiValueQueryStringParameters": null, "pathParameters": {}, "resource": "/data", "requestContext": {"accountId": "000000000000", "apiId": "vyedkk2c0a", "resourcePath": "/data", "domainPrefix": "vyedkk2c0a", "domainName": "vyedkk2c0a.execute-api.localhost.localstack.cloud", "resourceId": "gow7v7ah1g", "requestId": "a279cf8e-5f30-4ddf-939e-c726dbb39fa5", "identity": {"accountId": "000000000000", "sourceIp": "127.0.0.1", "userAgent": "curl/7.81.0"}, "httpMethod": "POST", "protocol": "HTTP/1.1", "requestTime": "18/Jun/2022:14:34:10 +0000", "requestTimeEpoch": 1655562850494, "authorizer": {"context": {}, "identity": {}}, "path": "/prod/data", "stage": "prod"}, "stageVariables": {}}}
# ↑ POSTは実装したのでerrorなし

# /dataに対してGET
$ curl https://vyedkk2c0a.execute-api.localhost.localstack.cloud:4566/prod/data
{"res": [[1, "one"], [2, "two"], [3, "hogehoge"]], "event": {"path": "/data", "headers": {"Remote-Addr": "172.24.0.1", "Host": "vyedkk2c0a.execute-api.localhost.localstack.cloud:4566", "User-Agent": "curl/7.81.0", "accept": "*/*", "X-Forwarded-For": "172.24.0.1, vyedkk2c0a.execute-api.localhost.localstack.cloud:4566, 127.0.0.1, vyedkk2c0a.execute-api.localhost.localstack.cloud:4566", "x-localstack-edge": "https://vyedkk2c0a.execute-api.localhost.localstack.cloud:4566", "Authorization": "", "x-localstack-tgt-api": "apigateway", "__apigw_request_region__": "ap-northeast-1"}, "multiValueHeaders": {"Remote-Addr": ["172.24.0.1"], "Host": ["vyedkk2c0a.execute-api.localhost.localstack.cloud:4566"], "User-Agent": ["curl/7.81.0"], "accept": ["*/*"], "X-Forwarded-For": ["172.24.0.1, vyedkk2c0a.execute-api.localhost.localstack.cloud:4566, 127.0.0.1, vyedkk2c0a.execute-api.localhost.localstack.cloud:4566"], "x-localstack-edge": ["https://vyedkk2c0a.execute-api.localhost.localstack.cloud:4566"], "Authorization": [""], "x-localstack-tgt-api": ["apigateway"], "__apigw_request_region__": ["ap-northeast-1"]}, "body": "", "isBase64Encoded": false, "httpMethod": "GET", "queryStringParameters": null, "multiValueQueryStringParameters": null, "pathParameters": {}, "resource": "/data", "requestContext": {"accountId": "000000000000", "apiId": "vyedkk2c0a", "resourcePath": "/data", "domainPrefix": "vyedkk2c0a", "domainName": "vyedkk2c0a.execute-api.localhost.localstack.cloud", "resourceId": "gow7v7ah1g", "requestId": "935e4436-4615-413c-82b9-7623d242fddf", "identity": {"accountId": "000000000000", "sourceIp": "127.0.0.1", "userAgent": "curl/7.81.0"}, "httpMethod": "GET", "protocol": "HTTP/1.1", "requestTime": "18/Jun/2022:14:35:21 +0000", "requestTimeEpoch": 1655562921281, "authorizer": {"context": {}, "identity": {}}, "path": "/prod/data", "stage": "prod"}, "stageVariables": {}}}
# ↑ GETしたら[3, "hogehoge"]が登録されていることを確認
これでデータ登録Lambdaの準備が整ったので、いよいよ簡単にwebアプリを作っていきます。
Webアプリの作成
今回はwebアプリ自体はあまり重要じゃないので、viteを使ってreactとaxiosで適当にさくっと実装します。(viteとかreactとかaxiosは他の人がめちゃ解説してくれてると思います)
npm create vite@latest web -- --template react-ts;
cd web;
npm i;
npm i axios;
以下適当にtemplateのApp.tsxを編集してAPI Gateway叩けるようにします。
import { ReactEventHandler, useEffect, useState } from "react";
import logo from "./logo.svg";
import "./App.css";
import axios from "axios";

function App() {
  const [count, setCount] = useState(0);
  const [data, setData] = useState([]);

  useEffect(() => {
    const timer = setTimeout(() => {
      setData([]);
    }, 3000);

    return () => {
      clearTimeout(timer);
    };
  }, [data]);

  const handleSubmit = async (e: React.FormEvent<HTMLFormElement>) => {
    e.preventDefault();
    console.log(e);
    const target = e.target as typeof e.target & {
      key: { value: string };
      value: { value: string };
    };
    const key = target.key.value;
    const value = target.value.value;

    const _data = await axios.post(
      `${import.meta.env.VITE_REST_API_ROOT_URL}data`,
      { key: key, value: value }
    );
    console.log(_data);
    alert(`A name was submitted: {${key} : ${value}}`);
  };

  return (
    <div className="App">
      <header className="App-header">
        <img src={logo} className="App-logo" alt="logo" />
        <p>Hello Vite + React!</p>
        <p>{data.length != 0 && data.map((d) => `${d[0]}: ${d[1]},`)}</p>
        <p>
          <button
            type="button"
            onClick={async () => {
              console.log("clicked");
              const _data = await axios.get(
                `${import.meta.env.VITE_REST_API_ROOT_URL}data`
              );
              console.log(_data.data);
              setData(_data.data.res);
            }}
          >
            Get Data from DB
          </button>
        </p>
        <p>
          <form onSubmit={handleSubmit}>
            <label>
              Key:
              <input type="text" name="key" />
            </label>
            <label>
              Value:
              <input type="text" name="value" />
            </label>
            <input type="submit" value="Submit" />
          </form>
        </p>
      </header>
    </div>
  );
}

export default App;
API Gatewayのエンドポイントが変わるたびにわざわざ上記コードを変更するのも面倒なので、axiosでのエンドポイントの設定を.envから読み込むようにしています。
そのため、viteプロジェクトのrootディレクトリに.envを作って、API Gatewayのエンドポイントを環境変数として登録しておきます。
VITE_REST_API_ROOT_URL=http://localhost:4566/restapis/9if3hzdkwk/prod/_user_request_/
ということで、これでとりあえずwebアプリも完成なので、npm run devで開発用サーバを起動してlocalhost:3000にアクセスして、webアプリの動作やAPI Gatewayのエンドポイントに正常に接続できることを確認していきます。

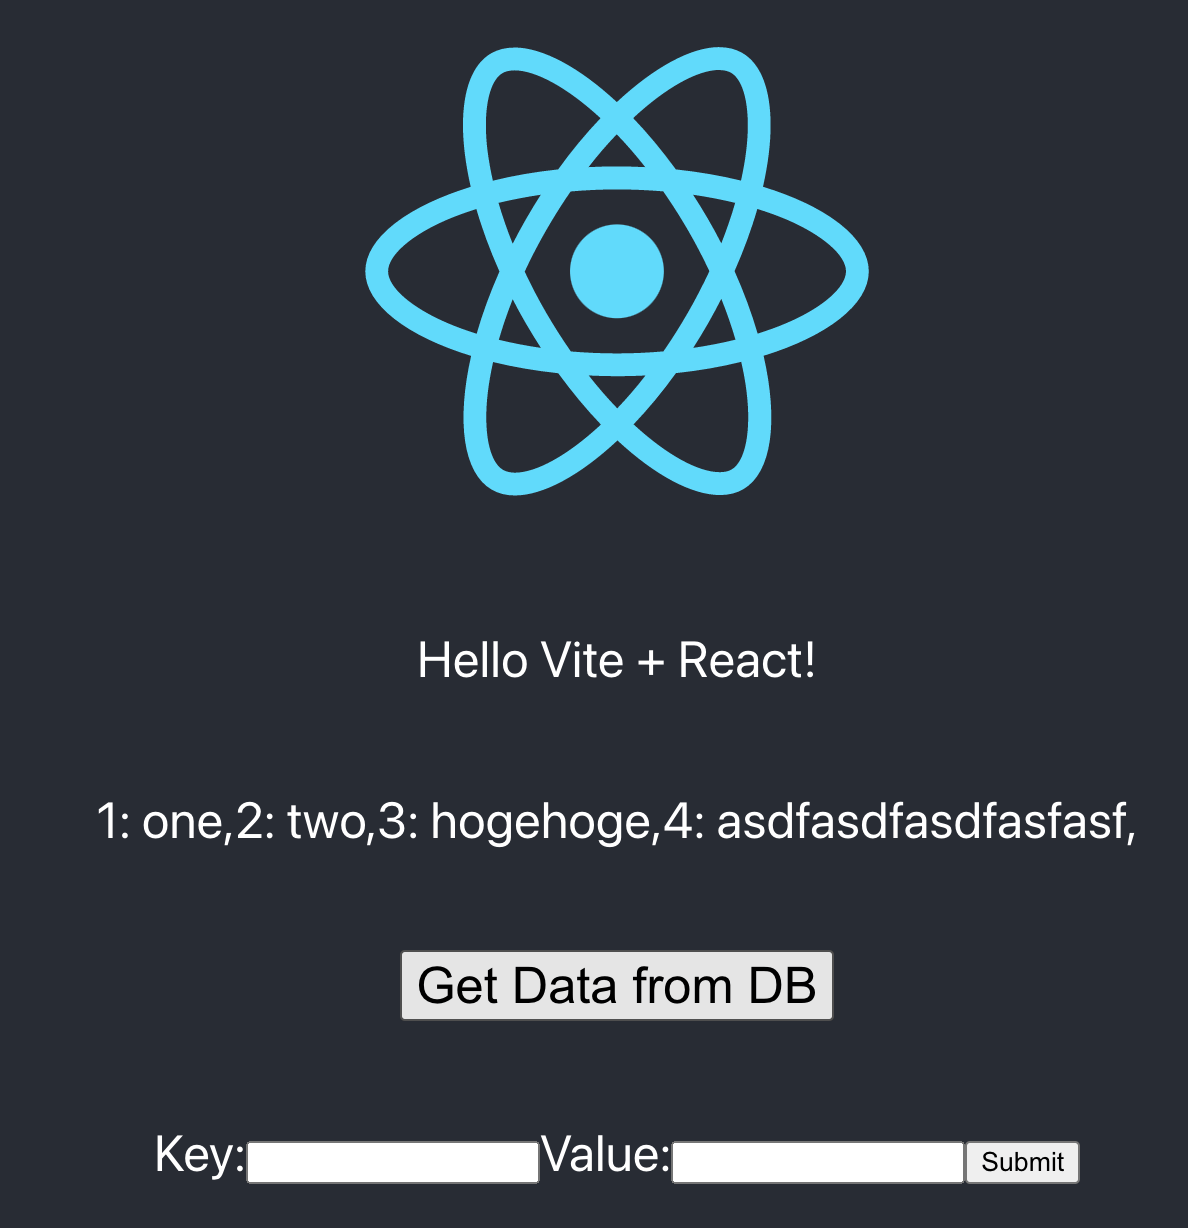
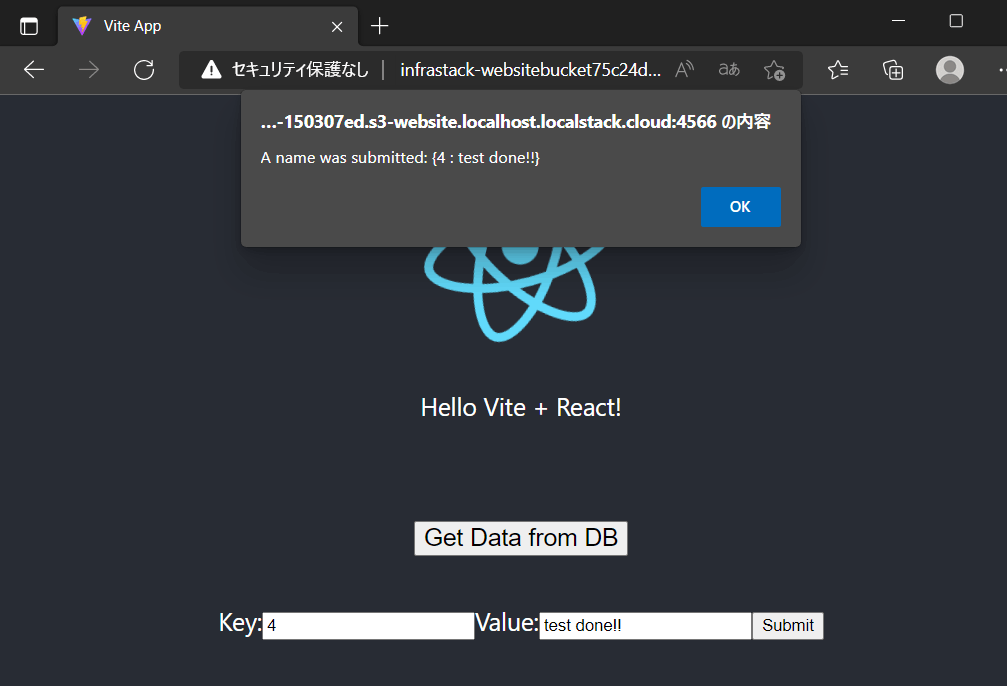
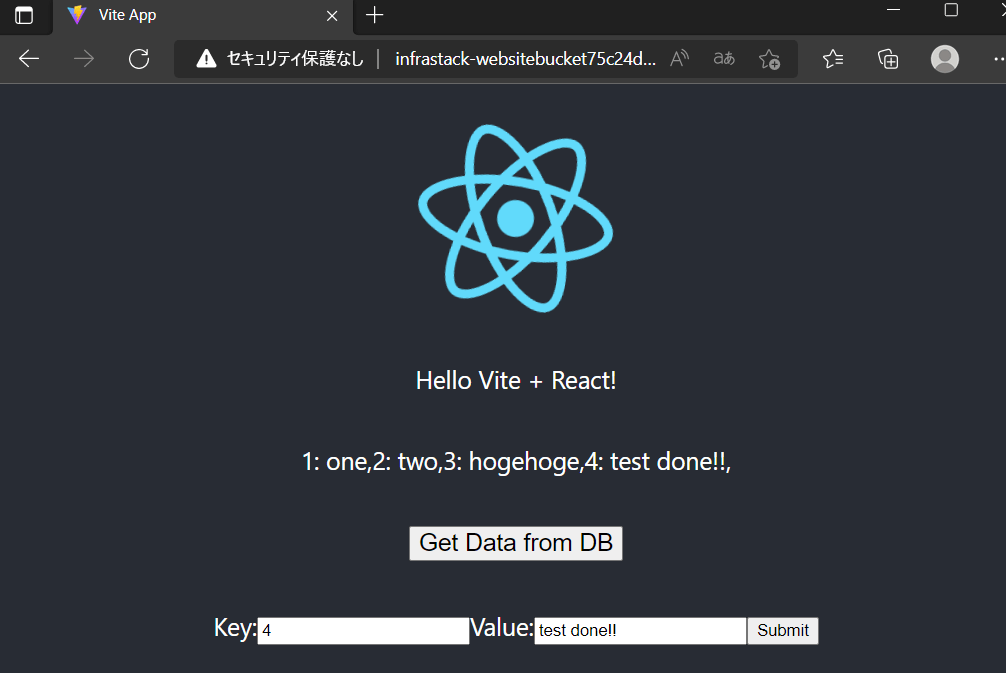
webアプリの動作としては下記のとおりです。
- 上の画像のように
Get Data from DBのボタンを押すと、axiosでエンドポイントへGETリクエストが送られMySQLに登録されているデータが3秒間表示される。 - 下のformのKeyに数字、Valueに適当な文字列を入力して
Submitボタンを押すと、POSTリクエストが送られデータが登録される。
API Gatewayへリクエストが正しく送られている事が確認できたので、最後にこのwebアプリをS3へdeployしていきます。
S3へWebアプリをdeploy
面倒ですが、先述の通りBucketDeploymentは使用しないので手作業でwebアプリをビルドしてS3にdeployしていきます。
webディレクトリでnpm run buildしてwebアプリをビルドします。
distにビルド結果が出力されるのでdist以下のファイルを全てs3 cpしてあげます。
前回の記事でawsdとかいうaliasを作ったりしてるので、それと同じ感じでバケット名確認して、cpで送りつけてあげましょう。
ip -a | grep docker とかでlocalstackに接続するためのアドレスを調べてあげて、ちゃんとs3バケットがあるか確認してからcpしてあげましょう。
$ awsd s3 ls --endpoint-url=http://172.17.0.1:4566                                                                    [main][~/work/.../localstack-mysql-apige/infra]
2022-06-20 12:52:23 cdk-hnb659fds-assets-000000000000-ap-northeast-1
2022-06-20 12:53:03 infrastack-websitebucket75c24d94-150307ed

$ awsd s3 cp ./web/dist s3://infrastack-websitebucket75c24d94-150307ed/ --recursive --endpoint-url=http://172.17.0.1:4566
upload: web/dist/assets/index.62f502b0.css to s3://infrastack-websitebucket75c24d94-150307ed/assets/index.62f502b0.css
upload: web/dist/assets/favicon.17e50649.svg to s3://infrastack-websitebucket75c24d94-150307ed/assets/favicon.17e50649.svg
upload: web/dist/assets/index.e2d3af3a.js to s3://infrastack-websitebucket75c24d94-150307ed/assets/index.e2d3af3a.js
upload: web/dist/index.html to s3://infrastack-websitebucket75c24d94-150307ed/index.html
upload: web/dist/assets/logo.ecc203fb.svg to s3://infrastack-websitebucket75c24d94-150307ed/assets/logo.ecc203fb.svg
これでS3への静的webサイトのdeployも完了です。
参考コードでは、CfnOutputでS3のURLも表示させていますが、localstackのドキュメントにもどんなURLでアクセスできるよ~と書いてありますので、それを参考にアクセスしてみましょう。
今回自分は
http://infrastack-websitebucket75c24d94-150307ed.s3.ap-northeast-1.amazonaws.com:4566/index.html
にアクセスして無事先程確認したサイトが表示されました。
これでS3へのwebアプリのdeploy完了です!
ついでにデータとか新規に登録できるか、APIを叩いてみましょう!


もしなんかアクセスできなかった場合は、多分viteの環境変数設定がうまくいってなかったりするので、deployしたAPI Gatewayのendpoint urlをちゃんと.envファイルに書き込んで、awsd s3 rm s3://infrastack-websitebucket75c24d94-150307ed/ --recursive --endpoint-url=http://172.17.0.1:4566とか叩いてバケットの中身をまっさらにして、再度バケットにcpしてみましょう。
まとめ
お疲れ様でした!!
S3にdeployしたwebアプリからバックエンドにAPI Gateway + Lambda、DBにMySQLを利用した構成をlocalstackとCDKで再現することができました!
こういう環境を手軽にお試しできる技術に感謝して、もっとCDKの練習をしていきたいと思います。
ここまで来たらlocalstackやCDKにもちゃんと貢献していきたいところですね。
コード全体はまた後日。。
Discussion
素晴らしい記事をありがとうございました。LocalStack と CDK は使えるものの、肝心の Web アプリの知識がほとんどなくて解説記事を探していたところこちらの記事を見つけました。
コードの全体は公開されていなったのでかえって良い演習問題ととらえ、再現実装をしてみました。折角なので CORS の設定を追加して、リモートアクセスを可能にして、勝手ながら手順を 記事化 させていただきました。大変勉強になりました。
ありがとうございます。
僕もまだまだ勉強中の身であり言葉足らずなところもあったと思いますが、お役に立てたのであれば幸いです。