EKSを触ってみる
eksctlを使ってクラスターを作成してみる
https://www.eksworkshop.com/030_eksctl/launcheks/ を参考に以下を実行することでEKS clusterを立ち上げることができる。t3.smallが三つくらい立ち上がるので終わったらリソースを削除することを忘れないように。
eksctl create cluster -f eksworkshop.yaml
---
apiVersion: eksctl.io/v1alpha5
kind: ClusterConfig

metadata:
  name: eksworkshop-eksctl
  region: us-east-1
  version: "1.19"

availabilityZones: ["us-east-1a", "us-east-1b", "us-east-1c"]

managedNodeGroups:
- name: nodegroup
  desiredCapacity: 3
  instanceType: t3.small
  ssh:
    enableSsm: true

# To enable all of the control plane logs, uncomment below:
# cloudWatch:
#  clusterLogging:
#    enableTypes: ["*"]

secretsEncryption:
  keyARN: arn:aws:kms:us-east-1:XXXXXXXXXXXXX:key/XXXXXXXXXXXXXXXXXXX
yamlの設定
概要
Kubernetesオブジェクトを.yamlファイルに記載して作成する場合、下記に示すフィールドに値をセットしておく必要があります:
apiVersion - どのバージョンのKubernetesAPIを利用してオブジェクトを作成するか
kind - どの種類のオブジェクトを作成するか
metadata - オブジェクトを一意に特定するための情報、文字列のname、UID、また任意のnamespaceが該当する
spec - オブジェクトの望ましい状態specの正確なフォーマットは、Kubernetesオブジェクトごとに異なり、オブジェクトごとに特有な入れ子のフィールドを持っています。Kubernetes API リファレンスが、Kubernetesで作成できる全てのオブジェクトに関するspecのフォーマットを探すのに役立ちます。 例えば、Podオブジェクトに関するspecのフォーマットはPodSpec v1 coreを、またDeploymentオブジェクトに関するspecのフォーマットはDeploymentSpec v1 appsをご確認ください。
spec部分
managedNodeGroups
Amazon EKS managed nodegroups is a feature that automates the provisioning and lifecycle management of nodes (EC2 instances) for Amazon EKS Kubernetes clusters. Customers can provision optimized groups of nodes for their clusters and EKS will keep their nodes up to date with the latest Kubernetes and host OS versions.
secretsEncryption
EKS supports using AWS KMS keys to provide envelope encryption of Kubernetes secrets stored in EKS. Implementing envelope encryption is considered a security best practice for applications that store sensitive data and is part of a defense in depth security strategy.
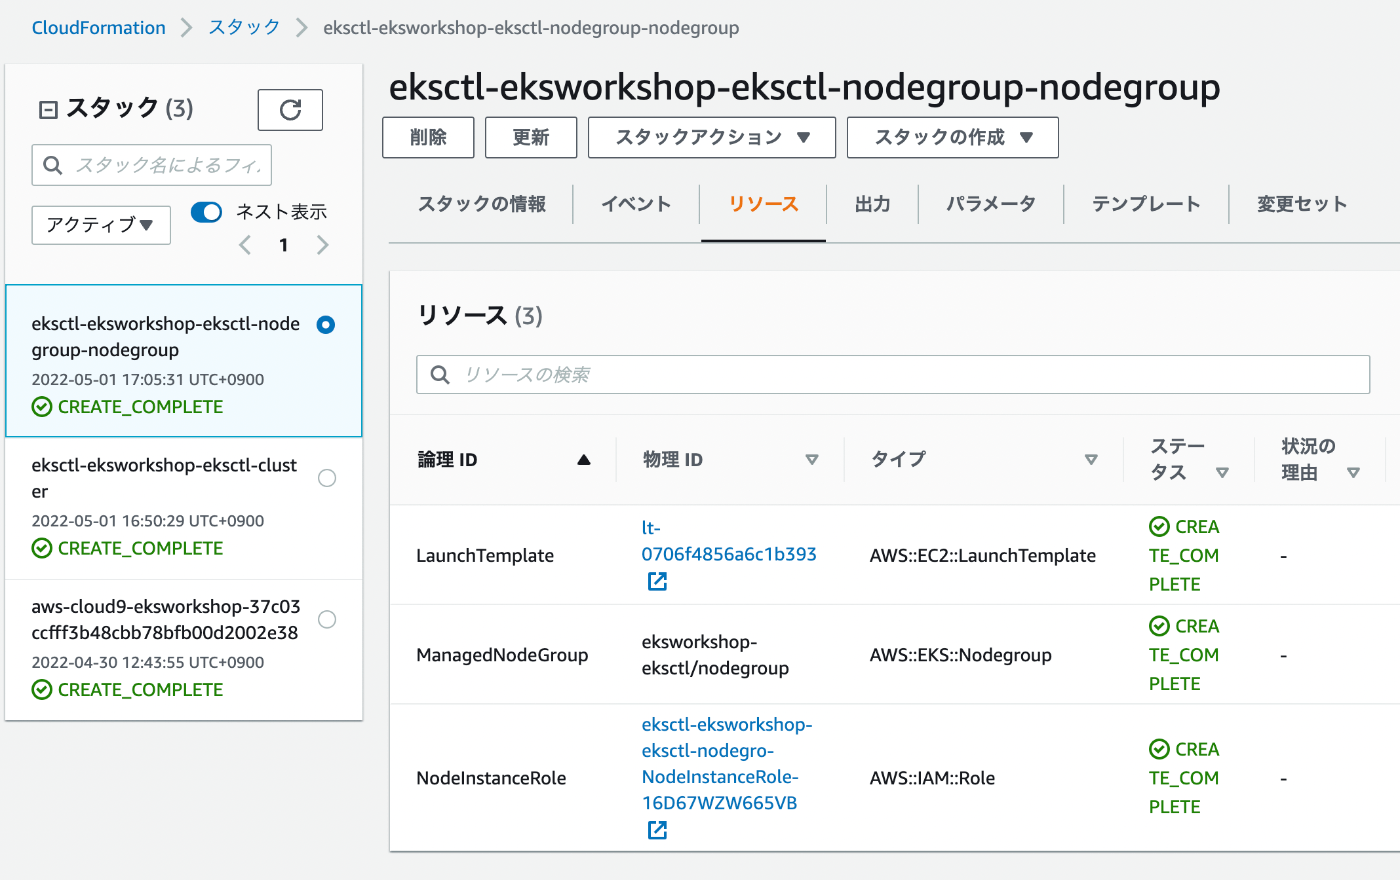
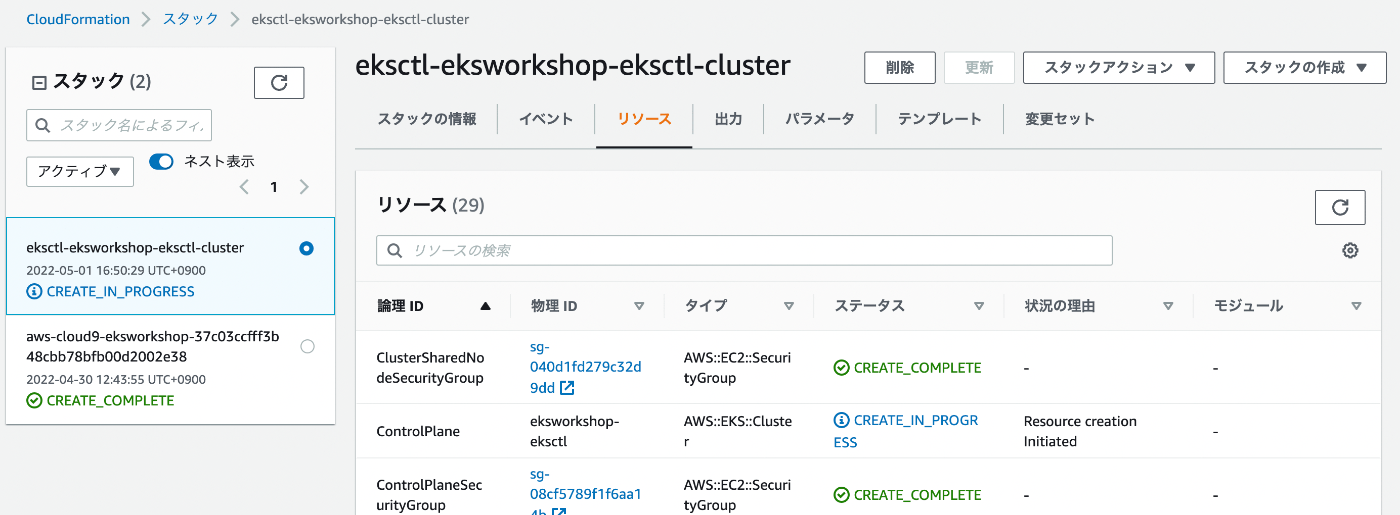
eksctl craete clusterすると裏でcloudformationが動いている
node group用のcloudformation

cluster用のcloudformation

Reference
config file
EKS creating cluster
EKS clusterを作成するためのyamlのサンプル
EKS Clusterの権限管理はIAM Principalとマッピングを作れるらしい
workshopだとこんな感じで自分のIAMにadmin付与してた。
eksctl create iamidentitymapping --cluster eksworkshop-eksctl --arn ${rolearn} --group system:masters --username admin
sample applicationをクラスター上にデプロイする
アプリケーションをデプロイする
kubectl apply -f kubernetes/deployment.yaml
デプロイの詳細(どのイメージを利用するか、どんなデプロイ方法かなど)がyamlに記載される
apiVersion: apps/v1
kind: Deployment
metadata:
  name: ecsdemo-nodejs
  labels:
    app: ecsdemo-nodejs
  namespace: default
spec:
  replicas: 1
  selector:
    matchLabels:
      app: ecsdemo-nodejs
  strategy:
    rollingUpdate:
      maxSurge: 25%
      maxUnavailable: 25%
    type: RollingUpdate
  template:
    metadata:
      labels:
        app: ecsdemo-nodejs
    spec:
      containers:
      - image: brentley/ecsdemo-nodejs:latest
        imagePullPolicy: Always
        name: ecsdemo-nodejs
        ports:
        - containerPort: 3000
          protocol: TCP
サービスとして公開する
kubectl apply -f kubernetes/service.yaml
このyamlではTypeを指定していないのでデフォルトのClusterIPが利用される。
ClusterIP: クラスター内部のIPでServiceを公開する。このタイプではServiceはクラスター内部からのみ疎通性があります。このタイプはデフォルトのServiceTypeです。
apiVersion: v1
kind: Service
metadata:
  name: ecsdemo-nodejs
spec:
  selector:
    app: ecsdemo-nodejs
  ports:
   -  protocol: TCP
      port: 80
      targetPort: 3000
以下のようにtypeをLoadBalancerにするとアプリケーションにLoadBalacner経由で外部からアクセスができるようになる。
apiVersion: v1
kind: Service
metadata:
  name: ecsdemo-frontend
spec:
  selector:
    app: ecsdemo-frontend
  type: LoadBalancer
  ports:
   -  protocol: TCP
      port: 80
      targetPort: 3000
Reference
サンプルのyamlは以下のものを利用