【NeRF】nerf2mesh(OSS)の環境構築調査
はじめに
以下のオープンソースを利用し、NeRFによるメッシュ生成を試したい。
前提となる知識も乏しく、環境構築から上手くいかないためメモしていく。
(そもそも実行不可の環境で試そうとしている?それすらも理解できていないので確認を進める)
オープンソース記載の環境情報
Tested environments
・Ubuntu 22 with torch 1.12 & CUDA 11.6 on a V100.
自PCの環境情報
| 項目 | 情報 |
|---|---|
| OS | Windows 10 Home(22H2 ビルド 19045.3324) |
| CPU | AMD Ryzen 7 3700X 8-Core Processor |
| GPU | NVIDIA GeForce RTX 3060 |
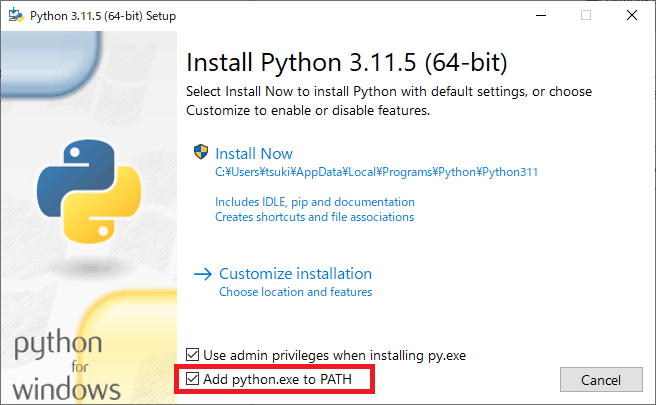
Pythonをインストールする
公式サイトから、Windows向けの最新バージョンをインストールした。
(2023.09.09時点の最新: python-3.11.5)
Python3.11.5は、PyTorchでは利用不可の模様。そのため [3.10.11] を改めてインストールした。
(PyTorchのインストール時にエラーが出た)
Build Tools for Visual Studio 2022 をインストールする
CUDAをインストールするには、VisualStudioが必須の模様。そのためインストールした
。
CUDAとPyTorchをインストールする
オープンソースのREADMEに記載があったバージョンをインストールしてみる。
- CUDA 11.6
- torch 1.12
CUDA 11.6 のDL&インストール
アーカイブ一覧から、対象バージョンをDLした。
PyTorch 1.12 のインストール
# CUDA 11.6
pip install torch==1.12.0+cu116 torchvision==0.13.0+cu116 torchaudio==0.12.0 --extra-index-url https://download.pytorch.org/whl/cu116
nerf2meshをダウンロード
公式通りのコマンドを実行
git clone https://github.com/ashawkey/nerf2mesh.git
cd nerf2mesh
必須コンポーネントをインストール
公式通りのコマンドを実行したところ、エラーが発生。
pip install -r requirements.txt
Collecting torch-scatter (from -r requirements.txt (line 20))
  Using cached torch_scatter-2.1.1.tar.gz (107 kB)
  Installing build dependencies ... done
  Getting requirements to build wheel ... error
  error: subprocess-exited-with-error

  × Getting requirements to build wheel did not run successfully.
  │ exit code: 1
  ╰─> [17 lines of output]
      Traceback (most recent call last):
        File "C:\Users\ユーザー名\AppData\Local\Programs\Python\Python310\lib\site-packages\pip\_vendor\pyproject_hooks\_in_process\_in_process.py", line 353, in <module>
          main()
        File "C:\Users\ユーザー名\AppData\Local\Programs\Python\Python310\lib\site-packages\pip\_vendor\pyproject_hooks\_in_process\_in_process.py", line 335, in main
          json_out['return_val'] = hook(**hook_input['kwargs'])
        File "C:\Users\ユーザー名\AppData\Local\Programs\Python\Python310\lib\site-packages\pip\_vendor\pyproject_hooks\_in_process\_in_process.py", line 118, in get_requires_for_build_wheel
          return hook(config_settings)
        File "C:\Users\ユーザー名\AppData\Local\Temp\pip-build-env-7oev7_6v\overlay\Lib\site-packages\setuptools\build_meta.py", line 355, in get_requires_for_build_wheel
          return self._get_build_requires(config_settings, requirements=['wheel'])
        File "C:\Users\ユーザー名\AppData\Local\Temp\pip-build-env-7oev7_6v\overlay\Lib\site-packages\setuptools\build_meta.py", line 325, in _get_build_requires
          self.run_setup()
        File "C:\Users\ユーザー名\AppData\Local\Temp\pip-build-env-7oev7_6v\overlay\Lib\site-packages\setuptools\build_meta.py", line 507, in run_setup
          super(_BuildMetaLegacyBackend, self).run_setup(setup_script=setup_script)
        File "C:\Users\ユーザー名\AppData\Local\Temp\pip-build-env-7oev7_6v\overlay\Lib\site-packages\setuptools\build_meta.py", line 341, in run_setup
          exec(code, locals())
        File "<string>", line 8, in <module>
      ModuleNotFoundError: No module named 'torch'
      [end of output]
エラー対象の [torch-scatter] を個別でインストール
参考サイトの情報をもとに、エラー発生していた [torch-scatter] のインストールコマンドを実行
pip install --no-index torch-scatter -f https://pytorch-geometric.com/whl/torch-1.12.0+cu116.html
再度、必須コンポーネントをインストール
改めて以下コマンドを実行したところ、エラーは発生しなくなった。
pip install -r requirements.txt
[tiny-cuda-nn] をインストール
公式通りのコマンドを実行したところ、エラーが発生。
pip install git+https://github.com/NVlabs/tiny-cuda-nn/#subdirectory=bindings/torch
pip install git+https://github.com/NVlabs/tiny-cuda-nn/#subdirectory=bindings/torch
Collecting git+https://github.com/NVlabs/tiny-cuda-nn/#subdirectory=bindings/torch
  Cloning https://github.com/NVlabs/tiny-cuda-nn/ to c:\users\ユーザー名\appdata\local\temp\pip-req-build-1e2gre5r
  Running command git clone --filter=blob:none --quiet https://github.com/NVlabs/tiny-cuda-nn/ 'C:\Users\ユーザー名\AppData\Local\Temp\pip-req-build-1e2gre5r'
  Resolved https://github.com/NVlabs/tiny-cuda-nn/ to commit e02068459c4c36ba8b6fc40e312a301dca39ce44
  Running command git submodule update --init --recursive -q
  Installing build dependencies ... done
  Getting requirements to build wheel ... error
  error: subprocess-exited-with-error

  × Getting requirements to build wheel did not run successfully.
  │ exit code: 1
  ╰─> [18 lines of output]
      <string>:5: DeprecationWarning: pkg_resources is deprecated as an API. See https://setuptools.pypa.io/en/latest/pkg_resources.html
      Traceback (most recent call last):
        File "C:\Users\ユーザー名\AppData\Local\Programs\Python\Python39\lib\site-packages\pip\_vendor\pyproject_hooks\_in_process\_in_process.py", line 353, in <module>
          main()
        File "C:\Users\ユーザー名\AppData\Local\Programs\Python\Python39\lib\site-packages\pip\_vendor\pyproject_hooks\_in_process\_in_process.py", line 335, in main
          json_out['return_val'] = hook(**hook_input['kwargs'])
        File "C:\Users\ユーザー名\AppData\Local\Programs\Python\Python39\lib\site-packages\pip\_vendor\pyproject_hooks\_in_process\_in_process.py", line 118, in get_requires_for_build_wheel
          return hook(config_settings)
        File "C:\Users\ユーザー名\AppData\Local\Temp\pip-build-env-3b2ecmw8\overlay\Lib\site-packages\setuptools\build_meta.py", line 355, in get_requires_for_build_wheel
          return self._get_build_requires(config_settings, requirements=['wheel'])
        File "C:\Users\ユーザー名\AppData\Local\Temp\pip-build-env-3b2ecmw8\overlay\Lib\site-packages\setuptools\build_meta.py", line 325, in _get_build_requires
          self.run_setup()
        File "C:\Users\ユーザー名\AppData\Local\Temp\pip-build-env-3b2ecmw8\overlay\Lib\site-packages\setuptools\build_meta.py", line 507, in run_setup
          super(_BuildMetaLegacyBackend, self).run_setup(setup_script=setup_script)
        File "C:\Users\ユーザー名\AppData\Local\Temp\pip-build-env-3b2ecmw8\overlay\Lib\site-packages\setuptools\build_meta.py", line 341, in run_setup
          exec(code, locals())
        File "<string>", line 9, in <module>
      ModuleNotFoundError: No module named 'torch'
      [end of output]

  note: This error originates from a subprocess, and is likely not a problem with pip.
error: subprocess-exited-with-error
pipのバージョンをダウングレードしてみる
エラー内容で検索すると、以下サイトで引用部分の情報を発見。
そのためpipのバージョンを下げてみる。
You're right, I just tried it again and ran into the same issues following my instructions.
I was able to fix it again by omitting the pip upgrade to 23.1.2. Everything seems to work as expected with pip 23.0.1.
# 元々インストールされていたバージョンは、「23.2.1」だった
# 「23.0.1」へダウングレードする
C:\Users\ユーザー名\AppData\Local\Programs\Python\Python39\python.exe -m pip install --upgrade pip==23.0.1
再度、[tiny-cuda-nn] をインストール
改めて以下コマンドを実行したところ、エラーは発生しなくなった。
pip install git+https://github.com/NVlabs/tiny-cuda-nn/#subdirectory=bindings/torch
pip install git+https://github.com/NVlabs/tiny-cuda-nn/#subdirectory=bindings/torch
Collecting git+https://github.com/NVlabs/tiny-cuda-nn/#subdirectory=bindings/torch
  Cloning https://github.com/NVlabs/tiny-cuda-nn/ to c:\users\ユーザー名\appdata\local\temp\pip-req-build-n10wudoz
  Running command git clone --filter=blob:none --quiet https://github.com/NVlabs/tiny-cuda-nn/ 'C:\Users\ユーザー名\AppData\Local\Temp\pip-req-build-n10wudoz'
  Resolved https://github.com/NVlabs/tiny-cuda-nn/ to commit e02068459c4c36ba8b6fc40e312a301dca39ce44
  Running command git submodule update --init --recursive -q
  Preparing metadata (setup.py) ... done
Installing collected packages: tinycudann
  DEPRECATION: tinycudann is being installed using the legacy 'setup.py install' method, because it does not have a 'pyproject.toml' and the 'wheel' package is not installed. pip 23.1 will enforce this behaviour change. A possible replacement is to enable the '--use-pep517' option. Discussion can be found at https://github.com/pypa/pip/issues/8559
  Running setup.py install for tinycudann ... done
Successfully installed tinycudann-1.7

[notice] A new release of pip is available: 23.0.1 -> 23.2.1
[notice] To update, run: python.exe -m pip install --upgrade pip
[nvdiffrast] をインストール
公式通りのコマンドを実行。特にエラーはなし。
# nvdiffrast
pip install git+https://github.com/NVlabs/nvdiffrast/
pip install git+https://github.com/NVlabs/nvdiffrast/
Collecting git+https://github.com/NVlabs/nvdiffrast/
  Cloning https://github.com/NVlabs/nvdiffrast/ to c:\users\ユーザー名\appdata\local\temp\pip-req-build-c6g4i1vl
  Running command git clone --filter=blob:none --quiet https://github.com/NVlabs/nvdiffrast/ 'C:\Users\ユーザー名\AppData\Local\Temp\pip-req-build-c6g4i1vl'
  Resolved https://github.com/NVlabs/nvdiffrast/ to commit c5caf7bdb8a2448acc491a9faa47753972edd380
  Preparing metadata (setup.py) ... done
Requirement already satisfied: numpy in c:\users\ユーザー名\appdata\local\programs\python\python39\lib\site-packages (from nvdiffrast==0.3.1) (1.25.2)
Installing collected packages: nvdiffrast
  DEPRECATION: nvdiffrast is being installed using the legacy 'setup.py install' method, because it does not have a 'pyproject.toml' and the 'wheel' package is not installed. pip 23.1 will enforce this behaviour change. A possible replacement is to enable the '--use-pep517' option. Discussion can be found at https://github.com/pypa/pip/issues/8559
  Running setup.py install for nvdiffrast ... done
Successfully installed nvdiffrast-0.3.1

[notice] A new release of pip is available: 23.0.1 -> 23.2.1
[notice] To update, run: python.exe -m pip install --upgrade pip
[pytorch3d] をインストール
公式通りのコマンドを実行。特にエラーはなし。
# pytorch3d
pip install git+https://github.com/facebookresearch/pytorch3d.git
pip install git+https://github.com/facebookresearch/pytorch3d.git
Collecting git+https://github.com/facebookresearch/pytorch3d.git
  Cloning https://github.com/facebookresearch/pytorch3d.git to c:\users\ユーザー名\appdata\local\temp\pip-req-build-71f6cnx5
  Running command git clone --filter=blob:none --quiet https://github.com/facebookresearch/pytorch3d.git 'C:\Users\ユーザー名\AppData\Local\Temp\pip-req-build-71f6cnx5'
  Resolved https://github.com/facebookresearch/pytorch3d.git to commit 6f2212da46f3ad1a596b3e1017be2d16eaaf95f9
  Preparing metadata (setup.py) ... done
Collecting fvcore
  Downloading fvcore-0.1.5.post20221221.tar.gz (50 kB)
     ---------------------------------------- 50.2/50.2 kB 2.5 MB/s eta 0:00:00
  Preparing metadata (setup.py) ... done
Collecting iopath
  Downloading iopath-0.1.10.tar.gz (42 kB)
     ---------------------------------------- 42.2/42.2 kB 2.1 MB/s eta 0:00:00
  Preparing metadata (setup.py) ... done
Requirement already satisfied: numpy in c:\users\ユーザー名\appdata\local\programs\python\python39\lib\site-packages (from fvcore->pytorch3d==0.7.4) (1.25.2)
Collecting yacs>=0.1.6
  Downloading yacs-0.1.8-py3-none-any.whl (14 kB)
Collecting pyyaml>=5.1
  Downloading PyYAML-6.0.1-cp39-cp39-win_amd64.whl (152 kB)
     ---------------------------------------- 152.8/152.8 kB 8.9 MB/s eta 0:00:00
Requirement already satisfied: tqdm in c:\users\ユーザー名\appdata\local\programs\python\python39\lib\site-packages (from fvcore->pytorch3d==0.7.4) (4.66.1)
Collecting termcolor>=1.1
  Downloading termcolor-2.3.0-py3-none-any.whl (6.9 kB)
Requirement already satisfied: Pillow in c:\users\ユーザー名\appdata\local\programs\python\python39\lib\site-packages (from fvcore->pytorch3d==0.7.4) (10.0.0)
Collecting tabulate
  Downloading tabulate-0.9.0-py3-none-any.whl (35 kB)
Requirement already satisfied: typing_extensions in c:\users\ユーザー名\appdata\local\programs\python\python39\lib\site-packages (from iopath->pytorch3d==0.7.4) (4.7.1)
Collecting portalocker
  Downloading portalocker-2.7.0-py2.py3-none-any.whl (15 kB)
Collecting pywin32>=226
  Downloading pywin32-306-cp39-cp39-win_amd64.whl (9.3 MB)
     ---------------------------------------- 9.3/9.3 MB 11.4 MB/s eta 0:00:00
Requirement already satisfied: colorama in c:\users\ユーザー名\appdata\local\programs\python\python39\lib\site-packages (from tqdm->fvcore->pytorch3d==0.7.4) (0.4.6)
Installing collected packages: pywin32, termcolor, tabulate, pyyaml, portalocker, yacs, iopath, fvcore, pytorch3d
  DEPRECATION: iopath is being installed using the legacy 'setup.py install' method, because it does not have a 'pyproject.toml' and the 'wheel' package is not installed. pip 23.1 will enforce this behaviour change. A possible replacement is to enable the '--use-pep517' option. Discussion can be found at https://github.com/pypa/pip/issues/8559
  Running setup.py install for iopath ... done
  DEPRECATION: fvcore is being installed using the legacy 'setup.py install' method, because it does not have a 'pyproject.toml' and the 'wheel' package is not installed. pip 23.1 will enforce this behaviour change. A possible replacement is to enable the '--use-pep517' option. Discussion can be found at https://github.com/pypa/pip/issues/8559
  Running setup.py install for fvcore ... done
  DEPRECATION: pytorch3d is being installed using the legacy 'setup.py install' method, because it does not have a 'pyproject.toml' and the 'wheel' package is not installed. pip 23.1 will enforce this behaviour change. A possible replacement is to enable the '--use-pep517' option. Discussion can be found at https://github.com/pypa/pip/issues/8559
  Running setup.py install for pytorch3d ... done
Successfully installed fvcore-0.1.5.post20221221 iopath-0.1.10 portalocker-2.7.0 pytorch3d-0.7.4 pywin32-306 pyyaml-6.0.1 tabulate-0.9.0 termcolor-2.3.0 yacs-0.1.8

[notice] A new release of pip is available: 23.0.1 -> 23.2.1
[notice] To update, run: python.exe -m pip install --upgrade pip
ビルド拡張機能 をインストール
公式通りのコマンドを実行したところ、エラーが発生。(2行目の部分でエラー発生)
# if you want to install manually, here is an example:
cd raymarching
python setup.py build_ext --inplace # build ext only, do not install (only can be used in the parent directory)
pip install . # install to python path (you still need the raymarching/ folder, since this only install the built extension.)
>python setup.py build_ext --inplace
running build_ext
building '_raymarching_mob' extension
creating C:\Users\ユーザー名\OneDrive\デスクトップ\20230908_nerf2meshe\nerf2mesh\raymarching\build
creating C:\Users\ユーザー名\OneDrive\デスクトップ\20230908_nerf2meshe\nerf2mesh\raymarching\build\temp.win-amd64-3.9
creating C:\Users\ユーザー名\OneDrive\デスクトップ\20230908_nerf2meshe\nerf2mesh\raymarching\build\temp.win-amd64-3.9\Release
creating C:\Users\ユーザー名\OneDrive\デスクトップ\20230908_nerf2meshe\nerf2mesh\raymarching\build\temp.win-amd64-3.9\Release\Users
creating C:\Users\ユーザー名\OneDrive\デスクトップ\20230908_nerf2meshe\nerf2mesh\raymarching\build\temp.win-amd64-3.9\Release\Users\ユーザー名
creating C:\Users\ユーザー名\OneDrive\デスクトップ\20230908_nerf2meshe\nerf2mesh\raymarching\build\temp.win-amd64-3.9\Release\Users\ユーザー名\OneDrive
creating C:\Users\ユーザー名\OneDrive\デスクトップ\20230908_nerf2meshe\nerf2mesh\raymarching\build\temp.win-amd64-3.9\Release\Users\ユーザー名\OneDrive\デスクトップ
creating C:\Users\ユーザー名\OneDrive\デスクトップ\20230908_nerf2meshe\nerf2mesh\raymarching\build\temp.win-amd64-3.9\Release\Users\ユーザー名\OneDrive\デスクトップ\20230908_nerf2meshe
creating C:\Users\ユーザー名\OneDrive\デスクトップ\20230908_nerf2meshe\nerf2mesh\raymarching\build\temp.win-amd64-3.9\Release\Users\ユーザー名\OneDrive\デスクトップ\20230908_nerf2meshe\nerf2mesh
creating C:\Users\ユーザー名\OneDrive\デスクトップ\20230908_nerf2meshe\nerf2mesh\raymarching\build\temp.win-amd64-3.9\Release\Users\ユーザー名\OneDrive\デスクトップ\20230908_nerf2meshe\nerf2mesh\raymarching
creating C:\Users\ユーザー名\OneDrive\デスクトップ\20230908_nerf2meshe\nerf2mesh\raymarching\build\temp.win-amd64-3.9\Release\Users\ユーザー名\OneDrive\デスクトップ\20230908_nerf2meshe\nerf2mesh\raymarching\src
Emitting ninja build file C:\Users\ユーザー名\OneDrive\デスクトップ\20230908_nerf2meshe\nerf2mesh\raymarching\build\temp.win-amd64-3.9\Release\build.ninja...
Compiling objects...
Allowing ninja to set a default number of workers... (overridable by setting the environment variable MAX_JOBS=N)
ninja: error: 'C:/Users/ユーザー名/OneDrive/デスクトップ/20230908_nerf2meshe/nerf2mesh/raymarching/src/bindings.cpp', needed by 'C:/Users/ユーザー名/OneDrive/デスクトップ/20230908_nerf2meshe/nerf2mesh/raymarching/build/temp.win-amd64-3.9/Release/Users/ユーザー名/OneDrive/デスクトップ/20230908_nerf2meshe/nerf2mesh/raymarching/src/bindings.obj', missing and no known rule to make it
Traceback (most recent call last):
  File "C:\Users\ユーザー名\AppData\Local\Programs\Python\Python39\lib\site-packages\torch\utils\cpp_extension.py", line 1808, in _run_ninja_build
    subprocess.run(
  File "C:\Users\ユーザー名\AppData\Local\Programs\Python\Python39\lib\subprocess.py", line 528, in run
    raise CalledProcessError(retcode, process.args,
subprocess.CalledProcessError: Command '['ninja', '-v']' returned non-zero exit status 1.

The above exception was the direct cause of the following exception:

Traceback (most recent call last):
  File "C:\Users\ユーザー名\OneDrive\デスクトップ\20230908_nerf2meshe\nerf2mesh\raymarching\setup.py", line 44, in <module>
    setup(
  File "C:\Users\ユーザー名\AppData\Local\Programs\Python\Python39\lib\site-packages\setuptools\__init__.py", line 153, in setup
    return distutils.core.setup(**attrs)
  File "C:\Users\ユーザー名\AppData\Local\Programs\Python\Python39\lib\distutils\core.py", line 148, in setup
    dist.run_commands()
  File "C:\Users\ユーザー名\AppData\Local\Programs\Python\Python39\lib\distutils\dist.py", line 966, in run_commands
    self.run_command(cmd)
  File "C:\Users\ユーザー名\AppData\Local\Programs\Python\Python39\lib\distutils\dist.py", line 985, in run_command
    cmd_obj.run()
  File "C:\Users\ユーザー名\AppData\Local\Programs\Python\Python39\lib\site-packages\setuptools\command\build_ext.py", line 79, in run
    _build_ext.run(self)
  File "C:\Users\ユーザー名\AppData\Local\Programs\Python\Python39\lib\distutils\command\build_ext.py", line 340, in run
    self.build_extensions()
  File "C:\Users\ユーザー名\AppData\Local\Programs\Python\Python39\lib\site-packages\torch\utils\cpp_extension.py", line 765, in build_extensions
    build_ext.build_extensions(self)
  File "C:\Users\ユーザー名\AppData\Local\Programs\Python\Python39\lib\distutils\command\build_ext.py", line 449, in build_extensions
    self._build_extensions_serial()
  File "C:\Users\ユーザー名\AppData\Local\Programs\Python\Python39\lib\distutils\command\build_ext.py", line 474, in _build_extensions_serial
    self.build_extension(ext)
  File "C:\Users\ユーザー名\AppData\Local\Programs\Python\Python39\lib\site-packages\setuptools\command\build_ext.py", line 202, in build_extension
    _build_ext.build_extension(self, ext)
  File "C:\Users\ユーザー名\AppData\Local\Programs\Python\Python39\lib\distutils\command\build_ext.py", line 529, in build_extension
    objects = self.compiler.compile(sources,
  File "C:\Users\ユーザー名\AppData\Local\Programs\Python\Python39\lib\site-packages\torch\utils\cpp_extension.py", line 738, in win_wrap_ninja_compile
    _write_ninja_file_and_compile_objects(
  File "C:\Users\ユーザー名\AppData\Local\Programs\Python\Python39\lib\site-packages\torch\utils\cpp_extension.py", line 1487, in _write_ninja_file_and_compile_objects
    _run_ninja_build(
  File "C:\Users\ユーザー名\AppData\Local\Programs\Python\Python39\lib\site-packages\torch\utils\cpp_extension.py", line 1824, in _run_ninja_build
    raise RuntimeError(message) from e
RuntimeError: Error compiling objects for extension
[cpp_extension.py]ファイル内の、_run_ninja_buildメソッドを修正してみる
参考サイトの情報をもとに、エラー対象のメソッド内容を修正してみる。
・対象ファイル: "C:\Users\ユーザー名\AppData\Local\Programs\Python\Python39\lib\site-packages\torch\utils\cpp_extension.py"
修正前: command = ['ninja', '--v']
修正後: command = ['ninja', '--version']
再度、エラーとなったコマンドを実行
前回のエラーは出なくなったものの、別のエラーが発生した。
python setup.py build_ext --inplace
python setup.py build_ext --inplace
running build_ext
building '_raymarching_mob' extension
Emitting ninja build file C:\20230908_nerf2meshe\nerf2mesh\raymarching\build\temp.win-amd64-3.9\Release\build.ninja...
Compiling objects...
Allowing ninja to set a default number of workers... (overridable by setting the environment variable MAX_JOBS=N)
1.11.1.git.kitware.jobserver-1
C:\Program Files\Microsoft Visual Studio\2022\Community\VC\Tools\MSVC\14.37.32822\bin\HostX86\x64\link.exe /nologo /INCREMENTAL:NO /LTCG /DLL /MANIFEST:EMBED,ID=2 /MANIFESTUAC:NO /LIBPATH:C:\Users\tsuki\AppData\Local\Programs\Python\Python39\lib\site-packages\torch\lib /LIBPATH:C:\Program Files\NVIDIA GPU Computing Toolkit\CUDA\v11.6\lib/x64 /LIBPATH:C:\Users\tsuki\AppData\Local\Programs\Python\Python39\libs /LIBPATH:C:\Users\tsuki\AppData\Local\Programs\Python\Python39\PCbuild\amd64 /LIBPATH:C:\Program Files\Microsoft Visual Studio\2022\Community\VC\Tools\MSVC\14.37.32822\ATLMFC\lib\x64 /LIBPATH:C:\Program Files\Microsoft Visual Studio\2022\Community\VC\Tools\MSVC\14.37.32822\lib\x64 /LIBPATH:C:\Program Files (x86)\Windows Kits\NETFXSDK\4.8\lib\um\x64 /LIBPATH:C:\Program Files (x86)\Windows Kits\10\lib\10.0.22621.0\ucrt\x64 /LIBPATH:C:\Program Files (x86)\Windows Kits\10\\lib\10.0.22621.0\\um\x64 c10.lib torch.lib torch_cpu.lib torch_python.lib cudart.lib c10_cuda.lib torch_cuda_cu.lib torch_cuda_cpp.lib /EXPORT:PyInit__raymarching_mob C:\20230908_nerf2meshe\nerf2mesh\raymarching\build\temp.win-amd64-3.9\Release\20230908_nerf2meshe\nerf2mesh\raymarching\src\bindings.obj C:\20230908_nerf2meshe\nerf2mesh\raymarching\build\temp.win-amd64-3.9\Release\20230908_nerf2meshe\nerf2mesh\raymarching\src\raymarching.obj /OUT:build\lib.win-amd64-3.9\_raymarching_mob.cp39-win_amd64.pyd /IMPLIB:C:\20230908_nerf2meshe\nerf2mesh\raymarching\build\temp.win-amd64-3.9\Release\20230908_nerf2meshe\nerf2mesh\raymarching\src\_raymarching_mob.cp39-win_amd64.lib
LINK : fatal error LNK1181: 入力ファイル 'C:\20230908_nerf2meshe\nerf2mesh\raymarching\build\temp.win-amd64-3.9\Release\20230908_nerf2meshe\nerf2mesh\raymarching\src\bindings.obj' を開けません。
error: command 'C:\\Program Files\\Microsoft Visual Studio\\2022\\Community\\VC\\Tools\\MSVC\\14.37.32822\\bin\\HostX86\\x64\\link.exe' failed with exit code 1181
nerf2meshのIssuesから、raymarchingのリンクエラー解決に関する情報を確認する
エラーに関連しそうなIssuesを発見。
Issues内の解決方法を参照すると以下記載があったが、落としてきたソースには const の指定がそもそも入っていなかった。
I have resolved that issue by removing const from at::Tensor in raymaching.cu.
-void composite_rays(const uint32_t n_alive, const uint32_t n_step, const float T_thresh, at::Tensor rays_alive, at::Tensor rays_t, const at::Tensor sigmas, const at::Tensor rgbs, const at::Tensor deltas, at::Tensor weights, at::Tensor depth, at::Tensor image) {

+void composite_rays(const uint32_t n_alive, const uint32_t n_step, const float T_thresh, at::Tensor rays_alive, at::Tensor rays_t, at::Tensor sigmas, at::Tensor rgbs, at::Tensor deltas, at::Tensor weights, at::Tensor depth, at::Tensor image) {
データ生成の実行
ビルド拡張機能のインストールは失敗したものの、データ生成ができるのか試す。
必要なデータをDL&配置後に、公式通りのコマンドを実行。
エラー内容的に、ビルド拡張のモジュールが必要?
python main.py data/nerf_synthetic/lego/ --workspace trial_syn_lego/ -O --bound 1 --scale 0.8 --dt_gamma 0 --stage 0 --lambda_tv 1e-8```
```shell:エラー内容
C:\Users\ユーザー名\AppData\Local\Programs\Python\Python39\lib\site-packages\torchaudio\backend\utils.py:62: UserWarning: No audio backend is available.
  warnings.warn("No audio backend is available.")
Traceback (most recent call last):
  File "C:\20230908_nerf2meshe\nerf2mesh\raymarching\raymarching.py", line 10, in <module>
    import _raymarching_mob as _backend
ModuleNotFoundError: No module named '_raymarching_mob'

During handling of the above exception, another exception occurred:

Traceback (most recent call last):
  File "C:\20230908_nerf2meshe\nerf2mesh\main.py", line 5, in <module>
    from nerf.network import NeRFNetwork
  File "C:\20230908_nerf2meshe\nerf2mesh\nerf\network.py", line 8, in <module>
    from .renderer import NeRFRenderer
  File "C:\20230908_nerf2meshe\nerf2mesh\nerf\renderer.py", line 14, in <module>
    import raymarching
  File "C:\20230908_nerf2meshe\nerf2mesh\raymarching\__init__.py", line 1, in <module>
    from .raymarching import *
  File "C:\20230908_nerf2meshe\nerf2mesh\raymarching\raymarching.py", line 12, in <module>
    from .backend import _backend
  File "C:\20230908_nerf2meshe\nerf2mesh\raymarching\backend.py", line 31, in <module>
    _backend = load(name='_raymarching_mob',
  File "C:\Users\ユーザー名\AppData\Local\Programs\Python\Python39\lib\site-packages\torch\utils\cpp_extension.py", line 1202, in load
    return _jit_compile(
  File "C:\Users\ユーザー名\AppData\Local\Programs\Python\Python39\lib\site-packages\torch\utils\cpp_extension.py", line 1450, in _jit_compile
    return _import_module_from_library(name, build_directory, is_python_module)
  File "C:\Users\ユーザー名\AppData\Local\Programs\Python\Python39\lib\site-packages\torch\utils\cpp_extension.py", line 1844, in _import_module_from_library
    module = importlib.util.module_from_spec(spec)
ImportError: DLL load failed while importing _raymarching_mob: 指定されたモジュールが見つかりません。
WindowsのWSL機能で、Ubuntuを入れてみる
上記エラーが解決しないので、公式のテスト環境であるUbuntuをWindowsに入れたい。
そこでWSL(Windows Subsystem for Linux)の機能を利用する。
WSLインストール手順
公式手順を参考に行う。
wsl --install
WSLのバージョン確認
「規定で WSL2 がインストールされる」とあったが、以下コマンドで確認すると「WSL1」になっていた。
wsl -l -v

#  NAME      STATE           VERSION
#* Ubuntu    Stopped         1
WSLの更新
WSL1から、WSL2に更新するためのコマンドを実行。
カーネルコンポーネントが不足しているとのことで、更新失敗。
wsl --set-version Ubuntu 2

# 変換中です。この処理には数分かかることがあります...
# WSL 2 との主な違いについては、https://aka.ms/wsl2 を参照してください
# WSL 2 を実行するには、カーネル コンポーネントの更新が必要です。詳細については  https://aka.ms/wsl2kernel を参照してください
カーネルコンポーネントのインストール&WSL2への再更新
上記メッセージ内にあったURLからコンポネントをDL&インストール実施。
その後に改めて WSL2 への更新を行ったら正常に完了した。
wsl --set-version Ubuntu 2

# 変換中です。この処理には数分かかることがあります...
# WSL 2 との主な違いについては、https://aka.ms/wsl2 を参照してください
# 変換が完了しました。

wsl -l -v
#   NAME      STATE           VERSION
# * Ubuntu    Stopped         2
Linux GUIアプリのインストール
Ubuntu環境をGUIで操作したいので、Linux GUIアプリのインストールを進める。
公式の手順を参考に進める。
ー>追記:
GUIアプリについて勘違いしておりました。
Ubuntu環境をすべてデスクトップ画面のようにGUIで操作可能になる訳ではなく、各アプリケーションをGUIで操作可能になるもの(?)なんですね。
Linux GUIアプリのインストール
1、WSLの更新
wsl --update

# インストール中: Linux 用 Windows サブシステム
# Linux 用 Windows サブシステム  はインストールされました。
2、WSLの再起動
wsl --shutdown
3、ディストリビューション内のパッケージを更新する
アプリ一覧からUbuntuを起動後、以下コマンドを実行
sudo apt update

# ~省略
# Fetched 27.1 MB in 14s (1977 kB/s)
# Reading package lists... Done
# Building dependency tree... Done
# Reading state information... Done
# 101 packages can be upgraded. Run 'apt list --upgradable' to see them.
4、Gnome テキスト エディターをインストールする
sudo apt install gnome-text-editor -y

# ~省略
# Processing triggers for libgdk-pixbuf-2.0-0:amd64 (2.42.8+dfsg-1ubuntu0.2) ...
# Processing triggers for libc-bin (2.35-0ubuntu3.1) ...
# /sbin/ldconfig.real: /usr/lib/wsl/lib/libcuda.so.1 is not a symbolic link
5、Nautilus をインストールする
sudo apt install nautilus -y

# ~省略
# Processing triggers for libc-bin (2.35-0ubuntu3.1) ...
# /sbin/ldconfig.real: /usr/lib/wsl/lib/libcuda.so.1 is not a symbolic link
6、X11 アプリをインストールする
sudo apt install x11-apps -y

# ~省略
# Processing triggers for libc-bin (2.35-0ubuntu3.1) ...
# /sbin/ldconfig.real: /usr/lib/wsl/lib/libcuda.so.1 is not a symbolic link
# Processing triggers for man-db (2.10.2-1) ...
7、Linux 向け Google Chrome をインストールする
cd /tmp
wget https://dl.google.com/linux/direct/google-chrome-stable_current_amd64.deb
sudo dpkg -i google-chrome-stable_current_amd64.deb
sudo apt install --fix-broken -y
sudo dpkg -i google-chrome-stable_current_amd64.deb

# ~省略
# Processing triggers for libc-bin (2.35-0ubuntu3.1) ...
# /sbin/ldconfig.real: /usr/lib/wsl/lib/libcuda.so.1 is not a symbolic link
# Processing triggers for man-db (2.10.2-1) ...
Windows WSLのUbuntu環境に、CUDAインストール
以下サイトを参考にインストール進めてみる。
インストール手順
1、NVIDIAのWindows Driverをインストール
以下から対象のドライバーをDL&インストール実施
2、古い GPG キーを削除
sudo apt-key del 7fa2af80
3、CUDA Toolkitインストール(ver11.6.0をインストールする)
wget https://developer.download.nvidia.com/compute/cuda/repos/wsl-ubuntu/x86_64/cuda-wsl-ubuntu.pin
sudo mv cuda-wsl-ubuntu.pin /etc/apt/preferences.d/cuda-repository-pin-600
wget https://developer.download.nvidia.com/compute/cuda/11.6.0/local_installers/cuda-repo-wsl-ubuntu-11-6-local_11.6.0-1_amd64.deb
sudo dpkg -i cuda-repo-wsl-ubuntu-11-6-local_11.6.0-1_amd64.deb
sudo apt-key add /var/cuda-repo-wsl-ubuntu-11-6-local/7fa2af80.pub
sudo apt-get update
sudo apt-get -y install cuda
CUDA Toolkitインストール時の、最後のインストールコマンド実行時に以下エラー発生。
エラー内容で検索すると、Ubuntuのバージョンを下げる必要がある?
- エラー内容
$ sudo apt-get -y install cuda
Reading package lists... Done
Building dependency tree... Done
Reading state information... Done
Some packages could not be installed. This may mean that you have
requested an impossible situation or if you are using the unstable
distribution that some required packages have not yet been created
or been moved out of Incoming.
The following information may help to resolve the situation:

The following packages have unmet dependencies:
 libcufile-11-6 : Depends: liburcu6 but it is not installable
E: Unable to correct problems, you have held broken packages.
既存のUbuntuのバージョンを再確認する
$ cat /etc/os-release
PRETTY_NAME="Ubuntu 22.04.2 LTS"
NAME="Ubuntu"
VERSION_ID="22.04"
VERSION="22.04.2 LTS (Jammy Jellyfish)"
VERSION_CODENAME=jammy
ID=ubuntu
ID_LIKE=debian
HOME_URL="https://www.ubuntu.com/"
SUPPORT_URL="https://help.ubuntu.com/"
BUG_REPORT_URL="https://bugs.launchpad.net/ubuntu/"
PRIVACY_POLICY_URL="https://www.ubuntu.com/legal/terms-and-policies/privacy-policy"
UBUNTU_CODENAME=jammy
Ubuntuを再インストールしてみる(22.04ー>20.04にする)
[設定]からUbuntuとWSLを削除して、環境を初期化する。
その後、以下コマンドでWSL(Ubuntu 20.04)を再インストールした。
wsl --install -d Ubuntu-20.04
Linux GUIアプリを再度初めからインストール
以前追記した情報をもとに実施。
Linux GUIアプリのインストール
CUDA Toolkitを再度初めからインストール
以前追記した情報をもとに実施。
Windows WSLのUbuntu環境に、CUDAインストール
CUDAのインストール状況を確認
以下コマンド実施したところ、JSON情報も出力されたので正常にインストールが完了した模様。
cat /usr/local/cuda-11.6/version.json

# 出力例
# {
#    "cuda" : {
#       "name" : "CUDA SDK",
#       "version" : "11.6.0"
#    },
#  ~以下省略~
Windows WSLのUbuntu環境に、PyTorchインストール
1、以下を参考に、Pythonの必要なツール類をインストール
sudo apt -y update
sudo apt -y install python3-dev python3-pip python3-setuptools
2、PyTorchをインストール
以下から該当のコマンドをコピーし、実行した。
pip install torch==1.12.1+cu116 torchvision==0.13.1+cu116 torchaudio==0.12.1 --extra-index-url https://download.pytorch.org/whl/cu116
Windows WSLのUbuntu環境に、Gitをインストール
sudo apt-get install git

git config --global user.name "Your Name"
git config --global user.email "youremail@domain.com"
Windows WSLのUbuntu環境に、GCC/G++ 8以降 をインストール
途中にインストールが必要な [tiny-cuda-nn] の必要要件に以下記載があった。
そのため、Ubuntu環境には「GCC/G++」というものをインストールしてみる。
C++14対応コンパイラ。次の選択が推奨されており、テストされています。
Windows: Visual Studio 2019 または 2022
Linux: GCC/G++ 8 以降
GCCをインストール
コマンド実行したところ、デフォルトで入っていた模様
sudo apt install gcc

# [sudo] password for testuser:
# Reading package lists... Done
# Building dependency tree
# Reading state information... Done
# gcc is already the newest version (4:9.3.0-1ubuntu2).
# gcc set to manually installed.
# 0 upgraded, 0 newly installed, 0 to remove and 73 not upgraded.
G++をインストール
コマンド実行したところ、デフォルトで入っていた模様
sudo apt install g++

# ~省略~
# Reading package lists... Done
# Building dependency tree
# Reading state information... Done
# g++ is already the newest version (4:9.3.0-1ubuntu2).
# g++ set to manually installed.
# 0 upgraded, 0 newly installed, 0 to remove and 72 not upgraded.
CMakeをインストール
sudo apt install cmake

# ~省略~
# Preparing to unpack .../cmake_3.16.3-1ubuntu1.20.04.1_amd64.deb ...
# Unpacking cmake (3.16.3-1ubuntu1.20.04.1) ...
# Setting up librhash0:amd64 (1.3.9-1) ...
# Setting up cmake-data (3.16.3-1ubuntu1.20.04.1) ...
# Setting up libjsoncpp1:amd64 (1.7.4-3.1ubuntu2) ...
# Setting up cmake (3.16.3-1ubuntu1.20.04.1) ...
# Processing triggers for man-db (2.9.1-1) ...
# Processing triggers for libc-bin (2.31-0ubuntu9.9) ...
改めて、nerf2meshの手順通りにセットアップとデータ生成を試してみる
Ubuntu上の環境設定は一通り行った(はず)。
もう一度データ生成までの手順を試す。
1、ソース一式をGitクローンする
任意のディレクトリを作成し、その配下にGitクローンした。
git clone https://github.com/ashawkey/nerf2mesh.git
cd nerf2mesh
2、必要ライブラリのインストール
公式通りのコマンドを実行。特にエラーはなし。
pip install -r requirements.txt
3、[tiny-cuda-nn] のインストール
公式通りのコマンドを実行。エラー発生。
pip install git+https://github.com/NVlabs/tiny-cuda-nn/#subdirectory=bindings/torch
Collecting git+https://github.com/NVlabs/tiny-cuda-nn/#subdirectory=bindings/torch
  Cloning https://github.com/NVlabs/tiny-cuda-nn/ to /tmp/pip-req-build-tnuvsya4
  Running command git clone -q https://github.com/NVlabs/tiny-cuda-nn/ /tmp/pip-req-build-tnuvsya4
  Running command git submodule update --init --recursive -q
    ERROR: Command errored out with exit status 1:
     command: /usr/bin/python3 -c 'import sys, setuptools, tokenize; sys.argv[0] = '"'"'/tmp/pip-req-build-tnuvsya4/bindings/torch/setup.py'"'"'; __file__='"'"'/tmp/pip-req-build-tnuvsya4/bindings/torch/setup.py'"'"';f=getattr(tokenize, '"'"'open'"'"', open)(__file__);code=f.read().replace('"'"'\r\n'"'"', '"'"'\n'"'"');f.close();exec(compile(code, __file__, '"'"'exec'"'"'))' egg_info --egg-base /tmp/pip-req-build-tnuvsya4/bindings/torch/pip-egg-info
         cwd: /tmp/pip-req-build-tnuvsya4/bindings/torch
    Complete output (7 lines):
    Traceback (most recent call last):
      File "<string>", line 1, in <module>
      File "/tmp/pip-req-build-tnuvsya4/bindings/torch/setup.py", line 51, in <module>
        raise EnvironmentError("Unknown compute capability. Specify the target compute capabilities in the TCNN_CUDA_ARCHITECTURES environment variable or install PyTorch with the CUDA backend to detect it automatically.")
    OSError: Unknown compute capability. Specify the target compute capabilities in the TCNN_CUDA_ARCHITECTURES environment variable or install PyTorch with the CUDA backend to detect it automatically.
    No CUDA runtime is found, using CUDA_HOME='/usr/local/cuda'
    Building PyTorch extension for tiny-cuda-nn version 1.7
    ----------------------------------------
ERROR: Command errored out with exit status 1: python setup.py egg_info Check the logs for full command output.
※CUDAに関するエラーログの様なので、 [tiny-cuda-nn] のページに記載があった、以下パス設定を行ってもエラーが改善しない。
export PATH="/usr/local/cuda-11.6/bin:$PATH"
export LD_LIBRARY_PATH="/usr/local/cuda-11.6/lib64:$LD_LIBRARY_PATH"
再度バージョンを変えて nerf2meshの導入を試してみる(Ubuntu22.04+諸々バージョン変えてみる)
上記エラーが改善されないので、さらにUbuntuのバージョンから変えて試してみる。
今回は、極力最新のバージョンを使ってみる。
WSL上のUbuntuを削除し、改めて以下条件で環境作成してみた。
| 項目 | バージョン | 備考 |
|---|---|---|
| Ubuntu | 22.04 | - |
| CUDA | 11.8 | - |
| PyTourch | 2.0.0 | - |
| Python | 3.10.6 | Ubuntuインストール時にデフォルトで入っていたもの |
各種インストールコマンドのまとめメモ
# Ubuntuインストール(ver22.04)
# ※コマンドプロンプトから実行
wsl --install -d Ubuntu-22.04


# Python3 開発用ファイル,pip, setuptools のインストール
# 右記の参考サイトを参照して実行: https://www.kkaneko.jp/tools/wsl/wsl_tensorflow2.html
sudo apt -y update
sudo apt -y install python3-dev python3-pip python3-setuptools


# CUDAインストール(ver11.8)
# ※Ubuntuから実行
wget https://developer.download.nvidia.com/compute/cuda/repos/wsl-ubuntu/x86_64/cuda-wsl-ubuntu.pin
sudo mv cuda-wsl-ubuntu.pin /etc/apt/preferences.d/cuda-repository-pin-600
wget https://developer.download.nvidia.com/compute/cuda/11.8.0/local_installers/cuda-repo-wsl-ubuntu-11-8-local_11.8.0-1_amd64.deb
sudo dpkg -i cuda-repo-wsl-ubuntu-11-8-local_11.8.0-1_amd64.deb
sudo cp /var/cuda-repo-wsl-ubuntu-11-8-local/cuda-*-keyring.gpg /usr/share/keyrings/
sudo apt-get update
sudo apt-get -y install cuda

# CUDAのパス設定
# ※Ubuntuから実行
export PATH="/usr/local/cuda-11.8/bin:$PATH"
export LD_LIBRARY_PATH="/usr/local/cuda-11.8/lib64:$LD_LIBRARY_PATH"

# CUDA Toolkitインストール
# ※nvccコマンドを実行しようとすると、以下コマンドの入力を促されたので対応
# ※Ubuntuから実行
sudo apt install nvidia-cuda-toolkit

# CUDAのバージョン確認
# インストールしたバージョンが表示されない場合、パス設定が誤っている可能性あり
# ※Ubuntuから実行
nvcc -V


# PyTorchインストール(ver2.0.0)
# ※Ubuntuから実行
pip install torch==2.0.0+cu118 torchvision==0.15.1+cu118 torchaudio==2.0.1 --index-url https://download.pytorch.org/whl/cu118


# [tiny-cuda-nn] パッケージに必要なツール類をインストール
# 右記のページに記載あったコマンド
# ※Ubuntuから実行
sudo apt-get install build-essential git


# Gnome テキスト エディターをインストール
# 起動する際のコマンドは右記: gnome-text-editor ~/.bashrc
# ※Ubuntuから実行
sudo apt install gnome-text-editor -y

# Nautilus をインストール
# 起動する際のコマンドは右記: nautilus
# ※Ubuntuから実行
sudo apt install nautilus -y

# X11 アプリをインストール
# 起動する際のコマンドは右記: xcalc, xclock, xeyes
# ※Ubuntuから実行
sudo apt install x11-apps -y

# Google Chrome をインストール
# 起動する際のコマンドは右記: google-chrome
# ※Ubuntuから実行
cd /tmp
wget https://dl.google.com/linux/direct/google-chrome-stable_current_amd64.deb
sudo dpkg -i google-chrome-stable_current_amd64.deb
sudo apt install --fix-broken -y
sudo dpkg -i google-chrome-stable_current_amd64.deb

# フォントインストール
# 文字化けしたのでフォントをインストール
# 参考サイト: https://www.kimoton.com/entry/2018/06/08/083114
# ※Ubuntuから実行
sudo apt-get install unifont

# unzipインストール(zipファイルの解凍用)
# ※Ubuntuから実行
sudo apt install unzip
nerf2mesh の、サンプルデータ取得&解凍手順
1、Ubuntu環境でGogleChromeを起動後、以下リンクより対象データをDL
2、DLしたデータを対象ディレクトリ配下へ移動&解凍
※パス情報は適宜修正お願いいたします。
# DLファイルの移動
mv /home/ユーザー名/Downloads/nerf_synthetic.zip-20230914T070307Z-001.zip /home/ユーザー名/nerf2mesh/nerf2mesh/data

# DLファイルの解凍
unzip nerf_synthetic.zip-20230914T070307Z-001.zip
unzip nerf_synthetic.zip
nerf2mesh の手順実行(環境を再構築したので再々実行)
1、ソースDL
git clone https://github.com/ashawkey/nerf2mesh.git
cd nerf2mesh
2、関連ツールのインストール
※今までは以下いずれかでエラーが発生していたが、どれも問題なく実行できた
pip install -r requirements.txt

# tiny-cuda-nn
pip install git+https://github.com/NVlabs/tiny-cuda-nn/#subdirectory=bindings/torch

# nvdiffrast
pip install git+https://github.com/NVlabs/nvdiffrast/

# pytorch3d
pip install git+https://github.com/facebookresearch/pytorch3d.git
3、ビルド拡張機能のインストール
※今までエラーが発生していたが、問題なく実行できた
# install all extension modules
bash scripts/install_ext.sh
4、ステージ0の実行(粗いメッシュ生成)
# nerf
python main.py data/nerf_synthetic/lego/ --workspace trial_syn_lego/ -O --bound 1 --scale 0.8 --dt_gamma 0 --stage 0 --lambda_tv 1e-8
「RuntimeError: Ninja is required to load C++ extensions」エラー発生
ステージ0の実行(粗いメッシュ生成)時に以下エラー発生。
- 1、エラー内容
Traceback (most recent call last):
  File "/home/testuser/nerf2mesh/nerf2mesh/main.py", line 268, in <module>
    trainer.save_mesh(resolution=opt.mcubes_reso, decimate_target=opt.decimate_target, dataset=train_loader._data if opt.mesh_visibility_culling else None)
  File "/home/testuser/nerf2mesh/nerf2mesh/nerf/utils.py", line 901, in save_mesh
    self.model.export_stage0(save_path, resolution=resolution, decimate_target=decimate_target, dataset=dataset)
  File "/home/testuser/.local/lib/python3.10/site-packages/torch/utils/_contextlib.py", line 115, in decorate_context
    return func(*args, **kwargs)
  File "/home/testuser/nerf2mesh/nerf2mesh/nerf/renderer.py", line 533, in export_stage0
    visibility_mask = self.mark_unseen_triangles(vertices, triangles, dataset.mvps, dataset.H, dataset.W).cpu().numpy()
  File "/home/testuser/.local/lib/python3.10/site-packages/torch/utils/_contextlib.py", line 115, in decorate_context
    return func(*args, **kwargs)
  File "/home/testuser/nerf2mesh/nerf2mesh/nerf/renderer.py", line 961, in mark_unseen_triangles
    self.glctx = dr.RasterizeGLContext(output_db=False)
  File "/home/testuser/.local/lib/python3.10/site-packages/nvdiffrast/torch/ops.py", line 221, in __init__
    self.cpp_wrapper = _get_plugin(gl=True).RasterizeGLStateWrapper(output_db, mode == 'automatic', cuda_device_idx)
  File "/home/testuser/.local/lib/python3.10/site-packages/nvdiffrast/torch/ops.py", line 118, in _get_plugin
    torch.utils.cpp_extension.load(name=plugin_name, sources=source_paths, extra_cflags=opts, extra_cuda_cflags=opts+['-lineinfo'], extra_ldflags=ldflags, with_cuda=True, verbose=False)
  File "/home/testuser/.local/lib/python3.10/site-packages/torch/utils/cpp_extension.py", line 1284, in load
    return _jit_compile(
  File "/home/testuser/.local/lib/python3.10/site-packages/torch/utils/cpp_extension.py", line 1509, in _jit_compile
    _write_ninja_file_and_build_library(
  File "/home/testuser/.local/lib/python3.10/site-packages/torch/utils/cpp_extension.py", line 1593, in _write_ninja_file_and_build_library
    verify_ninja_availability()
  File "/home/testuser/.local/lib/python3.10/site-packages/torch/utils/cpp_extension.py", line 1649, in verify_ninja_availability
    raise RuntimeError("Ninja is required to load C++ extensions")
RuntimeError: Ninja is required to load C++ extensions
-
2、参考サイト
https://learn.microsoft.com/ja-jp/cpp/build/walkthrough-build-debug-wsl2?view=msvc-170 -
3、対応内容
「ninja-build」をインストールしてみる
sudo apt install ninja-build
「RuntimeError: OpenGL 4.4 or later is required」エラー発生
ステージ0の実行(粗いメッシュ生成)時に以下エラー発生。
- 1、エラー内容
Traceback (most recent call last):
  File "/home/testuser/nerf2mesh/nerf2mesh/main.py", line 268, in <module>
    trainer.save_mesh(resolution=opt.mcubes_reso, decimate_target=opt.decimate_target, dataset=train_loader._data if opt.mesh_visibility_culling else None)
  File "/home/testuser/nerf2mesh/nerf2mesh/nerf/utils.py", line 901, in save_mesh
    self.model.export_stage0(save_path, resolution=resolution, decimate_target=decimate_target, dataset=dataset)
  File "/home/testuser/.local/lib/python3.10/site-packages/torch/utils/_contextlib.py", line 115, in decorate_context
    return func(*args, **kwargs)
  File "/home/testuser/nerf2mesh/nerf2mesh/nerf/renderer.py", line 533, in export_stage0
    visibility_mask = self.mark_unseen_triangles(vertices, triangles, dataset.mvps, dataset.H, dataset.W).cpu().numpy()
  File "/home/testuser/.local/lib/python3.10/site-packages/torch/utils/_contextlib.py", line 115, in decorate_context
    return func(*args, **kwargs)
  File "/home/testuser/nerf2mesh/nerf2mesh/nerf/renderer.py", line 961, in mark_unseen_triangles
    self.glctx = dr.RasterizeGLContext(output_db=False)
  File "/home/testuser/.local/lib/python3.10/site-packages/nvdiffrast/torch/ops.py", line 221, in __init__
    self.cpp_wrapper = _get_plugin(gl=True).RasterizeGLStateWrapper(output_db, mode == 'automatic', cuda_device_idx)
RuntimeError: OpenGL 4.4 or later is required
Segmentation fault
-
2、参考サイト
https://github.com/ashawkey/nerf2mesh/issues?q=OpenGL
https://github.com/ashawkey/nerf2mesh/issues/39
https://github.com/ashawkey/nerf2mesh/issues/77 -
3、対応内容
GitHub内のIssues情報をもとに、以下対応を実施したところ、メッシュ生成まで動作した。
3-1、「merf2mesh/nerf/render.py」ファイルの修正
ファイル内の「RasterizeGLContext(output_db=False)」を、「RasterizeCudaContext()」にすべて変更した。
※今回は二か所あったので、二か所とも修正。
    if self.opt.gui:
        self.glctx = dr.RasterizeCudaContext() # support at most 2048 resolution.
    else:
--        self.glctx = dr.RasterizeGLContext(output_db=False) # will crash if using GUI...
++        self.glctx = dr.RasterizeCudaContext()


if self.glctx is None:
--    self.glctx = dr.RasterizeGLContext(output_db=False)
++    self.glctx = dr.RasterizeCudaContext()
3-2、ステージ0(粗いメッシュ生成)の実行コマンド変更
以下コマンドを実施したところ、メッシュ生成まで行えた。
# ドキュメントのコマンド
python3 main.py data/nerf_synthetic/lego/ --workspace trial_syn_lego/ -O --bound 1 --scale 0.8 --dt_gamma 0 --stage 0 --lambda_tv 1e-8

# Issuesの情報をもとに実行したコマンド
python3 main.py data/nerf_synthetic/lego/ --workspace trial_syn_lego/ -O --bound 1 --scale 0.8 --dt_gamma 0 --stage 0 --texture_size 2048 --ssaa 1 --lambda_tv 1e-8
# ~省略~
++> Evaluate epoch 300 Finished, loss = 0.000491
==> Start Test, save results to trial_syn_lego/results
100% 200/200 [00:24<00:00,  8.63it/s]==> Finished Test.
100% 200/200 [00:26<00:00,  7.50it/s]
==> Saving mesh to trial_syn_lego/mesh_stage0
100%|█████████████████████████████████████████████████████████████████████████████████████████████████████████████████████████████████████████████████████| 100/100 [00:01<00:00, 56.00it/s]
[mark unseen trigs] 2576217 from 3994056
[INFO] mesh mask trigs: (2023038, 3) --> (1130456, 3), (3994056, 3) --> (2244722, 3)
[INFO] mesh cleaning: (1130456, 3) --> (1045526, 3), (2244722, 3) --> (2077203, 3)
[INFO] mesh decimation: (1045526, 3) --> (150648, 3), (2077203, 3) --> (300000, 3)
==> Finished saving mesh.
3-3、ステージ1(テクスチャ付きメッシュ生成)の実行コマンド変更
以下コマンドを実施したところ、メッシュ生成まで行えた。
# ドキュメントのコマンド
python3 main.py data/nerf_synthetic/lego/ --workspace trial_syn_lego/ -O --bound 1 --scale 0.8 --dt_gamma 0 --stage 1

# Issuesの情報をもとに実行したコマンド
python3 main.py data/nerf_synthetic/lego/ --workspace trial_syn_lego/ -O --bound 1 --scale 0.8 --dt_gamma 0 --stage 1 --texture_size 2048 --ssaa 1
# ~省略~
++> Evaluate epoch 300 Finished, loss = 0.000712
Loading test data: 100%|██████████████████████████████████████████████████████████████████████████████████████████████████████████████████████████████████| 200/200 [00:02<00:00, 91.44it/s]
++> Evaluate at epoch 300 ...
loss=0.000676 (0.000914): : 100% 200/200 [00:37<00:00,  5.35it/s]
PSNR = 30.834637
SSIM = 0.951897
LPIPS (vgg) = 0.059331
++> Evaluate epoch 300 Finished, loss = 0.000914
==> Start Test, save results to trial_syn_lego/results
 98% 196/200 [00:03<00:00, 61.06it/s]==> Finished Test.
100% 200/200 [00:05<00:00, 37.90it/s]
==> Exporting mesh to trial_syn_lego/mesh_stage1
[INFO] running xatlas to unwrap UVs for mesh: v=(144783, 3) f=(284239, 3)
[INFO] writing obj mesh to trial_syn_lego/mesh_stage1/mesh_0.obj
[INFO] writing vertices (144783, 3)
[INFO] writing vertices texture coords (313469, 2)
[INFO] writing faces (284239, 3)
[INFO] wrting MLP param net.0.weight: (6, 32)
[INFO] wrting MLP param net.1.weight: (32, 3)
==> Exported mesh to trial_syn_lego/mesh_stage1
生成できたメッシュの取得方法(WindowsからWSL上のファイルを取得する)
エクスプローラ起動後に以下パスを入力し、WSL上のファイルシステムにアクセスする。
\\wsl$
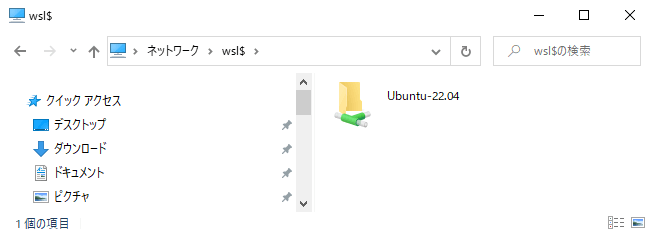
私の場合は以下配下に出力されてました。
実行したディレクトリによって変わるのでご注意ください。
\\wsl.localhost\Ubuntu-22.04\home\ユーザー名\nerf2mesh\nerf2mesh\trial_syn_lego
生成されたメッシュデータの確認
blenderで読み込んで確認。
NeRF技術を使ったメッシュデータの生成は初めてだったのですが、かなり精度が高く生成された様に感じました。
※他データは未検証なので、すべてがここまで精度高く生成されるかは不明。
-
ステージ0での生成結果(*.plyファイル)
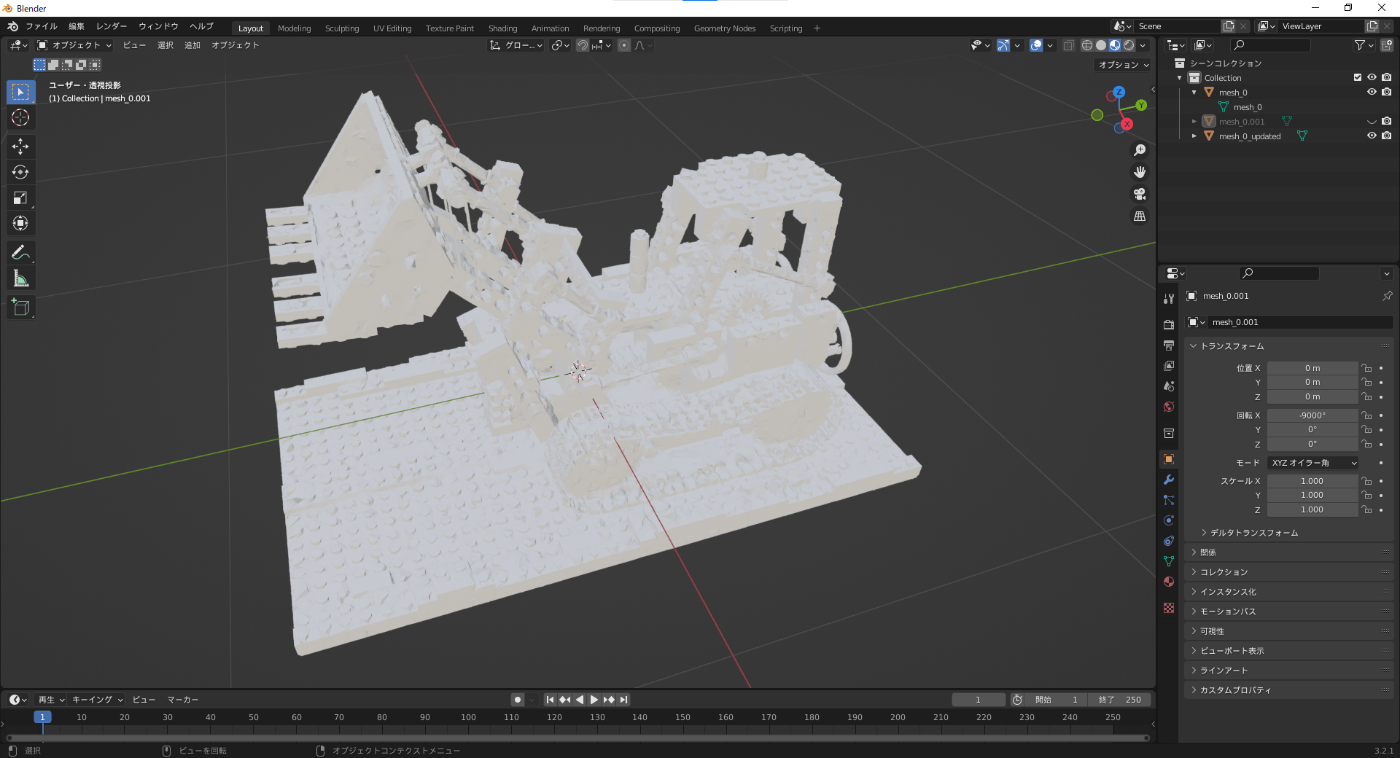
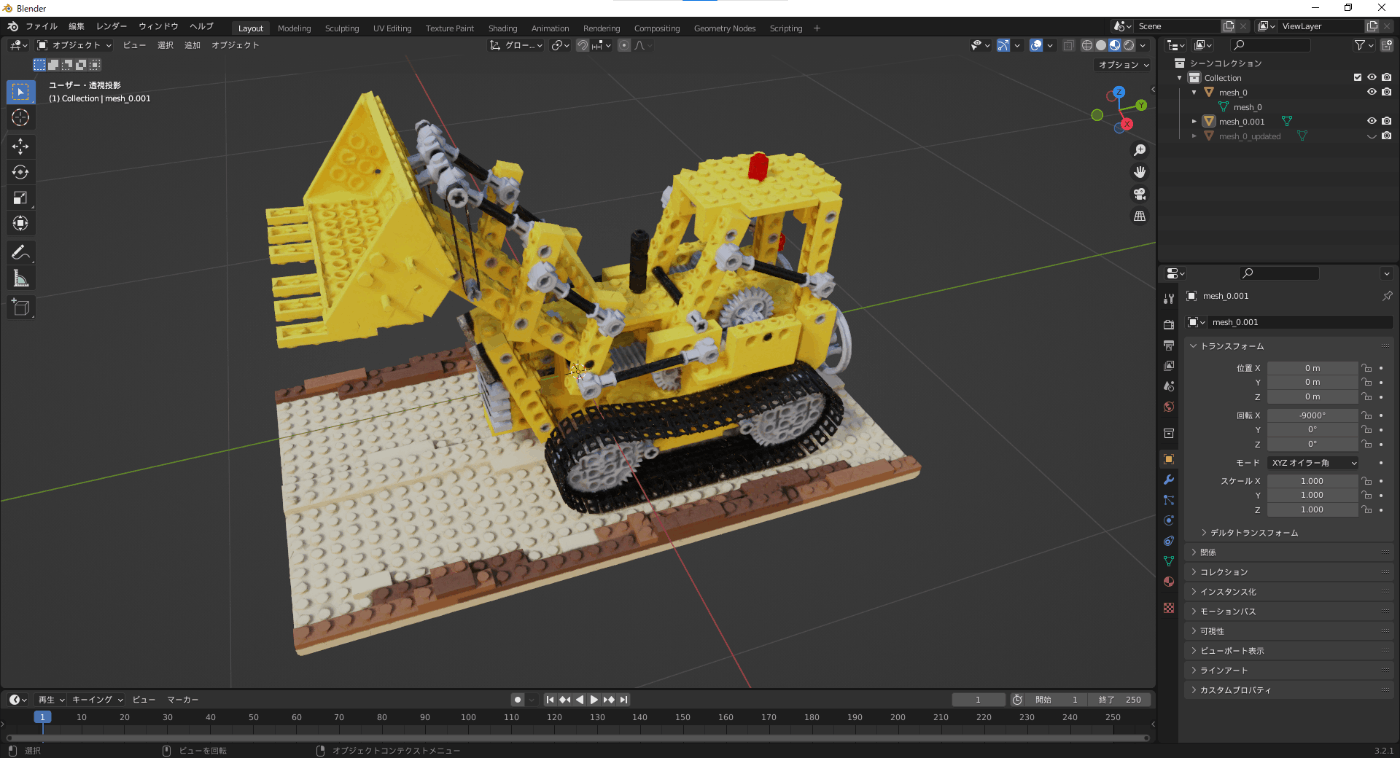
-
ステージ1での生成結果(*.objファイル)
COLMAPデータ形式の実行も試してみる
NeRFデータ形式の方は実行できたが、COLMAPデータ形式の方も問題ないのか試す。
1、COLMAP用データをDL&任意のディレクトリに配置
READMEに記載のあった以下ファイルを、UbuntuのChromeブラウザからファイルをDLし、適当なディレクトリに配置した。
その後に解凍を実施。
2、COLMAP生成用のコマンドを実行
実行したものの、エラーが発生してメッシュ生成できなかった。
### Stage0 (NeRF, continuous, volumetric rendering), this stage exports a coarse mesh under <workspace>/mesh_stage0/
# colmap
python3 main.py data/garden/ --workspace trial_360_garden -O --data_format colmap --bound 16 --enable_cam_center --enable_cam_near_far --scale 0.3 --downscale 4 --stage 0 --lambda_entropy 1e-3 --clean_min_f 16 --clean_min_d 10 --lambda_tv 2e-8 --visibility_mask_dilation 50
[swscaler @ 0x7401880] Warning: data is not aligned! This can lead to a speed loss
==> Finished Test.
100% 100/100 [00:06<00:00, 14.79it/s]
==> Saving mesh to trial_360_garden/mesh_stage0
  0%|                                                                                                                                      | 0/161 [00:00<?, ?it/s]
Traceback (most recent call last):
  File "/home/testuser/nerf2mesh/nerf2mesh/main.py", line 268, in <module>
    trainer.save_mesh(resolution=opt.mcubes_reso, decimate_target=opt.decimate_target, dataset=train_loader._data if opt.mesh_visibility_culling else None)
  File "/home/testuser/nerf2mesh/nerf2mesh/nerf/utils.py", line 901, in save_mesh
    self.model.export_stage0(save_path, resolution=resolution, decimate_target=decimate_target, dataset=dataset)
  File "/home/testuser/.local/lib/python3.10/site-packages/torch/utils/_contextlib.py", line 115, in decorate_context
    return func(*args, **kwargs)
  File "/home/testuser/nerf2mesh/nerf2mesh/nerf/renderer.py", line 536, in export_stage0
    visibility_mask = self.mark_unseen_triangles(vertices, triangles, dataset.mvps, dataset.H, dataset.W).cpu().numpy()
  File "/home/testuser/.local/lib/python3.10/site-packages/torch/utils/_contextlib.py", line 115, in decorate_context
    return func(*args, **kwargs)
  File "/home/testuser/nerf2mesh/nerf2mesh/nerf/renderer.py", line 972, in mark_unseen_triangles
    rast, _ = dr.rasterize(self.glctx, vertices_clip, triangles, (H, W)) # [1, H, W, 4]
  File "/home/testuser/.local/lib/python3.10/site-packages/nvdiffrast/torch/ops.py", line 310, in rasterize
    return _rasterize_func.apply(glctx, pos, tri, resolution, ranges, grad_db, -1)
  File "/home/testuser/.local/lib/python3.10/site-packages/torch/autograd/function.py", line 506, in apply
    return super().apply(*args, **kwargs)  # type: ignore[misc]
  File "/home/testuser/.local/lib/python3.10/site-packages/nvdiffrast/torch/ops.py", line 248, in forward
    out, out_db = _get_plugin().rasterize_fwd_cuda(raster_ctx.cpp_wrapper, pos, tri, resolution, ranges, peeling_idx)
RuntimeError: width and height must be divisible by 8
DLしたデータの画像サイズ確認
上記エラーで「幅と高さは8で割り切れること」と言われているので、念のため画像サイズを確認してみる。
DLした各画像を確認すると以下だった。8で割り切れるのが一つもない。
どう対応するのが適切なのか、引き続き確認する。
| データ | 画像サイズ |
|---|---|
| bicycle | 4946 x 3286 |
| bonsai | 3118 x 2078 |
| counter | 3115 x 2076 |
| garden | 5187 x 3361 |
| kitchen | 3115 x 2078 |
| room | 3114 x 2075 |
「画像自体のサイズを8で割れるサイズに変更」しても解決しない
処理は変更せず、画像側をffmpegで一括サイズ変換してみた。それでも同様のエラーが発生する。
そもそもログに出力されるサイズが、画像のサイズと異なっている。
画像ファイルのサイズではなく、別のファイルか何かを参照している?
=>COLMAP形式のデータセットについて理解しておらず、処理で参照されるものを把握できていない状態。そもそもCOLMAP形式のデータセットについて確認進める。
COLMAPとは
Structure from Motion(SfM) ソフトの一つ
※SfM: 写真情報から3次元形状を復元する技術
COLMAPデータセット
以下参考サイトから引用すると、COLMAPを実行すると画像データ以外にもSfMの実行データが生成される模様。
今回、nerf2meshを試す際に使用したサンプルデータ内にも、同様のファイルがあった
COLMAPを実行すると指定した作業フォルダ内にsparseという名前のフォルダが作成されます。
このフォルダの中にSfMの結果が出力されます。SfMを実行すると以下の3つのバイナリファイルが生成されます。
cameras.bin
images.bin
points3D.bin
nerf2meshでCOLMAP形式の実行が失敗していた原因
COLMAPの概要と実際のソースを参照してみたところ、「cameras.bin」に含まれる情報を参照している様に見える。
なので、画像自体のファイルサイズを変更しても改善しなかった様子。
データ側で対処するとしたら、画像自体のファイルサイズを変更した上で、COLMAP形式のデータセットの生成をやり直す必要が出てくる認識。
(他にデータ側で対処する方法があったら申し訳ありません)
※nerf2mesh の該当ソース
if self.colmap_path is None:
    raise ValueError(f"Cannot find colmap sparse output under {self.root_path}, please run colmap first!")

# ↓ この行で「cameras.bin」を参照し、サイズを取得していた
camdata = read_cameras_binary(os.path.join(self.colmap_path, 'cameras.bin'))

# read image size (assume all images are of the same shape!)
self.H = int(round(camdata[1].height / self.downscale))
self.W = int(round(camdata[1].width / self.downscale))
print(f'[INFO] ColmapDataset: image H = {self.H}, W = {self.W}')
その他参考にしたサイトメモ
COLMAPデータ形式のメッシュ生成は実行まで出来てないのですが、NeRFデータ形式のメッシュ生成は行えるようになったので、一旦クローズします。