Gluon for deno + preact のテスト
0. モチベと目次
Gluon for deno に preact を組み合わせて遊ぶところ
- Gluon: WebView の代わりに Chrome / Firefox を 使ってデスクトップアプリを作るもの
- 公式の example が既存の .html を開くタイプのものしかなかったので、preact を載せて動かす
- 最終的に Worker として別スレッドで駆動している Deno が本体みたいな感じになるので、Deno ができることは(たぶん)何でもできる
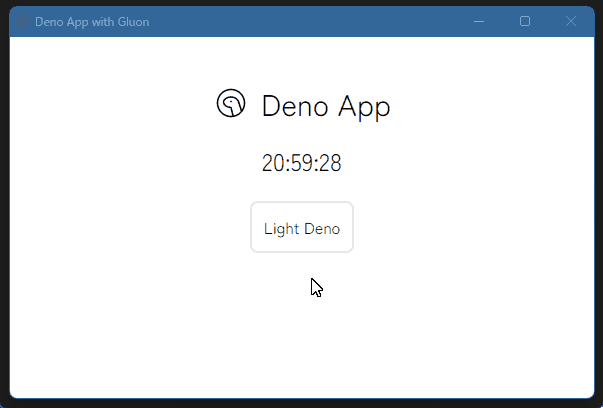
1. 最も単純な形式 🔝
見た目
基本的な流れは webview のときと同じで
- root となる
App.tsxとそこに載せるコンポーネントのファイル(Component.tsx)を用意する - hydration 用のファイル(
Cilent.tsx) を用意する - deno が読み込むファイル(
main.tsx) を用意し、その中で-
Cilent.tsx経由でApp.tsxと コンポーネントのファイルをバンドルし -
<html>...</html>を返す JSX の中にバンドル結果を<script>を使って流し込み - その JSX を
renderToString()で文字列にし - それを htmlファイルとして
Gluon.open()で開く、という流れ
-
ただし、webview.navigate() と異なり Gluon.open() は Data URI を対象に取れない[1]ので、Deno.makeTempFile()によって tempファイルを作成してそこに renderToString の結果を書き込み、そのファイルをGluon.open(tempファイル)する、という形式にしている。
また、複数の html を扱う際に Cilent_page1.tsx, Client_page2.tsx... となるのが面倒だったので、hydration 用のファイルは動的に生成する形式に変更した。
というわけで、main.tsx の基本形は↓のような感じ
/** @jsx h */
import { h } from "https://esm.sh/preact@10.10.6"
import * as Gluon from '../src/index.js'
import { renderToString } from "https://esm.sh/preact-render-to-string@5.2.2"
import { bundle } from "https://deno.land/x/emit@0.9.0/mod.ts"

import App from "./App.tsx"

// ------ settings ----------
const VIEW_CONFIG = {
  TITLE: "Deno App with Gluon",
  SIZE: [600, 400],
  CRIENT_PATH: "./tempClient.tsx"
}


// ------ Bundle and create script -------
const CLIENT_TS =`
  /** @jsx h */
  import { h, hydrate } from "https://esm.sh/preact@10.10.6"
  import App from "./App.tsx"
  hydrate( <App />, document.body )
`

await Deno.writeTextFile(VIEW_CONFIG.CRIENT_PATH, CLIENT_TS)
const script = await bundle(VIEW_CONFIG.CRIENT_PATH).then(result => result.code)
await Deno.remove(VIEW_CONFIG.CRIENT_PATH)


// ------ Define root component ------
function View(){
  return(
    <html>
      <head>
          <meta charSet="utf-8"/>
          <title>{VIEW_CONFIG.TITLE}</title>
          <script type="module" dangerouslySetInnerHTML={{__html: script}}></script>
      </head>
      <body>
        <App />
      </body>
    </html>
  )
}


// ------ Create html ------
const html = renderToString(View())
const tempFilePath = await Deno.makeTempFile({suffix: ".html"})
await Deno.writeTextFile(tempFilePath, html)


// ------- Start Gluon with file ---------
const _Browser = await Gluon.open(tempFilePath,
  {
    windowSize: VIEW_CONFIG.SIZE,
    forceBrowser: null,
    onLoad: () => {}
  }
)
-
ファイル名が長すぎるというエラーになる ↩︎
それぞれのファイルの具体的な中身
main.tsx: 基本形 + tailwind を使えるようにしたもの
App.tsx:signal と tabler_icon を利用している
ClockArea.tsx:単にファイル分割を行うためだけに分離したコンポーネント
2. 注意点とか 🔝
Gluon.open({onLoad:...}) で渡す関数では『定義の外で定義された変数』は利用できない
例えば上記の「main.tsxの基本形」では ↓のようにonLoad として渡した関数の中でウィンドウのタイトルを tempFilePath から "Deno App with Gluon" に変更しているが
const Browser = await Gluon.open(tempFilePath, {
  onLoad: () => {
    setTimeout(() => {
      document.title = "Deno App with Gluon"
      Object.defineProperty(document, 'title', { get() {}, set() {} })
    }, 1000)
  }
})
これを↓のようにするとUncaught ReferenceError: TITLE is not definedになって変更されない
const TITLE = "Deno App with Gluon"
const Browser = await Gluon.open(tempFilePath, {
  onLoad: () => {
    setTimeout(() => {
      document.title = TITLE
      Object.defineProperty(document, 'title', { get() {}, set() {} })
    }, 1000)
  }
})
onLoadで利用したいデータは、すべてその中で具体的に記述してあげる必要がある。
理由
Gluon.open()の定義が以下のようになっており、onLoadとして渡した関数がonLoad.toString()で処理されるためだと思われる。
3. Worker を使う その1:ページ遷移 🔝
webworker と通信することで、ページ遷移に応じて異なる html を表示させることができる。
処理そのものには特別な要素はなく、main.tsx の中で行った「バンドル → script を流し込んでView() を定義 → renderToString(View())」をページ遷移ごとに繰り返すだけ。
より具体的には以下のような流れになる
-
worker.tsxの中でserve()を使ってサーバーをたてておく - Gluon を htmlファイルではなく
http://localhost:8088を対象にして起動 - 呼び出しに応じて worker が
main.tsxで書き出した htmlファイルの中身を返す (<App />) - ページ遷移として、例えば
http://localhost:8088/page/1にアクセスが行われる - 呼び出しに応じて worker が対応するコンポーネント
<Page />を使って「バンドル →Vierw()作成 → html書き出し」を行い、その html を返す
というわけで、`worker.tsx`の基本形はこんな感じ
/** @jsx h */
import { h } from "https://esm.sh/preact@10.10.6"
import { serve } from "https://deno.land/std@0.155.0/http/server.ts"
import { bundle } from "https://deno.land/x/emit@0.9.0/mod.ts"
import { renderToString } from "https://esm.sh/preact-render-to-string@5.2.2"

import { VIEW_CONFIG } from "./settings.ts"
import Page from "./Page.tsx"

const HEADER_OPTION = {
  'Access-Control-Allow-Method':  'OPTIONS, GET, POST',
  'Access-Control-Allow-Headers': 'Content-Type, Origin',
  'Access-Control-Allow-Origin': 'null'
}


const PTRN_page = new URLPattern({ pathname: '/page/:idx' })

const server = serve( async (req) => {

  if (req.url == `http://localhost:8088/` && Deno.env.get("ToppageFilePath")){
    const html = await Deno.readTextFile(Deno.env.get("ToppageFilePath")!)
    const headers = new Headers({...HEADER_OPTION, "Content-Type":`text/html`})
    return new Response(html, {headers, status: 200})
  }
  else if (PTRN_page.test(req.url)){
    const idx = Number(PTRN_page.exec(req.url)!.pathname.groups["idx"])
    const title = `ページその ${idx}`
    const text = `このページは ${idx}番目のページです。`


    // ------ Bundle -------
    const CLIENT_TS =`
      /** @jsx h */
      import { h, hydrate } from "https://esm.sh/preact@10.10.6"
      import Page from "./Page.tsx"
      hydrate( <Page {...${JSON.stringify({title, text, idx})}} />, document.body )
    `

    await Deno.writeTextFile(VIEW_CONFIG.CRIENT_PATH, CLIENT_TS)
    const script = await bundle(VIEW_CONFIG.CRIENT_PATH).then(result => result.code)
    await Deno.remove(VIEW_CONFIG.CRIENT_PATH)

    // ------ Define root component ------
    const View = () => {
      return(
        <html>
          <head>
              <meta charSet="utf-8"/>
              <script type="module" dangerouslySetInnerHTML={{__html: script}}></script>
          </head>
          <body>
            <Page {...{title, text, idx}} />
          </body>
        </html>
      )
    }

    // ------ Create html and respond ------
    const html = renderToString(View())
    const headers = new Headers({...HEADER_OPTION, "Content-Type":`text/html`})
    return new Response(html, {headers, status: 200})
  }

  const headers = new Headers({...HEADER_OPTION, "Content-Type":`text/pain`})
  return new Response("", {headers, status: 404})
}, { port: 8088 })

await server
見れば明らかだが、ルーティング後の処理はほぼmain.tsxの中身と同じになる
4. Worker を使う その2:ローカルファイルの操作 🔝
woker を使う利点は、Deno の read / wirte や walk を使ってローカルファイルを対象にしてあれこれできること。
ということで、最近整理した fresh 用の monaco editor を流用してエディタを作成してみた
見た目

基本的な仕組みはページ遷移の場合と同じで、worker 内でhttp://localhost:8088/xxx の呼び出しに応じてフォルダ内のファイルの一覧を返したり、.readTextFile()した結果を返したり、逆に POST された文字列で .wirteTextFile()するなどの処理を行う。
その他情報
サブプロセスの stdout をメインに出す