FlutterFireを使ったiOSのpush通知設定
前提:
- Flutterのプロジェクトディレクトを作成済み
- current dir : プロジェクトディレクトリにいる
各種必要なFirebaseライブラリを導入する
# 使用するのに必須の共通プラグイン
flutter pub add firebase_core
# FCM
flutter pub add firebase_messaging

# 記事作成時点
# firebase_core: ^1.18.0
# firebase_messaging: ^11.4.2
公式の対応表は下記
FlutterFire CLIのインストール
前提としてFirebaseCLIが導入されている前提.
dart pub global activate flutterfire_cli
FlutterSDK保存先でパスを通す
export PATH="$PATH":"$HOME/.pub-cache/bin"
Flutterfire の初期設定を行う
flutterfire configure
- Select a Firebase project to configure your Flutter application with
紐付けるプロジェクトの選択 - Which platforms should your configuration support (use arrow keys & space to select)?
android,ios,webなどの作成予定のプラットフォームを選択
今回はiOSとAndroidを選択した.
この時点でコンソール画面(Browser)でプロジェクトを確認するとプロジェクト内にiOSとAndroidのアプリができているはず.
ただし、BundleIDが勝手に設定されてしまう...
そういうものなのだろうか??
今回は、リモートでiOSアプリを作成→BundleIDを指定して、ローカルで下記を実行してiOSと紐付けた.
flutterfire configure
BundleIDはしっかりと設定しておかないと本番リリースできない & 後述する証明証系の設定で必須となるのでしっかりと初期設定しておきたいところ.
flutterfire configureをした時点でBundleIDを設定する方法があればどなたか教えて下さい.
試しにiOSのEmulatorを起動すると下記のerrorが出た.
Automatically assigning platform `iOS` with version `9.0` on target `Runner` because no platform was specified. Please specify a platform for this target in your Podfile.
どうやらiOSのversionに指定がなければdefaultで9.0が当たるようになっているらしい.
firebase系のパッケージが古いversion(9.0)に対応していないためerrorとなる.
ios>Podfileの2行目のコメントアウトを外し最新のiOSへ変更する.
# Uncomment this line to define a global platform for your project
- # platform :ios, '9.0'
+ platform :ios, '15.0'
iOSのセットアップ
- XcodeのPush通知の設定
- APNsとFCMの紐付け
- APNsキーをFirebaseへ登録する
- App Identifier の生成
- Provisioning Profile の登録
XcodeのPush通知の設定
XcodeでFlutterのiosディレクトリを開く
Runner>Targets>Signing & Capabilitiesを選択
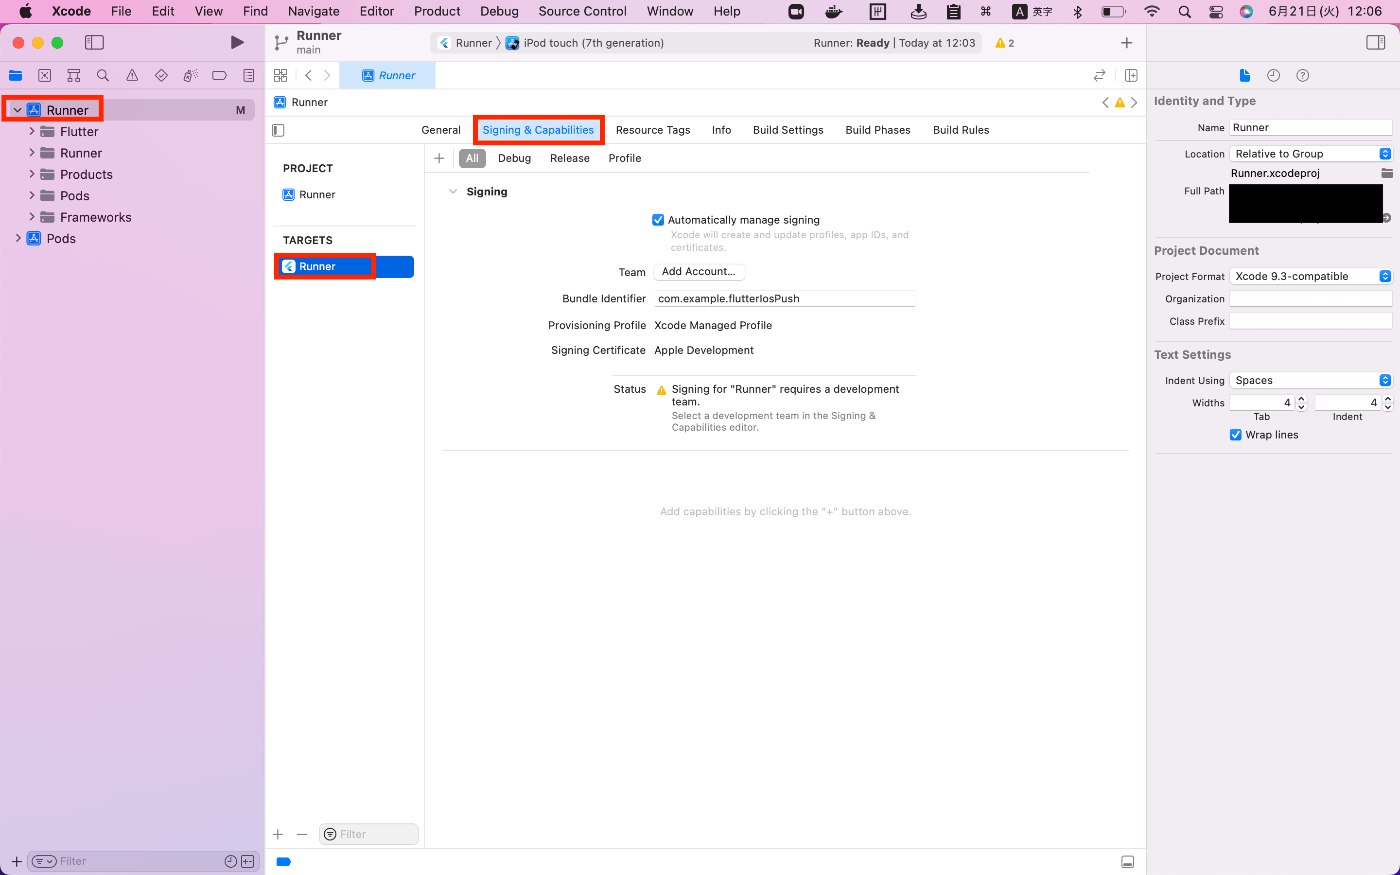
+ボタンをクリックし、「Push Notifications」、「Background Modes」を選択する.
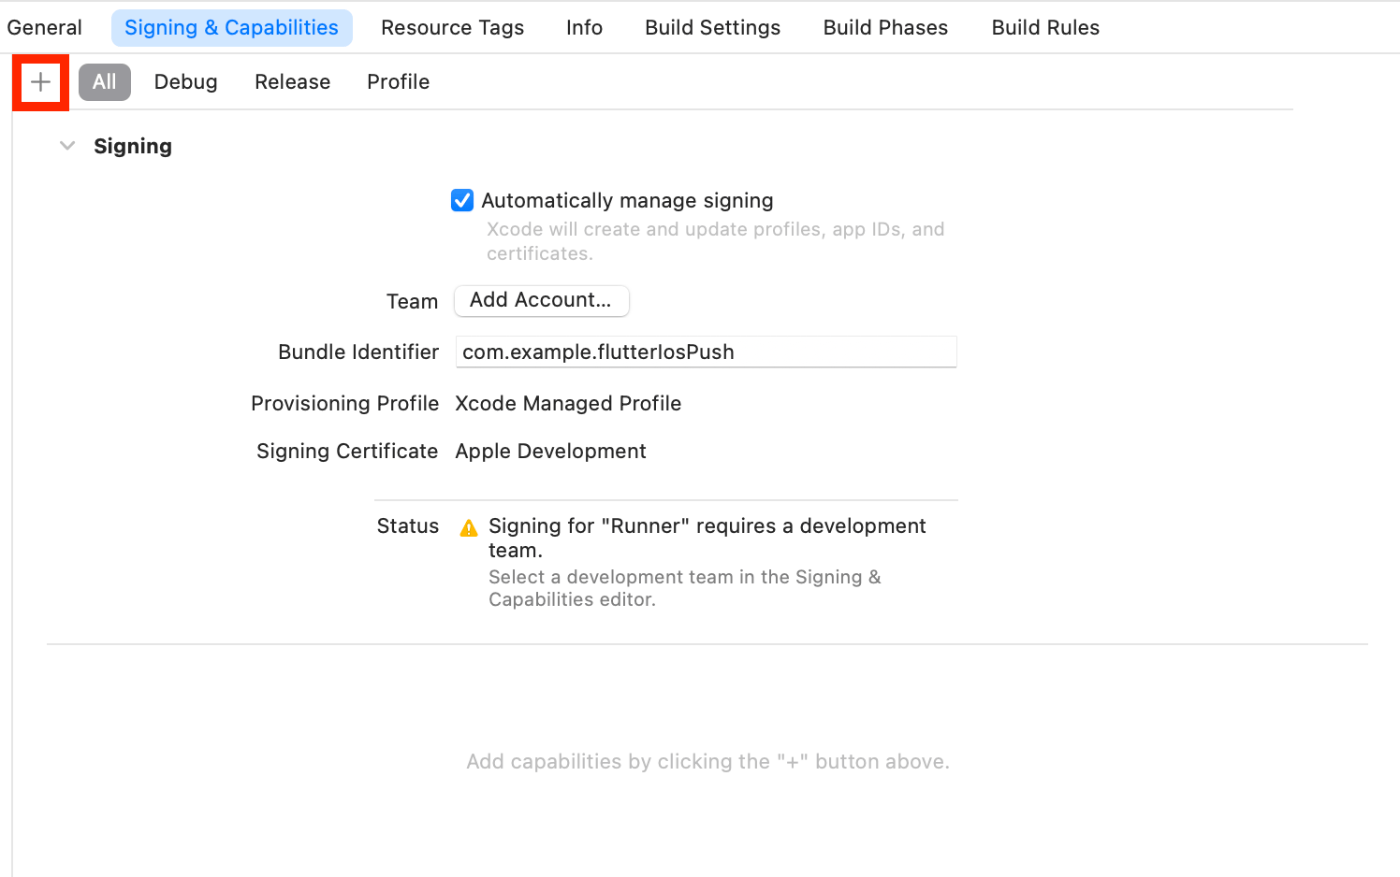
- Push Notifications:プッシュ通知機能
- Background Modes:バックグラウンドで使用する機能
- Background fetchとRemote notificationsにチェックを入れる.

- Background fetchとRemote notificationsにチェックを入れる.
APNsとFCMの紐付け
※これらの手順はすべて、Apple Developerアカウントにアクセスする必要があります.アカウントにアクセスしたら、アカウントのサイドバーにある「Certificates, Identifiers & Profiles」タブに移動してください.
※ Apple DeveloperのRoleによってはこれからの設定ができない場合があります.Role別の権限
APNsのキーを作成する
APNsを介してFCMにフルアクセスするためキーを生成する必要がある.
このプライベートなキーとプライベートなファイルを生成し、FCMのコンソール画面からAPNsの紐付けを行う.
※Keysの追加時に「You have already reached the maximum allowed number of Keys for this service.」が出た場合は、Push Notice Keyの上限(2つまで)にかかっている?よく分からない...
→諸々調べてみたがどうやら2つまでが上限の可能性大.3つ目を作るのは難しそう.今回は不要なKeysを削除しました.

任意のKeyNameと「Apple Push Notifications service (APNs)」にチェックを入れてContinue.
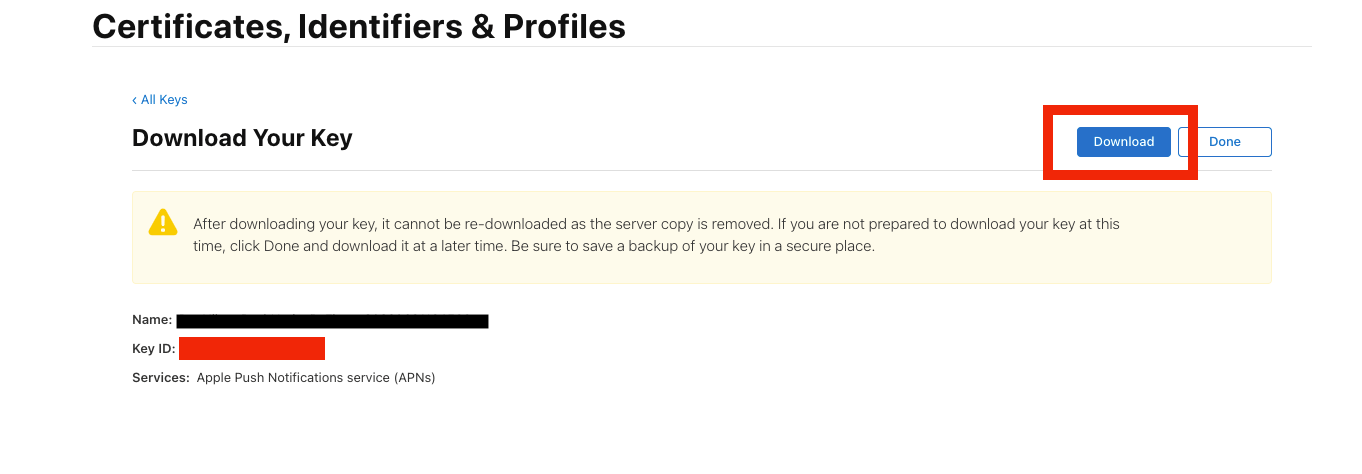
Key IDをコピーし、Downloadファイルがあるのでダウンロードする.
※Downloadファイルは一度のみ?ダウンロードできるようなので注意.
Firebaseコンソール画面から先程のKeyを登録する
- コンソール > プロジェクトの設定 > Cloud Messagingを開く
- Apple アプリの構成 > APNs 認証キー > アップロードを開く
- ファイル:先程のダウンロードファイル(.p8)
- キーID:先程コピーしたKey ID
- チームID:Apple Developer画面右上の10桁の英数字
App Identifierの登録
アプリを本番用にビルドする際にメッセージングを機能させるために、開発中のアプリにリンクされた新しいIdentifierを作成する必要がある.
Flutterプロジェクト作成時に一意で作成されたBundleIDが必要になる.
App Identifierはこの後のprovisioning profileにて必要になる.
- Apple Devloper > Certificates, Identifiers & Profiles > Identifiersを開く
- +ボタンで新しく追加する
- Register a new identifier:App IDsを選択
- Register a new identifier:App
- Register an App ID
- Description:任意
- Bundle ID:調べ方はこちら
- Capabilities > Push Notificationsを選択する
Provisioning Profileの生成
プロビジョニングプロファイルはAppleとユーザー間の署名付き通信を可能にする.
署名入り証明証はデバイスにインストールされているアプリが本物であり正しい認証がされていることの保証になる.
- Certificates, Identifiers & Profiles > Profilesを開く
- +で追加を開く
- iOS App Development を選択し、Continueを選択
- Select an App IDのプルダウンで先程作成したApple identifierを選択する.
- Select Certificates:ユーザーを選択
- Select Devices:事前に端末の登録をしておく必要があります.
- 端末の登録にはCertificates, Identifiers & Profiles > Devicesから行います.
- 実端末とmacPCで端末のID(UDID)を確認する必要があります.
- Profile Name:任意の名前
- Download and Install:ファイルのダウンロード(後々もダウンロード可)
Xcodeと紐付け
Xcode上でAppleDevelopアカウントにサインインしている場合は、「Automatically manage signing」にチェックを入れておけば、先程ダウンロードしたProfileとの紐付けを自動で行ってくれる.

※Autoにしていない場合は、「Provisioning Profile」の欄から先程ダウンロードしたProfileをアップロードする必要があります.
試しにビルドしてみる
現状の状態で問題ないか確認するために実機動作するか確認を行う.
パソコンに実機をつないだ状態でいつもどおりビルドするとスマホ側で動作確認がきる.
※ビルド中に「iproxy」のインストール許可が必要になるので許可して再度ビルドし直します.
Push通知周りの実装を調べていたら本件と似たような記事を見つけたので参考にさせていただきます.
Flutter × FCMでプッシュ通知を実装する
試しにmain.dartのFCMのtokenをPrintする処理と起動時に通知許可のアラートを表示させてみる.
import 'package:firebase_core/firebase_core.dart';
import 'package:firebase_messaging/firebase_messaging.dart';
import 'package:flutter/material.dart';
import 'package:flutter_ios_push/firebase_options.dart';

Future<void> main() async {
  WidgetsFlutterBinding.ensureInitialized(); // (1)
  // firebase_optionsの設定オプションを渡す
  await Firebase.initializeApp(
    options: DefaultFirebaseOptions.currentPlatform,
  );
  await generateNoticeSetting();
  runApp(const MyApp());
}

Future generateNoticeSetting() async {
  final messaging = FirebaseMessaging.instance;
  NotificationSettings settings = await messaging.requestPermission(
    alert: true,
    announcement: false,
    badge: true,
    carPlay: false,
    criticalAlert: false,
    provisional: false,
    sound: true,
  );
  print('⭐ User granted permission: ${settings.authorizationStatus}');

  final token = await messaging.getToken();
  print('🔥 FCM TOKEN: $token');

  FirebaseMessaging.onMessage.listen((RemoteMessage message) {
    print('Got a message in the foreground!');

    if (message.notification != null) {
      print('ForegroundMessage Title: ${message.notification?.title}');
      print('ForegroundMessage Body: ${message.notification?.body}');
    }
  });
}

class MyApp extends StatelessWidget {...}
(1):[Flutter] WidgetsBindingとは何か?
承認アラートが表示された
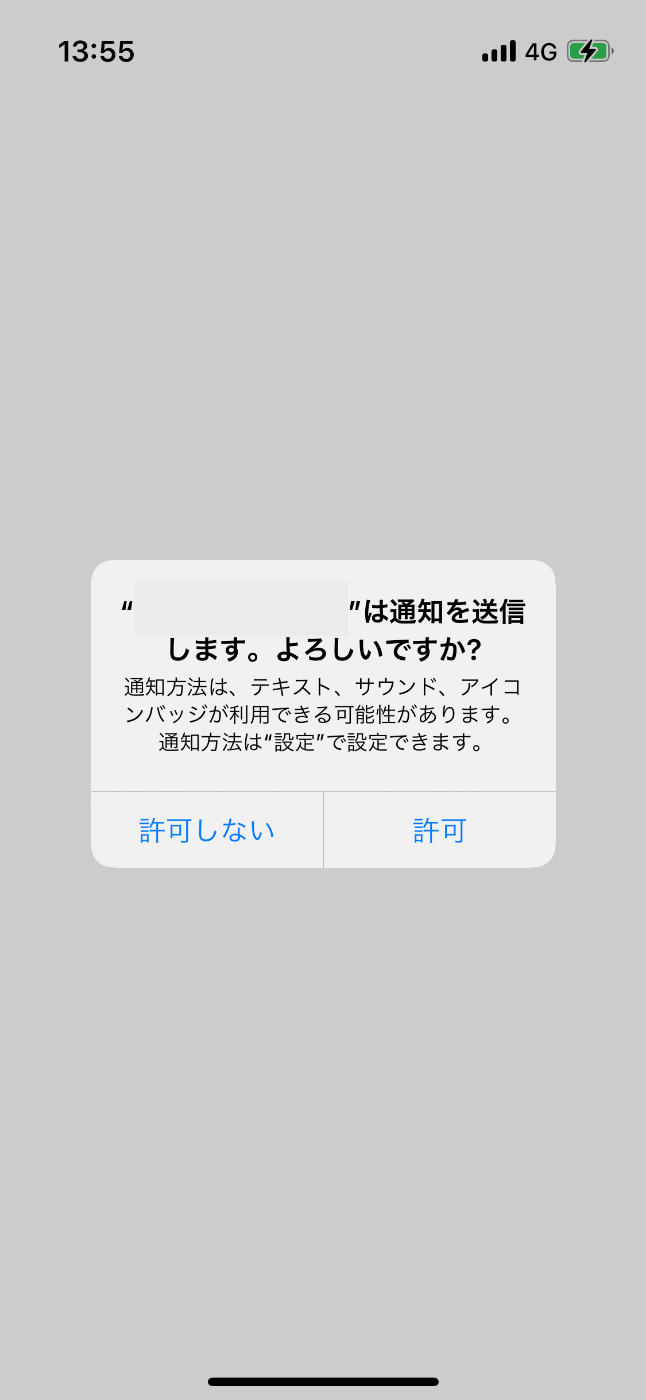
デバックコンソールには、tokenが取得できていることがわかる.
flutter: ⭐ User granted permission: AuthorizationStatus.authorized
flutter: 🔥 FCM TOKEN: xxxxxxxxxxxxxxxxx
これにて通知を受け取る準備ができたはず...
やっと、受信できた!
バックグラウンド:画像の状態. アプリは起動しているが閉じている状態.
FCMのxxxxxxxxxxxxxxxxx宛にFCMの管理画面から手動でテスト通知する.
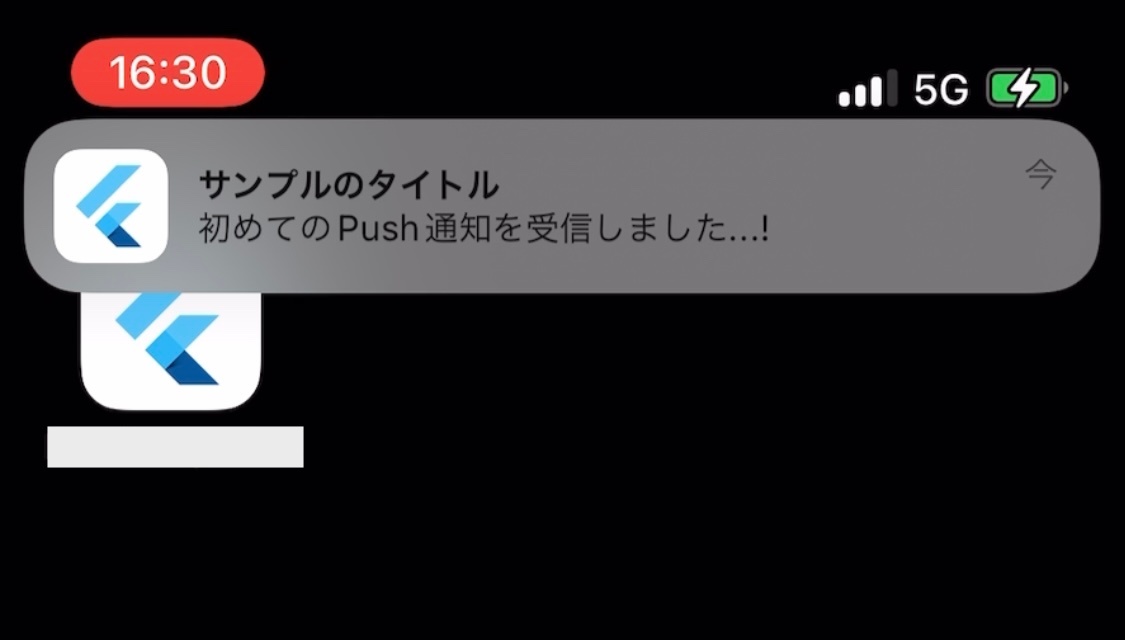
フォアグラウンドでも受信の確認ができるはず!
flutter: Got a message in the foreground!
flutter: ForegroundMessage Title: サンプルのタイトル
flutter: ForegroundMessage Body: 初めてのPush通知を受信しました...!
実はこれが取得できるまでに時間を少し溶かしてしまいました...!
証明証の発行やAppleDeveloperアカウント周りの設定、BundleIDの設定など少しでも設定項目にミスがあると通知が来ません.
しっかりと慎重に登録しましょう.
私の場合は、BundleIDに不一致ミスがありました.
このあたり何回も調べてしまうので、とても参考になりました!ありがとうございます!