Next.jsの環境を構築する(+TypeScript, Storybook, Hygen)
Next.jsの導入
typescriptを導入したい場合はオプションに--typescript(もしくは--ts)を追加するか、プロジェクト作成後に必要なファイルの作成およびパッケージのインストールを行います。
npx create-next-app project-name --typescript
npx create-next-app project-name
touch tsconfig.json
yarn add --dev typescript @types/react @types/node
プロジェクト作成後に下記を実行し、http://localhost:3000にアクセスできれば導入は完了です。
cd project-name
yarn dev

以降では、導入する際に設定しておくと良いことや、周辺ツールについてまとめていきます。
例として、下記のような最小構成のプロジェクトを用意します。
project-name/
 ├── components/
 |	├── atoms/
 |	│   └── Button.tsx
 |	├── molecules/
 |	└── organisms/
 ├── pages/
 |	└── index.tsx
 ...
interface Props {
  purpose?: string;
}

export const Button: React.FC<Props> = ({ purpose = "primary", children }) => {
  return (
    <button className={`button ${purpose}`}>
      {children}
      <style jsx>{`
        .button {
          width: 100px;
          padding: 4px 8px;
          border: none;
          border-radius: 4px;
          font-size: 16px;
        }

        .primary {
          background-color: #007bff;
          color: #fff;
        }

        .danger {
          background-color: #dc3545;
          color: #fff;
        }
      `}</style>
    </button>
  );
};
import { Button } from "../components/atoms/Button";

export default function Home() {
  return (
    <div>
      <Button></Button>
    </div>
  );
}
モジュールをルート相対パスでimportできるようにする
参考:Absolute Imports and Module path aliases
開発を進めていくとモジュールをimportする機会も多くなると思いますが、その度に相対パスを辿るのはとても面倒です。また、相対パスでの記述は「import文を流用しにくい」「ディレクトリ構成の変更に弱い」など何かと不便なので、モジュールをルート相対パスでimportできるようにします。
{
  "compilerOptions": {
    "target": "es5",
    "lib": ["dom", "dom.iterable", "esnext"],
    "allowJs": true,
    "skipLibCheck": true,
    "strict": true,
    "forceConsistentCasingInFileNames": true,
    "noEmit": true,
    "esModuleInterop": true,
    "module": "esnext",
    "moduleResolution": "node",
    "resolveJsonModule": true,
    "isolatedModules": true,
    "jsx": "preserve",
    "baseUrl": "." // モジュールをルート相対パスでimportできるようにする
  },
  "include": ["next-env.d.ts", "**/*.ts", "**/*.tsx"],
  "exclude": ["node_modules"]
}
tsconfig.json修正後は、モジュールをルート相対パスでimportできるようになります。
- import { Button } from "../components/atoms/Button";
+ import { Button } from "components/atoms/Button";

export default function Home() {
  return (
    <div>
      <Button></Button>
    </div>
  );
}
Storybookの導入
Storybookはコンポーネントをカタログとして閲覧・管理できるツールです。
npx sb init
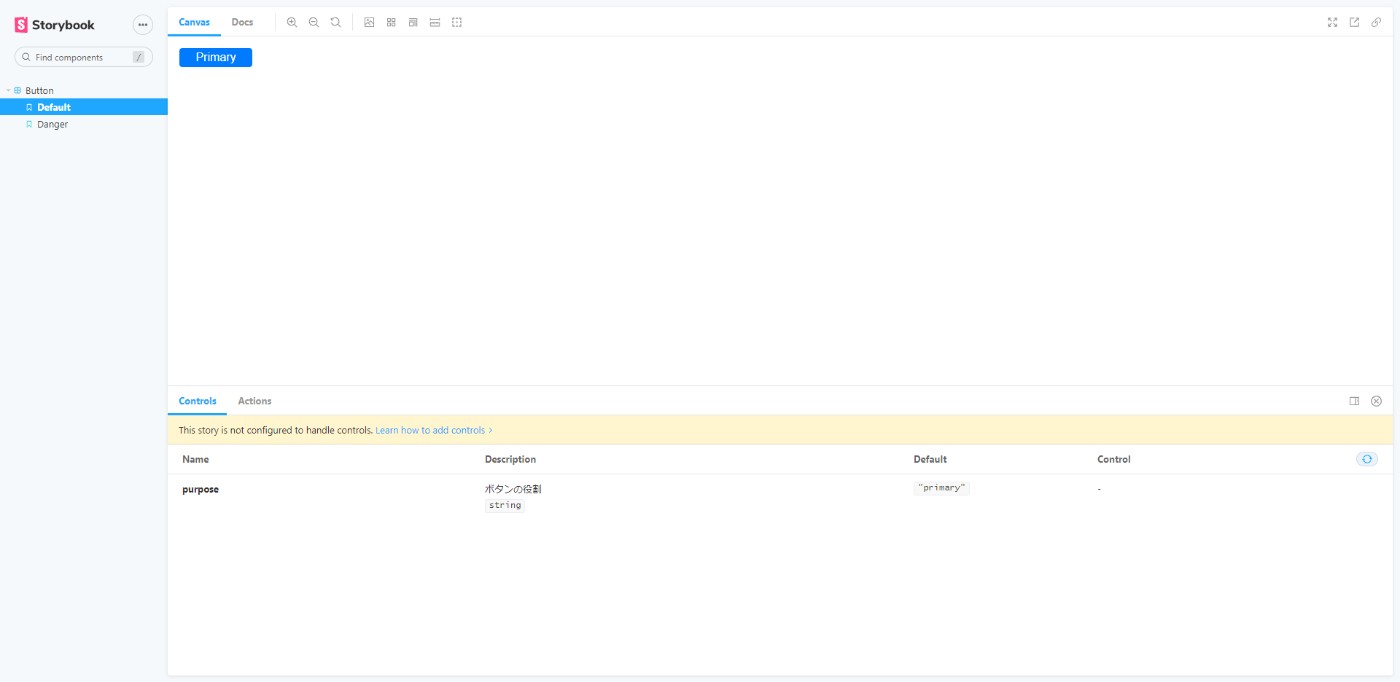
インストール後に下記を実行し、http://localhost:6006にアクセスできれば導入は完了です。
npm run storybook

atoms/Button.tsxのstoryを作成してみます。
import React from "react";
import { Story, Meta } from "@storybook/react";
import { Button } from "components/atoms/Button";

export default {
  title: "Button",
  component: Button,
  argTypes: {
    purpose: { description: "ボタンの役割" },
  },
} as Meta;

export const Default: Story = () => <Button>Primary</Button>;

export const Danger: Story = () => <Button purpose="danger">Danger</Button>;
ただ、このままだと下記のようなエラーが発生します。
Next.jsではデフォルトで解決される絶対パスの設定が、storybookでは解決されないことによるエラーのようです。
ERROR in ./stories/atoms/Button.stories.tsx
Module not found: Error: Can't resolve 'components/atoms/Button' in 'D:\projects\sampleproject\stories\atoms'
これを解決するために、.storybook/main.jsを下記のように変更します。
const path = require("path"); // 追加

module.exports = {
  stories: [
    "../stories/**/*.stories.mdx",
    "../stories/**/*.stories.@(js|jsx|ts|tsx)",
  ],
  addons: ["@storybook/addon-links", "@storybook/addon-essentials"],
  framework: "@storybook/react",
  // ここから追加
  webpackFinal: async (baseConfig) => {
    baseConfig.resolve.modules = [
      ...(baseConfig.resolve.modules || []),
      path.resolve(__dirname, "../"),
    ];
    return baseConfig;
  },
  // ここまで追加
};

Hygenの導入
コンポーネントを作成する度に手動でstoryを作成しようとすると開発を進める過程で抜け・漏れが発生する可能性がありますし、そうでなくても単純に面倒です。
対話式のコードジェネレータであるHygenを使用することで、コンポーネント作成時にstoryも作成されるようにします。
yarn add -D Hygen
生成テンプレートを作成します。yarn hygen init selfで生成することもできますが、今回は自分で記述していきます。
project-name/
 ├── hygen/component/add
 |	├── index.tsx.t
 |	├── index.stories.tsx.t
 |	└── prompt.js
 .hygen.js
---
to: components/<%= level %>/<%= name %>.tsx
unless_exists: true
---
interface Props {
  purpose?: string;
}

export const <%= name %>: React.FC<Props> = () => {
  return (
    <>
      <style jsx>{`
      `}</style>
    </>
  );
};
---
to: stories/<%= level %>/<%= name %>.stories.tsx
unless_exists: true
---
import React from "react";
import { Story, Meta } from "@storybook/react";
import { <%= name %> } from "components/<%= level %>/<%= name %>";

export default {
  title: "<%= name %>",
  component: <%= name %>,
  argTypes: {},
} as Meta;

export const Default: Story = () => <<%= name %>></<%= name %>>;
module.exports = {
  prompt: ({ inquirer }) => {
    const questions = [
      {
        type: "select",
        name: "level",
        message: "Which Atomic Design category?",
        choices: ["atoms", "molecules", "organisms"],
      },
      {
        type: "input",
        name: "name",
        message: "What is the component name?",
      },
    ];
    return inquirer.prompt(questions).then((answers) => {
      const { level, name } = answers;
      return { level, name };
    });
  },
};
index.tsx.t, index.stories.tsx.tはそれぞれコンポーネントとstoryのテンプレートファイル、prompt.jsは対話式プロンプトを定義するファイルです。
生成テンプレートを読み込むための設定ファイルも用意します。
module.exports = {
  templates: `${__dirname}/hygen`,
};
最後に、npm scriptsを追加します。
{
  "scripts": {
    "hygen:add": "hygen component add"
  },
}
実行してみます。
$ yarn hygen-add
yarn run v1.22.10
$ hygen component add
? Which Atomic Design category? ...
> atoms
  molecules
  organisms
? What is the component name? » MyButton

Loaded templates: hygen
       added: stories/atoms/MyButton.stories.tsx
       added: components/atoms/MyButton.tsx
Done in 2.90s.
interface Props {
  purpose?: string;
}

export const MyButton: React.FC<Props> = () => {
  return (
    <>
      <style jsx>{`
      `}</style>
    </>
  );
};
import React from "react";
import { Story, Meta } from "@storybook/react";
import { MyButton } from "components/atoms/MyButton";

export default {
  title: "MyButton",
  component: MyButton,
  argTypes: {},
} as Meta;

export const Default: Story = () => <MyButton></MyButton>;
生成されました。テンプレートファイルや対話式プロンプトは必要に応じて修正してください。
tailwindcssの導入
npm install tailwindcss postcss@latest autoprefixer@latest
npm install @storybook/addon-postcss
npx tailwindcss init -p
module.exports = {
  // 最小設定では不要の認識だが設定しないとtailwindcssが反映されない
  purge: ["./pages/**/*.{js,ts,jsx,tsx}", "./components/**/*.{js,ts,jsx,tsx}"],
}
// ここから追加
@tailwind base;
@tailwind components;
@tailwind utilities;
// ここまで追加
storybookとの連携
storybookでpostcssを使用するように.storybook/main.jsに追加します。
const path = require("path");

module.exports = {
  stories: [
    "../stories/**/*.stories.mdx",
    "../stories/**/*.stories.@(js|jsx|ts|tsx)",
  ],
  addons: [
    "@storybook/addon-links",
    "@storybook/addon-essentials",
    // ここから追加
    {
      name: "@storybook/addon-postcss",
      options: {
        postcssLoaderOptions: {
          implementation: require("postcss"),
        },
      },
    },
    // ここまで追加
  ],
  framework: "@storybook/react",
  webpackFinal: async (baseConfig) => {
    baseConfig.resolve.modules = [
      ...(baseConfig.resolve.modules || []),
      path.resolve(__dirname, "../"),
    ];
    return baseConfig;
  },
};
storybookがstyles/global.cssを読み込むように、.storybook/preview.jsにコードを追加します。
import "styles/globals.css";

export const parameters = {
  actions: { argTypesRegex: "^on[A-Z].*" },
  controls: {
    matchers: {
      color: /(background|color)$/i,
      date: /Date$/,
    },
  },
};
Discussion