🐛
Biomeを簡単に導入してみた。
Biomeとは何か
公式ドキュメントの最初のページにはこのように書いてありました。
Web開発のためのたった1つのツールチェーン
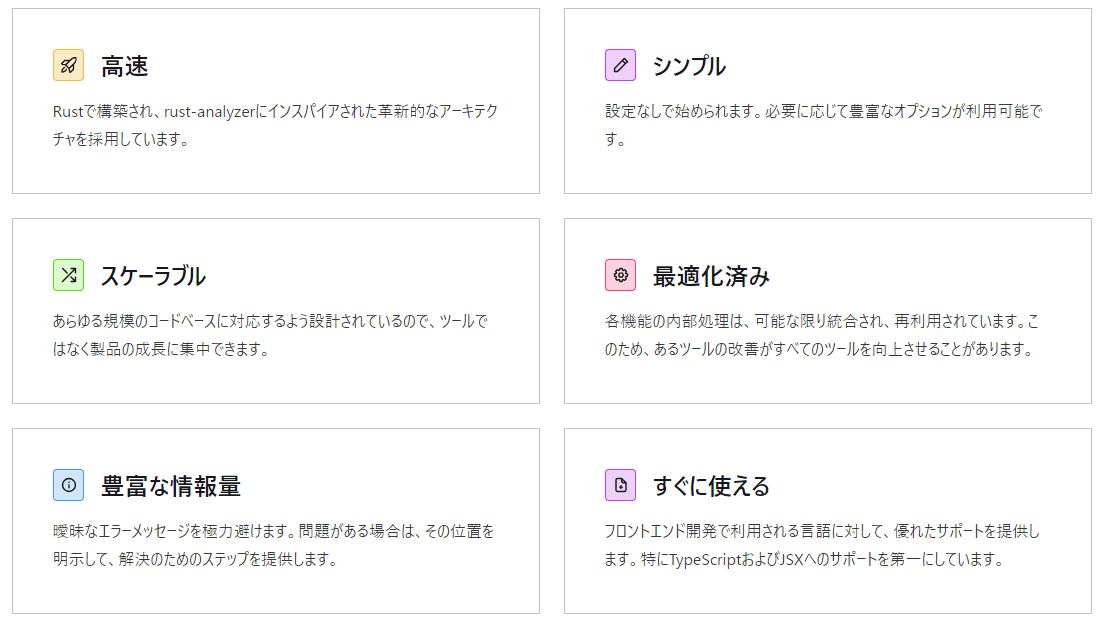
ざっと見た感じだと、以下のような特徴を持つ。
- JavaScript、TypeScript、JSX、JSON、CSS、GraphQLのためのformatter
- Rust製ゆえに高速なformatter
- Prettierとの互換性が97%
- シンプルなオプション設定
公式ドキュメントのトップページスクショしてみた↓

何か良さそうな感じが、ぷんぷんするので早速触ってみます。
Biomeの導入
使用FW:Next.js
IDE:VSCode
パッケージマネージャ:npm
手始めにBiomeのインストール
以下のコマンドを実行。
npm install --save-dev --save-exact @biomejs/biome
biome.jsonファイルの作成
ルートディレクトリで、以下のコマンドを実行することでbiome.jsonファイルを作成する。
npx @biomejs/biome init
biome.jsonに設定を書き込んでみた
長いからアコーディオンに収納
{
  "$schema": "https://biomejs.dev/schemas/1.2.2/schema.json",
  "extends": [],
  "files": {
    "ignoreUnknown": true
  },
  "organizeImports": {
    "enabled": true
  },
  "formatter": {
    "enabled": true,
    "formatWithErrors": false,
    "ignore": [],
    "indentWidth": 2,
    "indentStyle": "space",
    "lineWidth": 80
  },
  "javascript": {
    "parser": {
      "unsafeParameterDecoratorsEnabled": true
    },
    "formatter": {
      "quoteStyle": "single",
      "jsxQuoteStyle": "single",
      "semicolons": "asNeeded",
      "arrowParentheses": "asNeeded"
    }
  },
  "json": {
    "parser": {
      "allowComments": true
    },
    "formatter": {
      "enabled": true,
      "indentStyle": "space",
      "indentWidth": 2,
      "lineWidth": 80
    }
  },
  "linter": {
    "ignore": [],
    "rules": {
      "a11y": {
        "noDistractingElements": "error",
        "useAltText": "error"
      },
      "complexity": {
        "noExtraBooleanCast": "error",
        "noUselessRename": "error"
      },
      "correctness": {
        "noUnusedVariables": "warn"
      },
      "performance": {
        "noDelete": "error"
      },
      "security": {
        "noDangerouslySetInnerHtml": "warn"
      },
      "style": {
        "noArguments": "error",
        "noVar": "error",
        "useConst": "error",
        "useSelfClosingElements": "error",
        "useTemplate": "error"
      },
      "suspicious": {
        "noArrayIndexKey": "error",
        "noAssignInExpressions": "error",
        "noAsyncPromiseExecutor": "error",
        "noCatchAssign": "error",
        "noCommentText": "error",
        "noConsoleLog": "error",
        "noDoubleEquals": "error",
        "noDuplicateCase": "error",
        "noDuplicateJsxProps": "error",
        "noDuplicateObjectKeys": "error",
        "noDuplicateParameters": "error",
        "noExplicitAny": "warn",
        "noExtraNonNullAssertion": "error",
        "noRedeclare": "error",
        "noRedundantUseStrict": "error",
        "noShadowRestrictedNames": "error",
        "noUnsafeDeclarationMerging": "error",
        "useDefaultSwitchClauseLast": "error"
      }
    }
  }
}
VSCodeの設定
拡張機能のインストール
VSCodeにBiomeの拡張機能をインストールします。
VSCodeの設定を変更
ショートカット、Ctrl+,を押して、設定が開くと、ウィンドウ右上の[設定(JSON)を開く]をアイコンをクリック。settings.jsonファイルが開くので、以下の設定を追記して下さい。
"editor.codeActionsOnSave": {
    // Biomeによるインポートの整理を明示的に実行
    "source.organizeImports.biome": "explicit",
    // 未使用のインポートを常に削除
    "source.removeUnusedImports": "always",
    // TypeScriptの未使用のインポートを削除しない
    "source.removeUnused.ts": "never",
    // TypeScriptの全ての問題を明示的に修正
    "source.fixAll.ts": "explicit",
    // ESLintの全ての問題を明示的に修正
    "source.fixAll.eslint": "explicit"
  },

  "[javascript][javascriptreact][typescript][typescriptreact]": {
    // デフォルトフォーマッタをBiomeに設定
    "editor.defaultFormatter": "biomejs.biome",
    // 保存時に自動フォーマットを有効にする
    "editor.formatOnSave": true
  }
ちなみに、Biomeの設定に関して調査しているときに、[javascript][javascriptreact][typescript][typescriptreact]のように連結できることを知りました。
これをsettings.jsonに記述すると、おそらくBiomeの設定が完了します。
参考文献
今回の記事の参考リンク


Discussion