⏲️
M5Stackを学ぶ その5(キッチンタイマー)
1,はじめに
久しぶりの更新になりました。今回作成するのは久々に料理をしてキッチンタイマーがなくて困ったので、せっかくなのでM5Stackで作ってみようと思います。
2,コーディング
今回は配線など無しで可能なのでコードのみ記載します。以下が今回作成したコードになります。
#include <M5Stack.h>

void updateDisplay();

// タイマー設定 (初期値は0秒)
int timerSeconds = 0;
int currentSeconds = 0;

// タイマー状態
bool timerRunning = false;

void setup() {
  M5.begin();
  M5.Lcd.setTextSize(3);
  M5.Lcd.setTextColor(WHITE);
  M5.Lcd.setTextDatum(MC_DATUM);
  M5.Lcd.fillScreen(BLACK);
  updateDisplay();
}

void loop() {
  M5.update();

  // Aボタンで30秒ずつ増やす (上限5分=300秒)
  if (M5.BtnA.wasPressed()) {
    if (timerSeconds < 300) {
      timerSeconds += 30;
    } else {
      timerSeconds = 0; // 5分を超えたら0に戻す
    }
    currentSeconds = timerSeconds;
    updateDisplay();
  }

  // Bボタンでスタート/ストップ
  if (M5.BtnB.wasPressed()) {
    timerRunning = !timerRunning;
    updateDisplay();
  }

  // Cボタンでリセット
  if (M5.BtnC.wasPressed()) {
    timerRunning = false;
    timerSeconds = 0;
    currentSeconds = 0;
    updateDisplay();
  }

  // タイマーが動作中なら1秒ごとに減らす
  if (timerRunning && millis() % 1000 == 0) {
    if (currentSeconds > 0) {
      currentSeconds--;
      updateDisplay();
    } else {
      timerRunning = false;
      updateDisplay();
      // タイマー終了音などを鳴らすことができます (例: M5.Speaker.beep())
    }
  }
}

void updateDisplay() {
  M5.Lcd.fillScreen(BLACK);
  M5.Lcd.setCursor(0, 60);

  // 現在の時間を分:秒形式で表示
  int minutes = currentSeconds / 60;
  int seconds = currentSeconds % 60;
  M5.Lcd.printf("%02d:%02d", minutes, seconds);

  if (timerRunning) {
    M5.Lcd.setCursor(0, 120);
    M5.Lcd.print("Timer Running");
  } else {
    M5.Lcd.setCursor(0, 120);
    M5.Lcd.print("Timer Stopped");
  }
}
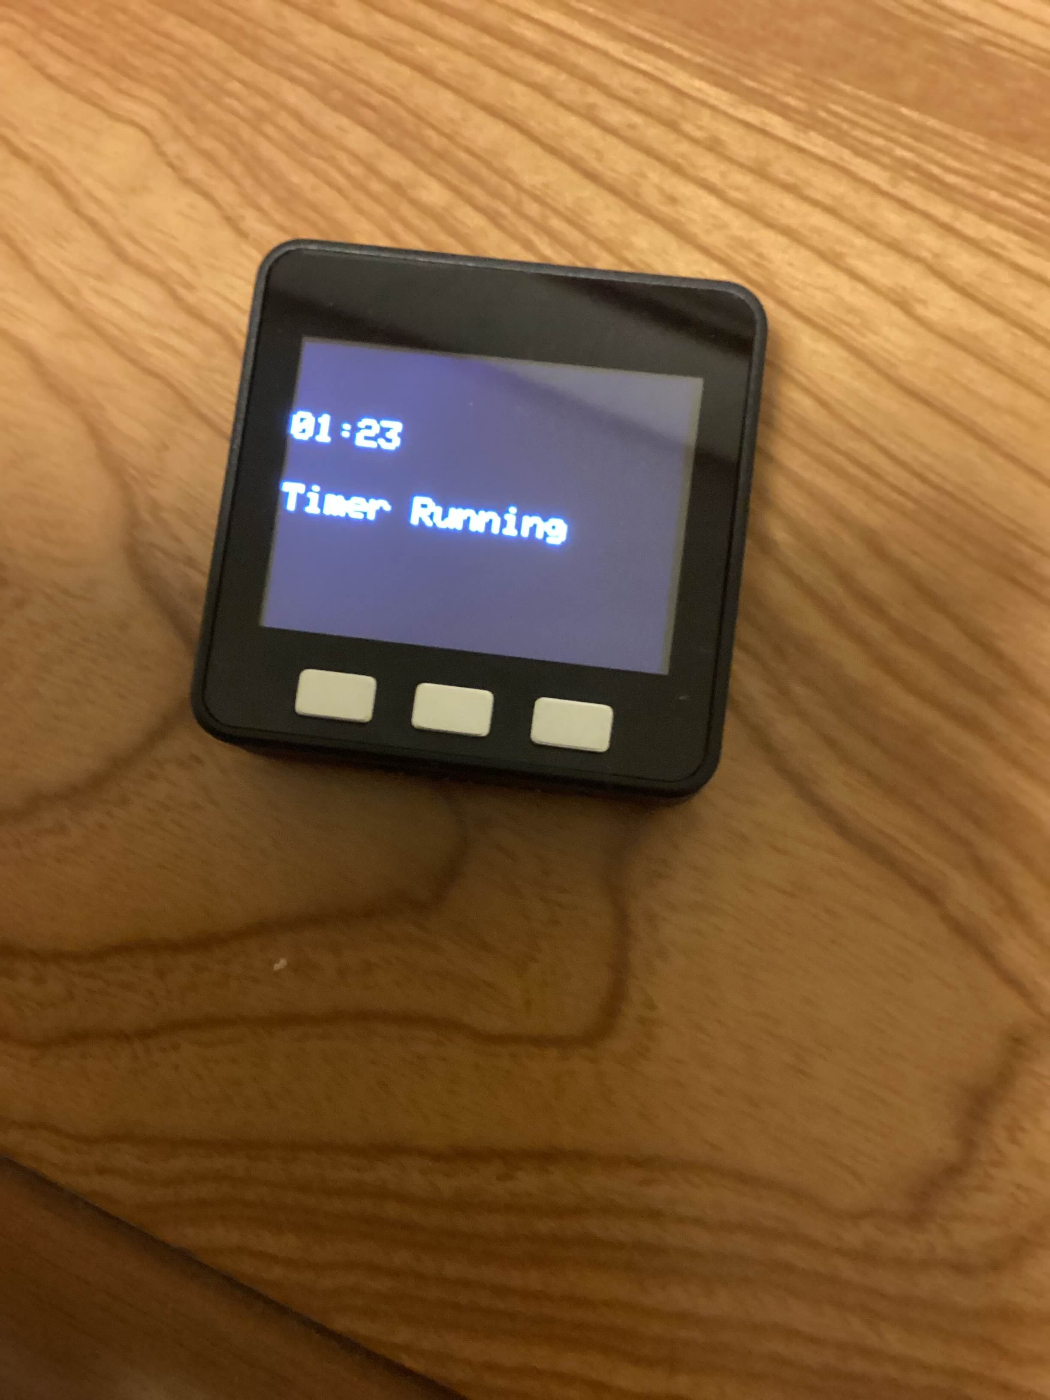
仕様としましては、Aボタンで30秒単位で秒数を増加、Bボタンでスタートとストップ、Cボタンでリセットという仕様にしました。
3,テスト
実際に動かしてみます。

問題なく動作しました。
おわりに
久々の更新となりましたが、こんな感じで不定期で何か作ったら更新していこうと思います。短いですが、お疲れさまでした。
Discussion