Next.js + Tailwind + Firebase + デザインのメモ帳
childrenは暗黙でコンポーネントの子要素
// このchildrenは暗黙で<Hoge></Hoge>の中の要素
export function Hoge({children}) {
  return (
    <div>
      {children}
    </div>
  )
}

export default function Fuga() {
  return (
    <>
      <Hoge>
        <div>this is child</div>
      </Hoge>
      <div>another div</div>
    </>
  )
}
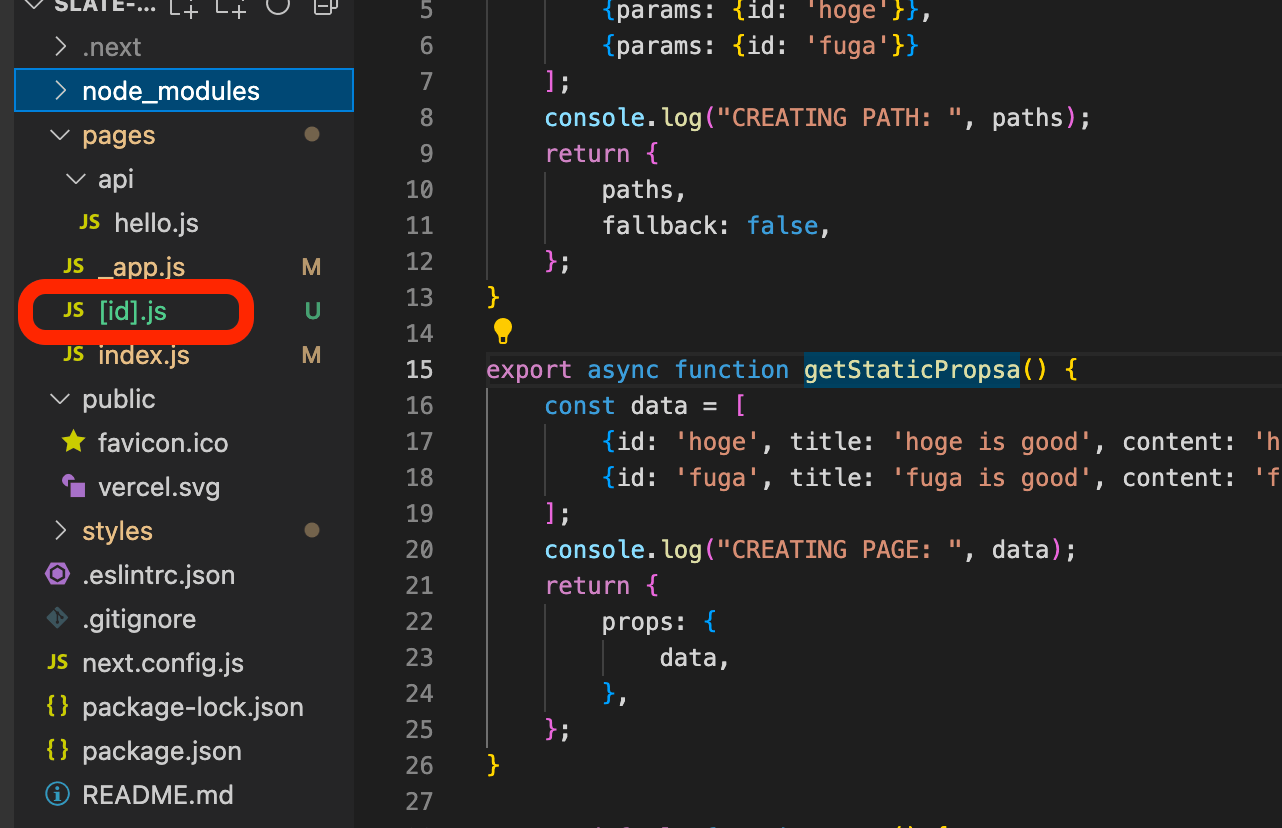
[id].jsはpagesの下に入れるとビルド時にページを生成してくれる。暗黙でpagesというフォルダ名が使われる(設定できるけど)。
暗黙でgetStaticPaths, getStaticPropsはそれぞれパスとページを生成する関数。
npm run devではコードと表示が一対一対応しない。バグがあってもエラーにならない場合もあるし、同一のコードでも前の状態によってエラーになったりならなかったりする。
npm run devでホットリロードできるが、next.jsはロードした変数しかvalidateしないのでバグなし→バグあり(当該コード使わない)はエラーにならない。ここまでなら普通のjsでも同じだがバグあり(当該コードを使う)→バグなし(当該コードを使わない)の場合は前回の状態を記憶していてエラーになる。つまり全く同じコードでも前の状態によってエラーになるときとならない時がある。しかもこれはホットリロードだけで手動でリフレッシュするとコードと表示が一対一対応する。
ちょっと誤解があるかも。後で消すかも。
(JavaScript)
exportとimportの基本をおさらい。
const hoge = 3;
export { hoge };
import { hoge } from "hogehoge.js"
defaultを使えば{}を省略できる。
const hoge = 3;
export default hoge;
import hoge from "hogehoge.js"
Next.js + Firebase.jsで参考になったdocument
このエラーが出る時は「どんなエラーか詳しくわからないけどコンポーネントに問題がある」くらいの意味。非常に広い範囲で同じエラーが出る(のでエラーで検索しても解決はしない)。

Next.js + Firestoreでクライアント側からFirebaseのデータを呼び出す
Next.jsとFirebaseだとSSRの例は出てくるけどSPAみたいなクライアントが側からデータを取ってくる例があまりない。あってもHostingとかAuthとかでFirestoreの例が探しても出てこないのでメモ。
Firestoreからのデータ読み込みは当然asyncなんだけど、reactのasync対応が肝。プレーンなJSであればデータロードが終わった時点でgetElementsByIdみたいなのを呼び出してDOMに反映すればいいが、reactはこれを使わない(作法?)。で、わざわざ[data, setData]を用意してデータロードが終わった時点でsetDataをしてsetDataによってロードしたデータをDOMに反映する。
さらに反映する先のDOMがsetDataの前にロードされている必要がある。プレーンなJSならwindow.onloadの後に全てを入れればいいけどreactは使わない(作法?)。そこでuseEffectを使う。useEffectはDOMがロードされた後に実行される特殊な関数。この中でasyncで定義したfirebaseのデータロード用関数を呼び出してthen以下でsetDataをする。
なんともややこしい。。。プレーンなJSに比べて4倍くらいコードが必要。スケールしたらreactのメリットが感じられると信じて勉強してる。
import { useState, useEffect } from "react";
import FirebaseApp from "../myFirebase";
import { getFirestore, collection, getDocs } from "firebase/firestore/lite";

export function comment(props) {
    return (
        <div>
            {
                ["content", "age", "time"].map(k => (
                    <div>
                        {props[k]}
                    </div>
                ))
            }
        </div>
    );
}

export async function fetchFromFirestore() {
    const db = getFirestore(FirebaseApp);
    const col = collection(db, "commentV1");
    const docs = await getDocs(col);
    let arr = [];
    docs.forEach((d) => {
        arr.push(d.data());
    });
    return arr;
}

export default function Hoge() {
    const [data, setData] = useState([]);

    useEffect(() => {
       fetchFromFirestore().then(a => {
            setData(a);
        });
    }, []);

    return (
        <>
            <div>{
                data.map(a => comment(a))
            }</div>
        </>
    );
}
一番シンプルなISR
ISR (incremental static regeneration)はレンダリング結果をキャッシュするタイプのSSR。当然キャッシュは更新が必要で現在のストラテジでは時間切れで対応している。そのため更新性が重要なコンテンツ(地震速報とか?)には向いてない。
Next.jsがほぼ全てのことをサーバーでやってくれるのでSSRのコードにreavalidate: 5(5は時間切れまでの秒数)を入れるだけ。Vercelでホストすれば生成されたページはCDNにキャッシュされてサーバー負荷が小さくなるだけでなくHTMLのロードが爆速になる。そう、これをしたいがためにReact.js, Next.jsを選択したのである。
参考になるレポ:
自分で書いたデモ:
import { useState } from "react";
export default function Home({ currStamp, nextStamp }) {
const [currTime, setCurrTime] = useState("");
setInterval(() => {
setCurrTime((new Date()).toString());
}, 100);
return (
<>
<div>ISR test <br/>now {currTime} <br/> last: {currStamp} <br/> next: {nextStamp}</div>
<p>
You can see:
<br/> - now is current time set by your browser
<br/> - last is the time this page was rendered in SERVER (that's why 'Coordinated Universal Time')
<br/> - Keep refreshing. 'last' changes every 10 seconds, meaning the cache is updated every 10 seconds.
<br/> ✌️
</p>
</>
)
}
export async function getStaticProps() {
const currStamp = (new Date()).toString();
const nextStamp = "10秒後";
return {
props: {
currStamp,
nextStamp
},
revalidate: 10,
}
}
Dynamic Routeのファイル名(パス)とgetStaticPathsのparamsは暗黙的に対応している必要がある。
たとえば
pages/[id].js(2行目のpathsのデータ構造に注目。このparamsもidも他の名前では動かない)
export async function getStaticPaths() {
    const paths = [ { params: { id: 'nyc-is-down' } }, { params: { id: 'london-is-back' } } ];
    return {
        paths,
        fallback: false
    }
}

export async function getStaticProps({ params }) {
    console.log(params);
    const pageData = {"title": "NYC is Down"};
    return {
        props: {
            pageData
        },
        revalidate: 5
    }
}

export default function Page({ pageData }) {
    return <div>{ pageData.title }</div>
}
pages/[username]/[album]/[photo].js
の時は当然
 {
  params: {
    username: "Kenshiro",
    album: "2022 Summer",
    photo: "smiling_dog"
  }
}
みたいになってる必要がある。
getStaticProps({ params })のparamsは暗黙的にgetStaticPathsの中で定義されるparams
(上のコード参照)
ちなみにgetStaticPropsに渡されるparamsはコード上のparamsではなくてURLのパラメータという意味で使われる。従って{params: {id: "nyc-is-good", title: "NYC is Good"}}みたいなことをしてもgetStaticPropsがtitleを読み取ることはできない。
getStaticPathsは自身が存在するファイルのパスとparamsを比較して合致しているものをreplaceしている。例えばpages/[username]/[album]/[photo].jsというパスなら
{{ params: {username: "Kenshiro", album: "2022 Summer", photo: "smiling_dog", dummy: "can you see this"}}}
となってたとしてもdummyは無視される。getStaticPath以外のどこからも参照できない。getStaticPropsではparamsを受け取るためgetStaticProps内部でparams.dummyが読めるように見えるが、このparamsはgetStaticPropsが存在するファイルのパスのパラメータなので読めない。
getStaticPropsがreturnするpropsってなんなんだろう。
export async function getStaticProps({ params }) {
    const pageData = {title: "NYC is Good", content: "NYC is good because..."};
    return {
        props: {
            pageData
        }
    }
}

// ここで{ props }としてもconsole.log(props)はundefined。暗黙的にpropsの中身の変数の名前を見ている。どこで決まる?
export default function Page({ pageData }) {
    return <div>{ pageData.title }</div>
}
React+FirebaseでBlogを作るフルチュートリアル
つかえそうなリンク
Next.js走り書き
# npxはnpm executerでパッケージ実行コマンド。--use-npmをしないとyarnがデフォルトで実行される
npx create-next-app my-blog --use-npm
cd my-blog
これで一通り動く。
npm run dev
一番シンプルなFirebase
npm install firebase
import { initializeApp } from 'firebase/app'
import { getFirestore, collection, doc, where, query, setDoc, getDoc, getDocs } from "firebase/firestore";

const app = initializeApp({
    apiKey: ************************,
    authDomain: ************************,
    databaseURL: ************************,
    projectId: ************************,
    storageBucket: ************************,
    messagingSenderId: ************************,
    appId: ************************,
    measurementId: ************************
});

// https://firebase.google.com/docs/firestore/query-data/get-data

function getData1() {
  const db = getFirestore(app);
  const cl = collection(db, "comments");
  const rf = doc(db, "comments", "hoge");
  // rf -> cl  to get ALL docs
  getDoc(rf).then(doc => {
    console.log(doc.data());
  });
}

function getData2() {
  const db = getFirestore(app);
  const cl = collection(db, "comments");
  const qu = query(cl, where("city", "==", "東京"));
  getDocs(qu).then(docs => {
    docs.forEach(doc => {
      console.log(doc.data());
    });
  });
}

// https://firebase.google.com/docs/firestore/manage-data/add-data#web-version-9
function setData() {
  const db = getFirestore(app);
  const rf = doc(db, "comments", "yoyo");
  const data = {
    name: "Kenta",
    city: "Tokyo"
  };
  setDoc(rf, data).then(e => {
    console.log("Set data OK!");
  });
}

export default function Home() {
  // getData1();
  // getData2();
  setData();
  return (
    <div>firebase</div>
  )
}
いろいろ入ってるTODOアプリ。結局他人のコード読むのが一番早い。(フォームのuseStateを入れると編集ができない問題を解決しようとしてた)
Firestoreでデータのロード+更新
export default function Home() {
  const [val, setVal] = useState("");

  function getData(did) {
    const db = getFirestore(app);
    const rf = doc(db, "tweetsv1", did);
    getDoc(rf).then(e => {
      setVal(e.data().name);
    });
  }

  function setData(did, data) {
    const db = getFirestore(app);
    const rf = doc(db, "tweetsv1", did);
    setDoc(rf, data).then(e => {
      console.log("Set data OK!");
    });
  }

  function hc(e) {
    e.preventDefault();
    setVal(e.target.value);
  }

  function oc(e) {
    setData("hoge", {name: val});
  }

  useEffect = () => getData("hoge");

  return  (
    <>
      <input id="name" value={ val } onChange={ hc }></input>
      <button onClick={ oc }>update</button>
    </>
  )
}
プロフィール編集の入力フォームに新しい値を入れると直後に現在の値に戻ってしまう問題
入力フォームを編集するとDOMはvalueを書き換えようとするがステート変数は自分の値を維持しようとして編集ができない入力フォームができあがる(意味わからん)。そこでreactではonChangeをマウントしてステート変数の書き換え用関数(setValueみたいなやつ)実行する。「入力フォームに新しい値を入れる->入力フォームの値が変わる」という超単純な仕組みが「入力フォームに新しい値を入れる->新たに作られた関数を実行する->その中でsetValueが実行される->
入力フォームの値が変わる」という訳のわからない状態になってる(React的にはこうすることでイベントHookを入れやすくなる、と説明しているがそもそもonChangeがあるやん)。
で、このReact風ヘンテコ入力フォーム仕様とfireabaseが組み合わさるとさらにややこしくなる。名前の入力フォームに現在の名前を入れたいがfirebaseは非同期関数。jsxのdefault関数はasyncにできないのでreturnの前にfirebaseの関数は実行不可能。そこでステート変数とuseEffectを使ってDOMのロード->firebaseの関数実行->ステート変数のアップデート->DOMに反映という流れを作る。しかしuseEffectはロードされた後だけでなくステート変数がアップデートされるたびに実行される。
まとめると
- 名前の入力フォームに現在の値を入れるためにfirebaseを使う
- firebaseは非同期関数なのステート変数とuseEffectを使って値を入力する
- useEffectはステート変数を監視して変化があればuseEffectを実行する
- 入力フォームはステート変数の変更を経由して値を更新する
となる。
問題は、ユーザーが入力フォームに新しい値を入れると4が発動してステート変数が変わり、これを受けて3が発動してfirebaseから現在の値を取得して入力フォームを書き換える。結果的にユーザーが新しい値を入れた直後に元の値に戻る。これを回避するためにはuseEffectでステートの変化を無視する設定をすれば良い。
useEffect(() => {doFirebase}, [])
最後のuseEffectの第二引数は
- 何も入れなければ「すべてのステート変数の変化時にuseEffectを実行する」
- ステート変数を入れれば「いれたステート変数の変化時だけuseEffectを実行する」
- 空の変数を入れれば「すべてのステート変数の変化を無視する」
という意味で何も入れない時と空の配列をいれた時が真逆の意味になる。
プロフィール編集のための入力フォーム作るためだけになぜこんなことをしなきゃいけないのか正直わからない。useEffectの第二引数も暗黙的だし入力フォームがステート変数を迂回しないと編集できないとか、簡単なことを難しくしているようにしか思えない。。
Auth0を導入する
- Auth0のライブラリ入れる
npm install @auth0/nextjs-auth0
-
Auth0のページでプロジェクトの作成 (SPA -> reactを選択)
-
Settingタブで設定
- Allowed Callback URLs: http://localhost:3000/api/auth/callback
- Allowed Logout URLs: http://localhost:3000/
- SettingのDomain, Client ID, Secret IDはメモっておく
- トップレベルに.env.localを作成
# A long, secret value used to encrypt the session cookie
AUTH0_SECRET='LONG_RANDOM_VALUE'
# The base url of your application
AUTH0_BASE_URL='http://localhost:3000'
# The url of your Auth0 tenant domain
AUTH0_ISSUER_BASE_URL='https://YOUR_AUTH0_DOMAIN.auth0.com'
# Your Auth0 application's Client ID
AUTH0_CLIENT_ID='YOUR_AUTH0_CLIENT_ID'
# Your Auth0 application's Client Secret
AUTH0_CLIENT_SECRET='YOUR_AUTH0_CLIENT_SECRET'
AUTH0_SECRETは下のコマンドを使うと便利
node -e "console.log(crypto.randomBytes(32).toString('hex'))"
- Auh0のページを作成
mkdir pages/api/auth
touch pages/api/auth/\[...auth0\].js
このページがログイン、ログアウトなどのページを自動生成する
import { handleAuth } from '@auth0/nextjs-auth0';
export default handleAuth();
- /pages/_app.jsを設定して全ての画面でログインが必要にする(オプション)
import React from 'react';
import { UserProvider } from '@auth0/nextjs-auth0';

export default function App({ Component, pageProps }) {
  return (
    <UserProvider>
      <Component {...pageProps} />
    </UserProvider>
  );
}
- /pages/index.jsでログインしてみる
import { useUser } from '@auth0/nextjs-auth0';

export default function Index() {
  const { user, error, isLoading } = useUser();

  if (isLoading) return <div>Loading...</div>;
  if (error) return <div>{error.message}</div>;

  if (user) {
    return (
      <div>
        Welcome {user.name}! <a href="/api/auth/logout">Logout</a>
      </div>
    );
  }

  return <a href="/api/auth/login">Login</a>;
}
これでLoginに飛ぶとauth0のログインページに飛ばされる。以降、例えばGoogleでログインしている場合はuserにメールやアイコン画像などの情報が入っている。
vercelにデプロイするときは
- next/linkの設定
- Environment Variablesの設定
- Callbackの設定
- .env.productionの設定
をする。Vercelのデフォルトのビルドは<a>タグを禁止しているのでLinkにしないとエラーになる。Vercel側のビルドコマンドを変えてもいい。
import { useUser } from '@auth0/nextjs-auth0';
import Link from "next/link";

export default function Index() {
  const { user, error, isLoading } = useUser();

  if (isLoading) return <div>Loading...</div>;
  if (error) return <div>{error.message}</div>;

  if (user) {
    return (
      <div>
        Welcome {user.name}! <Link href="/api/auth/logout">Logout</Link>
      </div>
    );
  }

  return <Link href="/api/auth/login">Login</Link>;
}
Environmental Variables(.env.localに入れてたやつ)はGUIで設定する。こうすることでデプロイとローカルで別々の環境変数を使える。

つぎにAuth0側でCallbackを設定する。ここは注意が必要でVercelはデプロイごとにURLを変更するのでproject settings -> domainsから固定のURLを持ってきて設定する。localhostの次にカンマ区切りでvercelのURLを追加すれば両方使える。
(2022/8/10追記)
.env.productionを追加する
touch .env.production
AUTH0_BASE_URL=$VERCEL_URL
(VERCEL_URLの部分は変更しなくて良い)
どうやらVercelは最初に.env.productionを見に行ってAUTH0_BASE_URLを探すらしい。最終的には上でやった環境設定で上書きされるが見つからないと500エラーが出る(Vercel -> Functionsで確認できる。secretがどうみたいなこと言ってると思う)。
まだベストプラクティスが定まってないので随時更新します。
Next.jsのImageタグで外部URLを使うときはドメインを設定する必要がある
next.config.js
/** @type {import('next').NextConfig} */
const nextConfig = {
  reactStrictMode: true,
  swcMinify: true,
  images: {
    domains: ["lh3.googleusercontent.com"]
  }
}

module.exports = nextConfig
import Image from "next/Image"
<Image src="https://lh3.googleusercontent.com/483209" width="50" height="50">
next/Imageはlazyロードや自動でサイズ最適化をやってくれるがそのためにwidth, heightを指定する必要がある。レイアウトの指定方法も不自然で裏の仕組みを整えるために使いやすさを犠牲にしている感がある。今後に期待。
next/image + Tailwindのベストプラクティスがわからない。どっちかのドキュメントはあるけど両方組み合わせた時のベストな方法を探索中(ちょっと待てばnext/imageがマシになると期待して放置してみる)
            <div className="rounded-full blue relative w-24 h-24">
              <Image layout="fill" objectFit="contain" src="https://res.cloudinary.com/dhw3ap07h/image/upload/v1659000139/face2_ekc0pn.webp" width="100%" height="100%"></Image>
            </div>
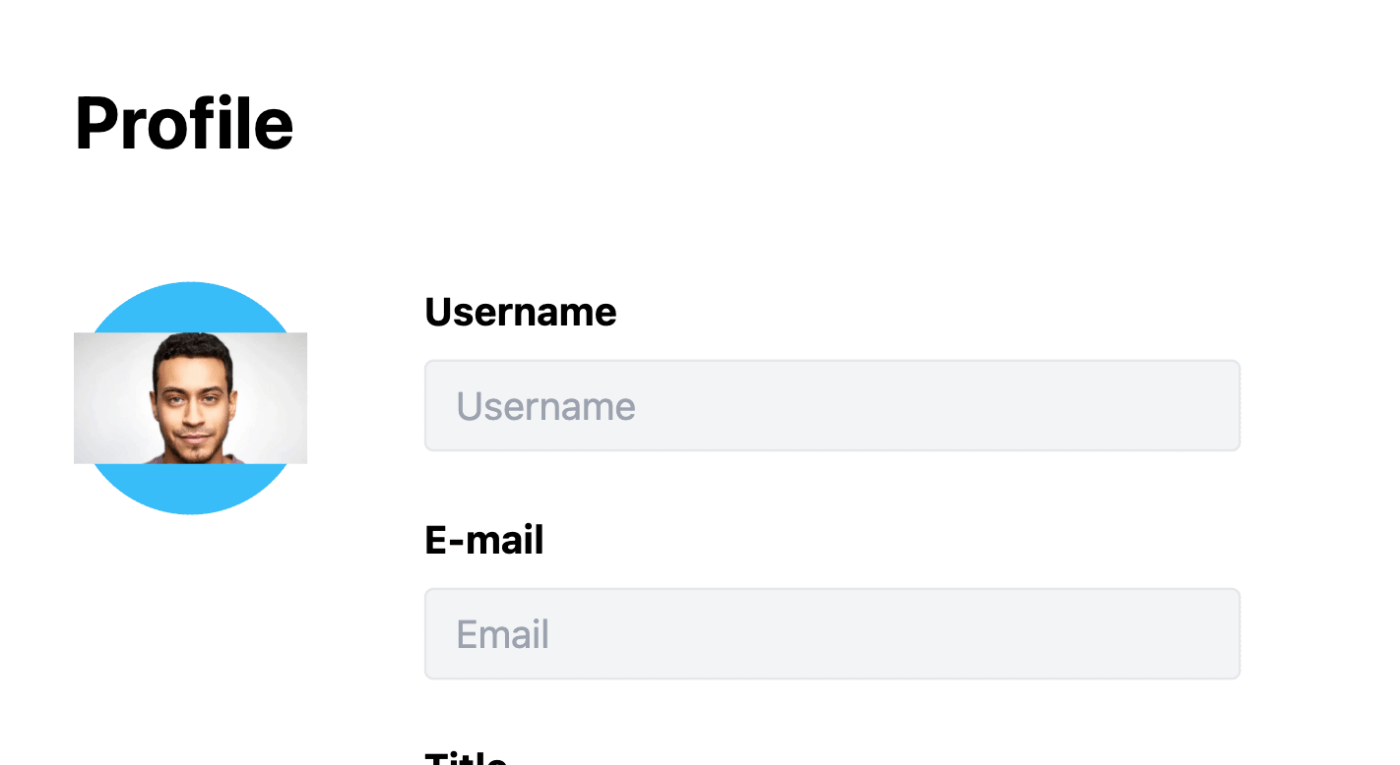
目的:プロフィール画像を円型にしたい。
ImageタグのなかでclassName="rounded-full"とすればできるけどshadowとか borderは使えない(image tagなので)。誰か教えて欲しい。
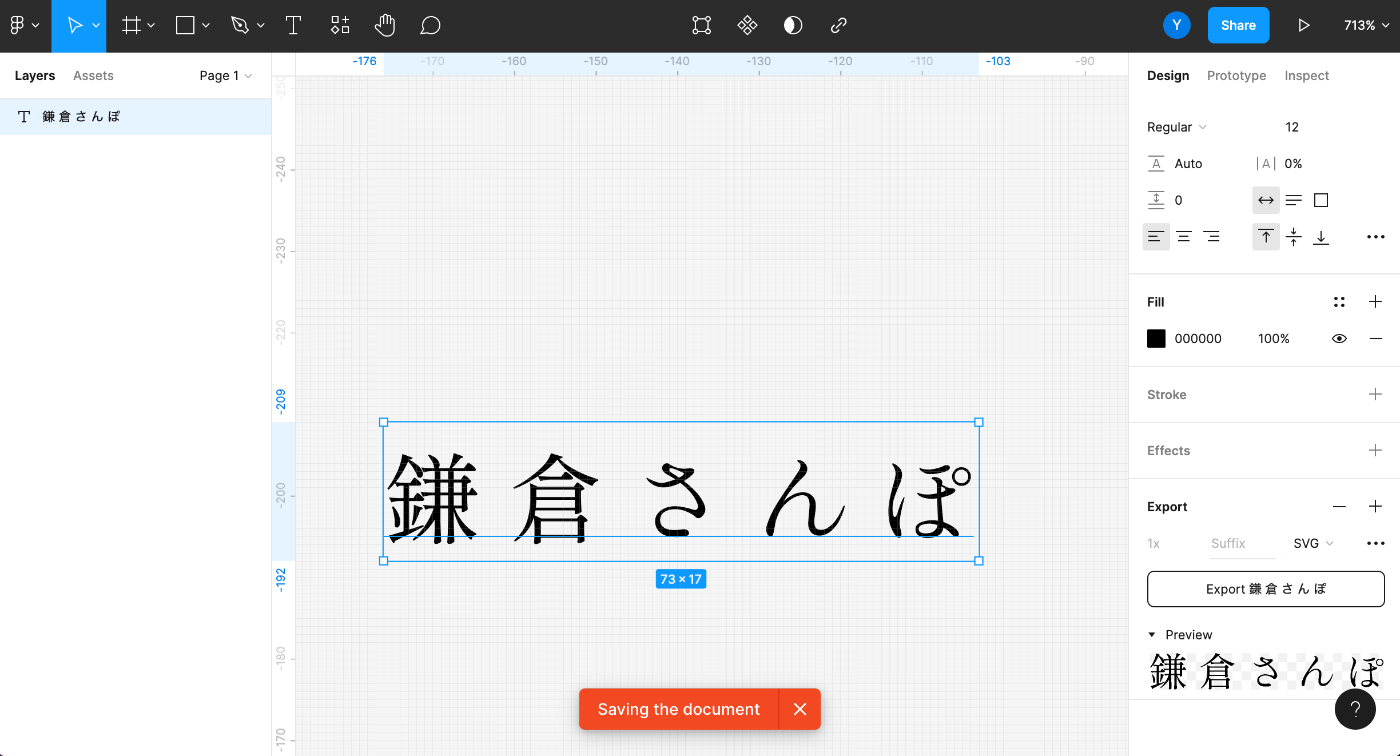
イラレなしでSVGのロゴを作る
Figmaがいい感じに盛り上がってて使い倒していきたい。
こんな感じで作ってSVGを出力してJSXにいれる。widthは消してheightだけでサイズ調整する方法が気に入ってる。
↓

日本語のフォントはこちら
Cloudinaryにアップロードする
Cloudinaryは画像だけでなく動画や3Dモデルもホストしてくれる。アップするだけでOCRをかけたり物体認識をしてくれるAddOnがあるので注目。今回は単純なアップロードをしてみる。
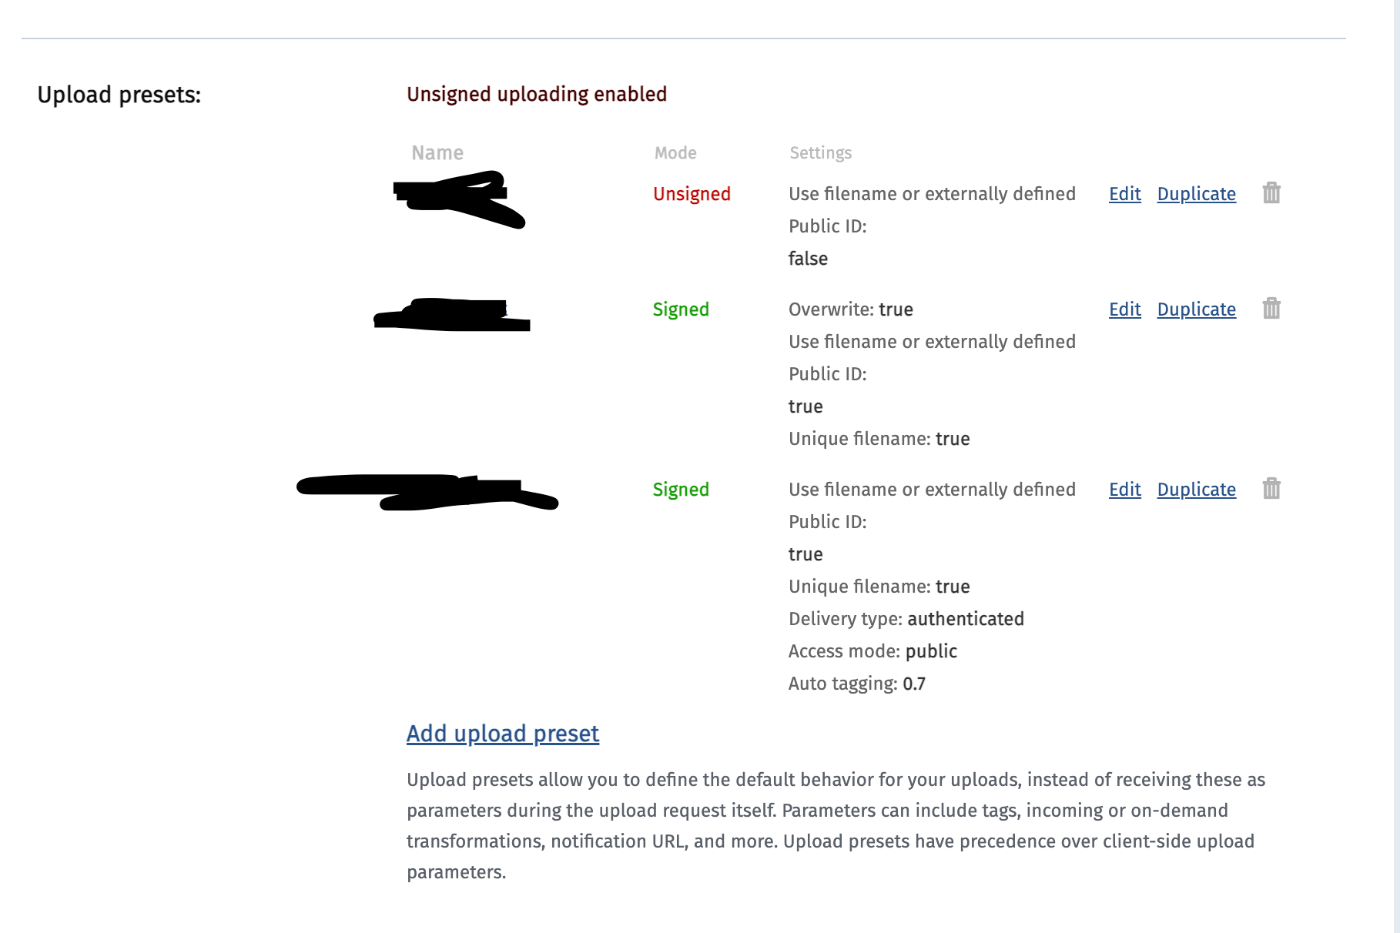
-
アカウントを作ってcloud nameとupload presetを取ってくる。下のnameってとこがupload presetで、cloud nameはホームに行くとAPIとかと一緒に表示される。
-
こんな感じでアップロードする
import { useState } from "react";

export default function Home() {
  const [rst, setRst] = useState("Choose files");

  function handle(e) {
    const files = e.target.files;
    const url = "https://api.cloudinary.com/v1_1/<CLOUD_NAME>/auto/upload";
    const data = new FormData();

    for (let i = 0; i < files.length; i++) {
      // data.append("file", "data:image/png;base64,iVBORw0KGgoAAAANSUhEUgAAAAUAAAAFCAYAAACNbyblAAAAHElEQVQI12P4//8/w38GIAXDIBKE0DHxgljNBAAO9TXL0Y4OHwAAAABJRU5ErkJggg==");
      data.append("file", files[i]);
      data.append("upload_preset", <UPLOAD_PRESET>);
      fetch(url, {method: "POST", body: data}).then(e => {
        return e.text();
      }).then(e => {
        setRst(e);
      });
    }
  }

  return (
    <>
      <div>{rst}</div>
      <input onChange={handle} type="file" name="example" accept="image/*" multiple></input>
    </>
  )
}
FormDataはappendなどのメソッドをちょっと入れただけのハッシュだと思っていい。appendはformdata.append(key, value)。ループのところで複数回同じファイルがappendされてるのが謎だが一旦放置。
Cloudinaryはファイルの送信側を認証しないunsignedアップロードが可能。放置すると勝手にアップロードされる可能性があるけど簡単。signedアップロードはちょっとややこしくてアドミンでドメインのwhitelistをする(それでもスクリプいじられたらアップロードされる)かSHA256でパラメータを連結したもののダイジェストを送るかする必要がある。上の例はunsigned。
zenn-markdown-htmlの導入。cssとか用意してくれててなんのボランティアなのか(あざます)
npm install zenn-markdown-html
npm install zenn-content-css
npm install zenn-embed-elements
import { useEffect, useState } from "react";
import markdownToHtml from "zenn-markdown-html";
import 'zenn-content-css';

// npm install zenn-markdown-html

export default function Home() {
  const [val, setVal] = useState("# これは見出し\nこれは*本文*\n- リスト\n- リスト\n- リスト\n[ZennのMarkdown記法一覧](https://zenn.dev/zenn/articles/markdown-guide)");
  function onChange(e) {
    setVal(e.target.value);
  }
  useEffect(() => {
    import("zenn-embed-elements")
  }, []);
  return (
    <div class="znc">
      <textarea style={{height: "500px", width: "700px"}} value={ val } onChange={ onChange }></textarea>
      <span dangerouslySetInnerHTML={{__html: markdownToHtml(val)}}></span>
    </div>
  )
}
tailwind.config.jsを設定(postcssの設定ファイルでcontent以下のファイルをまとめるように設定。
# postcssはcssファイルを整理して1つのcssにまとめてくれる。autoprefixerはcssにシュガーシンタックスを提供する。
npm install -D tailwindcss postcss autoprefixer
npx tailwindcss init -p
/** @type {import('tailwindcss').Config} */
module.exports = {
  content: [
    "./pages/**/*.{js,ts,jsx,tsx}",
    "./components/**/*.{js,ts,jsx,tsx}",
  ],
  theme: {
    extend: {},
  },
  plugins: [],
}
styles/globals.cssでtailwind directiveを設定する。@tailwind baseはbaseというtailwindのmodule(どっかにある)を挿入せよって意味。これでclassName="font-bold"みたいな書き方ができる。
@tailwind base;
@tailwind components;
@tailwind utilities;
Hero iconsを使う場合は
npm install @heroicons/react
import { BeakerIcon, InboxIcon } from '@heroicons/react/solid'
...
<BeakerIcon className="h-5 w-5"/>Lab
...
CSSでアニメーション(図とかCodePenを使って詳細描こうと思ったけどめっちゃめんどいからやめた方がいい)
ルール
- animation-durationの間にkeyframesの設定にあわせてCSSが変化する。
- アニメーションの後はanimation-fill-modeによって元のCSSに戻るか決まる。
- animation-nameが変化をトリガーにして始まる。
用語
- animation-duration: アニメーションの尺
- animation-name: keyframesの名前
- @keyframes: アニメーションの設定
- animation-timing-function: お手軽keyframeを設定できる[1]
- animation-fill-modeをforwardに設定するとアニメ後の状態を保持する。
- animation-iteration-countで繰り返し数を設定可能(inifiniteで無限)
- animation-directionをalternateに設定すると0%と100%を往復する。
[1] animation-timing-functionとkeyframesがコンフリクトしたらどうなるのか理解できてない。
<html>
    <style>
        div {
            width: 100px;
            height: 100px;
            border-radius: 10%;
            background-color: gray;
            animation-duration: 1s;
            animation-name: fadein;
        }
        @keyframes fadein {
            0% {
                opacity: 0;
            }
            50% {
                opacity: 0.1;
            }
            100% {
                opacity: 1;
            }
        }
    </style>
    <body>
        <div></div>
    </body>
</html>
アニメーションの設計に便利
トーストを実装してみた
<html>
    <style>
        div {
            position: fixed;
            opacity: 0;
            text-align: center;
            padding: 25px 50px;
            background-color: black;
            animation-duration: 2s;
            animation-delay: 1s;
            animation-name: fadein;
            animation-fill-mode: forwards;
        }
        @keyframes fadein {
            0% {
                opacity: 0;
                top: 0;
            }
            10% {
                opacity: 1;
                top: 10;
            }
            90% {
                opacity: 1;
                top: 10;
            }
            100% {
                opacity: 0;
                top: 0;
            }
        }
    </style>
    <body>
        <div></div>
    </body>
</html>
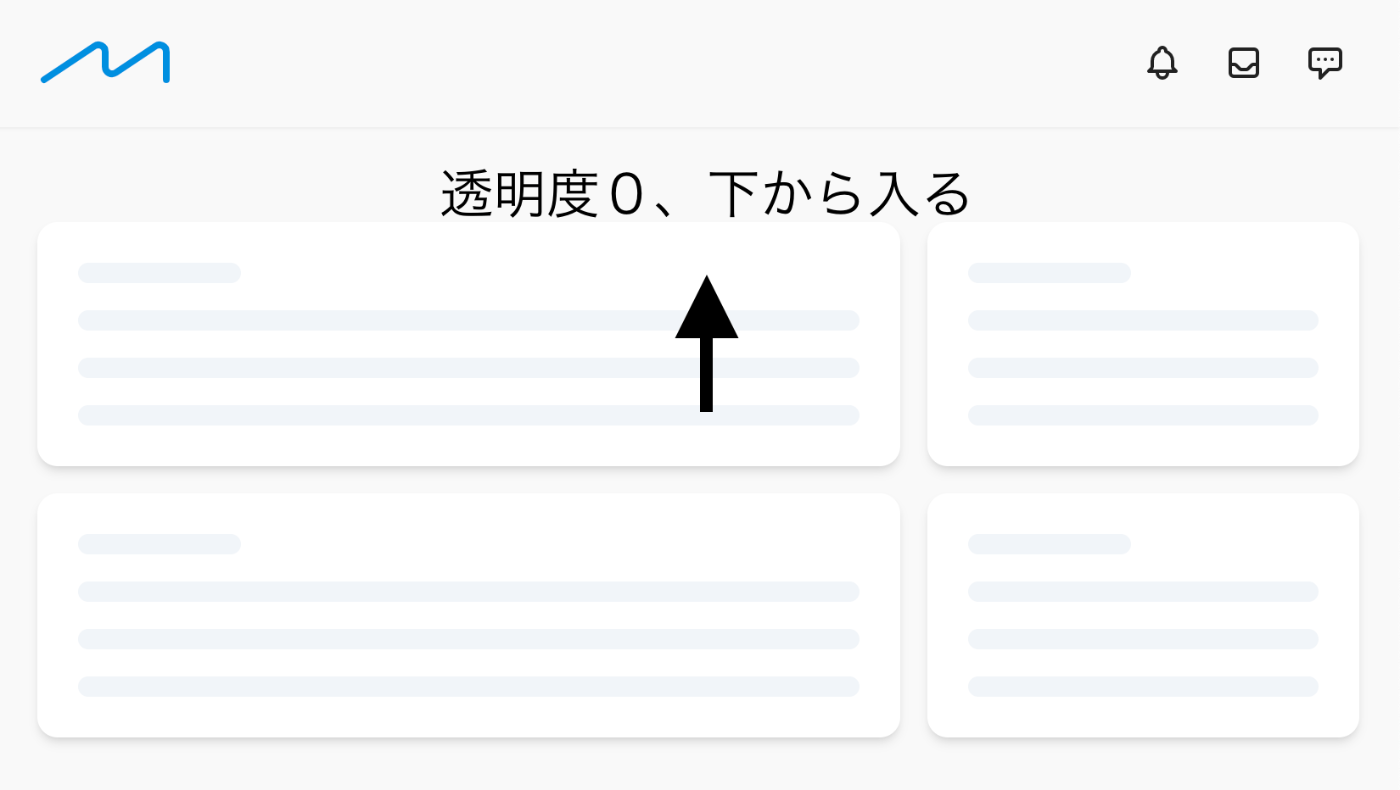
透明度を増しながら下から登ってくるアニメーション。fromだけ設定すれば設定されたプロパティまでアニメーションする。
next.js reactのフォームの一例
function salt() {
  return Math.random().toString().substring(2);
}

export function Knput() {
  const [page, setPage] = useState({});
  function oc(e) {
    // hashのスプレッド構文では[]をつけないとキー設定ができない(なぜ?)
    setPage({...page, [e.target.id]: e.target.value});
  }
  function submit() {
    setData(page.did, page).then(e => {
      console.log("Submit " + page.did);
    });
  }
  useEffect(() => {
    // salt()を使っているのでここはuseEffectにしないとHTMLレンダリングとタイミングが合わずにエラーになる
    setPage({"title": "", "content": "", "did": salt(), "blog": "yuyu"})
  }, []);
  return (
    <>
      // ここではvalue設定はしない
      Title: <input id="title" onChange={ oc }></input>
      Content: <input id="content" onChange={ oc }></input>
      <button onClick={ submit }>Submit</button>
      <div>{ JSON.stringify(page) }</div>
    </>
  )
}
routerを表示させるとText content does not match server-render HTMLのエラーが出る。これは文字通りSSRのオンオフで内容が変わるので注意せよという警告(エラー)。例えば
import { useRouter } from "next/router"

export default function Page(props) {
    const router = useRouter();
    return (
        <div>{ JSON.stringify(router) }</div>
    )
}
みたいなときrouterの内容はSSRとSPIで違うのでエラー。
import { useRouter } from "next/router"

export default function Page(props) {
    const router = useRouter();
    return (
        <div>{ JSON.stringify(router.pathname) }</div>
    )
}
にするとpathnameはSSRもSPIも同じなのでエラーにならない。
GitHubのリポジトリを指定する
まずはすでにあるリモートをチェック
git remote -v
たぶん空なので入れる。あとupstreamをこいつにする。
git remote add origin git@github.com:xxxxx/xxxxxx
git push --set-upstream origin main
Tooltipのベストプラクティス
function Tooltip({ text, children }) {
    const [show, setShow] = useState(false);
    return (
        <>
        <span className="cursor-pointer" onMouseOver={ _ => setShow(true) } onMouseLeave={ _ => setShow(false) } >{ children }</span>
        {
            show && <span className="text-xs text-white p-2 py-1 bg-slate-800 -translate-x-1/2 -translate-y-6 absolute rounded-sm">{ text }</span>
        }
        </>
    )
}
...
<Tooltip text="匿名で投稿ができます"><QuestionMarkCircleIcon className="h-3 h-3 inline -translate-y-1"></QuestionMarkCircleIcon></Tooltip>
...