Amazon Qでslackアプリを作ってみた
記事の内容
AWS re:Invent 2023で参加したセッションの内容の記録です。
こちらに記載したセッションで紹介されているslackのサンプルアプリを実際に作成してみました。
ハンズオン
- AWSコンソールにログイン
- Amazon Qコンソールでアプリを作成します。

Application name: 任意のアプリ名
Choose a method to authorize Amazon Q: Create and use a new service roleを選択

Retrievers: use native Retriever
Index Provisioning: 2
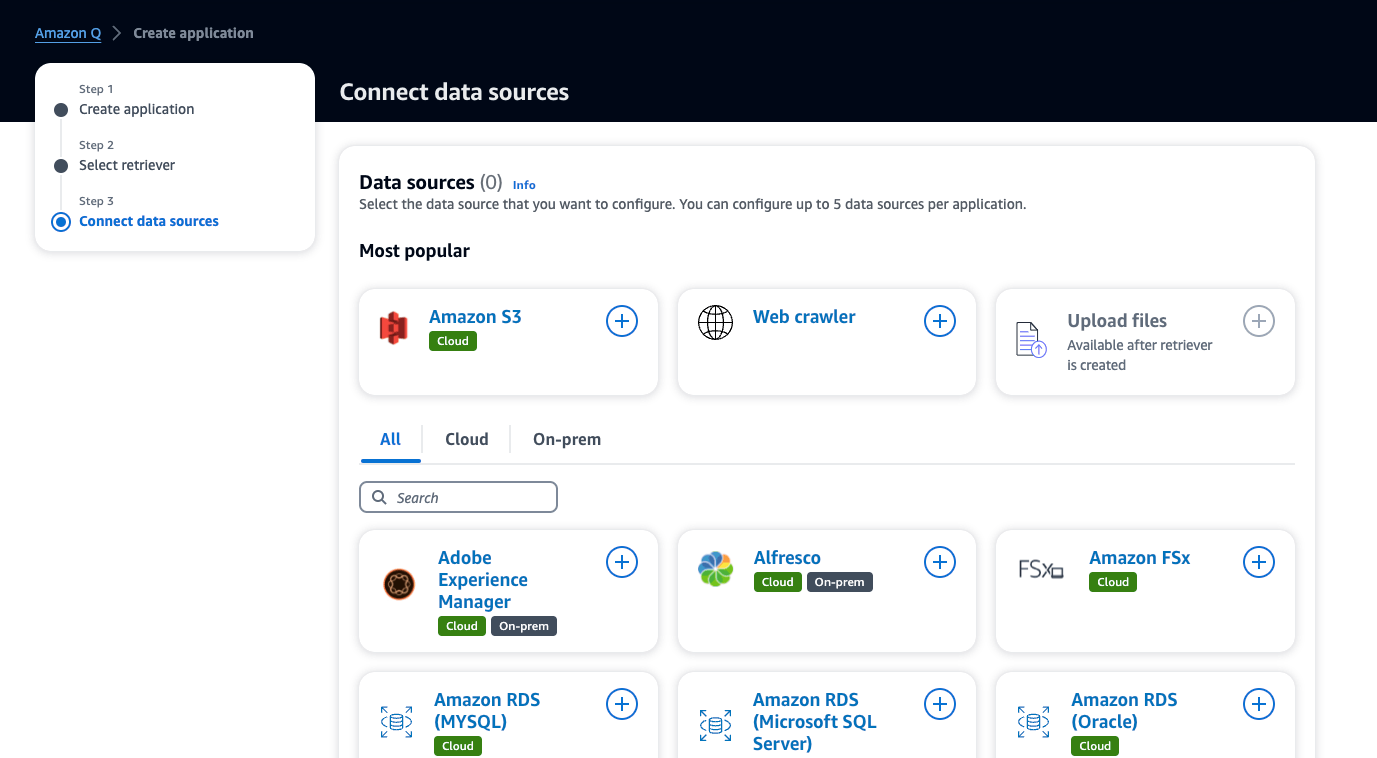
Connect data resources: 今回は検証のためソースは直アップロードにします。アプリ作成後追加できるため一旦スルー。
ここでQ本体は作成できるので、作成したらApplication IDを控えておきます。
- 下記のいずれかの「Launch Stack」でcfnテンプレートを読み込みます。

読み込んだら下記のパラメータを設定して、スタックを作成します。

AmazonQAppId: 2で作成したAmazon Q ID
AmazonQRegion: Qを作成したリージョン
AmazonQUserId: Slack上のメールアドレス(後程ワークスペースにslackを連携させる。動作確認で自身のメールアドレスでOK)
ContextDaysToLive: 90(デフォルト)
-
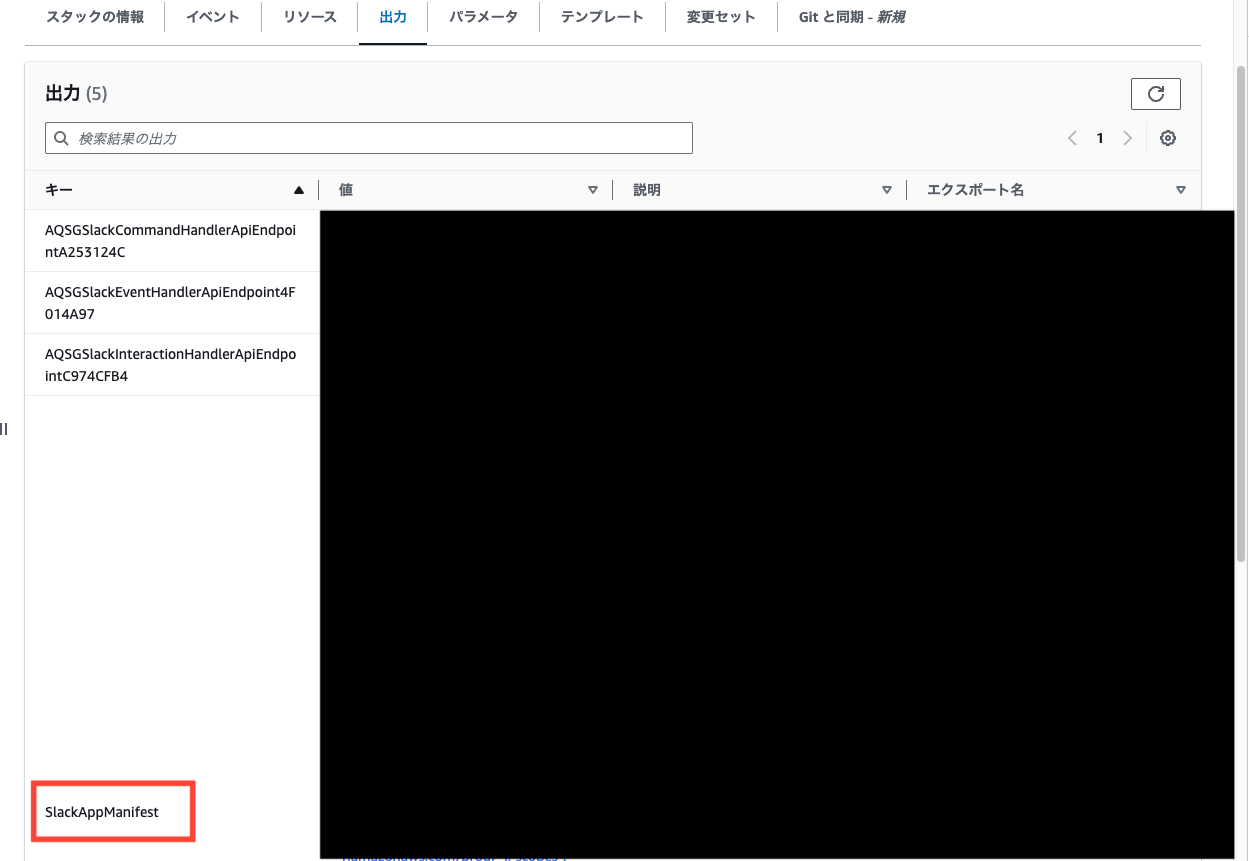
作成したスタックの出力から「SlackAppManifest」の値(json)をコピーします。
-
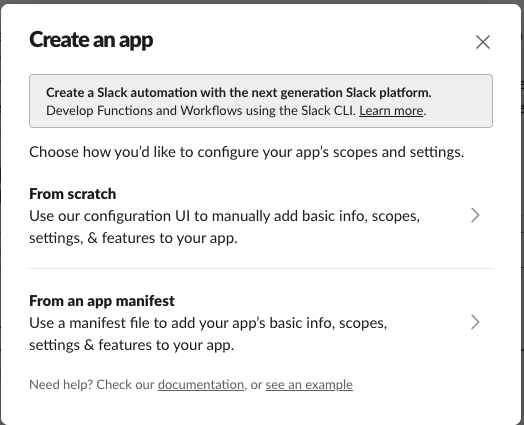
[Slackアプリの管理画面](https://api.slack.com/apps)にいき、「create app」からアプリを作成します。「from an app manifest」から進んでいき、作成するワークスペースを選んで、作成ほどコピーしておいたSlackAppManifestをコピーして作成します。
-
左サイドメニュー「App Home」から「Messages Tab」を探して、下記に設定します。

-
再びAWSコンソールに戻ります。スタックの出力にSlackSecretConsoleUrlが出力されています。クリックしてsecrets managerコンソールに移動します。

-
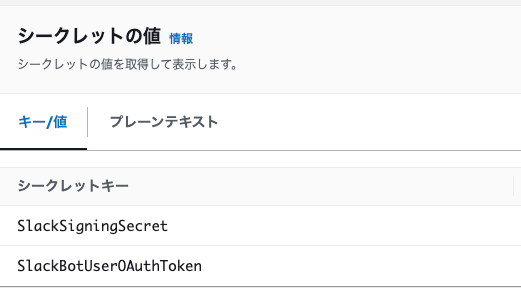
作成されている下記の2つのシークレットを作成したslackアプリをもとに設定します。
SlackSigningSecret: Basic Informationにある「Signing Secret」
SlackBotUserOAuthToken: OAuth & Permissionsにある「Bot User OAuth Token」
-
Slackに移動して、アプリを追加したワークスペースを表示します。「App」の「アプリを追加する」に作成したSlackアプリがあることがあるので選択します。

-
チャット欄から「hello」と入力してみます。Qからhelloの返答があれば、無事デプロイ成功です。

データソースを渡す
現状だとQはデータソースがないため、わかりませんと言われてしまうことだらけです。nodejsについて質問しても情報がないと言われてしまいます。

試しにデータソースを追加してみましょう。今回は手っ取り早く直接ソースをアップロードしてみます。
-
QコンソールからAdd data sourceから、「Upload files」を選択します。
-
Choose filesからデータソースを選択します。今回はnodejsについて下記のように渡してみようと思います。選択したら「upload」で確定します。
About Node.js®
As an asynchronous event-driven JavaScript runtime, Node.js is designed to build scalable network applications. In the following "hello world" example, many connections can be handled concurrently. Upon each connection, the callback is fired, but if there is no work to be done, Node.js will sleep.

const http = require('node:http');
const hostname = '127.0.0.1';
const port = 3000;
const server = http.createServer((req, res) => {
  res.statusCode = 200;
  res.setHeader('Content-Type', 'text/plain');
  res.end('Hello World');
});
server.listen(port, hostname, () => {
  console.log(`Server running at http://${hostname}:${port}/`);
});
This is in contrast to today's more common concurrency model, in which OS threads are employed. Thread-based networking is relatively inefficient and very difficult to use. Furthermore, users of Node.js are free from worries of dead-locking the process, since there are no locks. Almost no function in Node.js directly performs I/O, so the process never blocks except when the I/O is performed using synchronous methods of Node.js standard library. Because nothing blocks, scalable systems are very reasonable to develop in Node.js.

If some of this language is unfamiliar, there is a full article on Blocking vs. Non-Blocking.

Node.js is similar in design to, and influenced by, systems like Ruby's Event Machine and Python's Twisted. Node.js takes the event model a bit further. It presents an event loop as a runtime construct instead of as a library. In other systems, there is always a blocking call to start the event-loop. Typically, behavior is defined through callbacks at the beginning of a script, and at the end a server is started through a blocking call like EventMachine::run(). In Node.js, there is no such start-the-event-loop call. Node.js simply enters the event loop after executing the input script. Node.js exits the event loop when there are no more callbacks to perform. This behavior is like browser JavaScript — the event loop is hidden from the user.

HTTP is a first-class citizen in Node.js, designed with streaming and low latency in mind. This makes Node.js well suited for the foundation of a web library or framework.

Node.js being designed without threads doesn't mean you can't take advantage of multiple cores in your environment. Child processes can be spawned by using our child_process.fork() API, and are designed to be easy to communicate with. Built upon that same interface is the cluster module, which allows you to share sockets between processes to enable load balancing over your cores.
- 完了したら再度チャットしてみます。今度はnodejsについて質問してみます。
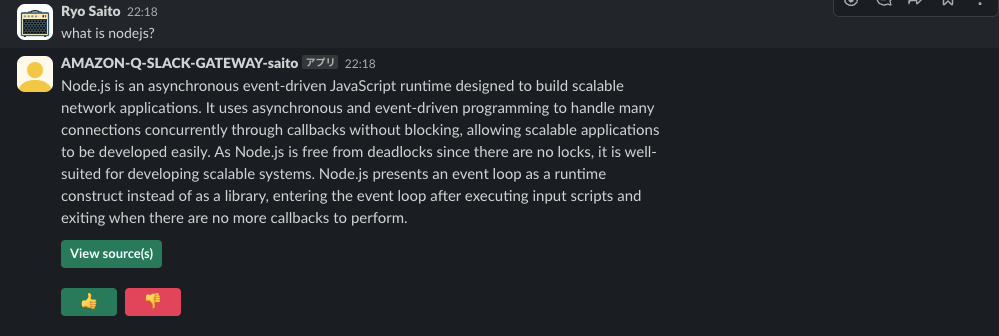
すると今度は情報が返ってきました。参照しているリソースについても、添付してくれています。確かにデータソースに渡した内容ですね。

まとめ
駆け足となりましたが、無事サンプルのSlackアプリを作れることができました。興味あればぜひ試してみてください。
現在Qは、プレビュー版となっておりデータソース、チャットともに英語のみのサポートです。日本語サポートが待ち遠しいですね。
NCDC株式会社( ncdc.co.jp/ )のエンジニアチームです。 募集中のエンジニアのポジションや、採用している技術スタックの紹介などはこちら( github.com/ncdcdev/recruitment )をご覧ください! ※エンジニア以外も記事を投稿することがあります
Discussion