RedwoodJS に入門する
Tutorial を進めていく
Chapter 1
Installation & Starting Development
yarn create redwood-app で project を scaffolding できる。
yarn create redwood-app --ts ./redwoodblog
dev server 起動
yarn redwood dev
Redwood File Structure
scaffolding された project の folder structure はこんな感じ
├── api
│   ├── db
│   │   └── schema.prisma
│   ├── dist
│   ├── src
│   │   ├── directives
│   │   │   ├── requireAuth
│   │   │   └── skipAuth
│   │   ├── functions
│   │   │   └── graphql.ts
│   │   ├── graphql
│   │   ├── lib
│   │   │   ├── auth.ts
│   │   │   ├── db.ts
│   │   │   └── logger.ts
│   │   └── services
│   └── types
│
├── scripts
│   └── seed.ts
│
└── web
    ├── public
    │   ├── favicon.png
    │   ├── README.md
    │   └── robots.txt
    └── src
        ├── components
        ├── layouts
        ├── pages
        │   ├── FatalErrorPage
        │   │   └── FatalErrorPage.tsx
        │   └── NotFoundPage
        │       └── NotFoundPage.tsx
        ├── App.tsx
        ├── index.css
        ├── index.html
        └── Routes.tsx
大きく3種類
- api: backend 関連
- scripts: スクリプト関連 (seed 処理とか)
- web: frontend 関連
Our First Page
page 生成コマンド実行
yarn redwood generate page home /
yarn redwood generate page home /
(node:14307) ExperimentalWarning: stream/web is an experimental feature. This feature could change at any time
(Use `node --trace-warnings ...` to show where the warning was created)
  ✔ Generating page files...
    ✔ Successfully wrote file `./web/src/pages/HomePage/HomePage.stories.tsx`
    ✔ Successfully wrote file `./web/src/pages/HomePage/HomePage.test.tsx`
    ✔ Successfully wrote file `./web/src/pages/HomePage/HomePage.tsx`
  ✔ Updating routes file...
  ✔ Generating types...
  ✔ One more thing...

    Page created! A note about <MetaTags>:

    At the top of your newly created page is a <MetaTags> component,
    which contains the title and description for your page, essential
    to good SEO. Check out this page for best practices:

    https://developers.google.com/search/docs/advanced/appearance/good-titles-snippets
以下ファイルが作成・更新される
-
web/src/pages/HomePage/HomePage.tsx作成 -
web/src/pages/HomePage/HomePage.test.tsx作成 -
web/src/pages/HomePage/HomePage.stories.tsx作成 -
web/src/Routes.tsx更新
Routes の更新について
import { Router, Route } from '@redwoodjs/router'

const Routes = () => {
  return (
    <Router>
+      <Route path="/" page={HomePage} name="home" />
      <Route notfound page={NotFoundPage} />
    </Router>
  )
}

export default Routes
A Second Page and a Link
about page を作成
yarn redwood generate page about
path を省略 => page 名がそのまま path に
e.g.) about => /about
Link を作成
about page へのリンクを home page に追加
import { Link, routes } from '@redwoodjs/router'
import { MetaTags } from '@redwoodjs/web'

const HomePage = () => {
  return (
    <>
      <MetaTags title="Home" description="Home page" />

      <header>
        <h1>Redwood Blog</h1>
        <nav>
          <ul>
            <li>
+              <Link to={routes.about()}>About</Link>
            </li>
          </ul>
        </nav>
      </header>
      <main>Home</main>
    </>
  )
}

export default HomePage
@redwoodjs/route の Link と routes を利用
import { Link, routes } from '@redwoodjs/router'

// ~~ 省略 ~~

<Link to={routes.about()}>About</Link>
routes.about() としておくと、Routes file で設定した path が参照される。
ここ↓
<Route path="/about" page={AboutPage} name="about" />
Layouts
yarn redwood g layout blog
  ✔ Generating layout files...
    ✔ Successfully wrote file `./web/src/layouts/BlogLayout/BlogLayout.test.tsx`
    ✔ Successfully wrote file `./web/src/layouts/BlogLayout/BlogLayout.stories.tsx`
    ✔ Successfully wrote file `./web/src/layouts/BlogLayout/BlogLayout.tsx`
以下が作成される↓
./web/src/layouts/BlogLayout/BlogLayout.test.tsx./web/src/layouts/BlogLayout/BlogLayout.stories.tsx./web/src/layouts/BlogLayout/BlogLayout.tsx
type BlogLayoutProps = {
  children?: React.ReactNode
}

const BlogLayout = ({ children }: BlogLayoutProps) => {
  return <>{children}</>
}

export default BlogLayout
Layout を適用
Routes.tsx で Layout を適用させたい Route をSet で wrap すれば Layout が適用される。
import { Router, Route, Set } from '@redwoodjs/router'
import BlogLayout from 'src/layouts/BlogLayout'

const Routes = () => {
  return (
    <Router>
      <Set wrap={BlogLayout}>
        <Route path="/about" page={AboutPage} name="about" />
        <Route path="/" page={HomePage} name="home" />
      </Set>
      <Route notfound page={NotFoundPage} />
    </Router>
  )
}

export default Routes
Chapter2
データの永続化をしていく
Getting Dynamic
Creating the Database Schema
Prisma schema で Post model を作成
datasource db {
  provider = "sqlite"
  url      = env("DATABASE_URL")
}

generator client {
  provider      = "prisma-client-js"
  binaryTargets = "native"
}

model Post {
  id        Int      @id @default(autoincrement())
  title     String
  body      String
  createdAt DateTime @default(now())
}
prisma migrate を実行
yarn rw prisma migrate dev
prisma studio を起動して確認
yarn rw prisma studio
Creating a Post Editor
以下コマンドで Post データの CRUD 関連のあれこれを一括で scaffolding できる!!!
yarn rw g scaffold post
以下のファイルが作成・更新される
-
web/src/pages/Post- EditPostPage
- NewPostPage
- PostPage
- PostsPage
web/src/layouts/PostsLayout/PostsLayout.tsxweb/src/Routes.tsx-
web/src/components/Post- EditPostCell
- PostCell
- PostsCell
- NewPost
- Post
- PostForm
- Posts
api/src/graphql/posts.sdl.tsapi/src/services/posts/posts.ts
Post の CRUD を行うための、
- バックエンドのCRUD処理
- Graphql schema, resolver
- フロントエンドの各ページ
- 一覧ページ
- 詳細ページ
- 新規作成ページ
- 編集ページ
等が生成される。便利!
Cells
データの取得用の component を作っていく。これを Redwood では Cell と呼んでいるらしい。
Post 一覧を取得して表示する Articles cell を作る。
yarn rw g cell Articles
  ✔ Generating cell files...
    ✔ Successfully wrote file `./web/src/components/ArticlesCell/ArticlesCell.mock.ts`
    ✔ Successfully wrote file `./web/src/components/ArticlesCell/ArticlesCell.test.tsx`
    ✔ Successfully wrote file `./web/src/components/ArticlesCell/ArticlesCell.stories.tsx`
    ✔ Successfully wrote file `./web/src/components/ArticlesCell/ArticlesCell.tsx`
生成される file ↓
./web/src/components/ArticlesCell/ArticlesCell.mock.ts./web/src/components/ArticlesCell/ArticlesCell.test.tsx./web/src/components/ArticlesCell/ArticlesCell.stories.tsx./web/src/components/ArticlesCell/ArticlesCell.tsx
ArticlesCell.tsx を見ていく。
import type { ArticlesQuery } from 'types/graphql'
import type { CellSuccessProps, CellFailureProps } from '@redwoodjs/web'

export const QUERY = gql`
  query ArticlesQuery {
    articles {
      id
    }
  }
`

export const Loading = () => <div>Loading...</div>

export const Empty = () => <div>Empty</div>

export const Failure = ({ error }: CellFailureProps) => (
  <div style={{ color: 'red' }}>Error: {error.message}</div>
)

export const Success = ({ articles }: CellSuccessProps<ArticlesQuery>) => {
  return (
    <ul>
      {articles.map((item) => {
        return <li key={item.id}>{JSON.stringify(item)}</li>
      })}
    </ul>
  )
}
Cell file の named export が肝。
以下の命名に沿って実装すれば、Redwood がよしなにデータ取得とその state 管理を担ってくれる。
- QUERY
- Loading
- Empty
- Failure
- Success
(QUERY と Success 以外は optional)
Routing Params
Routing Params は {} を利用する。
e.g.) /article/{id} => /article/sampleArticleId に match
<Route path="/article/{id}" page={ArticlePage} name="article" />
Link で Routing Params を指定する場合は、routes.article({ id: article.id }) のように引数の object で渡す。
<h2>
  <Link to={routes.article({ id: article.id })}>{article.title}</Link>
</h2>
Routing Params に型を指定
{id:Int} のように型を :Int と指定してあげればOK。
<Route path="/article/{id:Int}" page={ArticlePage} name="article" />
Chapter 3
データの保存を行なっていく
Building a Form
Redwood はform 作成を手助けする utility component を @redwoodjs/forms として提供されている。
import {
  FieldError,
  Form,
  Label,
  Submit,
  SubmitHandler,
  TextAreaField,
  TextField
} from '@redwoodjs/forms'
import { MetaTags } from '@redwoodjs/web'

type FormValues = {
  name: string
  email: string
  message: string
}

const ContactPage = () => {
  const onSubmit: SubmitHandler<FormValues> = (data) => {
    console.log(data)
  }

  return (
    <>
      <MetaTags title="Contact" description="Contact page" />

      <Form onSubmit={onSubmit} config={{ mode: 'onBlur' }}>
        <Label name="name" errorClassName="error">
          Name
        </Label>
        <TextField
          name="name"
          validation={{ required: true }}
          errorClassName="error"
        />
        <FieldError name="name" className="error" />

        <Label name="email" errorClassName="error">
          Email
        </Label>
        <TextField
          name="email"
          validation={{
            required: true,
            pattern: {
              value: /^[^@]+@[^.]+\..+$/,
              message: 'Please enter a valid email address',
            },
          }}
          errorClassName="error"
        />
        <FieldError name="email" className="error" />

        <Label name="message" errorClassName="error">
          Message
        </Label>
        <TextAreaField
          name="message"
          validation={{ required: true }}
          errorClassName="error"
        />
        <FieldError name="message" className="error" />

        <Submit>Save</Submit>
      </Form>
    </>
  )
}

export default ContactPage
-
Form内部の@redwoodjs/formsの component を認識して、よしなに onSubmit で form data を扱えるようにしてくれる。 - validation もよしなにやってくれる。
validationprop で validation を指定。 -
FieldErrorで validation error message の表示 -
errorClassNameにエラー時の class を指定することで error 時の styling
Saving Data
Create an SDL & Service
yarn rw g sdl Contact
  ✔ Generating SDL files...
    ✔ Successfully wrote file `./api/src/graphql/contacts.sdl.ts`
    ✔ Successfully wrote file `./api/src/services/contacts/contacts.scenarios.ts`
    ✔ Successfully wrote file `./api/src/services/contacts/contacts.test.ts`
    ✔ Successfully wrote file `./api/src/services/contacts/contacts.ts`
  ✔ Generating types ...
-
api/src/graphql/contacts.sdl.ts: GraphQL schema -
api/src/services/contacts/contacts.ts: ビジネスロジック
自動生成される Grapql Schema ↓ CRUD が一通り作られる。
export const schema = gql`
  type Contact {
    id: Int!
    name: String!
    email: String!
    message: String!
    createdAt: DateTime!
  }

  type Query {
    contacts: [Contact!]! @requireAuth
    contact(id: Int!): Contact @requireAuth
  }

  input CreateContactInput {
    name: String!
    email: String!
    message: String!
  }

  input UpdateContactInput {
    name: String
    email: String
    message: String
  }

  type Mutation {
    createContact(input: CreateContactInput!): Contact! @requireAuth
    updateContact(id: Int!, input: UpdateContactInput!): Contact! @requireAuth
    deleteContact(id: Int!): Contact! @requireAuth
  }
デフォルトで Query, Mutation には 認証を要求する @requireAuth directive が付与される。(認証の処理自体は別途実装する必要あり)
認証を skip したい場合は、 @skipAuth directive を付与
  type Mutation {
+    createContact(input: CreateContactInput!): Contact! @skipAuth
  }
自動生成される service はこちら↓
import { db } from 'src/lib/db'
import type { QueryResolvers, MutationResolvers } from 'types/graphql'

export const contacts: QueryResolvers['contacts'] = () => {
  return db.contact.findMany()
}

export const contact: QueryResolvers['contact'] = ({ id }) => {
  return db.contact.findUnique({
    where: { id },
  })
}

export const createContact: MutationResolvers['createContact'] = ({ input }) => {
  return db.contact.create({
    data: input,
  })
}

export const updateContact: MutationResolvers['updateContact'] = ({ id, input }) => {
  return db.contact.update({
    data: input,
    where: { id },
  })
}

export const deleteContact: MutationResolvers['deleteContact'] = ({ id }) => {
  return db.contact.delete({
    where: { id },
  })
}
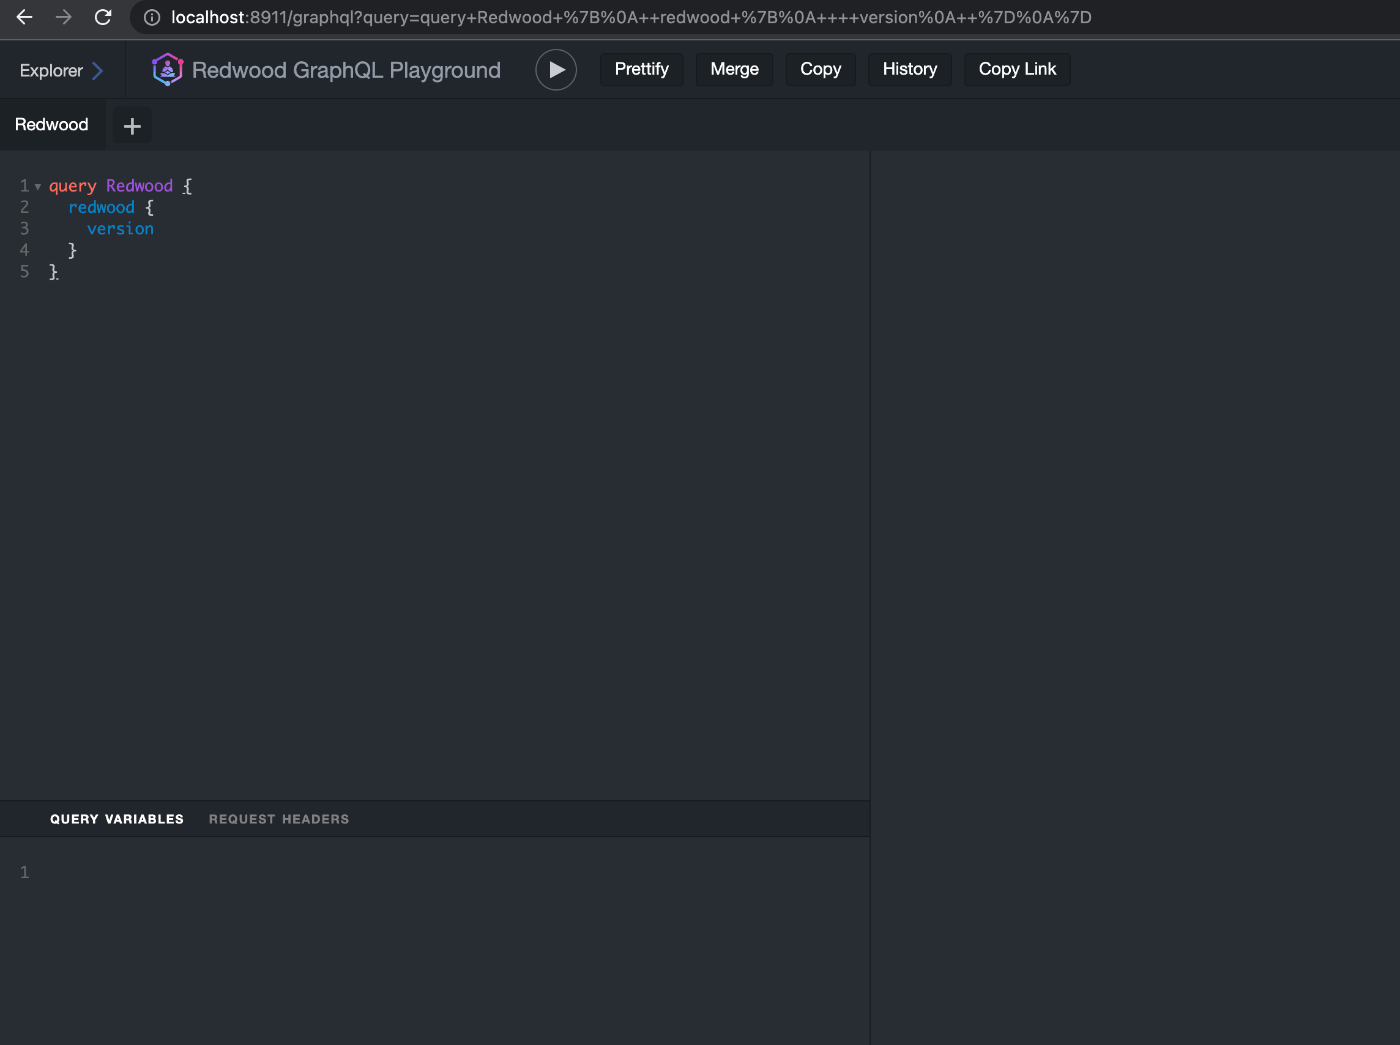
GraphqiQL
Redwood は graphql-yoga を使用しており、dev server として Graphql Playground (GraphqiQL) が利用できる。
http://localhost:8911/graphql にアクセスするとこんな感じ↓
Creating a Contact
Mutation を front-end から呼び出す。
@redwoodjs/web の useMutation を利用。
+ import {
+   CreateContactMutation,
+   CreateContactMutationVariables
+ } from 'types/graphql'

import {
  FieldError,
  Form,
  Label,
  Submit,
  SubmitHandler,
  TextAreaField,
  TextField
} from '@redwoodjs/forms'
+ import { MetaTags, useMutation } from '@redwoodjs/web'

+ const CREATE_CONTACT = gql`
+   mutation CreateContactMutation($input: CreateContactInput!) {
+     createContact(input: $input) {
+       id
+     }
+   }
+ `

type FormValues = {
  name: string
  email: string
  message: string
}

const ContactPage = () => {
+   const [create] = useMutation<
+     CreateContactMutation,
+     CreateContactMutationVariables
+   >(CREATE_CONTACT)

  const onSubmit: SubmitHandler<FormValues> = (data) => {
+     create({
+       variables: {
+         input: data,
+       },
+     })
  }

  return (
    <>
      <MetaTags title="Contact" description="Contact page" />

      <Form onSubmit={onSubmit} config={{ mode: 'onBlur' }}>
        <Label name="name" errorClassName="error">
          Name
        </Label>
        <TextField
          name="name"
          validation={{ required: true }}
          errorClassName="error"
        />
        <FieldError name="name" className="error" />

        <Label name="email" errorClassName="error">
          Email
        </Label>
        <TextField
          name="email"
          validation={{
            required: true,
            pattern: {
              value: /^[^@]+@[^.]+\..+$/,
              message: 'Please enter a valid email address',
            },
          }}
          errorClassName="error"
        />
        <FieldError name="email" className="error" />

        <Label name="message" errorClassName="error">
          Message
        </Label>
        <TextAreaField
          name="message"
          validation={{ required: true }}
          errorClassName="error"
        />
        <FieldError name="message" className="error" />

        <Submit>Save</Submit>
      </Form>
    </>
  )
}

export default ContactPage
Loading UI
useMutatiion の戻り値の tuple の二つ目の要素に Mutation に関する state を含む object が入っている。
処理の実行中は loading の flag を利用。
  const [create, { loading, error }] = useMutation<
    CreateContactMutation,
    CreateContactMutationVariables
  >(CREATE_CONTACT)


// ~~~ 省略 ~~~

        <Submit disabled={loading}>Save</Submit>
Success UI
処理の成功時は toast を出す。
Readwood は (react-hot-toast)[https://react-hot-toast.com/] を含んでいるので利用する。
useMutation の onCompleted callaback で toast を出す。
+ import { toast, Toaster } from '@redwoodjs/web/toast'

//  ~~~ 省略 ~~~

  const [create, { loading, error }] = useMutation<
    CreateContactMutation,
    CreateContactMutationVariables
  >(CREATE_CONTACT, {
+     onCompleted: () => {
+       toast.success('Thank you for your submission!')
+     },
  })

//  ~~~ 省略 ~~~

+       <Toaster />
      <Form onSubmit={onSubmit} config={{ mode: 'onBlur' }}>
Displaying Server Errors
server side の validation を追加し、適宜 fontend でエラーを表示する。
what format your data should be in is a concern of your business logic, and in a Redwood app the business logic lives in the Services!
ということで、service file に validation を追加。
Redwood は service の validation 用の utility も用意しているので利用する。
import type { Prisma } from '@prisma/client'

import { validate } from '@redwoodjs/api'

// ...

export const createContact = ({ input }: CreateContactArgs) => {
  validate(input.email, 'email', { email: true })
  return db.contact.create({ data: input })
}
validate(input.email, 'email', { email: true }
- 第一引数: validation 対象の値
- 第二引数: form での name
- 第三引数: validation directives (どの種類の validation を利用するか)
service 層で form での name を気にしなきゃいけないのはどうなんだろうか....
次に、frontend 側でエラーを表示。
Form に useMutation の error を渡し、FormError component を利用してエラーメッセージを表示。
import {
  FieldError,
  Form,
+   FormError,
  Label,
  TextField,
  TextAreaField,
  Submit,
  SubmitHandler,
} from '@redwoodjs/forms'

// ...

  const [create, { loading, error }] = useMutation<
    CreateContactMutation,
    CreateContactMutationVariables
  >(CREATE_CONTACT, {
    onCompleted: () => {
      toast.success('Thank you for your submission!')
    },
  })


// ...

+       <Form onSubmit={onSubmit} config={{ mode: 'onBlur' }} error={error}>
+         <FormError error={error} wrapperClassName="form-error" />
service validation で指定した TextField の name にもエラーメッセージが表示される。
e.g.) validate(input.email, 'email', { email: true } => name が "email" な TextField のエラーメッセージ表示

Success 後に form state の reset を行う。
Readwood が内部で使用している react-hook-form の useForm を @redwoodjs/forms から import して利用。
import {
  FieldError,
  Form,
  FormError,
  Label,
  Submit,
  TextAreaField,
  TextField,
+   useForm,
} from '@redwoodjs/forms'

// ...

const ContactPage = () => {
+   const formMethods = useForm({
+     mode: 'onBlur',
+   })
  const [create, { loading, error }] = useMutation<
    CreateContactMutation,
    CreateContactMutationVariables
  >(CREATE_CONTACT, {
    onCompleted: () => {
      toast.success('Thank you for your submission!')
+       formMethods.reset()
    },
  })

// ...

return (
  <>
    <Toaster />
    <Form
      onSubmit={onSubmit}
      config={{ mode: 'onBlur' }}
      error={error}
      formMethods={formMethods}
    >

// ...
完成
やったこと
- Graphql schema 作成 (自動生成)
- Service 作成 (自動生成)
- muation 呼び出し
- validation
- loading, success, error UI
完成形
import { MetaTags, useMutation } from '@redwoodjs/web'
import { toast, Toaster } from '@redwoodjs/web/toast'
import {
  FieldError,
  Form,
  FormError,
  Label,
  Submit,
  SubmitHandler,
  TextAreaField,
  TextField,
  useForm,
} from '@redwoodjs/forms'

import {
  CreateContactMutation,
  CreateContactMutationVariables,
} from 'types/graphql'

const CREATE_CONTACT = gql`
  mutation CreateContactMutation($input: CreateContactInput!) {
    createContact(input: $input) {
      id
    }
  }
`

interface FormValues {
  name: string
  email: string
  message: string
}

const ContactPage = () => {
  const formMethods = useForm()

  const [create, { loading, error }] = useMutation<
    CreateContactMutation,
    CreateContactMutationVariables
  >(CREATE_CONTACT, {
    onCompleted: () => {
      toast.success('Thank you for your submission!')
      formMethods.reset()
    },
  })

  const onSubmit: SubmitHandler<FormValues> = (data) => {
    create({ variables: { input: data } })
  }

  return (
    <>
      <MetaTags title="Contact" description="Contact page" />

      <Toaster />
      <Form
        onSubmit={onSubmit}
        config={{ mode: 'onBlur' }}
        error={error}
        formMethods={formMethods}
      >
        <FormError error={error} wrapperClassName="form-error" />

        <Label name="name" errorClassName="error">
          Name
        </Label>
        <TextField
          name="name"
          validation={{ required: true }}
          errorClassName="error"
        />
        <FieldError name="name" className="error" />

        <Label name="email" errorClassName="error">
          Email
        </Label>
        <TextField
          name="email"
          validation={{
            required: true,
            pattern: {
              value: /^[^@]+@[^.]+\..+$/,
              message: 'Please enter a valid email address',
            },
          }}
          errorClassName="error"
        />
        <FieldError name="email" className="error" />

        <Label name="message" errorClassName="error">
          Message
        </Label>
        <TextAreaField
          name="message"
          validation={{ required: true }}
          errorClassName="error"
        />
        <FieldError name="message" className="error" />

        <Submit disabled={loading}>Save</Submit>
      </Form>
    </>
  )
}

export default ContactPage
Chapter 4: Authentication
Authentication
Redwood includes two authentication paths out of the box:
- Self-hosted, where user credentials are stored in your own database
- Third-party hosted, where user credentials are stored with the third party
Redwood includes integrations for several of the most popular third-party auth providers:
- Auth0
- Clerk
- Netlify Identity
- Netlify GoTrue-JS
- Magic
- Nhost
- Firebase's GoogleAuthProvider
- Supabase
- SuperTokens
- WalletConnect
Auth Setup
Redwood の self-hosted な Auth を setup していく
yarn rw setup auth dbAuth
実行結果
✔ Overwrite existing /api/src/lib/auth.[jt]s? … yes
  ✔ Generating auth lib...
    ✔ Successfully wrote file `./api/src/lib/auth.ts`
    ✔ Successfully wrote file `./api/src/functions/auth.ts`
  ✔ Adding auth config to web...
  ✔ Adding auth config to GraphQL API...
  ✔ Adding required web packages...
  ✔ Installing packages...
  ✔ Adding SESSION_SECRET...
  ✔ One more thing...

    Done! But you have a little more work to do:

    You will need to add a couple of fields to your User ta
ble in order
    to store a hashed password and salt:

      model User {
        id                  Int @id @default(autoincrement(
))
        email               String  @unique
        hashedPassword      String    // <─┐
        salt                String    // <─┼─ add these lin
es
        resetToken          String?   // <─┤
        resetTokenExpiresAt DateTime? // <─┘
      }

    If you already have existing user records you will need
 to provide
    a default value for `hashedPassword` and `salt` or Pris
ma complains, so
    change those to:

      hashedPassword String @default("")
      salt           String @default("")

    If you expose any of your user data via GraphQL be sure
 to exclude
    `hashedPassword` and `salt` (or whatever you named them
) from the
    SDL file that defines the fields for your user.

    You'll need to let Redwood know what fields you're usin
g for your
    users' `id` and `username` fields. In this case we're u
sing `id` and
    `email`, so update those in the `authFields` config in
    `/api/src/functions/auth.js` (this is also the place to
 tell Redwood if
    you used a different name for the `hashedPassword`, `sa
lt`,
    `resetToken` or `resetTokenExpiresAt`, fields:`

      authFields: {
        id: 'id',
        username: 'email',
        hashedPassword: 'hashedPassword',
        salt: 'salt',
        resetToken: 'resetToken',
        resetTokenExpiresAt: 'resetTokenExpiresAt',
      },

    To get the actual user that's logged in, take a look at
 `getCurrentUser()`
    in `/api/src/lib/auth.js`. We default it to something s
imple, but you may
    use different names for your model or unique ID fields,
 in which case you
    need to update those calls (instructions are in the com
ment above the code).

    Finally, we created a SESSION_SECRET environment variab
le for you in
    /Users/satoshi/Documents/nbstsh/redwood-blog-tutorial/.
env. This value should NOT be checked
    into version control and should be unique for each envi
ronment you
    deploy to. If you ever need to log everyone out of your
 app at once
    change this secret to a new value and deploy. To create
 a new secret, run:

      yarn rw generate secret

    Need simple Login, Signup and Forgot Password pages? We
've got a generator
    for those as well:

      yarn rw generate dbAuth
Create a User Model
model User {
  id                  Int       @id @default(autoincrement())
  name                String?
  email               String    @unique
  hashedPassword      String
  salt                String
  resetToken          String?
  resetTokenExpiresAt DateTime?
}
- hashedPassword: stores the result of combining the user's password with a salt and then hashed
- salt: a unique string that combines with the hashedPassword to prevent rainbow table attacks
- resetToken: if the user forgets their password, dbAuth inserts a token in here that must be present when the user returns to reset their password
- resetTokenExpiresAt: a timestamp after which the resetToken will be considered expired and no longer valid (the user will need to fill out the forgot password form again)
Private Routes
+import { Private, Router, Route, Set } from '@redwoodjs/router'
import PostsLayout from 'src/layouts/PostsLayout'
import BlogLayout from 'src/layouts/BlogLayout'

const Routes = () => {
  return (
    <Router>
+      <Private unauthenticated="home">
        <Set wrap={PostsLayout}>
          <Route path="/admin/posts/new" page={PostNewPostPage} name="newPost" />
          <Route path="/admin/posts/{id:Int}/edit" page={PostEditPostPage} name="editPost" />
          <Route path="/admin/posts/{id:Int}" page={PostPostPage} name="post" />
          <Route path="/admin/posts" page={PostPostsPage} name="posts" />
        </Set>
+      </Private>
      <Set wrap={BlogLayout}>
        <Route path="/article/{id:Int}" page={ArticlePage} name="article" />
        <Route path="/contact" page={ContactPage} name="contact" />
        <Route path="/about" page={AboutPage} name="about" />
        <Route path="/" page={HomePage} name="home" />
      </Set>
      <Route notfound page={NotFoundPage} />
    </Router>
  )
}

export default Routes
<Private> component で囲った Routes は、ログインしていないと表示されない。
ログインしていない場合の redirect 先 の name を unauthenticated で指定。
e.g.) <Private unauthenticated="home"> => <Route path="/" page={HomePage} name="home" /> が表示される
@skipAuth
Remember, Redwood is secure by default—we'd rather you accidentally expose too little of your app than too much!
Redwood はデフォで secure な状態
自動生成した posts には @requireAuth が付与されている↓
  type Query {
    posts: [Post!]! @requireAuth
    post(id: Int!): Post @requireAuth
  }
ログインしていないユーザーにも公開したい場合は、意図的に @skipAuth directive を付与し、public にしてあげる必要がある
  type Query {
+    posts: [Post!]! @skipAuth
+    post(id: Int!): Post @requireAuth
  }
Login & Signup Pages
yarn rw g dbAuth
実行結果
yarn rw g dbAuth
(node:15788) ExperimentalWarning: stream/web is an experimental feature. This feature could change at any time
(Use `node --trace-warnings ...` to show where the warning was created)
  ✔ Creating pages...
    ✔ Successfully wrote file `./web/src/pages/SignupPage/SignupPage.tsx`
    ✔ Successfully wrote file `./web/src/pages/ResetPasswordPage/ResetPasswordPage.tsx`
    ✔ Successfully wrote file `./web/src/pages/LoginPage/LoginPage.tsx`
    ✔ Successfully wrote file `./web/src/pages/ForgotPasswordPage/ForgotPasswordPage.tsx`
  ✔ Adding routes...
  ✔ Adding scaffold import...
  ✔ One more thing...

    Pages created! But you're not done yet:

    You'll need to tell your pages where to redirect after a user has logged in,
    signed up, or reset their password. Look in LoginPage, SignupPage,
    ForgotPasswordPage and ResetPasswordPage for these lines:

      if (isAuthenticated) {
        navigate(routes.home())
      }

    and change the route to where you want them to go if the user is already
    logged in. Also take a look in the onSubmit() functions in ForgotPasswordPage
    and ResetPasswordPage to change where the user redirects to after submitting
    those forms.

    Oh, and if you haven't already, add the necessary dbAuth functions and
    app setup by running:

      yarn rw setup auth dbAuth

    Happy authenticating!
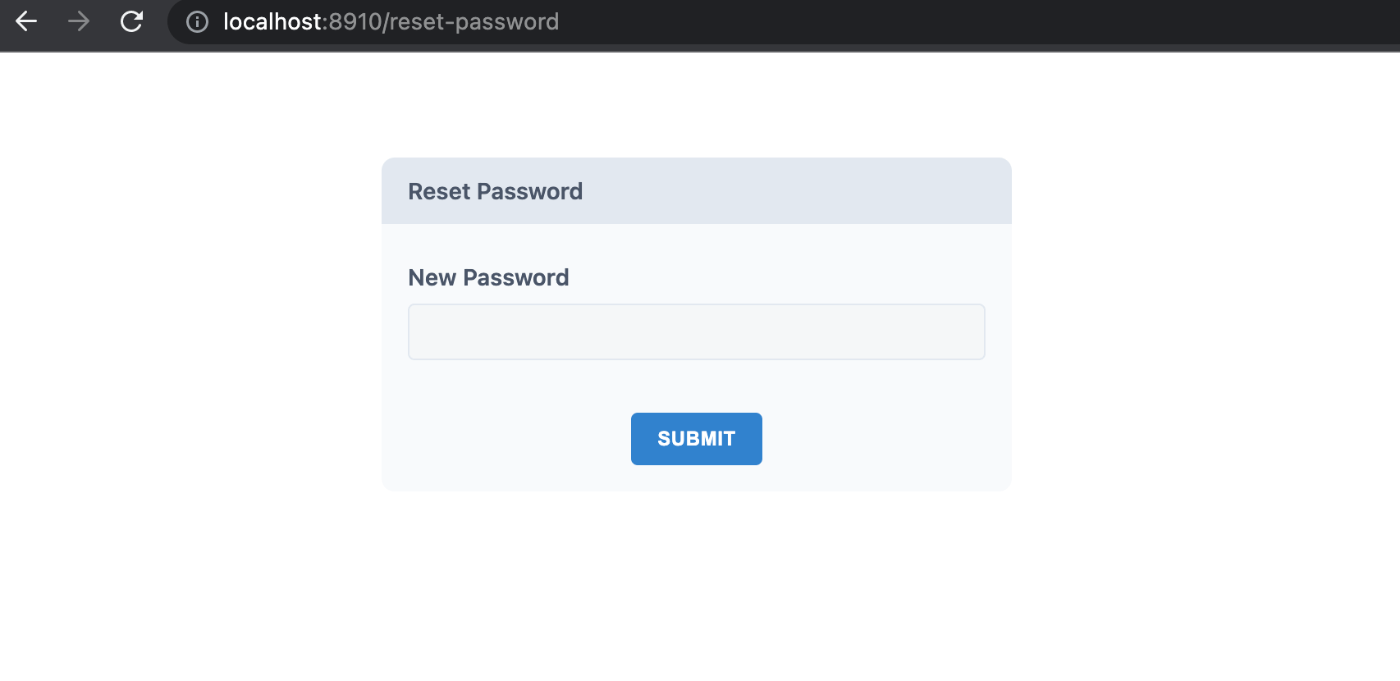
以下が自動生成される↓
-
Login Page
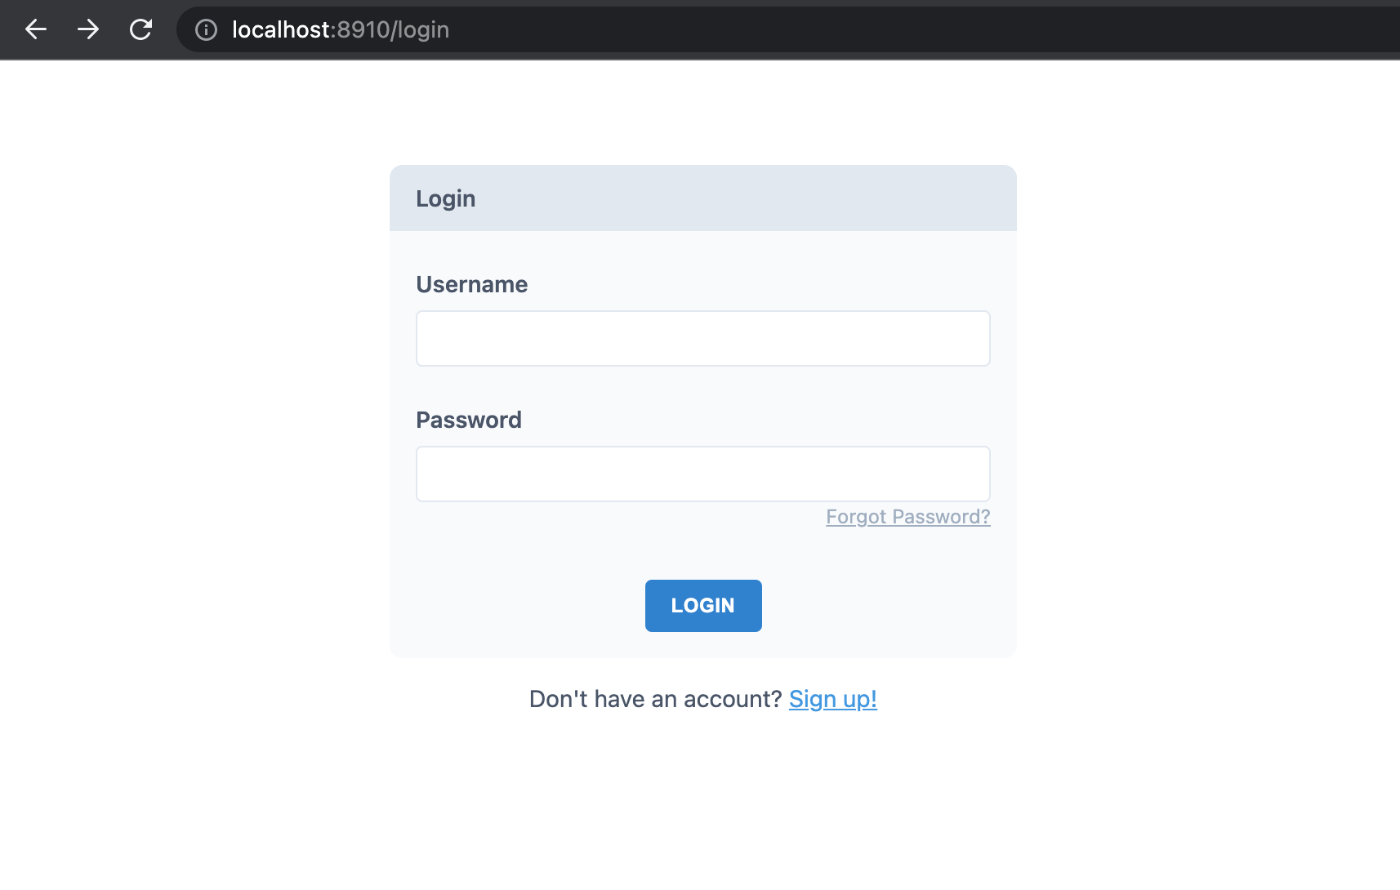
-
SignUp Page
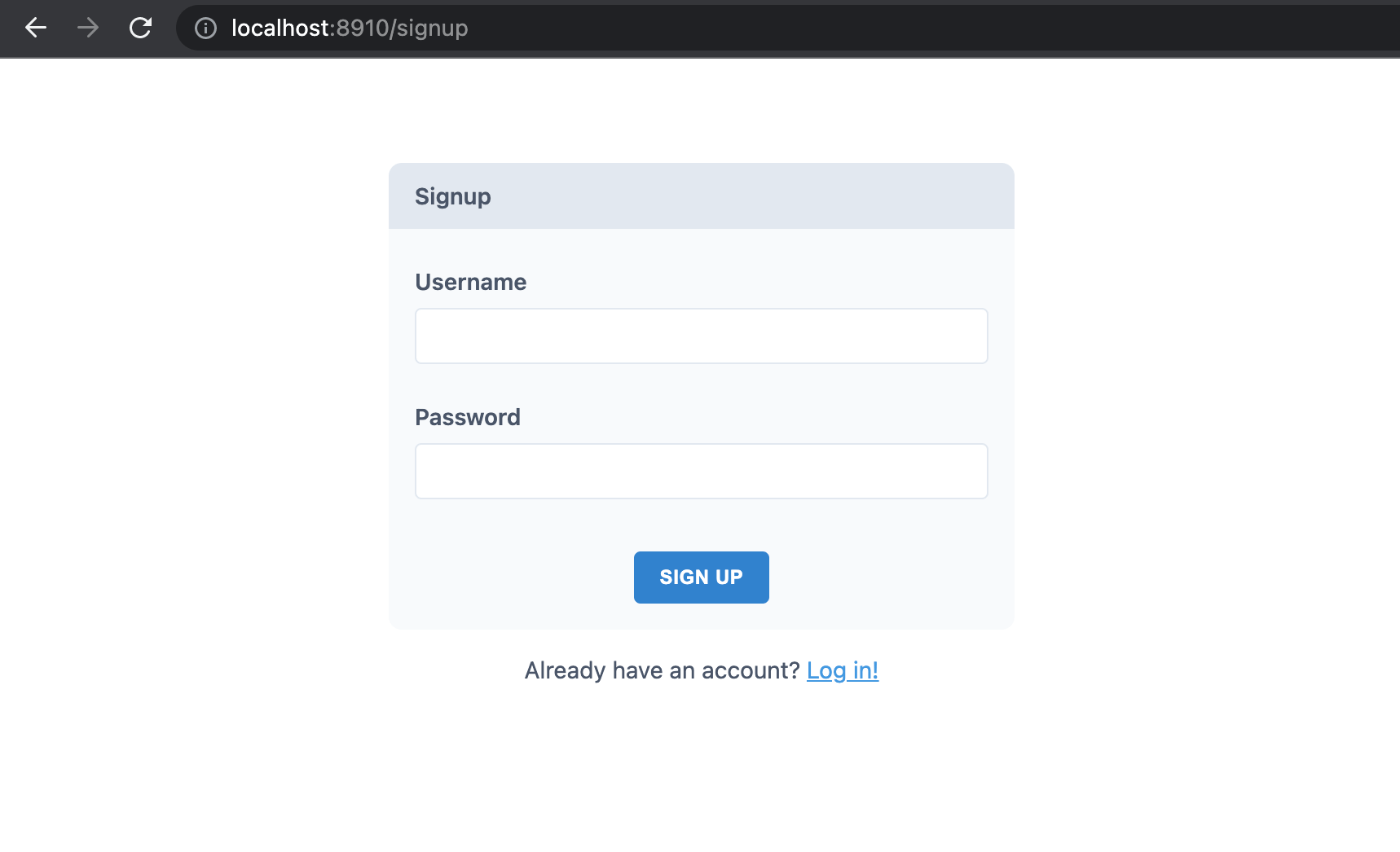
-
Forgot Password Page
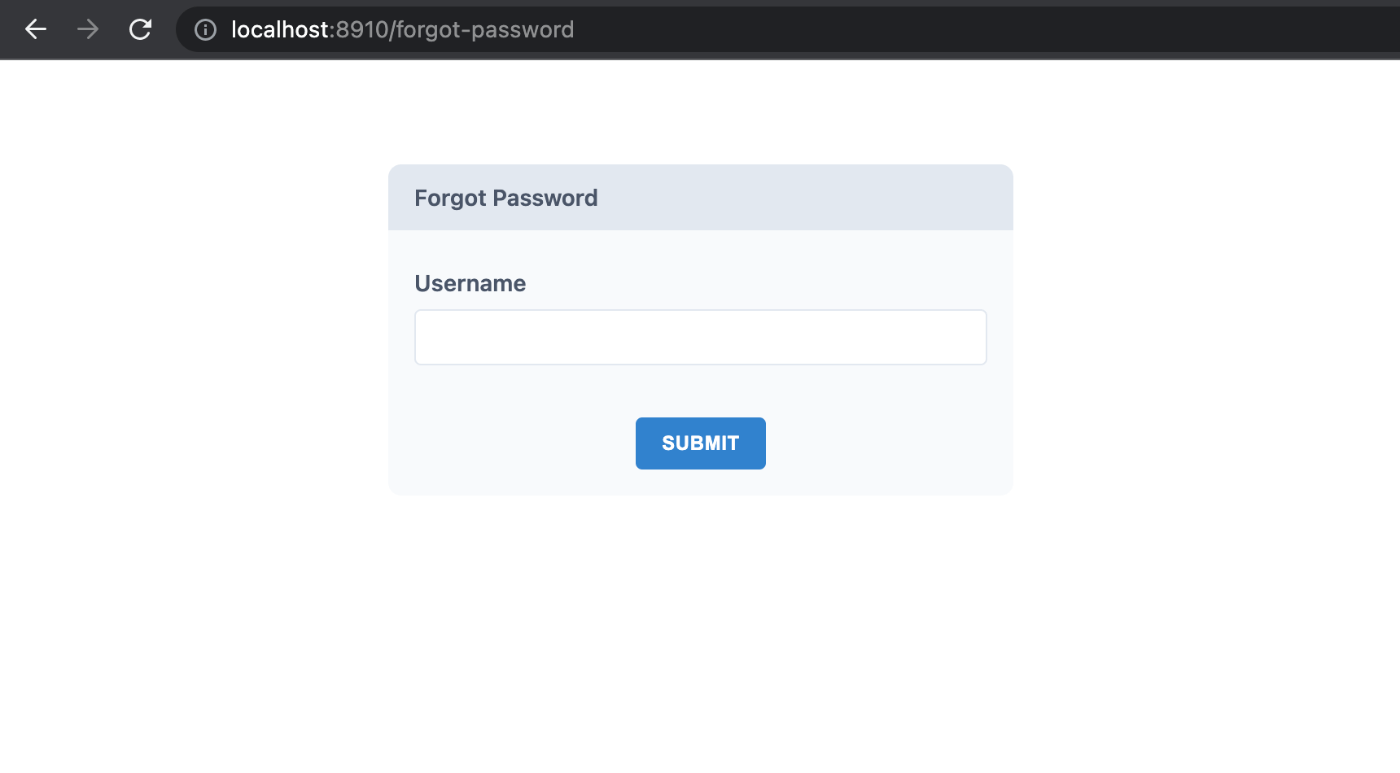
-
Reset Password Page
useAuth
Auth 関連の state, utility は useAuth を利用する。
以下は Layout にログイン済みならログインユーザーの情報とログアウトボタンを表示している。
+import { useAuth } from '@redwoodjs/auth'
import { Link, routes } from '@redwoodjs/router'

type BlogLayoutProps = {
  children?: React.ReactNode
}

const BlogLayout = ({ children }: BlogLayoutProps) => {
+  const { isAuthenticated, currentUser, logOut } = useAuth()

  return (
    <>
      <header>
        <div className="flex-between">
          <h1>
            <Link to={routes.home()}>Redwood Blog</Link>
          </h1>
+          {isAuthenticated ? (
+            <div>
+              <span>Logged in as {currentUser.email}</span>{' '}
+              <button type="button" onClick={logOut}>
+                Logout
+              </button>
+            </div>
+          ) : (
+            <Link to={routes.login()}>Login</Link>
+          )}
        </div>
        <nav>
          <ul>
            <li>
              <Link to={routes.home()}>Home</Link>
            </li>
            <li>
              <Link to={routes.about()}>About</Link>
            </li>
            <li>
              <Link to={routes.contact()}>Contact</Link>
            </li>
          </ul>
        </nav>
      </header>
      <main>{children}</main>
    </>
  )
}

export default BlogLayout
currentUser について
userAuth でアクセスする currentUser はどこからきているのか?
=> api/src/lib/auth.ts の getCurrentUser() の戻り値
export const getCurrentUser = async (session) => {
  return await db.user.findUnique({
    where: { id: session.id },
    select: { id: true },
  })
}
By default, the function that determines what's in currentUser only returns that user's id field for security reasons (better to expose too little than too much, remember!).
デフォでは、security の都合上 id のみが返却されるようになっている。
tutorial のように email も含ませたい場合は、getCurentUser() を更新する。
export const getCurrentUser = async (session) => {
  return await db.user.findUnique({
    where: { id: session.id },
+    select: { id: true, email: true},
  })
}
Session Secret
dbAuth の setup コマンドで .env に SESSION_SECRET が追加される。
SESSION_SECRET= big-random-string-of-numbers-and-letters
This is the encryption key for the cookies that are stored in the user's browser when they log in. This secret should never be shared, never checked into your repo, and should be re-generated for each environment you deploy to.
生成
encryption key 生成用のコマンドも用意されている。
yarn rw g secret
値を terminal に表示するだけなので、.env へのコピペは別途行う。
Chapter4: Deployment
Production DB
Railway に postgresql DB を用意
ログインすら必要ないので相当楽。(だだしすぐ使えなくなるが...)
Migration 実行
.env の DATABASE_URL を Railway に作成した DB のものに書き換え
DATABASE_URL=${postgresql の connection string}
prisma を postgresql 用に設定し直し、migration 実行
schema.prisma の provider を "postgresql" に更新
provider = "postgresql"
api/db/migrations (SQLite 用のものが入っている) を消し、prisma migrate dev 実行
yarn rw prisma migrate dev
Netlify
Netlify に deploy していく。
Netlify への deploy 環境 setup 用のコマンドがある..!
ので実行
yarn rw setup deploy netlify
Netlify に site 作成 (GitHub repository から import)
Netlify にログインし、Github repository から import する形で site を作成
環境変数設定
Site settings > Environment から以下2つの環境変数を設定する
-
DATABASE_URL: 先ほど Railway で作成した DB の connection url -
SESSION_SECRET:yarn rw g secretで生成した値
Deploy
Trigger Deploy ボタンを押して deploy
ここまでで前半戦終了。
後半は、Storybook や test 関連の話っぽい。
後半は毛色が若干違いそうなので、一旦このスクラップはここでクローズ。