graphql-yoga に入門する
graphql-yoga の quickstart をやる
Project setup
とりあえず ts の project setup
$ mkdir graphql-yoga-quickstart
$ cd graphql-yoga-quickstart
$ yarn init --yes
$ yarn add -D typescript ts-node-dev
graphql-yoga server
install dependencies
$ yarn add graphql @graphql-yoga/node
package.json はこんな感じ
{
  "name": "graphql-yoga-quickstart",
  "version": "1.0.0",
  "main": "index.js",
  "license": "MIT",
  "devDependencies": {
    "ts-node-dev": "^1.1.8",
    "typescript": "^4.6.3"
  },
  "dependencies": {
    "@graphql-yoga/node": "^2.3.0",
    "graphql": "^16.3.0"
  },
  "scripts": {
    "dev": "ts-node-dev src/main.ts"
  }
}
graphql server 作る
import { createServer } from '@graphql-yoga/node';

// Create your server
const server = createServer({
  schema: {
    typeDefs: /* GraphQL */ `
      type Query {
        hello: String
      }
    `,
    resolvers: {
      Query: {
        hello: () => 'Hello Hello Hello',
      },
    },
  },
});
// start the server and explore http://localhost:4000/graphql
server.start();
実行
$ yarn dev
完了!
Schema について
// Create your server
const server = createServer({
  schema: {
    typeDefs: /* GraphQL */ `
      type Query {
        hello: String
      }
    `,
    resolvers: {
      Query: {
        hello: () => 'Hello Hello Hello',
      },
    },
  },
});
You can simply provide type definitions and a resolver map based on the popular graphql-tools makeExecutableSchema pattern. You can learn more on the GraphQL Tools documentation
schema として、typeDefs と resolvers を含んだ object を渡しているが、こちらは graphql-tools の makeExecutableSchema にならっているとのこと。
Schema Building Library
You can also pass an existing GraphQLSchema instance to createServer. Use your favorite schema building library such as Pothos, gqtx, GraphQL Nexus or plain graphql-js schema classes.
ここで使用する schema には Code First Aproach の各種 schema building library を使えるみたい。
Pothos 気になるので後日試す
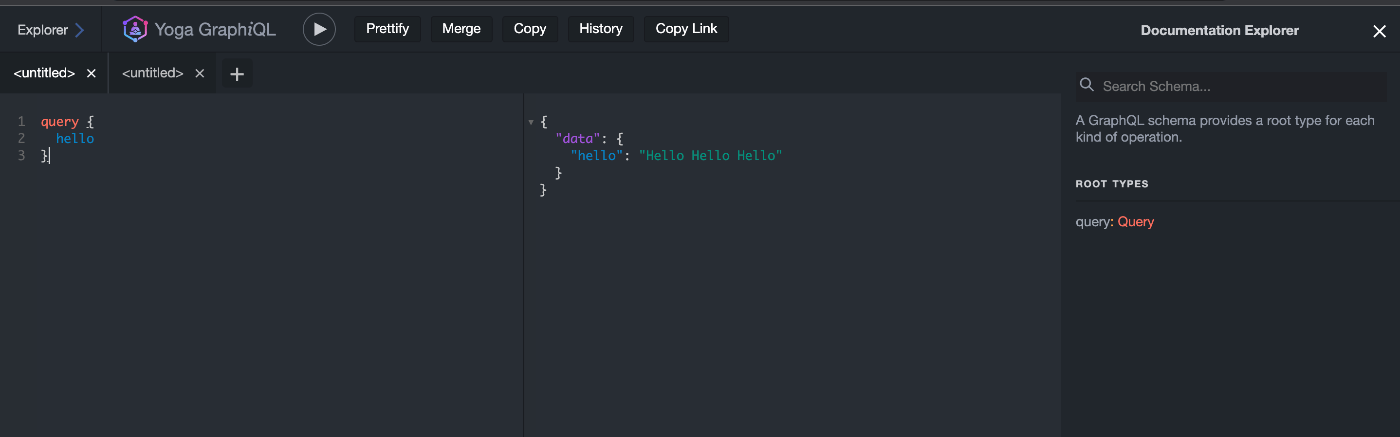
GraphiQL
graphql-yoga はデフォルトで GraphiQL がついてくる。
GraphiQL is an in-browser IDE for writing, validating, and testing GraphQL queries.
GraphiiQL とは、ブラウザで GraphQL を簡単に操作できる IDE。

GraphiQL の設定
const server = createServer({
  graphiql: {
    defaultQuery: /* GraphQL */ `
      query {
        hello
      }
    `,
  },
})
GraphiQL を disable
const server = createServer({
  graphiql: false,
})
Error Masking
Yoga uses the Envelop useMaskedErrors for automatically masking unexpected errors and preventing sensitive information leaking to clients.
Yoga は sensitive information が含まれるエラーメッセージを自動的にマスクしてくれる。(裏側で Envelop の useMaskedErrors plugin が使用されている。 )
例
import { createServer } from '@graphql-yoga/node'
import { fetch } from 'cross-undici-fetch'

// Provide your schema
const server = createServer({
  schema: {
    typeDefs: /* GraphQL */ `
      type Query {
        greeting: String!
      }
    `,
    resolvers: {
      Query: {
        greeting: async () => {
          // This service does not exist
          const greeting = await fetch('http://localhost:9876/greeting').then(
            (res) => res.text(),
          )

          return greeting
        },
      },
    },
  },
})

// Start the server and explore http://localhost:4000/graphql
server.start()
greeting を query するとエラーが起きる。
{
  greeting
}
エラーメッセージにはエラーの詳細は書かれていない (マスクされている)
{
  "errors": [
    {
      "message": "Unexpected error.",
      "locations": [
        {
          "line": 2,
          "column": 3
        }
      ],
      "path": ["greetings"]
    }
  ],
  "data": null
}
dev 環境でのデバッグ
Instead we recommend enabling the Yoga development mode.
To do this you need to start Yoga with the NODE_ENV environment variable set to "development".
NODE_ENV を "development" に設定すればエラーがマスクされずに詳細なエラーが返されるようになる。
NODE_ENV を "development" にして graphql server を動かす↓
NODE_ENV=development ts-node-dev src/main.ts
{
  "errors": [
    {
      "message": "Unexpected error.",
      "locations": [
        {
          "line": 2,
          "column": 3
        }
      ],
      "path": [
        "greeting"
      ],
+      "extensions": {
+        "originalError": {
+          "message": "fetch failed",
+          "stack": "TypeError: fetch failed\n    at Object.processResponse (/Users/satoshi/Documents/nbstsh/graphql-yoga-quickstart/node_modules/undici/lib/fetch/index.js:200:23)\n    at /Users/satoshi/Documents/nbstsh/graphql-yoga-quickstart/node_modules/undici/lib/fetch/index.js:941:38\n    at node:internal/process/task_queues:141:7\n    at AsyncResource.runInAsyncScope (node:async_hooks:199:9)\n    at AsyncResource.runMicrotask (node:internal/process/task_queues:138:8)\n    at processTicksAndRejections (node:internal/process/task_queues:96:5)"
+        }
+      }
    }
  ],
  "data": null
}
client へ渡したい意図的なエラー
Error を throw する代わりに GraphQLYogaError を throw すると、そのエラーメッセージはマスクされずにそのまま client へ伝わる。
import { createServer, GraphQLYogaError } from '@graphql-yoga/node'

const users = [
  {
    id: '1',
    login: 'Laurin',
  },
  {
    id: '2',
    login: 'Saihaj',
  },
  {
    id: '3',
    login: 'Dotan',
  },
]

// Provide your schema
const server = createServer({
  schema: {
    typeDefs: /* GraphQL */ `
      type User {
        id: ID!
        login: String!
      }
      type Query {
        user(byId: ID!): User!
      }
    `,
    resolvers: {
      Query: {
        user: async (_, args) => {
          const user = users.find((user) => user.id === args.byId)
          if (!user) {
            throw new GraphQLYogaError(`User with id '${args.byId}' not found.`)
          }

          return user
        },
      },
    },
  },
})

// Start the server and explore http://localhost:4000/graphql
server.start()
存在しない userId で user を query
query {
  user(byId: "6") {
    id
  }
}
ちゃんとエラーメッセージが表示されている
{
  "errors": [
    {
      "message": "User with id '6' not found.",
      "locations": [
        {
          "line": 2,
          "column": 3
        }
      ],
      "path": ["user"]
    }
  ],
  "data": null
}
Error に metadata を付与
任意のobject を GraphQLYogaError の第二引数に渡すことで、Error Code などの付帯情報を client へ受け渡すことが可能。
受け渡した object は "extensions" field に入る。
      Query: {
        user: async (_, args) => {
          const user = users.find((user) => user.id === args.byId)
          if (!user) {
            throw new GraphQLYogaError(
              `User with id '${args.byId}' not found.`,
              // error extensions
+              {
+                code: 'USER_NOT_FOUND',
+              },
            )
          }

          return user
        },
      },
{
  "errors": [
    {
      "message": "User with id '6' not found.",
      "locations": [
        {
          "line": 2,
          "column": 3
        }
      ],
      "path": ["user"],
+      "extensions": {
+        "code": "USER_NOT_FOUND"
+      }
    }
  ],
  "data": null
}
Error Masking を disable
We highly recommend using error masking. However, you can still disable it using the maskedErrors config option.
おすすめされてはいないが、Error Masking は無効化も可能
createServer({
  maskedErrors: false,
})
Subscriptions
GraphQL Yoga uses server-sent-events for the subscription protocol. You don't need any extra packages to use subscriptions.
GraphQL Yoga は server-sent-events を利用して subscription を実現している。
Quick start
とりあえず試す
import { createServer } from '@graphql-yoga/node'

// Provide your schema
const server = createServer({
  schema: {
    typeDefs: /* GraphQL */ `
      type Subscription {
        countdown(from: Int!): Int!
      }
    `,
    resolvers: {
      Subscription: {
        countdown: {
          // This will return the value on every 1 sec until it reaches 0
          subscribe: async function* (_, { from }) {
            for (let i = from; i >= 0; i--) {
              await new Promise((resolve) => setTimeout(resolve, 1000))
              yield { countdown: i }
            }
          },
        },
      },
    },
  },
})

server.start()
以下を GraphiQL から実行すると、1秒おきに 5, 4, 3, ... と response が帰ってくる。
subscription {
  countdown(from: 5)
}
Pubsub
GraphQL Yoga comes with a built-in PubSub (publish/subscribe) bus
pubSub を使うとシンプルに subscription の実装ができる。
import { createServer, createPubSub } from '@graphql-yoga/node'

const pubSub = createPubSub()

// Provide your schema
const server = createServer({
  typeDefs: /* GraphQL */ `
    type Subscription {
      randomNumber: Float!
    }

    type Mutation {
      broadcastRandomNumber: Boolean
    }
  `,
  resolvers: {
    Subscription: {
      randomNumber: {
        // subscribe to the randomNumber event
        subscribe: () => pubSub.subscribe('randomNumber'),
        resolve: (payload) => payload,
      },
    },
    Mutation: {
      broadcastRandomNumber: (_, args) => {
        // publish a random number
        pubSub.publish('randomNumber', Math.random())
      },
    },
  },
})

server.start()
randomNumber を subscribe した状態で、
subscription {
    randomNumber
}
broadcastRandomNumber mutation を叩くと、
mutation {
  broadcastRandomNumber
}
randomNumber を subscribe した GraphiQL でランダムな数値が返ってくる。
{
  "data": {
    "randomNumber": 0.9211582212918947
  }
}
Topic
pubsub の topic は型安全にできる!これはありがたい!
const pubSub = createPubSub<{
  randomNumber: [randomNumber: number],
}>()

pubsub.subscribe('randomNumber')

// This is now type-safe.
pubSub.publish('randomNumber', 1)

// This causes a TypeScript error.
pubSub.publish('randomNumber')

// This causes a TypeScript error.
pubSub.publish('event does not exist')
createPubSub() の generics についてメモ
ポイント: tuple の最後の値が payload になる
tuple の要素がひとつ以下
=> その値が payload
const pubSub = createPubSub<{
  // event has no payload
  'event:without:payload': []
  // event has payload of type number
  'event:payload:number': [payload: number]
  // event has payload of type { foo: number }
  'event:payload:obj': [payload: { foo: number }]
}>()

pubSub.publish('event:without:payload')
pubSub.publish('event:payload:number', 12)
pubSub.publish('event:payload:obj', { foo: 1 })
tuple の要素が2つ
=> 1つ目は識別子、2つ目が payload
const pubSub = createPubSub<{
  'user:followerCount': [userId: string, payload: { followerCount: number }]
}>()

const userId1 = '420'
const userId2 = '69'

// the userId argument is enforced by the TypeScript compiler.
pubSub.subscribe('user:followerCount', userId1)
pubSub.subscribe('user:followerCount', userId2)

pubSub.publish('user:followerCount', userId1, { followerCount: 30 })
pubSub.publish('user:followerCount', userId2, { followerCount: 12 }
Distributed pub/sub for production
server の instance が複数存在する場合、Yoga noデフォルトの in-memory pubsub は機能しなくなってしまうので注意が必要
The createPubSub function allows you to specify a custom EventTarget implementation, which can use an external datastore for distributing the events across all server replicas such as Redis Pub/Sub or Kafka.
外部の datastore を利用して、この問題を解消することができる。
const pubSub = createPubSub({
  eventTarget: redisEventTarget,
})
Currently GraphQL Yoga does not have any concrete EventTarget implementations other than the default in-memory one. Implementations for Redis and Kafka will follow soon.
がしかし、具体的な実装例はまだないてことかな...?
production 運用するには検討が必要かしら
Adavnced
- event の filtering や map
- 初期値の配信
- 複数の topic の merrge
Yoga uses and re-exports Repeater.js ("The missing constructor for creating safe async iterators") for providing a friendly developer experience.
subscription は async iterator を土台に成り立っているんでけど、Yoga は内部で async iterator を安全に利用するための Repeater.js というライブラリを使っているとのこと。
複数の topic の merrge はガッツリこの Repeater.js を使って実現する。
File Upload
yoga ではかなり容易に file upload を実装できる。
In GraphQL Yoga, you consume uploaded files or blobs as WHATWG standard File or Blob objects you might be familiar from the browser's API.
upload した file はおなじみの File や Blob として扱えるとのこと!
作ってみる
You only need to add a scalar type definition for file uploads in your schema. The name of the scalar doesn't matter. Let's use File in this example.
やることは、
- file upload 用の scalr type を用意 (名前はなんでも良い. 例では "File" としている)
- 1 で用意した scalar を引数に受け取る file upload 用の mutation を作成
以上!
import { createServer } from '@graphql-yoga/node'

// Provide your schema
const server = createServer({
  schema: {
    typeDefs: /* GraphQL */ `
      scalar File

      type Mutation {
        readTextFile(file: File!): String!
      }
    `,
    resolvers: {
      Mutation: {
        /**
         * TypeScript type `File` is globally available.
         * You don't need to install/import anything else
         * for both `File` GraphQL Scalar and this type
         */
        readTextFile: async (_, { file }: { file: File }) => {
          const textContent = await file.text()
          return textContent
        },
      },
    },
  },
})
// Start the server and explore http://localhost:4000/graphql
server.start()
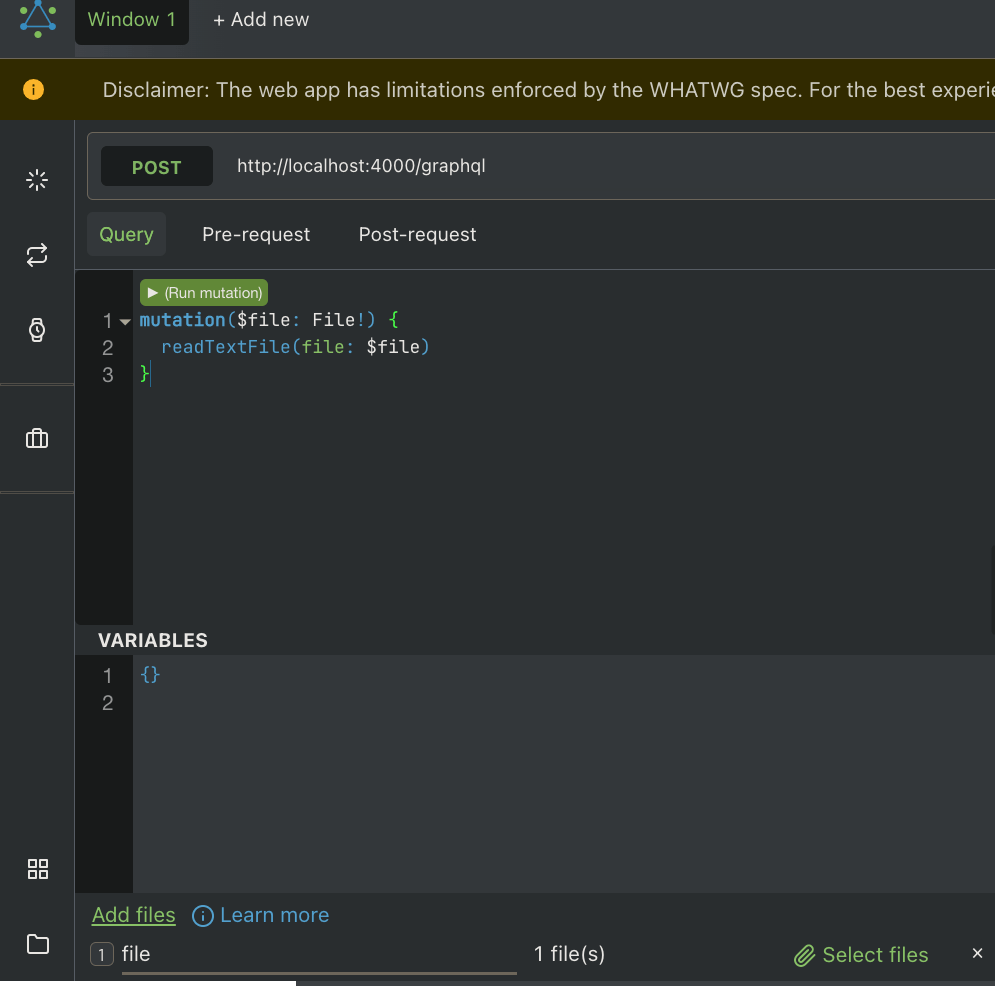
動作確認
ざっと調べた限り、GraphiQL IDE だと file upload ができないので、代わりに Altaier を使う
画面左下の "Add files" から file を選択して file を送信できる
Use Envelop Plugins within GraphQL Yoga
GraphQL Yoga uses Envelop under the hood so you can easily extend your server's capabilities with the plugins from Envelop Ecosystem
GraphQL Yoga は Envelop をベースに作成されているため、Envelop Ecosystem の提供する多様な plugin を活用して、容易に server の機能を拡張することが可能。
以下は Envelop GraphQL JIT Plugin を追加する例。
import { useGraphQLJit } from '@envelop/graphql-jit'
import { createServer } from '@graphql-yoga/node'

// Provide your schema
const server = createServer({
  schema: {
    typeDefs: /* GraphQL */ `
      type Query {
        greetings: String!
      }
    `,
    resolvers: {
      Query: {
        greetings: () => 'Hello World!',
      },
    },
  },
  plugins: [useGraphQlJit()],
})

// Start the server and explore http://localhost:4000/graphql
server.start()
Testing
yoga の server instance (createServer() の戻り値) は test 用の utility を提供してくれている。
inject()fetch()
この二つを利用して test を書くことも可能だし、express の test でお馴染みの supretest に yoga の server instance を渡して test を書くことも可能。
inject()
import { createServer } from '@graphql-yoga/common'

const yoga = createServer()

const response = await yoga.inject({
  document: '{ greetings }',
})

console.assert(response.status === 200, 'Response status should be 200')
const executionResult = await response.json()
console.assert(
  executionResult.data.greetings ===
    'This is the `greetings` field of the root `Query` type',
  `Expected 'This is the `greetings` field of the root `Query` type' but got ${executionResult.data.greetings}`,
)
fetch()
import { createServer } from '@graphql-yoga/common'

const response = await yoga.fetch('http://localhost:4000/graphql', {
  method: 'POST',
  headers: {
    'Content-Type': 'application/json',
  },
  body: JSON.stringify({
    query: '{ greetings }',
  }),
})

console.assert(response.status === 200, 'Response status should be 200')
const executionResult = await response.json()
console.assert(
  executionResult.data.greetings ===
    'This is the `greetings` field of the root `Query` type',
  `Expected 'This is the `greetings` field of the root `Query` type' but got ${executionResult.data.greetings}`,
)
supertest を利用
import { createServer } from '@graphql-yoga/node'
import request from 'supertest'
import { deepEqual } from 'assert'

const yoga = createServer()

const response = await request(yoga).post('/graphql').send({
  query: '{ greetings }',
})

deepEqual(response.status, 200)
deepEqual(
  response.body.data.greetings,
  'This is the `greetings` field of the root `Query` type',
)
3種類の test 手法の比較 (vitest 利用)
import { createServer } from '@graphql-yoga/node';

export const server = createServer({
  schema: {
    typeDefs: /* GraphQL */ `
      type Query {
        greeting: String!
      }
    `,
    resolvers: {
      Query: {
        greeting: () => {
          return `Hello World`;
        },
      },
    },
  },
});
import request from 'supertest';
import { describe, expect, it } from 'vitest';
import { server } from './server';

describe('Using inject', () => {
  it('should query greeting message.', async () => {
    const res = await server.inject({
      document: /* GraphQL */ `
        query {
          greeting
        }
      `,
    });

    expect(res.response.status).toBe(200);
    expect(res.executionResult?.data).toEqual({
      greeting: 'Hello World',
    });
  });
});

describe('Using fetch to test just like browsers on any JS environment', () => {
  it('should query greeting message', async () => {
    const response = await server.fetch('http://localhost:4000/graphql', {
      method: 'POST',
      headers: {
        'Content-Type': 'application/json',
      },
      body: JSON.stringify({
        query: '{ greeting }',
      }),
    });

    expect(response.status).toBe(200);

    const json = await response.json();
    expect(json?.data).toEqual({
      greeting: 'Hello World',
    });
  });
});

describe('Using supertest for Node.js', () => {
  it('should query greeting message', async () => {
    const response = await request(server).post('/graphql').send({
      query: '{ greeting }',
    });

    expect(response.status).toBe(200);
    expect(response.body?.data).toEqual({
      greeting: 'Hello World',
    });
  });
});
Apollo Federation with GraphQL Yoga
Envelop の Apollo Federation plugin を利用すれば Apollo Federation 対応も可能。
Gateway、Federation Service どちらでも Yoga で対応できる。
GraphQL Context
There are 4 steps that GraphQL Yoga follows to generate the final context object;
Default Context -> Server Context -> User Context -> Envelop Plugins
Context は 4 つの step がある。
1. Default Context
デフォで入ってくるもの
- query: The DocumentNode that was parsed from the GraphQL query string
- request: WHATWG Request object that represents the incoming HTTP request in platform-independent way
- operationName: The operation name selected from the incoming query
- variables: The variables that were defined in the query
- extensions: The extensions that were received from the client
2. Server Context
Yoga server を別の framework (Express, Next.js, Fastify, Koa, etc...) で使用する際に、提供されるそれらの framework ごとに異なる server の情報。
3. User Context
一般的に "GraphQL の context" の文脈で指し示すのがこの context。リクエストごとの User の認証情報を受け渡す際などに利用されるやつ。
createServer() の context field に factory function を渡すことで設定。
import { createServer } from '@graphql-yoga/node';

export const server = createServer({
  // others...

  context: async ({ request}) => {
    const user = await getUserByToken(request.headers.get('authorization'))
    return {
      user,
    }
  }
});
4. Envelop Plugins
Envelop plugin も context にアクセスし、必要に応じてデータを context に受け渡す。
所感
setup が簡単だし、クセがなくsimple に GraphQL server を作れる感じはした。
Envelop による拡張性も期待できる。(Envelop はこれからみていくのでまだわからないが...)
ただ、Document が充実しているとはいえないのが難点かな...
Apollo と比べると Production 投入するにはちょっと不安が残る...
とはいうものの、The Guild がバックについているのはデカイので引き続きチェックしていきたい。
GraphQL Yoga 2.0 ってつい最近リリースされたのか...! そしたら Docs もこれから改善されていくかしら
The Guild took over the development of GraphQL Yoga from Prisma in early 2021, and with the growing community of tools in the GraphQL space, most recently Envelop, we were able to rewrite GraphQL Yoga 2.0 from scratch with easy setup, performance, and developer experience at the core.
元々 Prisma が作ってたのか
Built on top of a modular and extendable GraphQL Server, Yoga v2 allows you to use your preferred schema design approach and HTTP server library.
modular and extendable GraphQL Server は正しくその通りで、気に入ってるポイント。
GraphQL Yoga v2 has been built in production for production usage.
Production ready とはいってるな
We continue our effort of pushing GraphQL Yoga to more production environments with the imminent release of Redwood 1.0 that uses Yoga 2.0 as its default GraphQL server.
Redwood 気になってた!Yoga デフォで使ってるのか..!