Electron はじめてみる
とりあえず、公式 docs の quickstart と Tutorial やる
Electron Forge とは
Tutorial で Electron Forge が出てくるが、これが何者なのかよくわからなかったので調べる
Electron Forge is an all-in-one tool for packaging and distributing Electron applications.
便利な all-in-one-tool らしいけど、Electron を利用する上では別に必須ではないのかしら?
Why Electron Forge
packaging と distribution は、Electron 自身が何か解決策を提供しているわけではなく、開発者側で面倒を見る必要があると。
ただ、こんな感じ↓でやることが多くてめんどい...
- Application packaging (electron-packager)
- Code signing (e.g. @electron/osx-sign)
- Creating platform-specific installers (e.g. electron-winstaller or electron-installer-dmg).
- Native Node.js module rebuilding (electron-rebuild)
- Universal macOS builds (@electron/universal)
Electron Forge はこのめんどいタスクを最低限の労力でできるようにするためのツールって感じだな
Electron Builder とは何が違う?
調べてると Electron Builder ってのが出てきて困惑していたんだけど、Electron Forge の docs に記載あった。
Electron Forge can be considered an alternative to Electron Builder, which fulfills the same use-case for application building and publishing.
両者ともにやってることは基本同じ。application building and publishing のためのツール。
The key difference in philosophy between the two projects is that Electron Forge focuses on combining existing first-party tools into a single build pipeline, while Builder rewrites its own in-house logic for most build tasks.
思想の違いがあるとのこと。
Electron Forge は既存の "first-party tools" の組み合わせで成り立つのに対し、Electron Builder は独自の路線を走っているらしい。
Electron Forge の利点
- Forge receives new features for application building as soon as they are supported in Electron
新しい機能を提供するツールがでたら、すぐにそのツールを組み合わせることができる。
- Forge's multi-package architecture makes it easier to understand and extend.
用意に理解できるし、拡張もできる。
個人的には、Electron Forge で良さそうだな
React + TypeScript で開発したい
Electron の UI を React + TypeScript で開発したいので、セットアップ方法調べる。
Webpack + TypeScript
Electron Forge が Webpack + TypeScript の template で project を scaffold するコマンドを提供してたのでまずはこちらを利用する。
yarn create electron-app my-new-app --template=webpack-typescript
この issue と同じエラーが生じる...
エラー解消
yarn の version を 3.x に固定
yarn set version 3.x
Plug'n'Play を利用せず、node_modules を普通に利用するよう変更
yarnPath: .yarn/releases/yarn-3.6.4.cjs
nodeLinker: node-modules
これでとりあえずエラー解消
yarn start でちゃんと dev server 立ち上がる
yarn start
HMR 効くぞ、いい感じ
React セットアップする
Electron Forge の公式 docs に React + TypeScript についてのページ用意されてたので参考に進めていく
tsconfig を更新
"jsx": "react-jsx" を追加
{
  "compilerOptions": {
    "target": "ES6",
    "allowJs": true,
    "module": "commonjs",
    "skipLibCheck": true,
    "esModuleInterop": true,
    "noImplicitAny": true,
    "sourceMap": true,
    "baseUrl": ".",
    "outDir": "dist",
    "moduleResolution": "node",
    "resolveJsonModule": true,
+    "jsx": "react-jsx",
    "paths": {
      "*": ["node_modules/*"]
    }
  },
  "include": ["src/**/*"]
}
react 関連の deps を追加
yarn add react react-dom
yarn add --dev @types/react @types/react-dom
React 書いていく
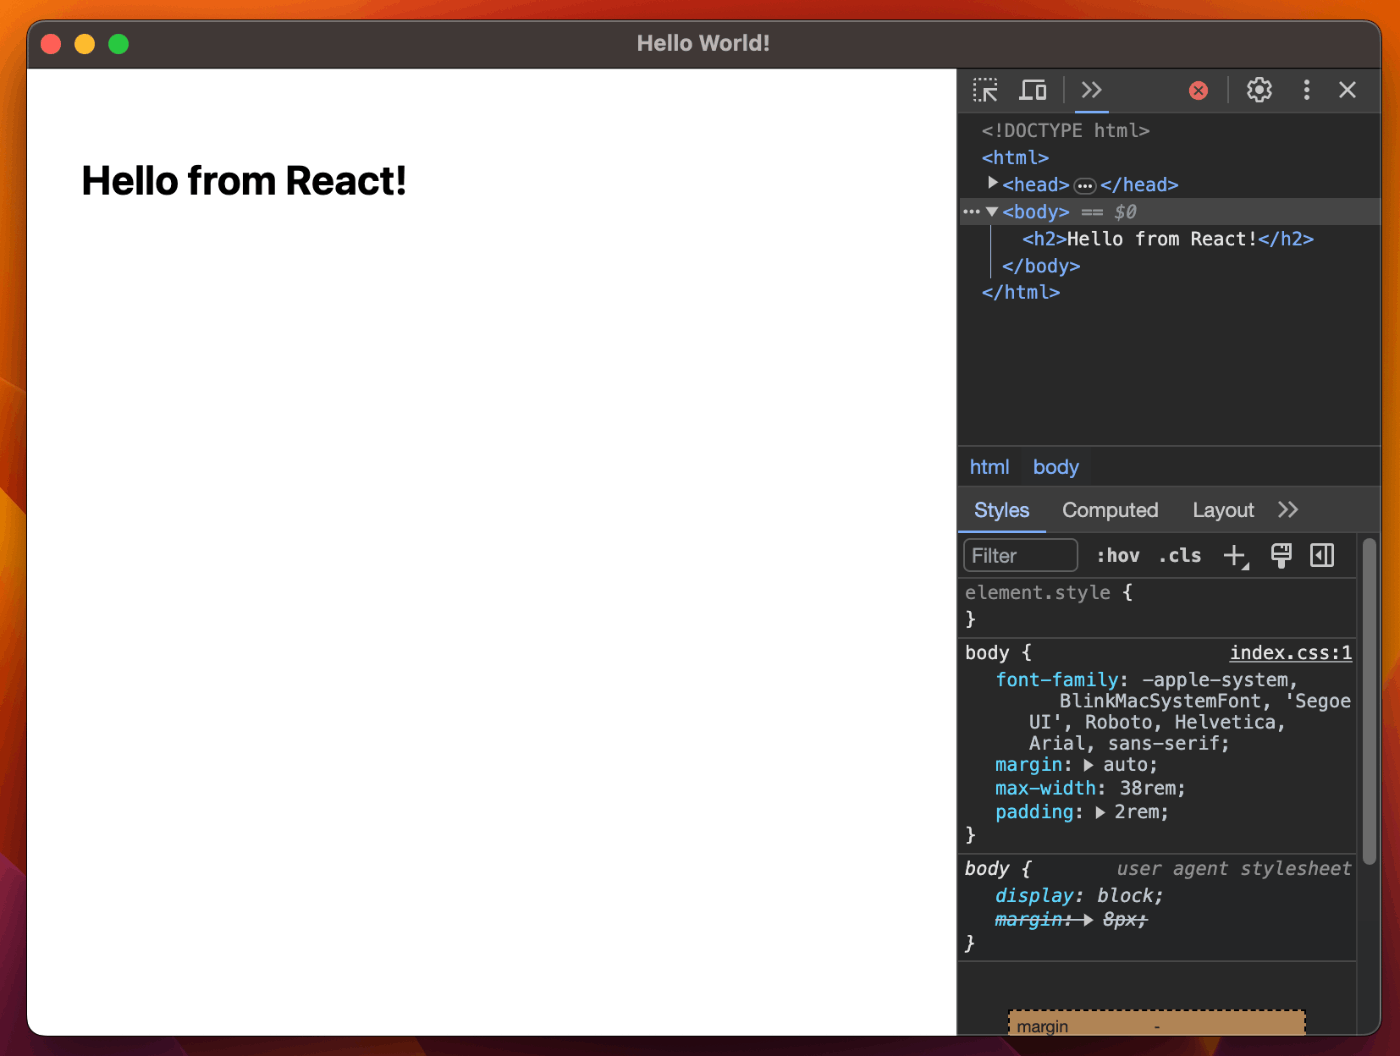
app.tsx を作成
import * as ReactDOM from 'react-dom';

function render() {
  ReactDOM.render(<h2>Hello from React!</h2>, document.body);
}

render();
renderer.ts で app.tsx を import すればOK
// Add this to the end of the existing file
import './app';
webpack plugin
webpack config file が4種類生成されているので、それぞれ何者なのか気になる...
├── webpack.main.config.ts
├── webpack.plugins.ts
├── webpack.renderer.config.ts
├── webpack.rules.ts
scaffold 時に自動で設定されている webpack plugin について見ていく
plugin configuration
You must provide two webpack configuration files: one for the main process in mainConfig, and one for the renderer process in renderer.config. The complete config options are available in the API docs under WebpackPluginConfig.
- main process 用の webpack configuration file
- renderer proocess 用の webpack configuration file
この 2 種類はマスト
forge.config.ts file でそれぞれの webpack configuration file を指定している↓
import type { ForgeConfig } from '@electron-forge/shared-types';
import { MakerSquirrel } from '@electron-forge/maker-squirrel';
import { MakerZIP } from '@electron-forge/maker-zip';
import { MakerDeb } from '@electron-forge/maker-deb';
import { MakerRpm } from '@electron-forge/maker-rpm';
import { AutoUnpackNativesPlugin } from '@electron-forge/plugin-auto-unpack-natives';
import { WebpackPlugin } from '@electron-forge/plugin-webpack';

import { mainConfig } from './webpack.main.config';
import { rendererConfig } from './webpack.renderer.config';

const config: ForgeConfig = {
  packagerConfig: {
    asar: true,
  },
  rebuildConfig: {},
  makers: [new MakerSquirrel({}), new MakerZIP({}, ['darwin']), new MakerRpm({}), new MakerDeb({})],
  plugins: [
    new AutoUnpackNativesPlugin({}),
    new WebpackPlugin({
      mainConfig,
      renderer: {
        config: rendererConfig,
        entryPoints: [
          {
            html: './src/index.html',
            js: './src/renderer.ts',
            name: 'main_window',
            preload: {
              js: './src/preload.ts',
            },
          },
        ],
      },
    }),
  ],
};

export default config;
package.json の設定
main entry は ./.webpack/main にする
{
  "name": "my-app",
  "main": "./.webpack/main",
  // ...
}
参照している file は、いつの間にか生成されている .webpack directory 下の file
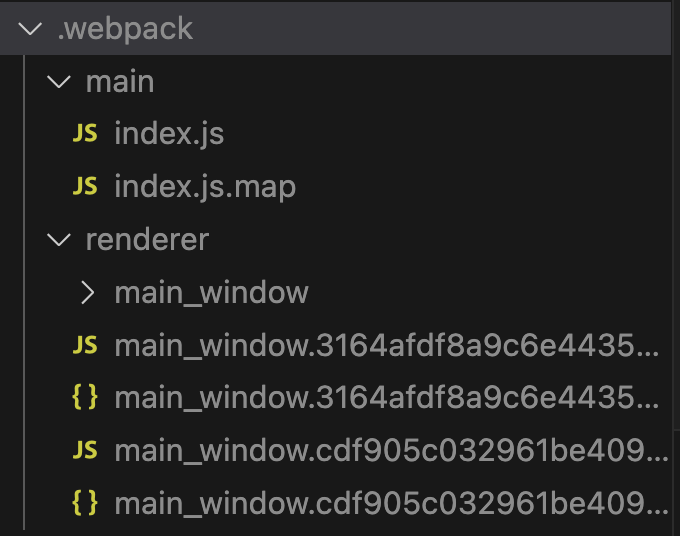
Main process code
Second, all loadURL and preload paths need to reference the magic global variables that this plugin will define for you.
declare const MAIN_WINDOW_WEBPACK_ENTRY: string;
declare const MAIN_WINDOW_PRELOAD_WEBPACK_ENTRY: string;

//...


const createWindow = (): void => {
  // Create the browser window.
  const mainWindow = new BrowserWindow({
    height: 600,
    width: 800,
    webPreferences: {
      preload: MAIN_WINDOW_PRELOAD_WEBPACK_ENTRY,
    },
  });

  // and load the index.html of the app.
  mainWindow.loadURL(MAIN_WINDOW_WEBPACK_ENTRY);

  // Open the DevTools.
  mainWindow.webContents.openDevTools();
};
MAIN_WINDOW_PRELOAD_WEBPACK_ENTRY, MAIN_WINDOW_PRELOAD_WEBPACK_ENTRY は webpack 側でよしなに変換してくれるものみたい
ちなみに、MAIN_WINDOW は forge.config.ts 内の WebpackPlugin で設定した entryPoint の name に応じて変更する
    new WebpackPlugin({
      mainConfig,
      renderer: {
        config: rendererConfig,
        entryPoints: [
          {
            html: './src/index.html',
            js: './src/renderer.ts',
            name: 'main_window', //<<<<<<< これ
            preload: {
              js: './src/preload.ts',
            },
          },
        ],
      },
    }),
``webpack config
生成される webpack に関しての記載はなかったので、file の中身を見ていく。
webpack.main.config.ts
main process 用の webpack config
import type { Configuration } from 'webpack';

import { rules } from './webpack.rules';

export const mainConfig: Configuration = {
  /**
   * This is the main entry point for your application, it's the first file
   * that runs in the main process.
   */
  entry: './src/index.ts',
  // Put your normal webpack config below here
  module: {
    rules,
  },
  resolve: {
    extensions: ['.js', '.ts', '.jsx', '.tsx', '.css', '.json'],
  },
};
webpack.renderer.config.ts
renderer 用の webpack config
import type { Configuration } from 'webpack';

import { rules } from './webpack.rules';
import { plugins } from './webpack.plugins';

rules.push({
  test: /\.css$/,
  use: [{ loader: 'style-loader' }, { loader: 'css-loader' }],
});

export const rendererConfig: Configuration = {
  module: {
    rules,
  },
  plugins,
  resolve: {
    extensions: ['.js', '.ts', '.jsx', '.tsx', '.css'],
  },
};
webpack.rules.ts
webpack.main.config.ts, webpack.renderer.config.ts 両者で共通して利用される rules の配列
import type { ModuleOptions } from 'webpack';

export const rules: Required<ModuleOptions>['rules'] = [
  // Add support for native node modules
  {
    // We're specifying native_modules in the test because the asset relocator loader generates a
    // "fake" .node file which is really a cjs file.
    test: /native_modules[/\\].+\.node$/,
    use: 'node-loader',
  },
  {
    test: /[/\\]node_modules[/\\].+\.(m?js|node)$/,
    parser: { amd: false },
    use: {
      loader: '@vercel/webpack-asset-relocator-loader',
      options: {
        outputAssetBase: 'native_modules',
      },
    },
  },
  {
    test: /\.tsx?$/,
    exclude: /(node_modules|\.webpack)/,
    use: {
      loader: 'ts-loader',
      options: {
        transpileOnly: true,
      },
    },
  },
];
webpack.plugins.ts
webpack.renderer.config.ts でのみ利用される webpack plugin の配列。
設定されているのは、fork-ts-checker-webpack-plugin のみ。(type check するやつ)
import type IForkTsCheckerWebpackPlugin from 'fork-ts-checker-webpack-plugin';

// eslint-disable-next-line @typescript-eslint/no-var-requires
const ForkTsCheckerWebpackPlugin: typeof IForkTsCheckerWebpackPlugin = require('fork-ts-checker-webpack-plugin');

export const plugins = [
  new ForkTsCheckerWebpackPlugin({
    logger: 'webpack-infrastructure',
  }),
];
tailwind 追加する
"Using PostCSS" で進めていく。
dev dependencies install
style-loader と css-loader は template にすでに含まれていたので、postcss & tailwnd 関連の以下の library を install する。
- autoprefixer
- postcss
- postcss-loader
- tailwindcss
yarn add -D autoprefixer postcss postcss-loader tailwindcss
webpack config に postcss-loader 設定
webpack.renderer.config.ts に postcss-loader を追加する。
import type { Configuration } from 'webpack';

import { rules } from './webpack.rules';
import { plugins } from './webpack.plugins';

rules.push({
  test: /\.css$/,
  use: [
    { loader: 'style-loader' },
    { loader: 'css-loader' },
+    { loader: 'postcss-loader' },
  ],
});

export const rendererConfig: Configuration = {
  module: {
    rules,
  },
  plugins,
  resolve: {
    extensions: ['.js', '.ts', '.jsx', '.tsx', '.css'],
  },
};
tailwind init
tailwindcss init で tailwind.config.js を作成。
npx tailwindcss init
tailwind.config.js を更新
ts, tsx を conntent に追加する。
/** @type {import('tailwindcss').Config} */
module.exports = {
+  content: ['./src/**/*.{html,js,tsx,ts}'],
  theme: {
    extend: {},
  },
  plugins: [],
};
postcss.config.js 作成
module.exports = {
  plugins: {
    tailwindcss: {},
    autoprefixer: {},
  },
};
index.css 更新
Tailwind directives を追加する。
+ @tailwind base;
+ @tailwind components;
+ @tailwind utilities;
これで準備完了!