Reactをそこそこ学んだのでReact Nativeに立ち向かう(Expoで)
私の環境
- MacOS
- Android Studioはなるべくつかわない方向で...
- Xcode
- typescriptで
- homebrew で node v14.17.0
expoのインストール
npm install -g expo-cli
expo init
✔ What would you like to name your app? … lesson-react-native
✔ Choose a template: › blank (TypeScript)  same as blank but with TypeScript configuration
✔ Downloaded and extracted project files.
🧶 Using Yarn to install packages. Pass --npm to use npm instead.
✔ Installed JavaScript dependencies.

✅ Your project is ready!
いけたらしい.
始めっぞ.
Ref
source
見慣れたapp.tsxがある.
Reactやんけ.
import { StatusBar } from 'expo-status-bar';
import React from 'react';
import { StyleSheet, Text, View } from 'react-native';

export default function App() {
  return (
    <View style={styles.container}>
      <Text>Open up App.tsx to start working on your app!</Text>
      <StatusBar style="auto" />
    </View>
  );
}

const styles = StyleSheet.create({
  container: {
    flex: 1,
    backgroundColor: '#fff',
    alignItems: 'center',
    justifyContent: 'center',
  },
});
StatusBarというのがわからないが続ける.
styled-componentsを使いたいので,Native Baseというライブラリ?を使う.
プレイグラウンドもあってすぐに遊べそうな感じでワクワクする.
とりあえずExpoでGetting Started.
なんかReactやNext.jsでも使えるっぽいのがすごく気になる...
他にもいろいろあるらしい.
iOSのシュミレーターを起動
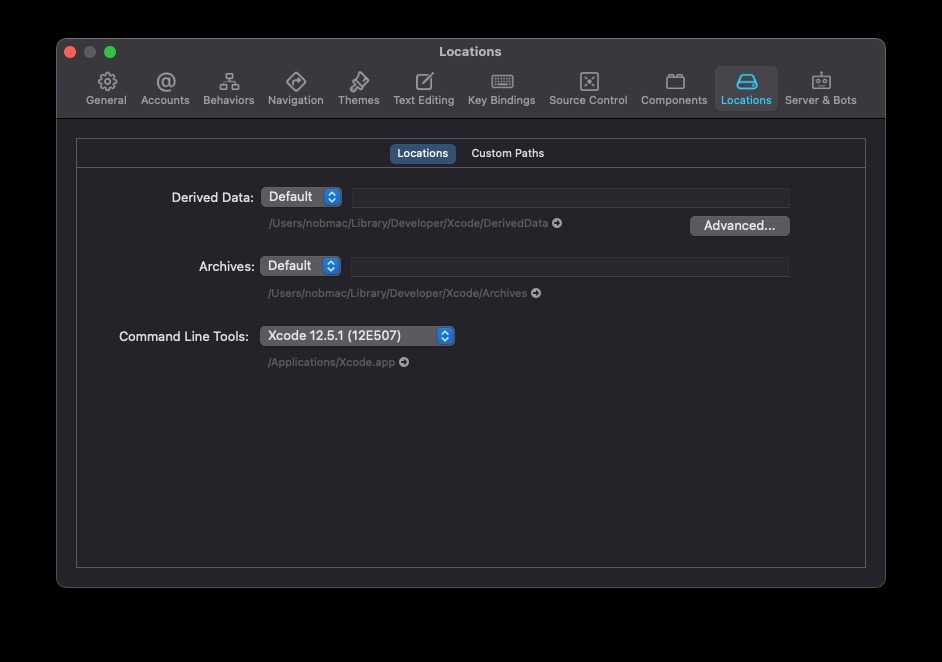
XcodeのPreference>Locations>Command Line Toolsが選択されているかチェック

なんかさ.PCの問題なんだけど.
こういうの出ると選択してもなにも動かないしこれが消えなくなるんだよね...
まじ卍

一旦後回し.
起動する
とりあえず,yarn startでブラウザが立ち上がる.そこにあるQRコードを使って手元のiphoneで起動できる.(Expoのアプリを入れる必要がある.)
Native Baseを始める
yarn add native-base styled-components styled-system
expo install react-native-svg
expo install react-native-safe-area-context
をする.ちょっと今はよくわかっていないけど,依存関係に必要なものをnpmとexpoそれぞれに入れているんだと思う.expoに別にinstallする必要性があるのかー.
一応型も入れておくー
npx typesync
どうしてもTypeScriptを使いたい
なんかずっと出ている型のエラーは
yarn add -D @types/styled-components-react-native
で,React Nativeの型を入れたら直った.
おまたせしました Hello world
Native Baseとstyled-componentsを同時にHello worldさせた.
import { StatusBar } from 'expo-status-bar';
import React from 'react';
import { NativeBaseProvider, Button } from 'native-base';
import styled from 'styled-components/native';

export default function App() {
  return (
    <NativeBaseProvider>
      <StyledView>
        <StatusBar style='auto' />
        <StyledText>Hello world!!</StyledText>
        <Button onPress={() => alert('Are you ready??')}>PUSH</Button>
      </StyledView>
    </NativeBaseProvider>
  );
}

// いつものstyled-componets
const StyledText = styled.Text`
  color: red;
  font-size: 20px;
  font-weight: bold;
  margin-bottom: 20px;
`;
const StyledView = styled.View`
  background-color: skyblue;
  height: 100%;
  color: red;
  display: flex;
  justify-content: center;
  align-items: center;
`;
Native Baseでボタンを表示して,いつものSCでスタイルを適応.

ちなみにalertは動いたが,confirmはダメだった.
import { Alert } from 'react-native';
として,仕様に基づいて使う必要がある様子.
export default function App() {
  const showConfirmDialog = () => {
    return Alert.alert(
      'Are your ready??',
      'テキスト テキスト テキスト テキスト テキスト',
      [
        {
          text: 'Yes',
          onPress: () => {},
        },
        {
          text: 'No',
        },
      ]
    );
  };
  return (
    <NativeBaseProvider>
      <StyledView>
        <StatusBar style='auto' />
        <StyledText>Hello world!!</StyledText>
        <Button onPress={showConfirmDialog}>PUSH</Button>
      </StyledView>
    </NativeBaseProvider>
  );
}

見慣れたコンポーネントでやる気もアップ!
速度は良好
React Nativeは勝手に重いイメージがあったが,コードを上書き保存してから反映までクソ早い.
さらっとここまでの重要ポイント
- HTMLタグは使えない
- CSSも適応されないものがある?
- flexboxの仕様も少しことなる様子
- すべて既存のコンポーネントをimportして作成する
- onClickがonPressだったりする
- SCの継承が使えた
- classNameは使えない
ページ遷移をしたい
さて,もっとも気になっているこの概念.
Native Baseにその機能はなく,これを使うらしい.
Expoとそうでないものでimportの仕方も変わるので注意
yarn add @react-navigation/native
expo install react-native-screens react-native-safe-area-context
なんか両方入れるみたい.
そんでこれも使うから入れる.
yarn add @react-navigation/native-stack
これでも型のエラーはでなさそうかな?
ページ遷移できた
NativeではPageではなくScreenと言うのでちょっと注意.
React Router的な感じで実装します.
app.tsx
import { StatusBar } from 'expo-status-bar';
import React from 'react';
import { NativeBaseProvider, Button, Input } from 'native-base';

/* react-navigation を使用 */
import { NavigationContainer } from '@react-navigation/native';
import { createNativeStackNavigator } from '@react-navigation/native-stack';
import { HomeScreen } from './src/screens/Home';
import { LessonScreen } from './src/screens/Lesson';

const Stack = createNativeStackNavigator();

export default function App() {
  return (
    <NavigationContainer>
      <NativeBaseProvider>
        <Stack.Navigator>
          <Stack.Screen name='Home' component={HomeScreen} />
          <Stack.Screen name='Lesson' component={LessonScreen} />
        </Stack.Navigator>
        <StatusBar style='auto' />
      </NativeBaseProvider>
    </NavigationContainer>
  );
}
src/screens/Home.tsx
import React from 'react';
import { Text, View } from 'react-native';
import { Button } from 'native-base';

export const HomeScreen = ({ navigation }: any) => {
  return (
    <View
      style={{
        flex: 1,
        alignItems: 'center',
        justifyContent: 'center',
        backgroundColor: 'lime',
      }}
    >
      <Text>Home Screen</Text>
      <Button onPress={() => navigation.navigate('Lesson')}>
        Go Lesson page
      </Button>
    </View>
  );
};
src/screens/Lesson.tsx
import { StatusBar } from 'expo-status-bar';
import React from 'react';
import { Button, Input } from 'native-base';
import styled from 'styled-components/native';

export const LessonScreen = ({ navigation }: any) => {
  const [text, onChangeText] = React.useState('');
  return (
    <StyledView>
      <StyledText>Hello world!!</StyledText>
      <Button onPress={() => alert('Are you ready??')}>PUSH</Button>
      <StyledTextInput
        placeholder='テキストを入力'
        onChangeText={onChangeText}
        value={text}
      />
      <StyledInput
        w='80%' // ここで書かないとFocus時にスタイルが当たらない
        my='20px'
        placeholder='テキストを入力'
        onChangeText={onChangeText}
        value={text}
      />
      <Button onPress={() => navigation.navigate('Home')}>Go Home page</Button>
    </StyledView>
  );
};

const StyledText = styled.Text`
  color: red;
  font-size: 20px;
  font-weight: bold;
  margin-bottom: 20px;
`;
const StyledView = styled.View`
  background-color: skyblue;
  color: red;

  flex: 1;
  justify-content: center;
  align-items: center;
`;

const StyledTextInput = styled.TextInput`
  border: 2px solid green;
  padding: 8px 12px;
  border-radius: 8px;
  margin: 12px auto;
`;
const StyledInput = styled(Input)`
  background-color: #eee;
`;
これで2スクリーン間を移動できるようになった🎉
より高度なものはここが参考になりそうなので,これは今度
補足
navigationのanyの解消法を調査した.
yarn add react-navigation-stackをして,NavigationStackPropという型を使えば良いらしい.
つまり
import { NavigationStackProp } from 'react-navigation-stack';

export const HomeScreen = ({ navigation }: NavigationStackProp) => {
とすれば良さそう.
調べてて思ったけど,型が複雑そう...
そして依存関係もハチャメチャ...
@react-navigation/native-stackで使用する変数の型が,react-navigation-stackに存在するのも謎...
いや,待て.これはバージョンが違う.
おそらく非推奨だ.
やり直し!
アプデめっちゃ最近だった...
一旦こんな感じでよさそう.
import { StackNavigationProp } from '@react-navigation/stack';

export const LessonScreen = ({
  navigation,
}: {
  navigation: StackNavigationProp<any>;
}) => {