Godot の iOS カスタムテンプレートを作成して Xcode プロジェクトをエクスポートする
前回の記事では、Godot エディタをソースコードから macOS 向けにビルドする手順について記述しました。
今回は iOS 向けのカスタムテンプレートを作成して Xcode プロジェクトのエクスポートに使用する際の手順について記述します。
環境
MacBook Pro 13-inch M1 2020, macOS Ventura 13.6, Xcode 15.0
0. 標準のテンプレートの扱いを知る
まずは標準のテンプレートの扱いについて記述します。
標準のテンプレートは、macOS の場合 {ホームディレクトリ}/Library/Application\ Support/Godot/export_templates/ に配置されます。(os_macos.mm)
export_templates ディレクトリ上には Godot エディタのバージョンに対応するファイルが配置されるようで、バージョン 4.1.1 Stable 版だと 4.1.1.stable が配置され、その中には色々なプラットフォーム向けのテンプレートファイルが格納されています。

テンプレートファイルの中身
ios.zip を解凍して中身を覗いてみましょう。

ios.zip の内容物
Xcode のプロジェクトファイルやビルド済みのフレームワークなどが配置されています。Godot エディタは、プロジェクトのエクスポート処理の中でzipファイルを解凍し、ファイルの書き換えやライブラリの配置などをしています。
iOS 向けに独自でテンプレートを用意するということは、自分で ios.zip を用意するということです。
1. カスタムテンプレートに配置するライブラリをビルドする
Compiling for iOS に従って必要なライブラリをビルドします。
ドキュメントに記載されているビルドは、実機用x2 (debug, release)、シミュレータ用x4 (x86_64 (debug, release), arm64 (debug, release)) の6種類です。
以下はライブラリのビルドのためのコマンドです。参考までに、本環境でそれぞれ初回のビルドにかかった時間を記載しています。
% scons platform=ios target=template_debug # 4m44sec
% scons platform=ios target=template_release # 4m18sec
% scons platform=ios target=template_debug ios_simulator=yes arch=x86_64 # 4m35sec
% scons platform=ios target=template_debug ios_simulator=yes arch=arm64 # 4m27sec
% scons platform=ios target=template_release ios_simulator=yes arch=x86_64 # 4m18sec
% scons platform=ios target=template_release ios_simulator=yes arch=arm64 # 4m14sec
これらのコマンドを実行して生成された成果物は bin ディレクトリに置かれます。

ビルドされたライブラリの一覧( libgodot.ios.template_ ではじまるファイル)
2. カスタムテンプレートに必要なファイルを配置する
標準のテンプレート ios.zip に含まれていたような、テンプレートに必要なファイルを配置していきます。といっても、カスタムテンプレートに必要なほとんどのファイルはリポジトリの misc ディレクトリの中に用意されています。

カスタムテンプレートの雛形が置かれている場所
これをコピーして、先ほど作成したライブラリを配置します。シミュレータ用のライブラリについては、lipo コマンドで arm64, x86_64 向けのライブラリをまとめて Universal Binary を生成してから配置しています。
# 用意されている雛形をコピーする
% cp -r misc/dist/ios_xcode .

# 実機向けのライブラリを配置する
% cp bin/libgodot.ios.template_debug.arm64.a ios_xcode/libgodot.ios.debug.xcframework/ios-arm64/libgodot.a
% cp bin/libgodot.ios.template_release.arm64.a ios_xcode/libgodot.ios.release.xcframework/ios-arm64/libgodot.a

# シミュレータ向けのライブラリを配置する
% lipo -create bin/libgodot.ios.template_debug.arm64.simulator.a bin/libgodot.ios.template_debug.x86_64.simulator.a -output ios_xcode/libgodot.ios.debug.xcframework/ios-arm64_x86_64-simulator/libgodot.a
% lipo -create bin/libgodot.ios.template_release.arm64.simulator.a bin/libgodot.ios.template_release.x86_64.simulator.a -output ios_xcode/libgodot.ios.release.xcframework/ios-arm64_x86_64-simulator/libgodot.a
ドキュメントによると、ビルドしたライブラリに加えて MoltenVK.xcframework を配置する必要があります。 ここでは、標準のテンプレートの中に含まれている MoltenVK.xcframework をコピーして使用することにしました。
The MoltenVK static .xcframework folder must also be placed in the ios_xcode folder once it has been created.

コピー後、必要なファイルを配置したテンプレート
3. カスタムテンプレートを作成して使用する
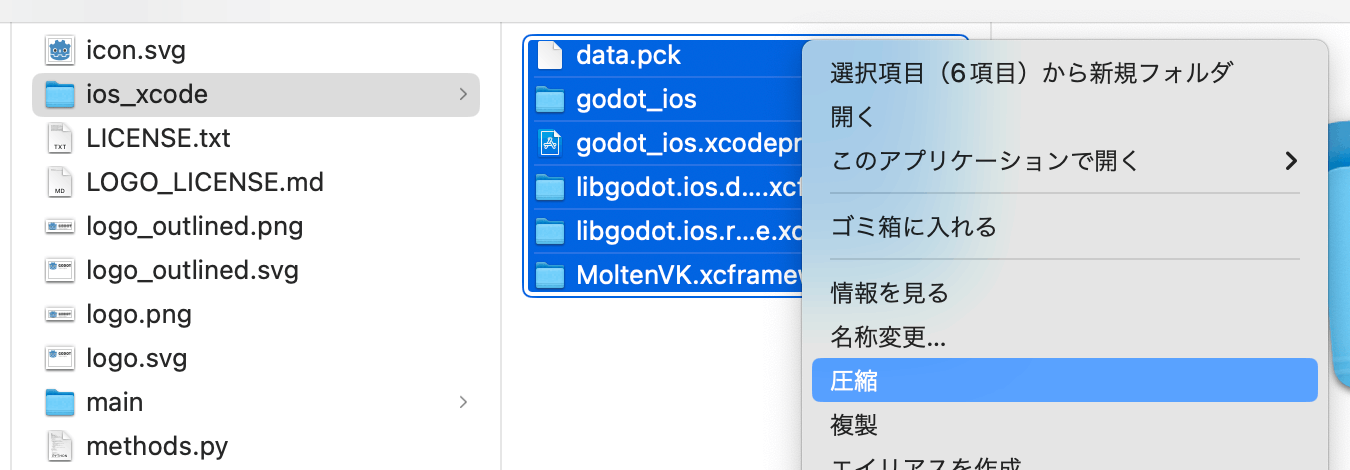
ここまでに用意したファイルを zip にまとめてカスタムテンプレートを作成します。テンプレートを配置した親のフォルダではなく、ios_xcode の中身をまとめて zip にする必要があります。

zip にまとめる対象のファイル
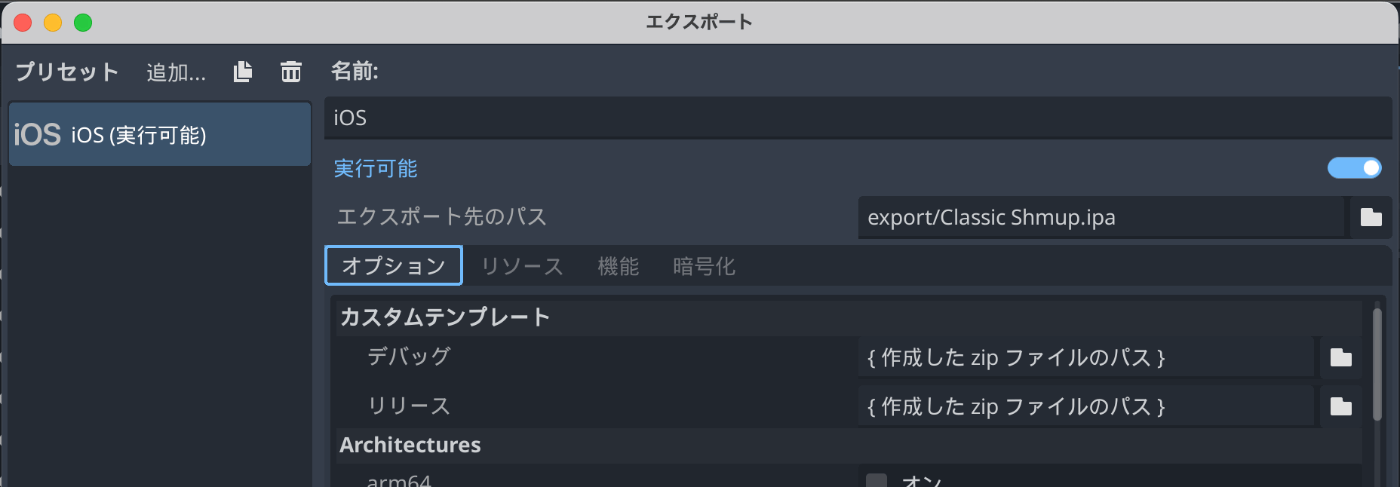
Godot エディタからプロジェクトをエクスポートする際に、項目『カスタムテンプレート』に作成した zip ファイルへのパスを指定することによって、カスタムテンプレートを使用したプロジェクトのエクスポートをすることができます。

『カスタムテンプレート』に上記で作成したzipファイルのパスを指定する
Discussion