cloudflare image transformations を `next/images` で使えるか?
おおよそできた
Cloudflare Images には Transform Images という機能があり Cloudflare に登録しているドメインが含まれる URL 経由で画像をリクエストすることで画像の変換、サイズの変更ができる。[1]
今回は worker 経由で画像を変換できる機能と、hono の cahce middleware にある vary options を利用して next/image の機能を最大限使う方法を模索していく
今回のゴール
- 端末ごとに画像の format 形式を変える
- avif, webp, png を切り替えられるようにする
- source によるブラウザ切り替えはできれば使いたくない
- next/image に乗っかれないから
- source によるブラウザ切り替えはできれば使いたくない
- avif, webp, png を切り替えられるようにする
- self hosting な画像以外も対応できる
- next/image の
blurDataURL[2] も使用できる
Next.js と統合するにはまず imageLoader.js を定義する。
画像変換サーバーを作る
- リクエストループを防ぐ
- query で
url,width,blur,formatを受け取れるようにする - cache middleware でキャッシュする
import { zValidator } from "@hono/zod-validator";
import { Hono } from "hono";
import { createMiddleware } from "hono/factory";
import { z } from "zod";

const TransformOptions = z.object({
  url: z.string(),
  blur: z.coerce.number().min(0).max(250).optional(),
  format: Format.optional(),
  height: z.coerce.number().min(0).optional(),
  width: z.coerce.number().min(0).optional(),
  quality: z.coerce.number().min(0).max(100).optional(),
});


const app = new Hono();

const preventRequestLoop = createMiddleware((c, next) => {
  if (/image-resizing/.test(c.req.header("via") ?? "")) {
    return fetch(c.req.raw)
  }

  return next()
})

app.get("*",
  preventRequestLoop,
  zValidator("query", TransformOptions),
  cache({ cacheName: "image-resizing", vary: ["accept", "accept-encoding"] }),
  async (c) => {
    const query = c.req.valid("query");
    const accept = c.req.header("accept");
    const url = new URL(query.url, c.req.url);

    const res = await fetch(url.toString(), {
      cf: {
        image: {
          ...query,
          get width() {
            return query.width;
          },
          get height() {
            return query.height
          },
          get format() {
            if (query.format !== undefined || accept === undefined)
              return query.format;

            if (/image\/avif/.test(accept)) {
              return "avif";
            } else if (/image\/webp/.test(accept)) {
              return "webp";
            }
          },
        },
      },
    });

    return res;
  })
こんなもん。const url = new URL(query.url, c.req.url); をしてるのは Worker Routes[1] を使うことを考えているから。
Cloudflare Pages では Transform Image が使えない
どうなるかというと fetch(url, { cf: { image: {} }) を通しても画像が変換されてない
これ全部嘘だった
次は worker で変換サーバーを hosting して pages に置いた画像が変換できるか確かめる。
以下を worker にデプロイしてアクセスすると Bad Request ERROR 9421: Too many redirects になる
| 画像 from pages | 画像 from R2 | 画像 from 外部 |
|---|---|---|
| Bad Request ERROR 9421: Too many redirects | 変換可能 | 変換可能 |
const res = await fetch("https://xxx.yyy.zzz/images/main.png", {
  cf: {
    image: {
      ...query,
      get width() {
        return query.width;
      },
      get height() {
        return query.height
      },
      get format() {
        if (query.format !== undefined || accept === undefined)
          return query.format;

        if (/image\/avif/.test(accept)) {
          return "avif";
        } else if (/image\/webp/.test(accept)) {
          return "webp";
        }
      },
    },
  },
});
Worker Routes を利用して pages に割り当てた custom domain の path に対して worker を適用する場合はすべて動作する。これでは外部画像が使えないので何かやり方を考える。
上の Worker の Routes にを設定する
| Route | Zone |
|---|---|
| xxx.yyy.zzz/images/* | xxx.yyy.zzz |
トラブルシューティングを見てもエラー文以上の内容がない。worker 同士で通信するときは service_binding を使う必要があることと関係しているような気がする。
うわ全く気付かなかった。
too many redirects が発生するときは domain の SSL/TLS を Full に設定するといける
The reason for “too many redirects” is if you have an http->https redirect on your origin server. The client connects over https, but Cloudflare connects to your origin on http, which returns a redirect to https, which connects over http to be redirected to https and so on forever until the browser gives up.
ははーん。なるほど。Worker Routes による proxy は https -> https の通信なので flexble だと https -> http になり、worker 側で redirect が発生し、無限ループになっていたということみたい。
それなら Worker Routes 使わなくても Pages で hosting した画像を worker に投げることもできるはず
xxx.yyy.zzz/images/* に Worker Routes を設定し、外部 URL が next/image に指定されたときは worker url に search paramter を渡すようにする。
外部 URL と /images から始まる画像出ないときはビルド時エラーを吐くようにする
export default function cloudflareLoader(options) {
  const { src, width, quality = 80 } = options;
  const searchParams = new URLSearchParams();
  searchParams.set("width", width);
  searchParams.set("quality", quality);

  if (src.startsWith("https://")) {
    searchParams.set("url", src);
    return `https://worker.yyy.zzz/?${searchParams.toString()}`;
  }

  if (src.startsWith("/images/")) {
    return `${src}?${searchParams.toString()}`;
  }

  throw new Error("Invalid image URL");
}
次は blurDataURL を適用する方法を考える。
Next.js 14 以降では base64 にして渡す必要があるようだ.....
_next/image は base64 じゃなくても blur を使える気がしたけど.....
base64 を作るために画像の fullpath が必要なので request url を middleware で header に指しておく
import { NextResponse } from "next/server";
import type { NextRequest } from "next/server";

export function middleware(request: NextRequest) {
  const headers = new Headers(request.headers);
  headers.set("x-req-url", request.url);

  return NextResponse.next({
    request: {
      headers,
    },
  });
}
import { blurDataURL } from "./blurDataURL";
import { headers } from "next/headers";
import Image from "next/image";
import { ComponentPropsWithoutRef } from "react";

type Props = ComponentPropsWithoutRef<typeof Image>;
export const CloudflareImage = async (props: Props) => {
  const header = headers();
  const url = header.get("x-req-url") ?? "";

  if (typeof props.src === "string") {
    const blurURL = new URL(blurDataURL(props.src), url);
    console.log(blurURL.toString());
    const res = await fetch(blurURL.toString());
    const blob = await res.arrayBuffer();
    const content = Buffer.from(blob).toString("base64");
    const type = res.headers.get("content-type") ?? "image/png";
    const base64 = `data:${type};base64, ${content}`;

    // eslint-disable-next-line jsx-a11y/alt-text
    return <Image {...props} blurDataURL={base64} />;
  }

  // eslint-disable-next-line jsx-a11y/alt-text
  return <Image {...props} />;
}
const config = {
  width: 48,
  quality: 20,
  blur: 10,
};

export const blurDataURL = (path: string) => {
  const searchParams = new URLSearchParams();
  searchParams.set("width", config.width.toString());
  searchParams.set("quality", config.quality.toString());
  searchParams.set("blur", config.blur.toString());

  if (path.startsWith("https://")) {
    searchParams.set("url", path);

    return `https://images.napochaan.dev/?${searchParams.toString()}`;
  }

  if (path.startsWith("/images/")) {
    return `${path}?${searchParams.toString()}`;
  }

  throw new Error("Invalid image URL");
};

const Page = async () => {
return (
<main>
<section>
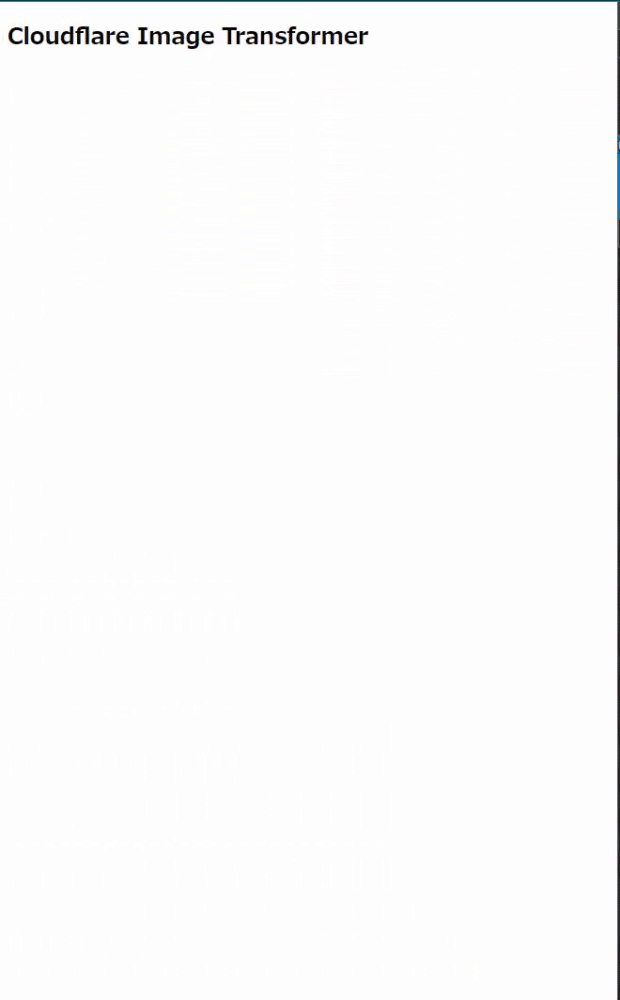
<h1>Cloudflare Image Transformer</h1>
<CloudflareImage
src="/images/main.png"
placeholder="blur"
alt="local large image"
width={2000}
height={1000}
style={{ width: "100%", height: "auto", objectFit: "cover" }}
/>
<CloudflareImage
src="/images/main.png"
placeholder="blur"
alt="local image"
width={400}
height={200}
style={{ width: "100%", height: "auto", objectFit: "cover" }}
/>
<CloudflareImage
src="https://public.napochaan.dev/images%2FComfyUI_LCM_00182_.png"
placeholder="blur"
alt="remote image"
width={400}
height={200}
style={{ width: "100%", height: "auto", objectFit: "cover" }}
/>
</section>
</main>
);
}
base64 の blur 画像を生成するために fetch を行っているがここが時間かかりすぎてリクエスト時間がかなり長くなってる。
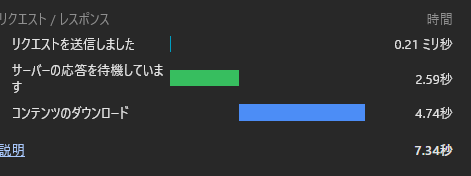
fetch(url, { cache: "force-cache" }) を blur に適用すれば最初の一回だけになるからまだ許容範囲な気がするが.....
@cloudflare/next-on-pages 環境では動かない.....
ここでは cache が使えているので fork して deploy してみたが、server actions が死んでる
x-forwarded-host header does not match origin が起きる
serverActions.allowedPrigins を追加して動くようにした。
__NEXT_ON_PAGES__KV_SUSPENSE_CACHE で KV を登録してみた。
KV に cache ができたことは確認できたが、revalidate も revalidateTag も動いてなさそう.....
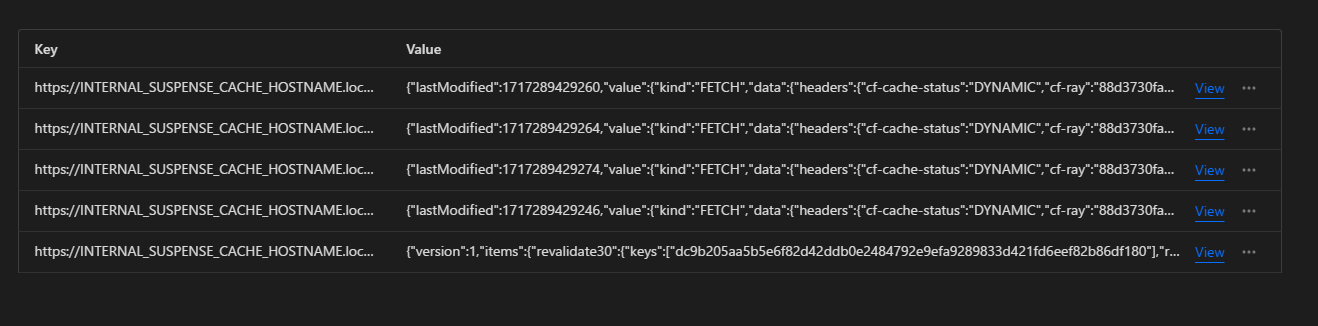
KV では revalidateTag が動かないという issue があったから KV の binding を消してみたけど変化なし
fetch で cache する方向は @cloudflare/next-on-pages がほんとに cache できるのかを確かめる必要が出てきて調査が難航したのでやめた。眠いのでまた別の機会にやる。
あと base64 にするのが手間なので onLoad と style をカスタマイズして next/image ぽい見た目にする方向にシフト。
@cloudflare/next-on-pages のキャッシュが効いてない問題に関しては別途調べる。
"use client";
import { blurDataURL } from "@utils/blur-data-url";
import Image from "next/image";
import {
  ComponentPropsWithoutRef,
  useCallback,
  useMemo,
  useState,
} from "react";

type Props = ComponentPropsWithoutRef<typeof Image>;
export const CloudflareImage = (props: Props) => {
  const [loading, setLoading] = useState(true);
  const handleLoad = useCallback(
    (event: React.SyntheticEvent<HTMLImageElement, Event>) => {
      setLoading(false);
      props?.onLoad?.(event);
    },
    [props],
  );
  const isPlaceholderBlur =
    typeof props.src === "string" && props.placeholder === "blur";
  const style = useMemo(
    () =>
      typeof props.src === "string" && props.placeholder === "blur"
        ? {
            ...props.style,
            backgroundImage: `url(${blurDataURL(props.src)})`,
            backgroundSize: "cover",
            backgroundPosition: "center",
            backgroundRepeat: "no-repeat",
          }
        : {},
    [props.placeholder, props.src, props.style],
  );

  return (
    <Image
      {...props}
      placeholder="empty"
      onLoad={handleLoad}
      alt={props.alt}
      style={isPlaceholderBlur && loading ? style : props.style}
    />
  );
};