🅰️
AngularのInterceptorでキャッシュを実装する
はじめに
Angularのinterceptorを使ったClient Requestのキャッシュを実装します。
Angular17を前提とし、最近の変更点含めまとめます。
Fetch API
HTTP Clientを使う場合(特にSSR時)標準のFetch APIを使うことが強く推奨されています。
app.config.ts にFetch APIを使うための設定 withFetch() を追加します。
app.config.ts
import { ApplicationConfig } from '@angular/core';
import { provideRouter } from '@angular/router';

import { routes } from './app.routes';
import { provideClientHydration } from '@angular/platform-browser';
import { provideHttpClient, withFetch } from '@angular/common/http';

export const appConfig: ApplicationConfig = {
  providers: [
    provideRouter(routes),
    provideClientHydration(),
    provideHttpClient(
      withFetch(),
    ),
  ]
};
Angular Interceptors
InterceptorはHttpClientから発行される通信をmiddleware的に制御することができます。
アクセス先のURLをKeyにレスポンスをメモリ上に保存することでキャッシュを実現します。
まずキャッシュするデータフォーマットを作成します。
interface/cache.ts
import { HttpResponse } from '@angular/common/http';

export interface RequestCacheEntry {
  urlWithParams: string;
  response: HttpResponse<any>;
  lastRead: number;
}
Angularのinterceptorの公式ドキュメントの通りinterceptorを実装します。
公式ドキュメントには肝心の caching logic が書かれてません。
今回は以下のようにGETリクエストの結果を30秒間キャッシュする実装を行いました。
interceptor/cache.interceptor.ts
import { HttpContextToken, HttpEvent, HttpInterceptorFn, HttpRequest, HttpResponse } from '@angular/common/http';
import { RequestCacheEntry } from '../interface/cache';
import { Observable, of, tap } from 'rxjs';

const cache = new Map<string, RequestCacheEntry>(); // キャッシュの構造
const maxAge = 30000; // キャッシュ時間(ms)

export const CACHING_ENABLED = new HttpContextToken<boolean>(() => true); // キャッシュのON/OFFスイッチ

export const cacheInterceptor: HttpInterceptorFn = (req, next) => {
  if (req.context.get(CACHING_ENABLED)) {
    const cached = cache.get(req.url); // アクセス先URLをKeyにキャッシュを検索
    if (cached !== undefined) {
      const isExpired = cached.lastRead < (Date.now() - maxAge); // キャッシュ時間満了を確認
      if (!isExpired) {
        return of(cached.response); // キャッシュ時間ないであればキャッシュされた内容を返却
      }
    }
    // レスポンスデータを取得しキャッシュに格納
    return next(req).pipe(
      tap((event) => {
        if (req.method === 'GET' && event instanceof HttpResponse) {
          cache.set(req.url, {urlWithParams: req.urlWithParams, response: event, lastRead: Date.now() })
        }
      })
    );
  } else {
    return next(req);
  }
};
作成した interceptor は app.config.ts に登録します。
app.config.ts
import { ApplicationConfig } from '@angular/core';
import { provideRouter } from '@angular/router';s
import { routes } from './app.routes';
import { provideClientHydration } from '@angular/platform-browser';
import { provideHttpClient, withFetch, withInterceptors } from '@angular/common/http';
import { cacheInterceptor } from './interceptor/cache.interceptor';

export const appConfig: ApplicationConfig = {
  providers: [
    provideRouter(routes),
    provideClientHydration(),
    provideHttpClient(
      withFetch(),
      withInterceptors([cacheInterceptor]),
    ),
  ]
};
HTTP Requestを出すサービスにHttpContextとして差し込むことでキャッシュが実現します。
import { Injectable, inject } from '@angular/core';
import { HttpClient, HttpContext } from '@angular/common/http';
import { Observable } from 'rxjs';
import { Todo } from '../interface/todo';
import { CACHING_ENABLED } from '../interceptor/cache.interceptor';

@Injectable({
  providedIn: 'root'
})
export class TodoService {
  #http = inject(HttpClient);

  findOneTodo(id: number): Observable<Todo> {
    return this.#http.get<Todo>('https://jsonplaceholder.typicode.com/todos/' + `${id}`, {
      context: new HttpContext().set(CACHING_ENABLED, true),
    })
  }
}
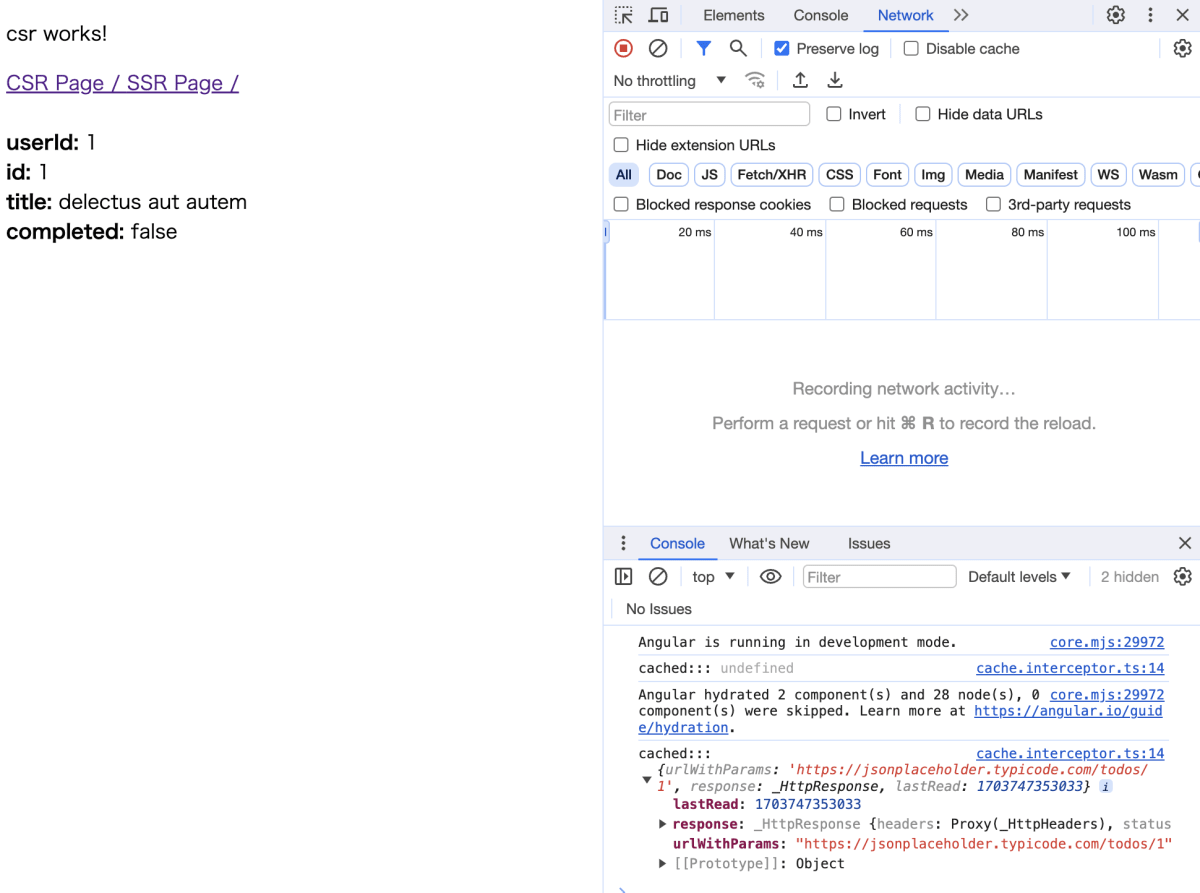
キャッシュを確認する
routerLink などで別のページに遷移し、戻ってくるとリクエストは飛ばず、キャッシュが使われていることがわかります。
まとめ
Angularのinterceptorを使ったClient Requestのキャッシュを実装する方法をまとめました。
Githubでコードを公開しておきます。
Discussion