AzureAD OAuth認証の設定
AzureAD のアプリケーション登録
OAuth認証で必要なアプリケーションの登録を行います。
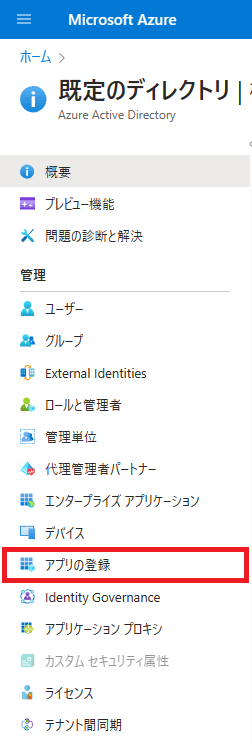
AzureADの左のメニューから「アプリの登録」を選択します。
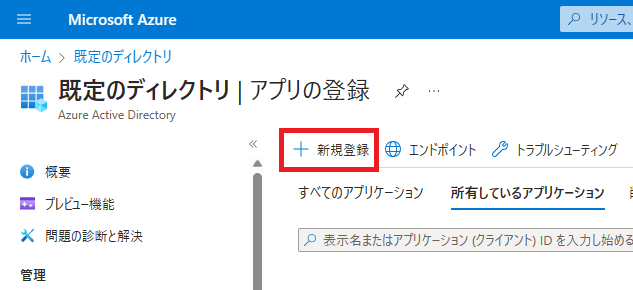
次に、アプリの新規登録を行います。
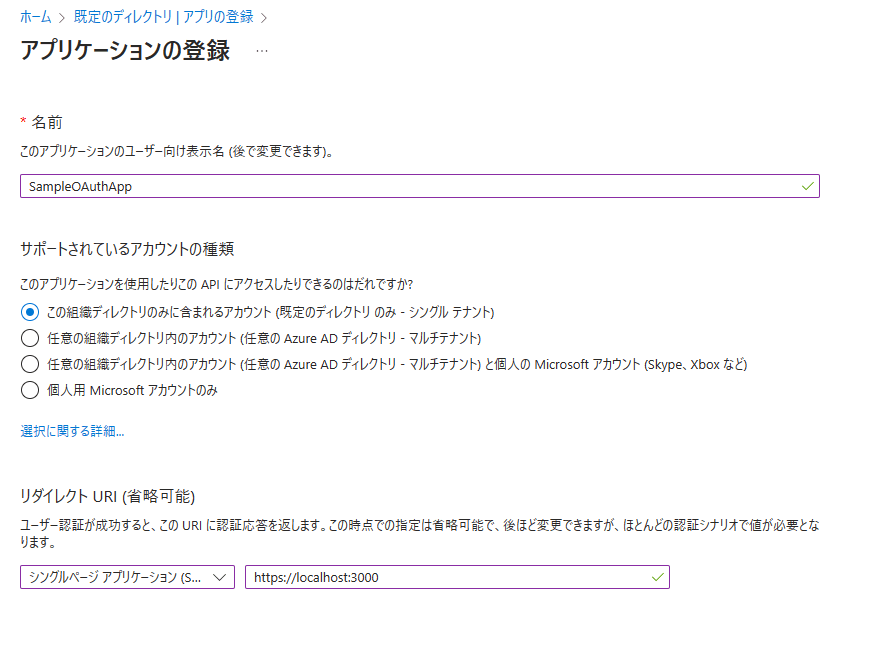
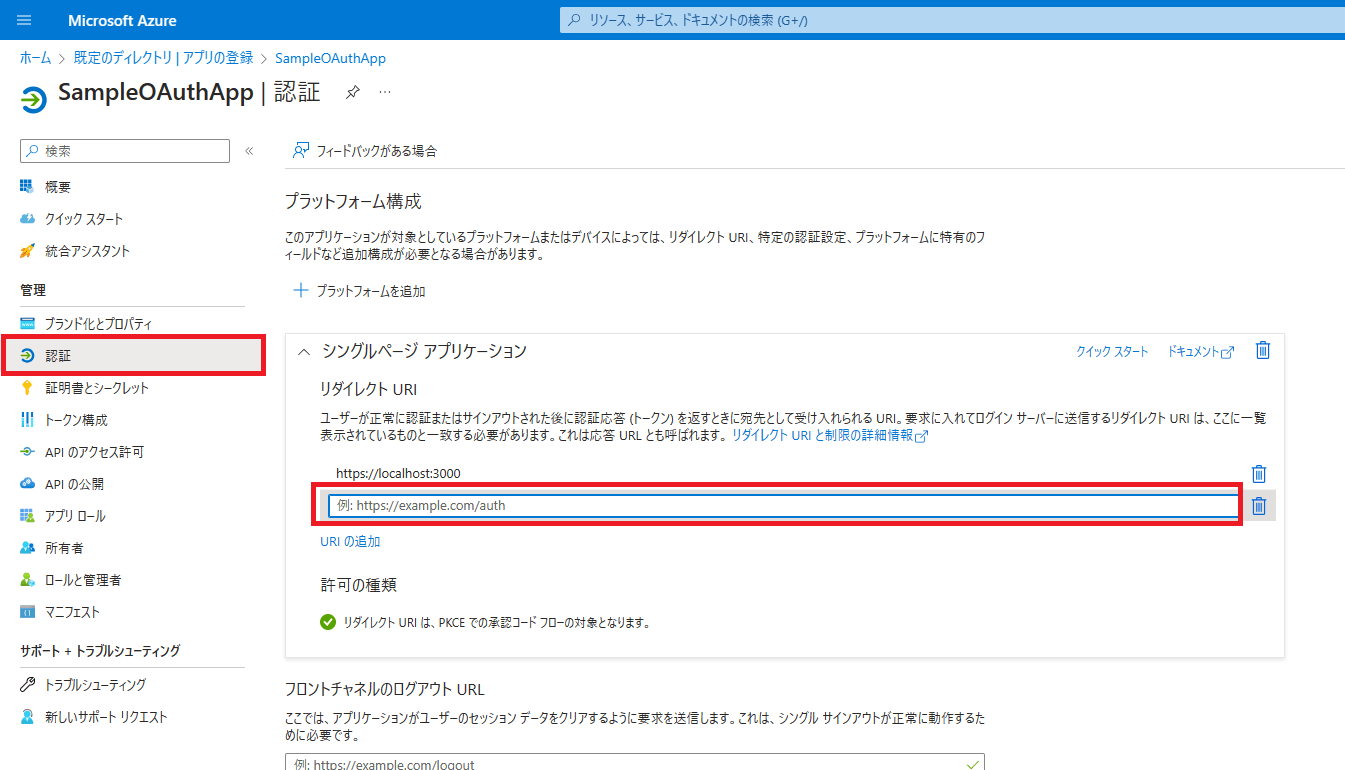
アプリ名、アクセス可能な範囲、リダイレクトURIを設定して登録します。
リダイレクトURIはシングルページアプリケーションにしてhttp://localhost:3000としておきましょう。(後から追加できるので大丈夫です)
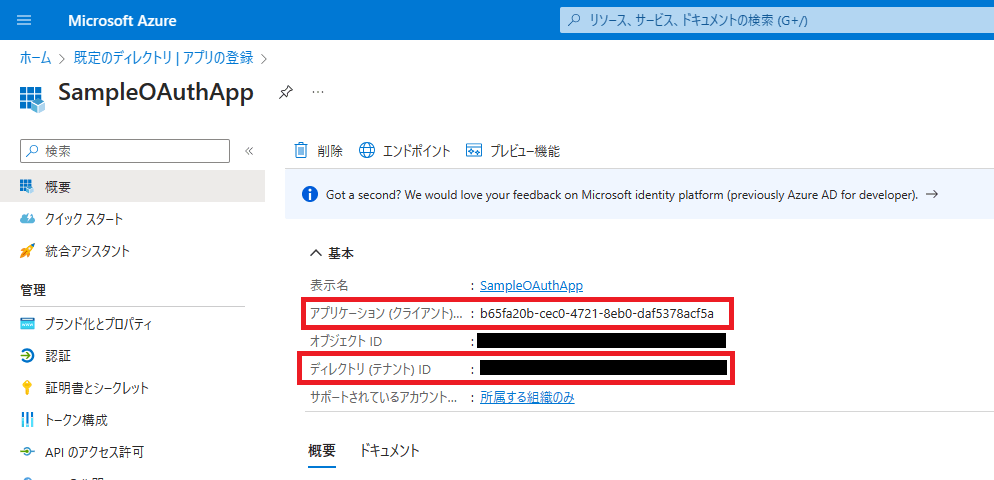
アプリケーションの登録が完了すると概要に「アプリケーション(クライアント)ID」と「ディレクトリ(テナント)ID」が表示されます。これをアプリケーション側で利用します。
WebAPIサーバーの設定
ASP.NET Core の設定では、Program.csに次の行を追加します。
JwtBearerDefaultsは追加のNuGetパッケージ Microsoft.AspNetCore.Authentication.JwtBearer のインストールが必要になります。
// Add services to the container.
// これを追加
builder.Services.AddAuthentication(JwtBearerDefaults.AuthenticationScheme)
    .AddJwtBearer(JwtBearerDefaults.AuthenticationScheme, options =>
    {
        options.MetadataAddress = "https://login.microsoftonline.com/XXXXXXXX-XXXX-XXXX-XXXX-XXXXXXXXXXXX/v2.0/.well-known/openid-configuration";
        options.Audience = "api://b65fa20b-cec0-4721-8eb0-daf5378acf5a";

        options.TokenValidationParameters = new TokenValidationParameters
        {
            ValidateIssuer = true,
            ValidIssuer = "https://sts.windows.net/XXXXXXXX-XXXX-XXXX-XXXX-XXXXXXXXXXXX/"
        };
    });
builder.Services.AddControllers();    // 元からある
app.UseAuthentication();    // これを追加
app.UseAuthorization();      // 元からある
アプリケーション毎に設定するのは主に以下の三つです。
設定から取得できるようにしておくと良いです。
| 設定対象 | 設定値 |
|---|---|
| options.MetadataAddress | https://login.microsoftonline.com/ディレクトリ(テナント)ID/v2.0/.well-known/openid-configuration |
| options.Audience | api://アプリケーション(クライアント)ID |
| ValidIssuer | https://sts.windows.net/ディレクトリ(テナント)ID/ |
あとは、認証を必要としたいAPIに[Authorize]をつけます。
    [Authorize]
    [HttpGet(Name = "GetWeatherForecast")]
    public IEnumerable<WeatherForecast> Get()
以上でアプリケーション側のOAuth認証のための設定は完了です。
Reactで呼び出せるように設定
WebAPIサーバー側でOAuthが必要になったので、クライアントで401エラーが発生します。
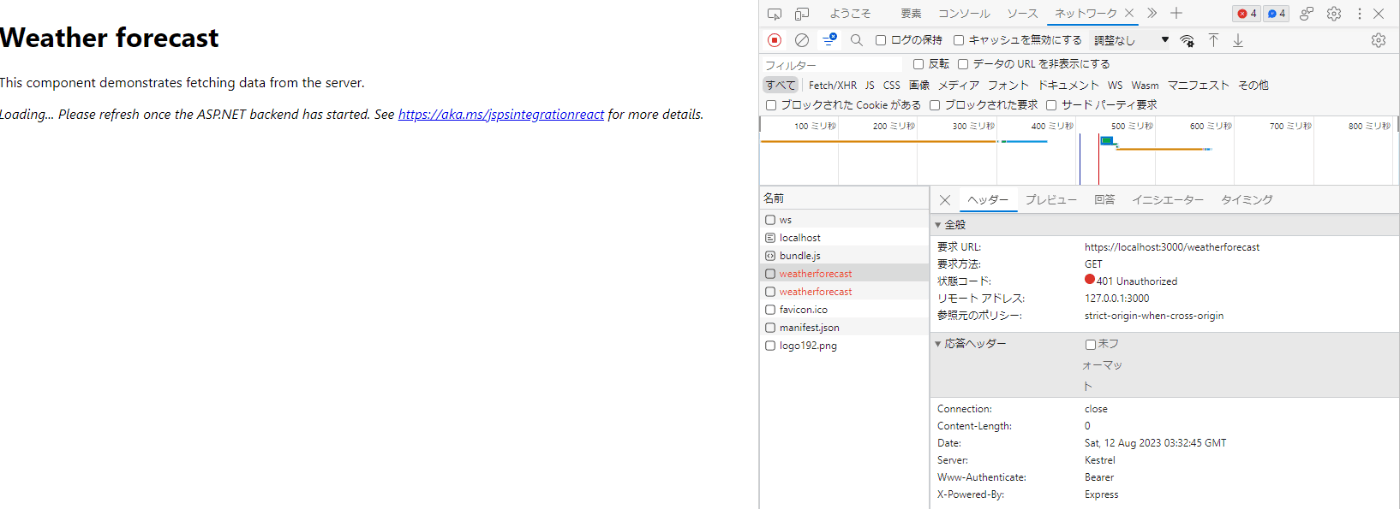
認証行いエラーが発生しないようにしていきます。
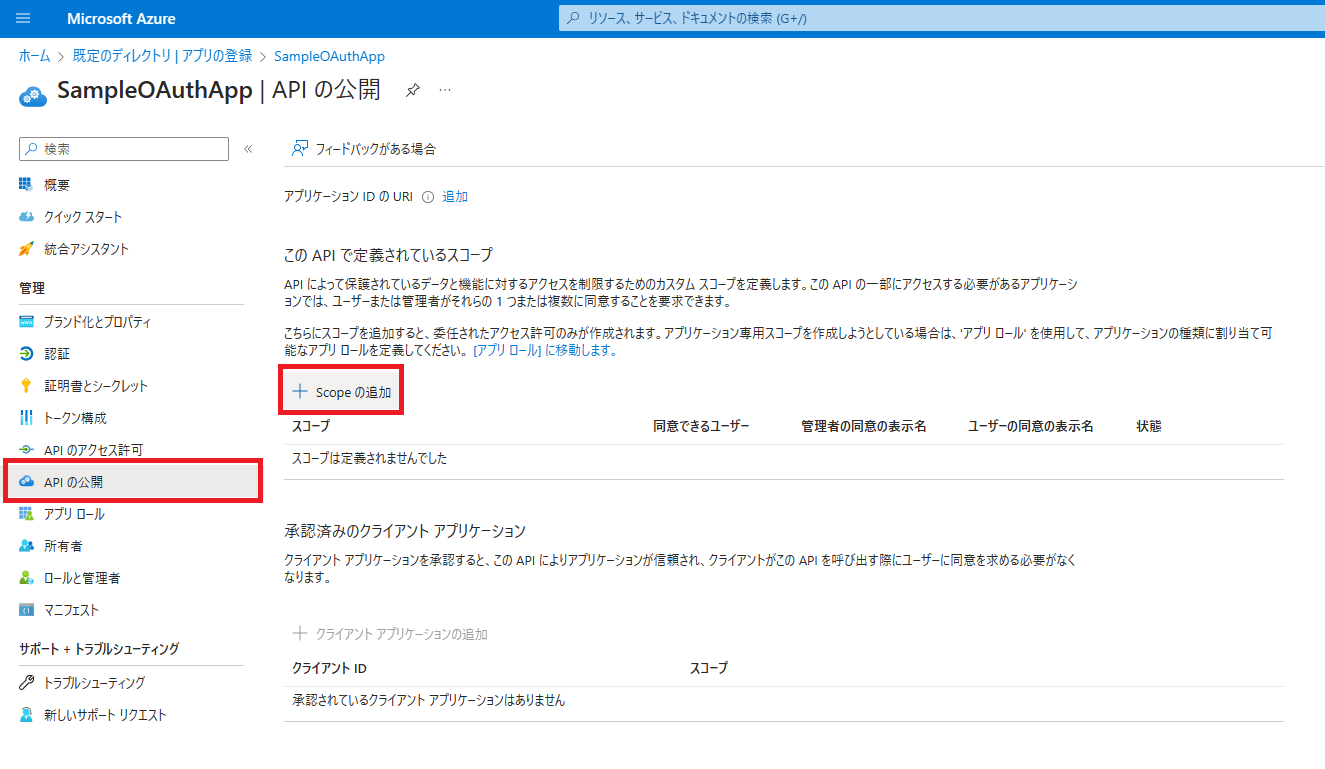
AzureADのアプリケーションにスコープを追加する
OAuth認証を行う際にスコープの指定をしますが、アプリケーションのスコープを作成する必要があります。
Azureの画面で「APIの公開」から「Socpeの追加」を行います。
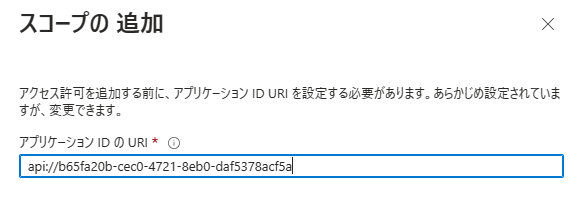
デフォルトでアプリケーション(クライアント)IDで設定されているので、そのまま保存します。
次に追加するスコープを設定します。
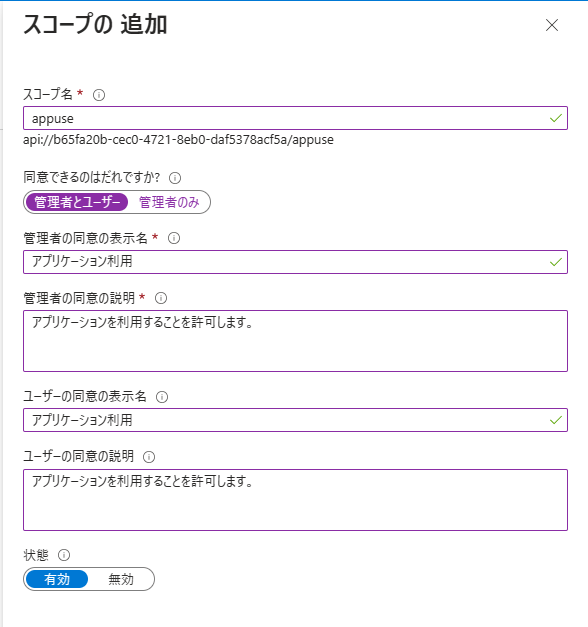
※スコープがない場合、JwTのアプリケーションIDが固定となるため、最低一つはスコープが必要になります。
ReactにMSALの設定を行う
今回はReactを使っているので、@azure/msal-browser と @azure/msal-react を npm install します。
**********************************************************************
** Visual Studio 2022 Developer PowerShell v17.6.5
** Copyright (c) 2022 Microsoft Corporation
**********************************************************************
PS C:\Users\xxxx\source\repos\AzureADSample\reactapp> npm install @azure/msal-browser @azure/msal-react
index.js にMSALを利用するための設定を行います。
主にMSALの設定を作って、<MsalProvider>で<App>を囲うかたちになります。
import { MsalProvider } from "@azure/msal-react";
import { PublicClientApplication } from "@azure/msal-browser";

// MSAL configuration
const pca = new PublicClientApplication({
    auth: {
        clientId: "b65fa20b-cec0-4721-8eb0-daf5378acf5a",
        authority: "https://login.microsoftonline.com/XXXXXXXX-XXXX-XXXX-XXXX-XXXXXXXXXXXX",
        redirectUri: "https://localhost:3000",
    },
    cache: {
        cacheLocation: "sessionStorage", // This configures where your cache will be stored
        storeAuthStateInCookie: false, // Set this to "true" if you are having issues on IE11 or Edge
    },
});

const root = ReactDOM.createRoot(document.getElementById('root'));
root.render(
    <React.StrictMode>
        <MsalProvider instance={pca}>
            <App />
        </MsalProvider>
    </React.StrictMode>
);
環境によって書き換えるのは以下の設定値です。.envなどを使って実装すると良いです。
なお、リダイレクト先のURLは事前にAzureADのアプリケーションで登録しておく必要があります。
| 設定対象 | 設定値 |
|---|---|
| clientId | アプリケーション(クライアント)ID |
| authority | https://login.microsoftonline.com/ディレクトリ(テナント)ID |
| redirectUri | リダイレクト先のURL |
次に、ログイン用のコンポーネントを作ります。Login.js といったファイルを作って以下のコードを書きます。
import { useMsal } from "@azure/msal-react";
const Login = () => {
const { instance, accounts, inProgress } = useMsal();
const login = async () => {
const loginRequest = {
scopes: ["api://b65fa20b-cec0-4721-8eb0-daf5378acf5a/appuse"],
};
var response = await instance.loginPopup(loginRequest);
instance.setActiveAccount(response.account);
}
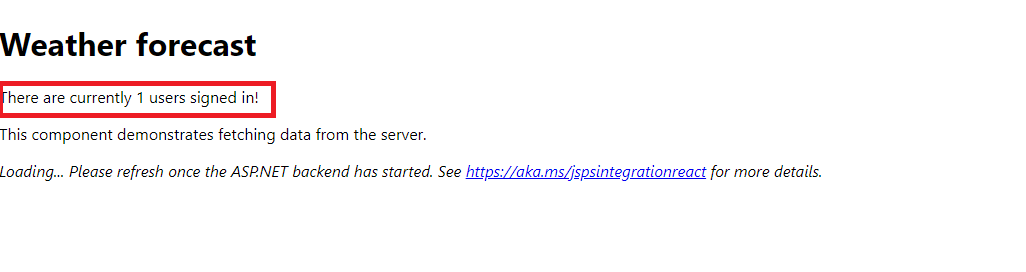
if (accounts.length > 0) {
return <span>There are currently {accounts.length} users signed in!</span>
} else if (inProgress === "login") {
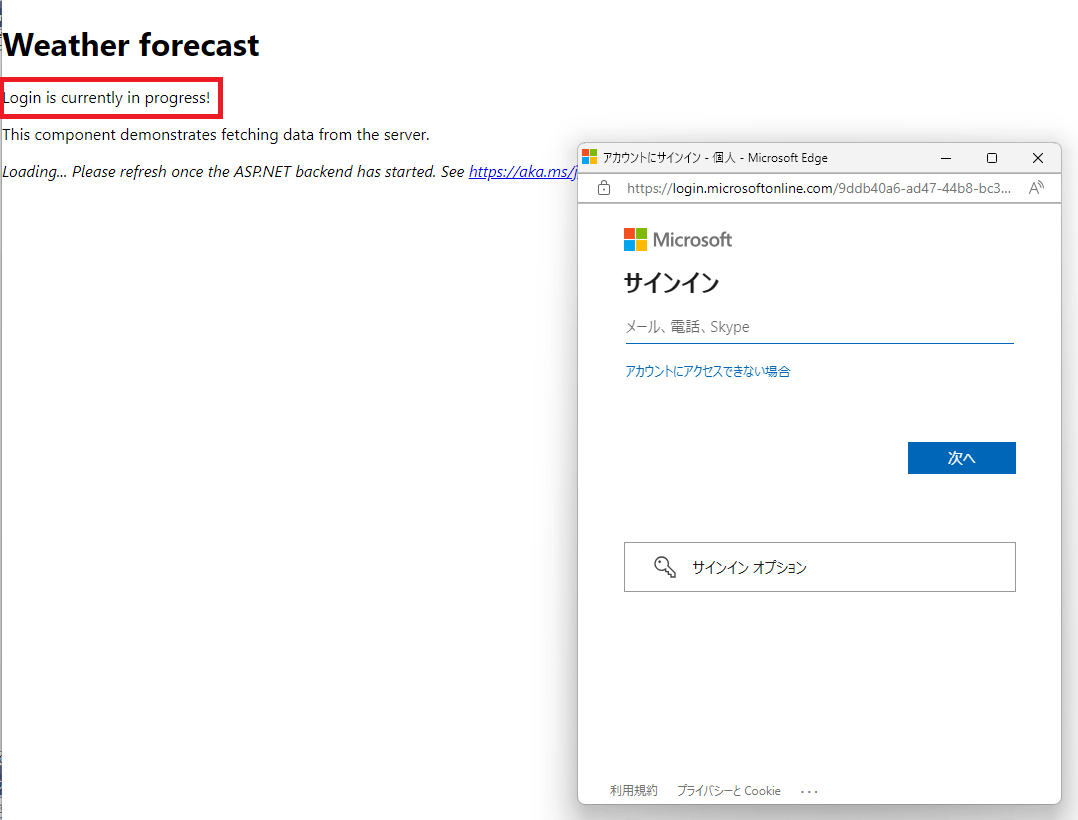
return <span>Login is currently in progress!</span>
} else {
return (
<>
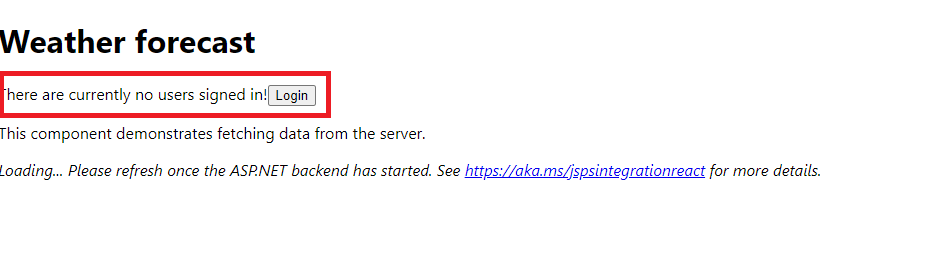
<span>There are currently no users signed in!</span>
<button onClick={login}>Login</button>
</>
);
}
}
export default Login;
スコープには"openid"とアプリケーションで登録したスコープのURIを配列で与えます。
次に、App.jsで作ったコンポーネントを読み込みます。
ファイル先頭あたりでimport Login from './Login'をして、以下のように<Login></Login>を適当な場所に置きます。
        return (
            <div>
                <h1 id="tabelLabel" >Weather forecast</h1>
                <Login></Login>
                <p>This component demonstrates fetching data from the server.</p>
                {contents}
            </div>
        );
ついでに、このまま動かすとweatherforecastのエラーが煩わしいので以下のコメントアウトを行います。
    async populateWeatherData() {
        // const response = await fetch('weatherforecast');
        // const data = await response.json();
        // this.setState({ forecasts: data, loading: false });
    }
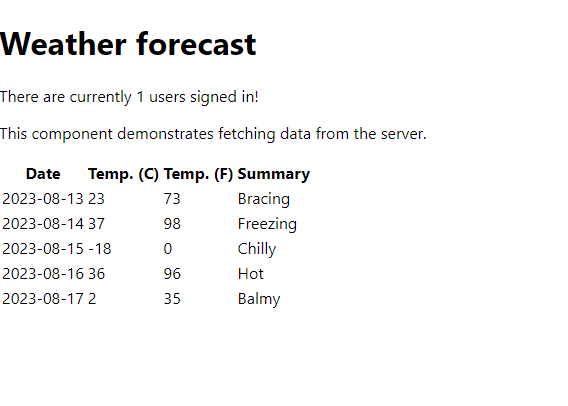
これで、起動して問題がなければ以下のような画面となります。ログインをして状態が変わることを確認してください。
これでログインに関する実装は完了です。
ReactでWebAPIサーバーを呼び出す
WebAPIサーバーにリクエストを送る際に、認証が必要となるAPIを呼び出す際はBearerトークンを渡す必要があります。
Bearerトークンを取得するための実装を行います。
まず、WeatherForecastの通信とテーブル表示に関する実装を個別のjsに移します。WeatherForecast.jsを作って以下のような実装にします。
import { useState, useEffect } from 'react';
import { useMsal } from "@azure/msal-react";
import { InteractionStatus, InteractionRequiredAuthError } from "@azure/msal-browser";

const WeatherForecast = () => {
    const [forecasts, setForecasts] = useState([]);
    const [loading, setLoading] = useState(true);

    const { instance, inProgress, accounts } = useMsal();

    useEffect(() => {
        const accessTokenRequest = {
            scopes: ["api://b65fa20b-cec0-4721-8eb0-daf5378acf5a/appuse"],
        };
        if (inProgress === InteractionStatus.None) {
            instance
                .acquireTokenSilent(accessTokenRequest)
                .then((accessTokenResponse) => {
                    // Acquire token silent success
                    let accessToken = accessTokenResponse.accessToken;
                    // Call your API with token
                    populateWeatherData(accessToken);
                })
                .catch((error) => {
                    if (error instanceof InteractionRequiredAuthError) {
                        instance.acquireTokenRedirect(accessTokenRequest);
                    }
                    console.log(error);
                });
        }
    }, [instance, inProgress, accounts]);

    const renderForecastsTable = (forecasts) => {
        return (
            <table className='table table-striped' aria-labelledby="tabelLabel">
                <thead>
                    <tr>
                        <th>Date</th>
                        <th>Temp. (C)</th>
                        <th>Temp. (F)</th>
                        <th>Summary</th>
                    </tr>
                </thead>
                <tbody>
                    {forecasts.map(forecast =>
                        <tr key={forecast.date}>
                            <td>{forecast.date}</td>
                            <td>{forecast.temperatureC}</td>
                            <td>{forecast.temperatureF}</td>
                            <td>{forecast.summary}</td>
                        </tr>
                    )}
                </tbody>
            </table>
        );
    }

    const populateWeatherData = async (accessToken) => {
        var headers = new Headers();
        var bearer = "Bearer " + accessToken;
        headers.append("Authorization", bearer);
        var options = {
            method: "GET",
            headers: headers
        };

        const response = await fetch('weatherforecast', options);
        const data = await response.json();
        setForecasts(data);
        setLoading(false);
    }

    let contents = loading
        ? <p><em>Loading... Please refresh once the ASP.NET backend has started. See <a href="https://aka.ms/jspsintegrationreact">https://aka.ms/jspsintegrationreact</a> for more details.</em></p>
        : renderForecastsTable(forecasts);

    return (
        contents
    )
}

export default WeatherForecast;
次に、App.jsを以下のように修正します。
import React, { Component } from 'react';
import Login from './Login'
import WeatherForcast from './WeatherForecast'

export default class App extends Component {
    static displayName = App.name;

    render() {
        return (
            <div>
                <h1 id="tabelLabel" >Weather forecast</h1>
                <Login />
                <p>This component demonstrates fetching data from the server.</p>
                <WeatherForcast />
            </div>
        );
    }
}
これで起動してログインすると、weatherforecastが取得できます。
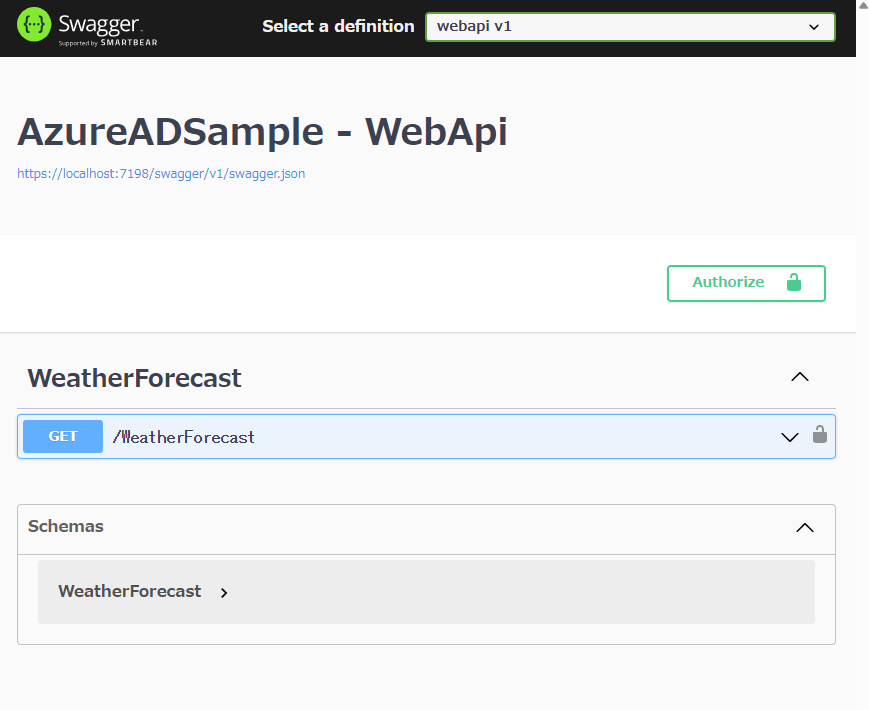
SwaggerでAzureAD認証を行えるようにする。
WebAPIサーバーのSwaggerでもテストが行えるようにAzureADに対応させます。
AddSwaggerGenを以下のように実装します。
builder.Services.AddSwaggerGen(c =>
{
    c.SwaggerDoc("v1", new OpenApiInfo { Title = "アプリ名 - WebApi" });

    c.AddSecurityDefinition("Azure AD", new OpenApiSecurityScheme
    {
        Name = "Authorization",
        Description = "Azure AD Authorization Code Flow authorization",
        Type = SecuritySchemeType.OAuth2,
        Flows = new OpenApiOAuthFlows
        {
            AuthorizationCode = new OpenApiOAuthFlow
            {
                AuthorizationUrl = new Uri("https://login.microsoftonline.com/XXXXXXXX-XXXX-XXXX-XXXX-XXXXXXXXXXXX/oauth2/v2.0/authorize"),
                TokenUrl = new Uri("https://login.microsoftonline.com/XXXXXXXX-XXXX-XXXX-XXXX-XXXXXXXXXXXX/oauth2/v2.0/token"),
                Scopes = new Dictionary<string, string>
                {
                    ["openid"] = "Sign in Permissions",
                    ["api://b65fa20b-cec0-4721-8eb0-daf5378acf5a/appuse"] = "API permission",
                },
            },
        },
        In = ParameterLocation.Header,
    });

    c.AddSecurityRequirement(new OpenApiSecurityRequirement
    {
        {
            new OpenApiSecurityScheme
            {
                Reference = new OpenApiReference
                {
                    Type = ReferenceType.SecurityScheme,
                    Id = "Azure AD",
                },
            },
            Array.Empty<string>()
        }
    });
});
UseSwaggerUIを以下のように実装します。
// Configure the HTTP request pipeline.
if (app.Environment.IsDevelopment())
{
    app.UseSwagger();
    app.UseSwaggerUI(c =>
    {
        c.OAuthClientId("b65fa20b-cec0-4721-8eb0-daf5378acf5a");
        c.OAuthUsePkce();
    });
}
ここで設定する値は以下となります。
| 設定対象 | 設定値 |
|---|---|
| AuthorizationUrl | https://login.microsoftonline.com/ディレクトリ(テナント)ID/oauth2/v2.0/authorize |
| TokenUrl | https://login.microsoftonline.com/ディレクトリ(テナント)ID/oauth2/v2.0/token |
これらの値は、AzureADのエンドポイントから確認することができます。
最後に、AzureADのアプリケーションにhttps://localhost:ポート番号/swagger/oauth2-redirect.htmlのリダイレクトURIを登録します。※ポート番号はアプリ毎に異なります。
デバッグ起動すると「Authorize」ボタンがあるので、そこから認証を行ってAPIを呼び出してください。