wikibaseのapiをつかってみる
概要
wikibaseのapiをpythonクライアントから使用する機会がありましたので、その備忘録です。
以下のライプラリを使用しました。
インストール
以下でインストールします。
!pip install wikibase-api
Read
今回は、以下のwikibaseインスタンスに対して処理を行います。
https://nakamura196.wikibase.cloud/
from wikibase_api import Wikibase

api_url = "https://nakamura196.wikibase.cloud/w/api.php"
wb = Wikibase(api_url=api_url)

r = wb.entity.get("Q1")
print(r)
上記により、Q1に関する情報を取得することができました。
Create
認証情報の取得
アイテムの作成などを行う際には、以下のどちらかの方法で認証を行う必要がありました。
- Authentication using OAuth
- Authentication with a user account
後者はBot passwordsを作成する方法で、以下の記事でも作成方法を紹介しています。
今回は前者の方法を試します。
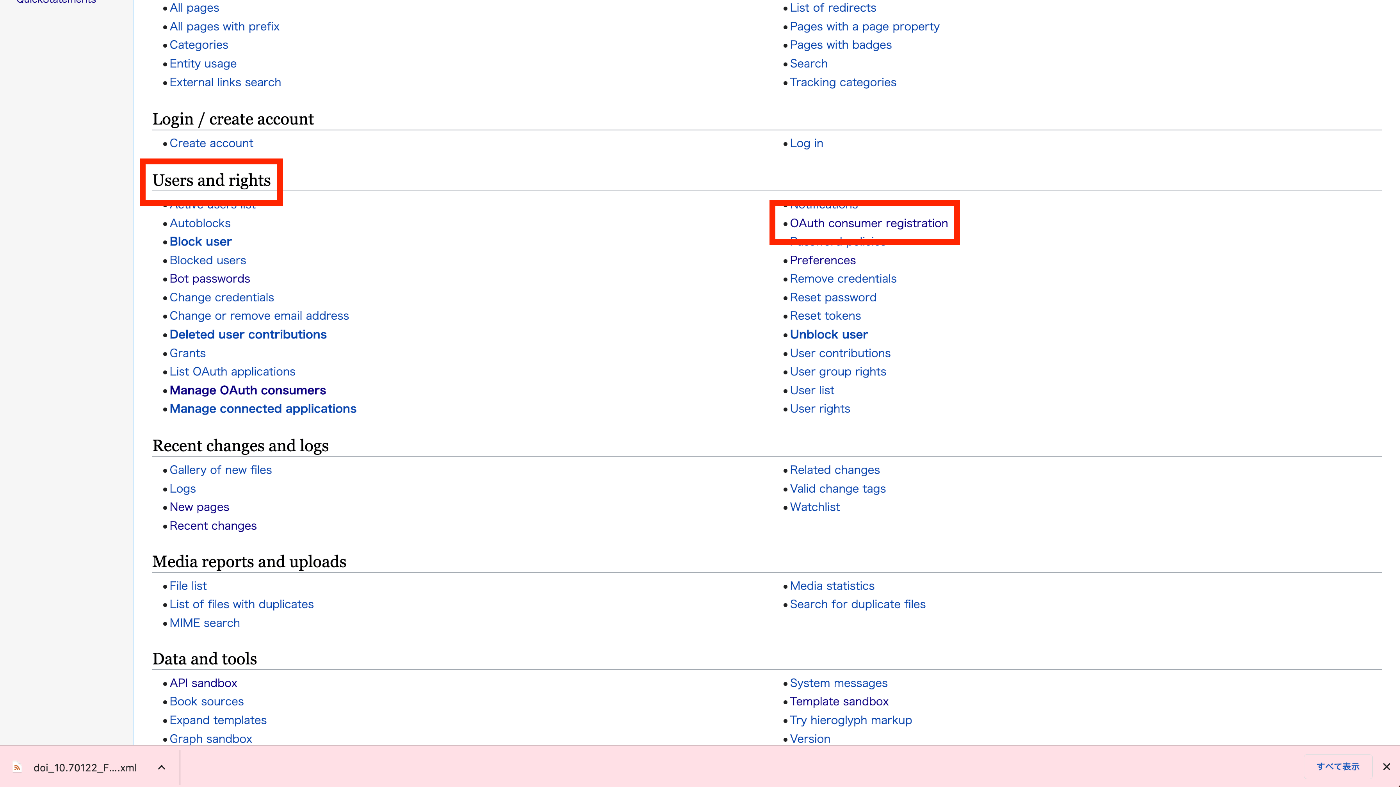
「Special pages」の「OAuth consumer registration」を選択します。

「Request a token for a new OAuth 1.0a consumer.」と「Request a token for a new OAuth 2.0 client.」の2つの作成方法がありますが、前者を選択します。

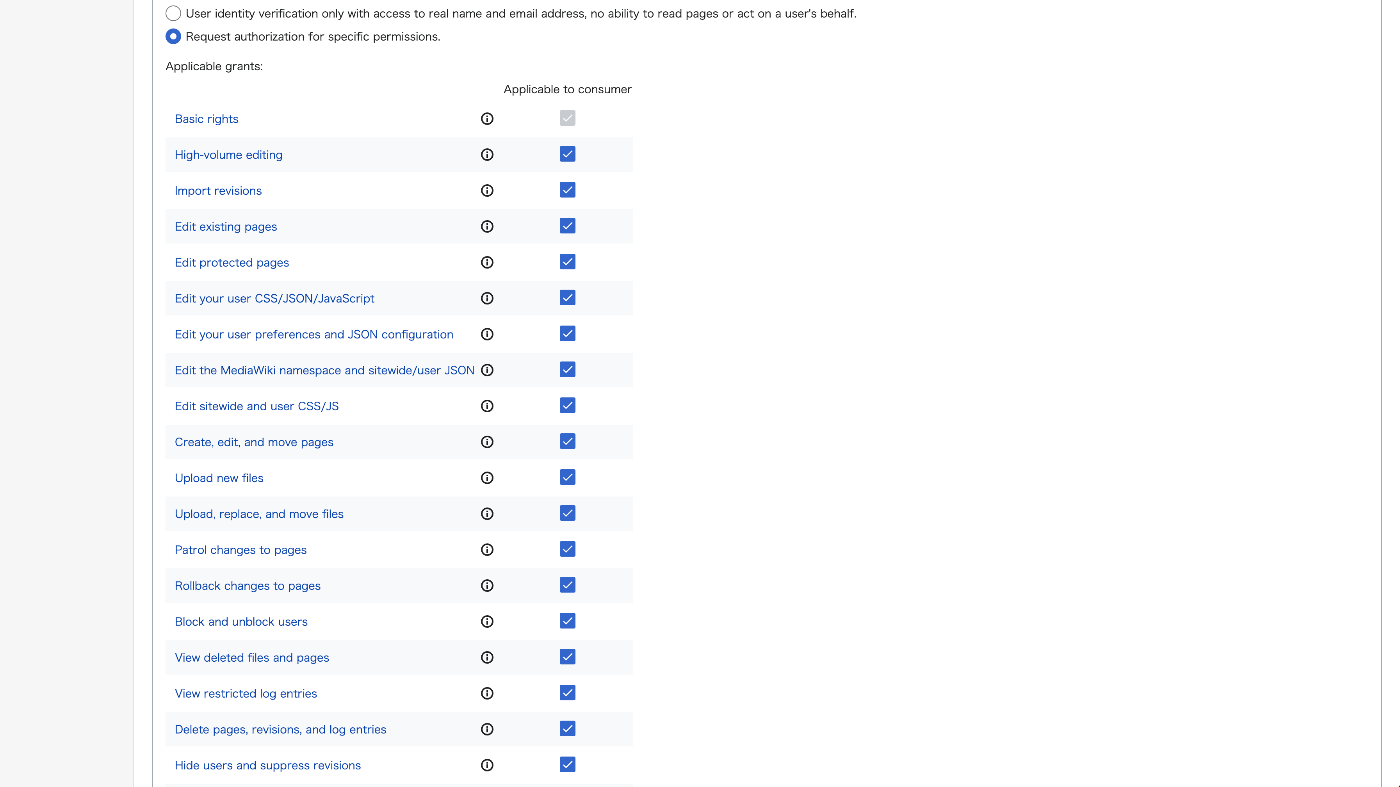
項目を埋めていきます。

今回はテストのため、すべての項目にチェックを入れました。

結果、以下のようなページが表示され、認証情報を取得できます。

実行
.envファイルを作成します。
consumer_key=xxx
consumer_secret=yyy
access_token=zzz
access_secret=aaa
load_dotenvを使って認証情報をロードして、設定します。
from wikibase_api import Wikibase
from dotenv import load_dotenv
import os

api_url = "https://nakamura196.wikibase.cloud/w/api.php"

load_dotenv(override=True)

oauth_credentials = {
    "consumer_key": os.getenv("consumer_key"),
    "consumer_secret": os.getenv("consumer_secret"),
    "access_token": os.getenv("access_token"),
    "access_secret": os.getenv("access_secret"),
}

wb = Wikibase(api_url=api_url, oauth_credentials=oauth_credentials)
以下を実行することで、空のアイテムを作成できます。
r = wb.entity.add("item")
例えば、以下のような結果が得られます。
{'entity': {'type': 'item',
  'id': 'Q49',
  'labels': {},
  'descriptions': {},
  'aliases': {},
  'claims': {},
  'sitelinks': {},
  'lastrevid': 128},
 'success': 1}
アイテムの編集等については、別の記事にまとめたいと思います。
削除
削除する際には、Item:やProperty:を頭につける必要がありました。
wb.entity.remove("Item:Q49")
以下のような結果が得られ、ページが削除されました。
{'warnings': {'main': {'*': 'Unrecognized parameter: summary.'}},
'delete': {'title': 'Item:Q49',
 'reason': 'content was: "", and the only contributor was "[[Special:Contributions/Nakamura|Nakamura]]" ([[User talk:Nakamura|talk]])',
 'logid': 100}}
検索
以下のようなクエリを発行してみます。
wb.entity.search("japan", "en")
以下のような結果が得られました。
{
	"warnings": {
		"main": {
			"*": "Unrecognized parameter: offset."
		}
	},
	"searchinfo": {
		"search": "japan"
	},
	"search": [
		{
			"id": "Q43",
			"title": "Item:Q43",
			"pageid": 84,
			"display": {
				"label": {
					"value": "Japan",
					"language": "en"
				},
				"description": {
					"value": "island country in East Asia",
					"language": "en"
				}
			},
			"repository": "local",
			"url": "https://nakamura196.wikibase.cloud/wiki/Item:Q43",
			"concepturi": "https://nakamura196.wikibase.cloud/entity/Q43",
			"label": "Japan",
			"description": "island country in East Asia",
			"match": {
				"type": "label",
				"language": "en",
				"text": "Japan"
			}
		}
	],
	"success": 1
}
まとめ
wikibaseのapiをpythonクライアントから試してみました。wikibaseと外部システムをAPIを介して接続することで、色々と便利に利用することができそうでした。
他の方の参考になりましたら幸いです。
Discussion