📑
PayPay Api使って爆速で支払いシステム作ってみた(Nextjs app router)
目的
- 自分は今までに支払いシステムを作ったことがなかった
- 自分のお金周りのシステムのハードルを下げたかった。
実際の画面
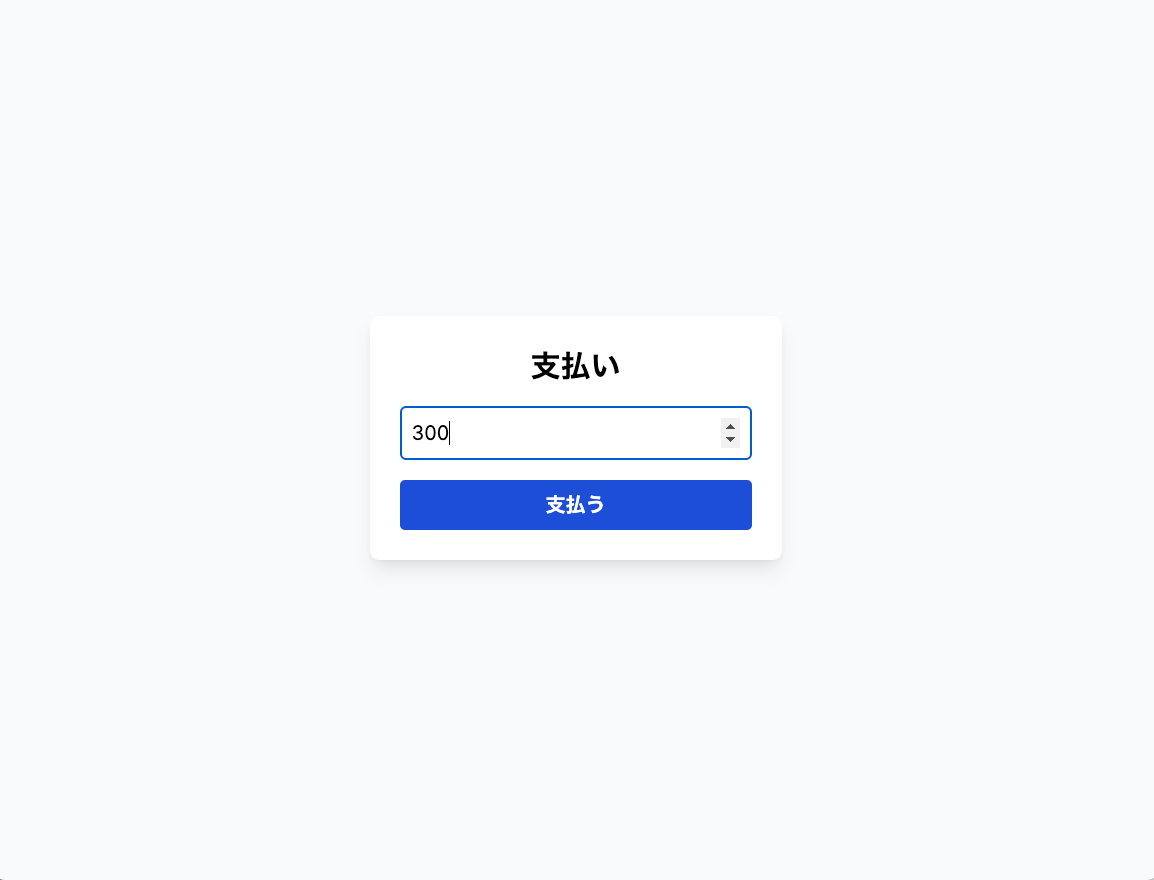
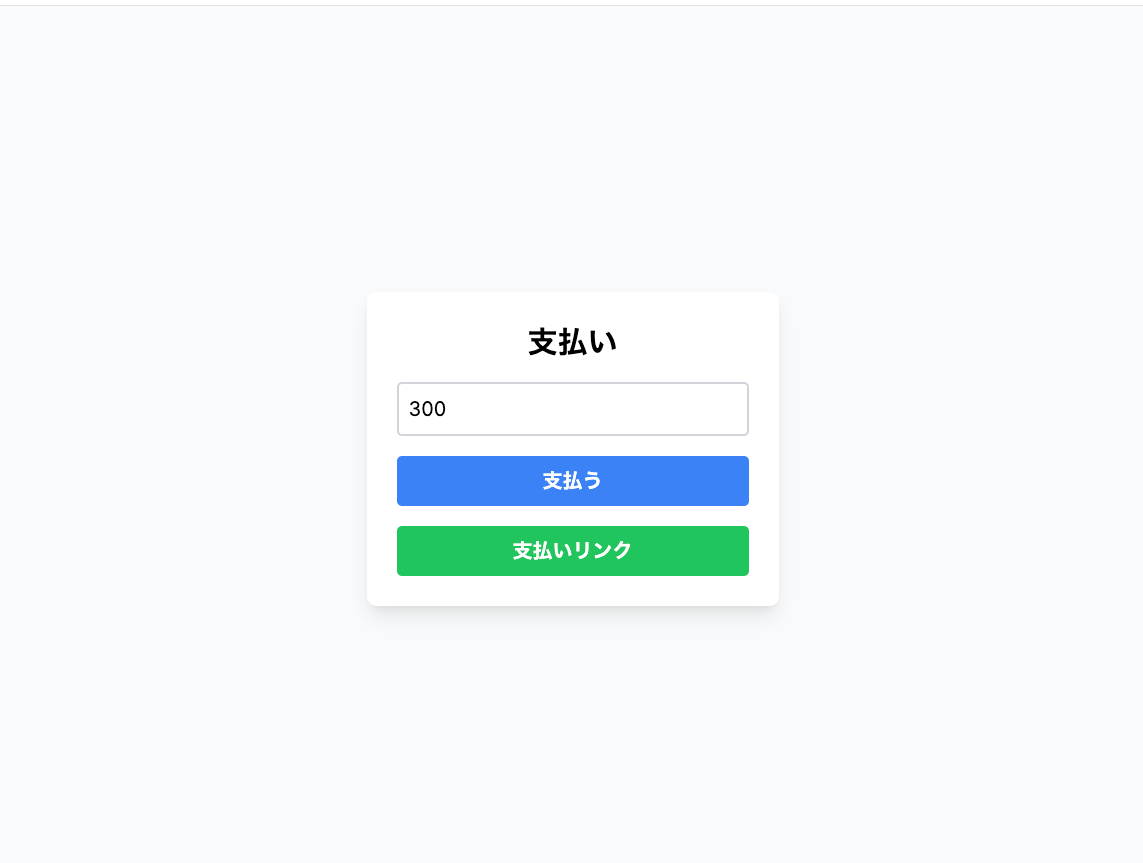
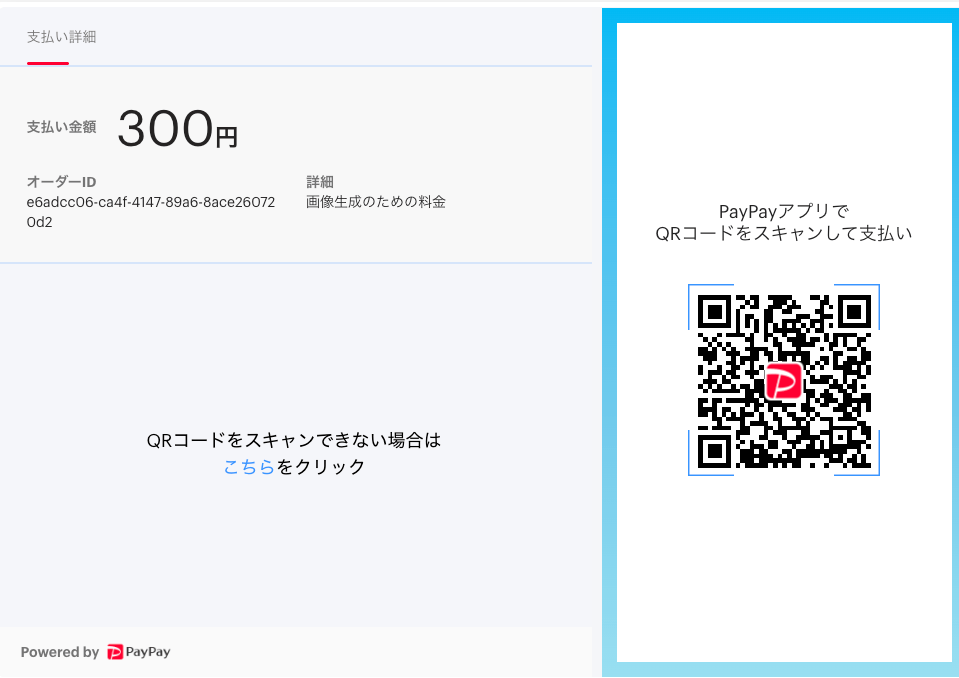
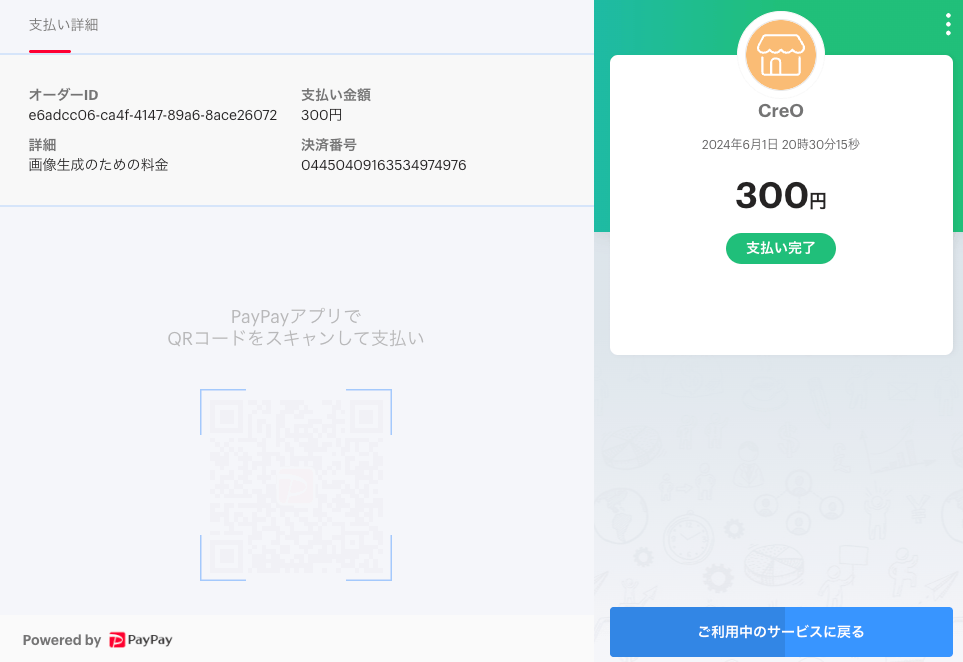
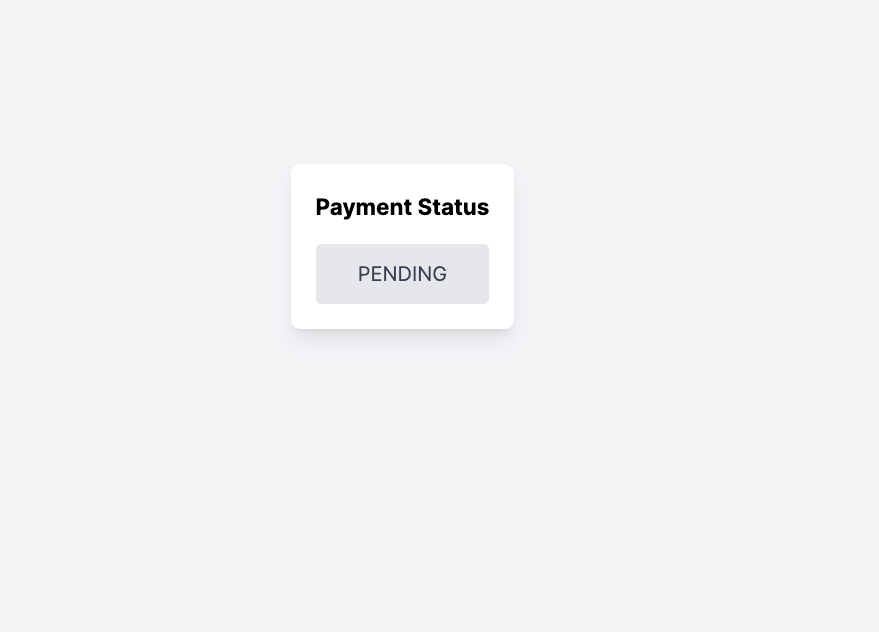
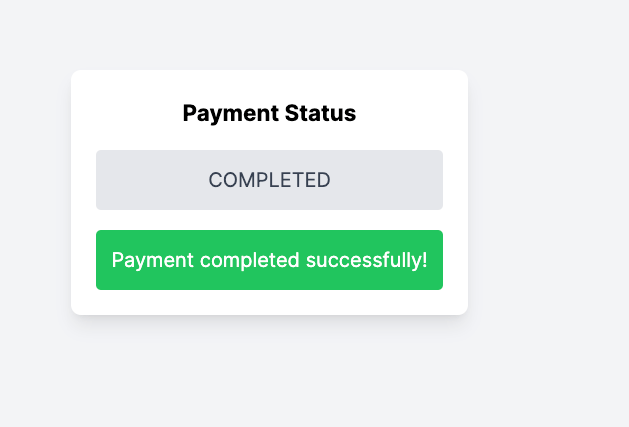
実際のコード
技術選定
- Nextjs AppRouter
事前準備
paypay developer の登録
Nextjs の必要なパッケージをインストール
今回は、javascript の paypay sdk キットを利用と HTTP クライアントライブラリの axios を利用します。
npm i @paypayopa/paypayopa-sdk-node axios
env ファイルの作成
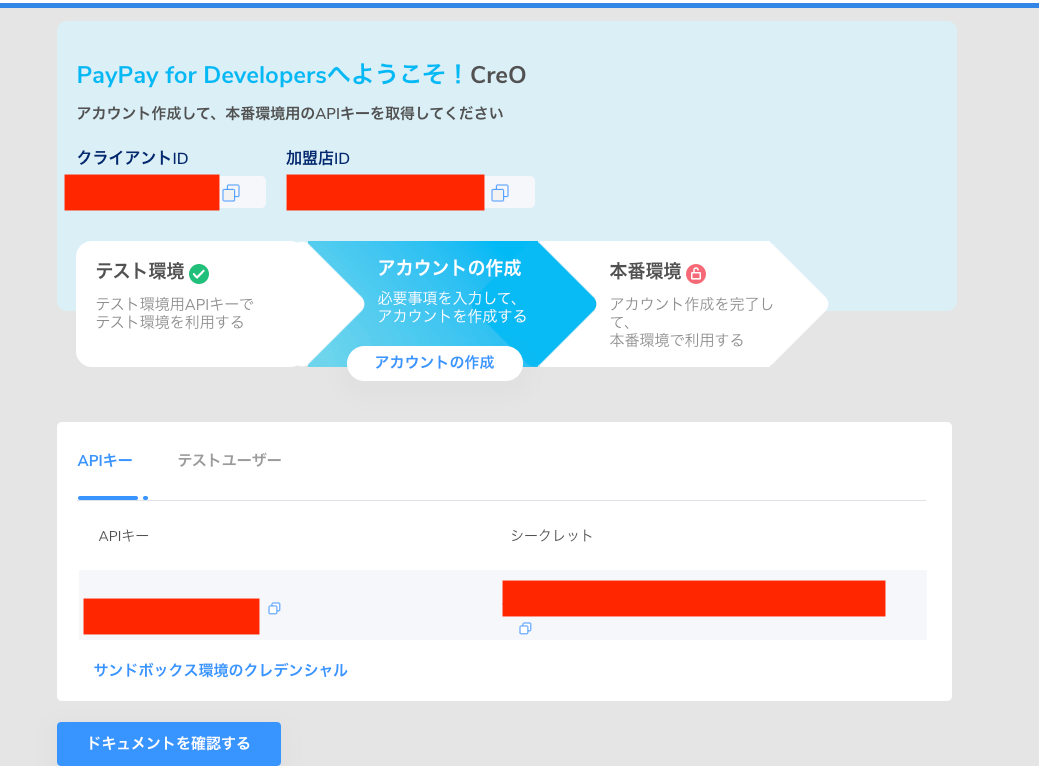
上の paypay developer の dashbord 画面から以下を env ファイルに記載してください。
PAYPAY_API_KEY = APIキー
PAYPAY_SECRET = シークレット
MERCHANT_ID= 加盟店ID
実装
API 設計
今回は、paypay Developer にも載っている以下のシーケンスを採用しました。
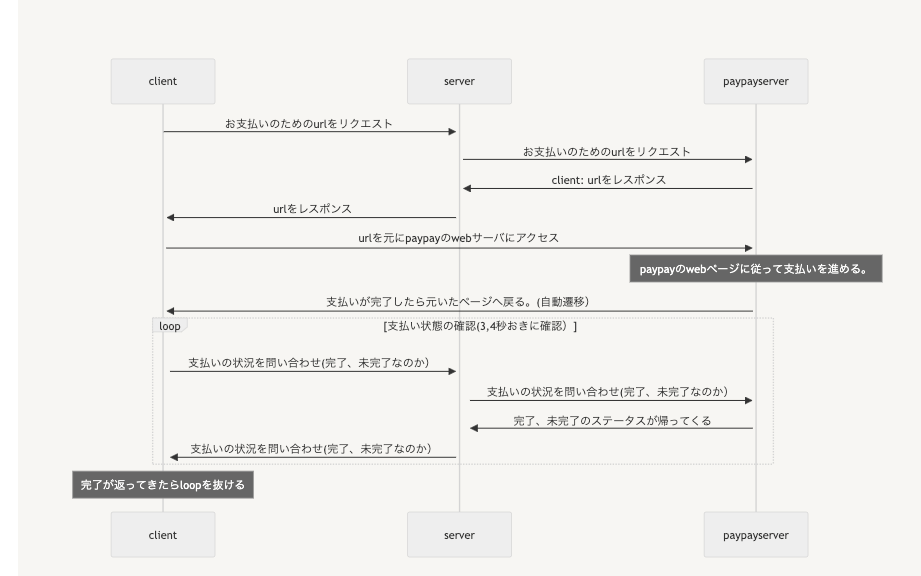
※paypay developer を参考
API 実装
支払いのための url 取得の api を作成
/api/paypay/route.ts を作成
import { NextResponse } from "next/server";
import crypto from "crypto"; // Importing crypto for generating unique IDs
import PAYPAY from "@paypayopa/paypayopa-sdk-node"; // Importing PayPay SDK
const { v4: uuidv4 } = require("uuid");
// POST Handler
// Configuring the PayPay SDK
PAYPAY.Configure({
  clientId: process.env.PAYPAY_API_KEY || "",
  clientSecret: process.env.PAYPAY_SECRET || "",
  merchantId: process.env.MERCHANT_ID,
  // productionMode: process.env.NODE_ENV === "production", // Automatically set based on environment
});
export async function POST(request: Request) {
  const { amount } = await request.json(); // Extracting amount from request
  const merchantPaymentId = uuidv4(); // 支払いID(一意になるようにuuidで生成)
  const orderDescription = "画像生成のための料金"; // Description of the order
  const payload = {
    merchantPaymentId: merchantPaymentId,
    amount: {
      amount: parseInt(amount),
      currency: "JPY",
    },
    codeType: "ORDER_QR",
    orderDescription: orderDescription,
    isAuthorization: false,
    redirectUrl: `http://localhost:3002/${merchantPaymentId}`, // Redirect URL
    redirectType: "WEB_LINK",
  };

  try {
    const response = await PAYPAY.QRCodeCreate(payload); // Attempting to create a payment
    return NextResponse.json(response); // Sending response back to client
  } catch (error) {
    console.error("PayPay Payment Error:", error); // Logging the error
    return new NextResponse(
      JSON.stringify({
        error: "支払いに失敗しました",
      }),
      {
        status: 400,
      }
    );
  }
}
支払い状況確認の api を作成
api/checkPaymentStatus/route.ts を作成
import { NextResponse } from "next/server";
import crypto from "crypto"; // Importing crypto for generating unique IDs
import PAYPAY from "@paypayopa/paypayopa-sdk-node"; // Importing PayPay SDK
const { v4: uuidv4 } = require("uuid");
// POST Handler
// Configuring the PayPay SDK
PAYPAY.Configure({
  clientId: process.env.PAYPAY_API_KEY || "",
  clientSecret: process.env.PAYPAY_SECRET || "",
  merchantId: process.env.MERCHANT_ID,
  // productionMode: process.env.NODE_ENV === "production", // Automatically set based on environment
});
export async function POST(request: Request) {
  const { amount } = await request.json(); // Extracting amount from request
  const merchantPaymentId = uuidv4(); // 支払いID(一意になるようにuuidで生成)
  const orderDescription = "画像生成のための料金"; // Description of the order
  const payload = {
    merchantPaymentId: merchantPaymentId,
    amount: {
      amount: parseInt(amount),
      currency: "JPY",
    },
    codeType: "ORDER_QR",
    orderDescription: orderDescription,
    isAuthorization: false,
    redirectUrl: `http://localhost:3002/${merchantPaymentId}`, // Redirect URL
    redirectType: "WEB_LINK",
  };

  try {
    const response = await PAYPAY.QRCodeCreate(payload); // Attempting to create a payment
    return NextResponse.json(response); // Sending response back to client
  } catch (error) {
    console.error("PayPay Payment Error:", error); // Logging the error
    return new NextResponse(
      JSON.stringify({
        error: "支払いに失敗しました",
      }),
      {
        status: 400,
      }
    );
  }
}
画面の実装
金額を入力してその金額を支払うための url を取得して表示する page
page.tsx を作成
"use client";
import axios from "axios";
import { useState } from "react";

export default function Home() {
  const [amount, setAmount] = useState(0);
  const [url, setUrl] = useState("");
  const handlePay = async () => {
    const payed = await axios.post("/api/paypay", { amount });
    setUrl(payed.data.BODY.data.url);
  };

  return (
    <div className="bg-gray-50 min-h-screen flex flex-col justify-center items-center">
      <div className="bg-white p-6 rounded-lg shadow-lg">
        <h1 className="text-2xl font-bold text-center mb-4">支払い</h1>
        <input
          type="number"
          value={amount}
          onChange={(e) => setAmount(Number(e.target.value))}
          className="border-2 border-gray-300 p-2 rounded w-full"
          placeholder="金額を入力"
        />
        <button
          onClick={handlePay}
          className="mt-4 bg-blue-500 hover:bg-blue-700 text-white font-bold py-2 px-4 rounded w-full"
        >
          支払う
        </button>
        {url && (
          <a
            href={url}
            className="block mt-4 bg-green-500 hover:bg-green-700 text-white text-center font-bold py-2 px-4 rounded"
          >
            支払いリンク
          </a>
        )}
      </div>
    </div>
  );
}
支払い状況が完了したかどうかを確認して確認ができたら complate と表示する page
[id]/page.tsx を作成
"use client";
import axios from "axios";
import React, { useEffect, useState } from "react";

const Page = ({ params }: { params: { id: number } }) => {
  const [paymentStatus, setPaymentStatus] = useState("PENDING"); // Default to PENDING until first check

  useEffect(() => {
    const interval = setInterval(() => {
      axios
        .post("/api/checkPaymentStatus", { id: params.id })
        .then((response) => {
          const { status } = response.data;
          setPaymentStatus(status);
          console.log(status);
          if (status === "COMPLETED" || status === "FAILED") {
            clearInterval(interval); // Stop polling when transaction completes or fails
          }
        })
        .catch((error) => {
          console.error("Failed to check payment status:", error);
          clearInterval(interval); // Also stop polling on error
        });
    }, 4500); // Check status every 4.5 seconds

    return () => clearInterval(interval); // Clean up the interval on component unmount
  }, [params.id]);

  return (
    <div className="bg-gray-100 min-h-screen flex flex-col items-center justify-center">
      <div className="p-5 bg-white rounded-lg shadow-lg">
        <h1 className="text-lg font-bold text-center mb-4">Payment Status</h1>
        <div className="text-center p-3 rounded bg-gray-200 text-gray-700">
          {paymentStatus}
        </div>
        {paymentStatus === "COMPLETED" && (
          <div className="mt-4 p-3 rounded bg-green-500 text-white text-center">
            Payment completed successfully!
          </div>
        )}
        {paymentStatus === "FAILED" && (
          <div className="mt-4 p-3 rounded bg-red-500 text-white text-center">
            Payment failed. Please try again.
          </div>
        )}
      </div>
    </div>
  );
};

export default Page;
まとめ
今回は web に限定して行ったが、ios や android などのネイティブアプリでも実装を行っていきたい
Discussion
ステップバイステップな記事でわかりやすかったです!とても簡単に実装できるんですね😮
コードの表示部分に言語を指定してシンタックスハイライト記法を使うともっと読みやすくなりそうと思いました。不躾なお願いですみませんが、気が向いたら追加してもらえると嬉しいです🙏
ご指摘ありがとうございます!フィードバックをいただけてとても嬉しいです😊
コードの表示部分関して勉強になります!ありがとうございます!
おお、ありがとうございます!大変読みやすくなり助かりました☺️今後の記事も楽しみにしてます🙏