MotionBuilder Scripts - Custom Text HUD
目標
独自のText HUD(Text表示のHeads Up Display)を作成する。
使用例

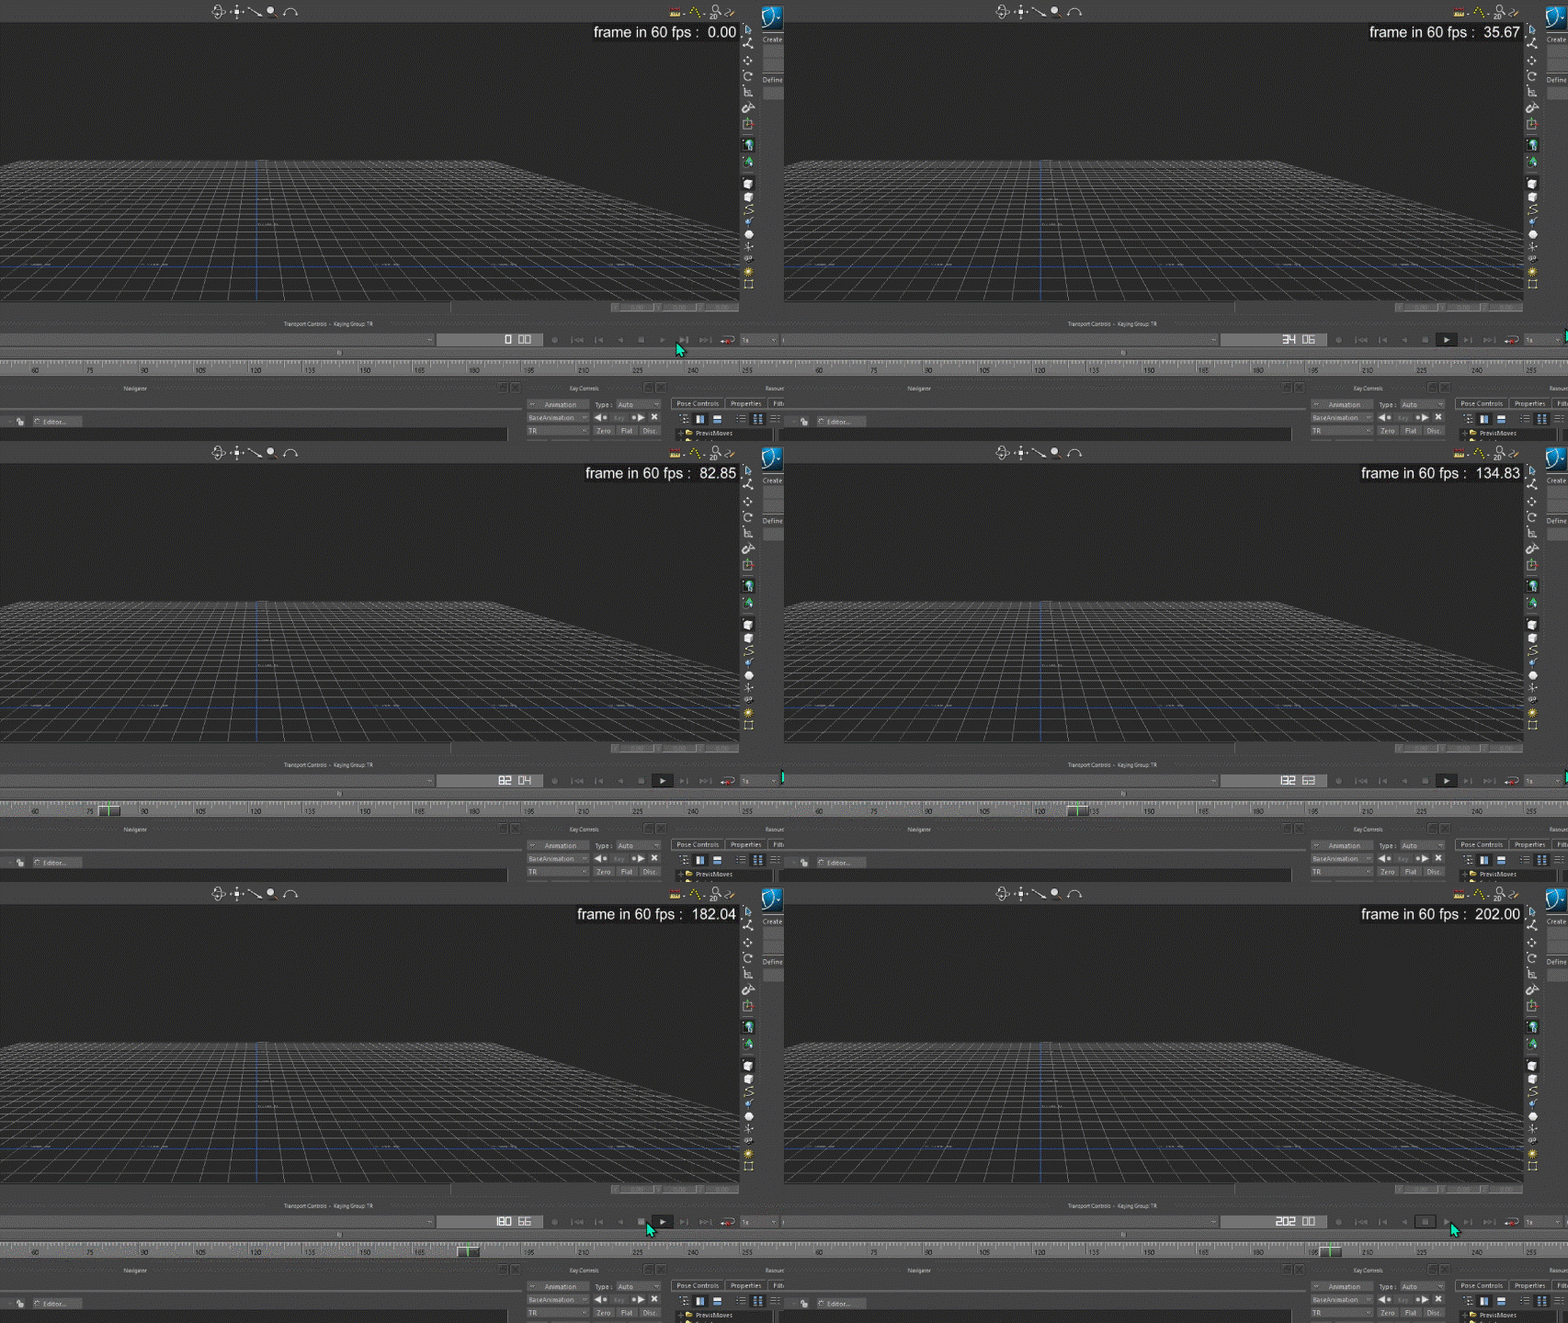
60 fpsでフレーム数をViewerに表示
解説
Text HUDに対して、Custom PropertyとRelation Constraintを用いる[1]。
HUD関連
ベースのHUDを作成する。
# configure text hud element
lHud = FBHUD("CustomHUD")
lHud_frames = FBHUDTextElement("Previs_frames")
lHud_frames.Content = "frame in 60 fps : "
lHud_frames.X = 0
lHud_frames.Y = 0
lHud_frames.Height = 7
lHud_frames.Justification = FBHUDElementHAlignment.kFBHUDRight
lHud_frames.HorizontalDock = FBHUDElementHAlignment.kFBHUDRight
lHud_frames.VerticalDock = FBHUDElementVAlignment.kFBHUDTop
lHud.ConnectSrc(lHud_frames)
FBHUD()
このコンストラクタはHUDを作成するが、HUDElementを作成するわけではないので注意。

FBHUD()が作成するもの
FBHUDTextElement()
実際にViewerに表示される内容を扱うのがこのコンストラクタ。テキストのHUDを作成する。

FBHUDTextElement()が作成するもの
FBHUDElementの派生クラスで、本来この基本クラスのオブジェクトがFBHUD型オブジェクトに接続され、さらにFBHUD型オブジェクトがScene内のCameraに接続されることでHUDが表示されるようになる。
lHud = FBHUD("HUD name")
lHud_text = FBHudTextElement("HUD element name")
lHud.ConnectSrc(lHud_text)
FBSystem().Scene.Cameras[0].ConnectSrc(lHud)
この FBCamera.ConnectSrc( <FBHUD class> ) を実行することで初めて、Scene BrowserにHUDが表示されるので注意。
Justification, Dock
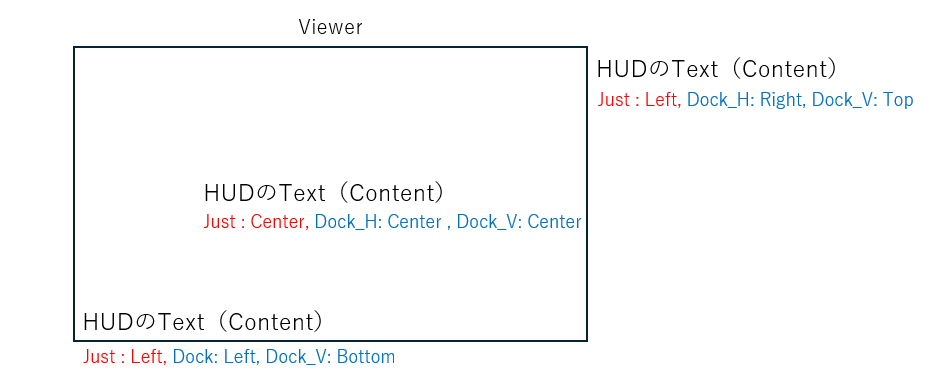
- Justification : テキストのどこでDockするのか(右側・左側・真ん中)
- Dock : テキストをどの端に配置するのか(水平右・中央・左、垂直上・中・下)

JustificationとDockの "Right/Left" を合わせないと画面外にはみ出す
ベースのHUDを作成したら、Cameraに接続する。FBScene.Camera属性でシステムのCameraを得るのが普通だが、前回の記事の内容を利用すれば、現在アクティブなViewで使用されるCameraを指定できる。
# set HUD to the current camera
renderer = FBSystem().Scene.Renderer
ActivePaneIndex = renderer.GetSelectedPaneIndex()
renderer.GetCameraInPane(ActivePaneIndex).ConnectSrc(lHud)
Property関連
Property: Base property class.
A property is a holder for function callbacks into the internals of the application. - FBProperty Class Reference
Propertyは本来オブジェクトが持っているもの以外に、Custom Property というユーザが追加で割り当てて作成できるPropertyがある[2]。このようなcustom propertyを作成する場合は、FBComponent.PropertyCreate() を用いる。
customprop = lHud.PropertyCreate(
    "custom prop",
    FBPropertyType.kFBPT_double,
    "Number",
    True,
    True,
    None
)
第1引数はPropertyの表示名で、自由に設定してよい。一方で、第2引数のPropertyTypeと第3引数のDataTypeは CustomProperty.pyサンプル から選択して用いる必要がある。第4引数は、作成するPropertyをAnimatableにするか否かの指定だが、ものによってAnimatableにできないものもあるので、これもサンプルを参照すること。第5引数はTrueでよい。
作成したPropertyをAnimateするのを忘れない。忘れるとReleation ConstraintでBoxを作成したときにPropertyが表示されないので、Nodeで接続することができなくなる。
customprop.SetAnimated(True)
こうしてHUDにPropertyを作成することで、Relation Constraintを介して外部から何かしらの時刻データを流しこむことができるようになる。一方で、HUDに適用してもHUDElementにも適用できなければ画面上のHUDのテキスト表示は変化しない。
FBComponent.PropertyAddReferenceProperty() は、Reference Property という”別のPropertyを参照するProperty”を作成する。このReference PropertyをHUDElementに作成し、その参照先をHUDのCustom Propertyに設定するのである。
lHud_frames.PropertyAddReferenceProperty(customprop)
Relation Constraint関連
Relation Constraintは、Box と (Animation)Node を用いて、プロパティ間のアニメーションデータのフローを作成できるConstraintである。UI上ではノード編集のようにBox間をノードでつないでいくのだが、もちろんスクリプトでも同じことができる。
Relation Constraintを作成する際は、基本まず3つの関数を用いる。
FBConstraint.SetAsSource() / ConstrainObject()
データの参照元と適用先のBoxを設定する。オブジェクトをConstraintのwindowにドラッグアンドドロップした時に出る下図の2つに対応する。モデルについてBoxを作りたいなら、これらの関数の引数にモデルのオブジェクトをとればよい。

FBConstraint.CreateFunctionBox()
Constraint Settingsに表示されている"Relation Operator"を配置するもの。

CreateFunctionBox()で作成できるOperatorたち[3]
第1引数にUI上のツリー名を、第2引数にOperator名をとればよい。ただUI上では半角空白が空いているのかどうかよく見えないので、実際にBoxが作成できるまで実行してみるしかない。
# create relation constraint
lConstraint = FBConstraintRelation("HUD configure")
srcbox = lConstraint.CreateFunctionBox("System", "Local Time")
timetosecbox = lConstraint.CreateFunctionBox("Converters", "Time to seconds")

# Multiplyの後に空白、乗算記号の前後に空白あり
multiplybox = lConstraint.CreateFunctionBox("Number", "Multiply (a x b)")
dstbox = lConstraint.ConstrainObject(lHud)
Boxには "In/Out" の2つのAnimationNodeがあり、それぞれからさらに各PropertyのAnimationNodeに分かれている。Boxを配置したら次はそれらをNodeで接続しなければならないのだが、この時Box内でNode名を指定して特定のPropertyのAnimationNodeを取得する関数 FindAnimationNode() を利用すると便利である。
# get box node function
def FindAnimationNode( parentNode:FBAnimationNode, nodeName:str ) -> FBAnimationNode:
    lResult = None
    for lNode in parentNode.Nodes:
        if lNode.Name == nodeName:
            lResult = lNode
            break
    return lResult
これは、CreateAndPopulateAConstraintRelation.pyで定義されていたもの。
各PropertyのAnimationNodeの名前は、UI上でBoxに表示されているもの(括弧で挟まれていない方)と同じである。
# create relation boxes
srcboxOutput = FindAnimationNode(srcbox.AnimationNodeOutGet(), "Result")
timetosecboxInput = FindAnimationNode(timetosecbox.AnimationNodeInGet(), "Time")
timetosecboxOutput = FindAnimationNode(timetosecbox.AnimationNodeOutGet(), "Result")
multiplyInput_a = FindAnimationNode(multiplybox.AnimationNodeInGet(), "a")
multiplyInput_b = FindAnimationNode(multiplybox.AnimationNodeInGet(), "b")
multiplyOutput = FindAnimationNode(multiplybox.AnimationNodeOutGet(), "Result")
dstboxInput = FindAnimationNode(dstbox.AnimationNodeInGet(), customprop.Name)
あとはNodeの接続である。FBConnect() を用いて、2つのNodeを接続する。この際、Nodeが確実に取得されていることを事前に確認する。
# connect boxes
if(srcboxOutput and timetosecboxInput and timetosecboxOutput
   and multiplyInput_a and multiplyInput_b and multiplyOutput and dstboxInput):
    FBConnect(srcboxOutput, timetosecboxInput)
    FBConnect(timetosecboxOutput, multiplyInput_a)
    FBConnect(multiplyOutput, dstboxInput)
BoxにはValueを設定することができる。より正確には、BoxのAnimationNodeにValueという決まった値のデータを送り続けることができる。

UI上で空いた接続部を右クリックするとValueの設定ができる
Set Valueを行う(AnimationNodeにデータを送る)際には WriteData() 用いるのだが、引数がひと癖あるので注意。

FBAnimationNode Class Referenceより
第1引数が「float」となっているが、正しくは list である。
ここを間違えると did not match C++ signature: WriteData(class PYFBSDK::FBAnimationNode_Wrapper {lvalue}, class boost::python::list) WriteData(class PYFBSDK::FBAnimationNode_Wrapper {lvalue}, class boost::python::list, class PYFBSDK::FBEvaluateInfo_Wrapper * __ptr64) と表示されるはず。
listであるから、Set Valueとしてただの数を登録する場合は WriteData([value]) のように括弧に入れる必要がある。
# set multiply box value
multiplyInput_b.WriteData([60.0])
以上でRelationが作成できる。

作成したRelation
Relation Constraint も "Constraint" であるから、最後に必ずActiveにしなければならない。
lConstraint.Active = True
忘れると、せっかく設定した内容がいつまでも適用されない。
ソースコード
-
実際にはPropertyは3種類ある(FBEditProperty Referenceを参照) ↩︎
-
詳細はRelation Referenceを参照 ↩︎
Discussion