Rcloneでオブジェクトストレージに、リアルタイム暗号化バックアップ検証
要件
開発マシンのファイルを、
①.gitignoreを再帰的にチェックして、対象をフィルタしながら
②リアルタイムで
③オブジェクトストレージに
④暗号化して
⑤バックアップ
⑥マルチプラットフォーム対応(win,mac,linux)
これらの要件を満たせるソリューションが2024/07時点で未だに見つかっておらず、
Rcloneのツールをまだ試していなかったので、今回チャレンジしてみたいと思います。
これまで、syncthingやresticなどを使って、上記の一部を対応する事はできたのですが、
全てについて対応できるソリューションは確認できませんでした。
今回、rclone検証前のイメージでは、
・rcloneで③〜⑥を対応する
・①、②については、Rustによる自作ツールを開発して対応する
Rustで、ファイルの変更を取得するのは、こちらのモジュールを利用します
Cross-platform filesystem notification library for Rust.
検証ポイント
要件をクリアするために、可能か否かの検証が必要なポイントは以下の通り。
1.rcloneで、ファイルを個別に指定して同期処理が行えるか
2.rcloneで、gitignoreファイルのような形式の同期時のフィルタリングが可能か
3.notify-rsで、膨大な大きさのフォルダを監視したとき、CPUやメモリの使用量、あるいは
Rustのビルドのように大量のファイル処理が行われたとき、問題が生じないか
Rcloneを色々触ってみる①(設定)
linux mintノートPCで、rcloneをダウンロードして設定、簡単に動作テスト。
こちらからバイナリダウンロードして、
backblaze b2をオブジェクトストレージとして使いたいので
ここを見ながら進める。
configコマンドで、backblazeのキー情報をセットした。
backblazeはリモートタイプの選択肢が用意されているので、それを選んでキー情報を登録。
これでconfigのセットアップは完了。
※細かいconfig設定をするか?と聞かれて、利用帯域の制限など制御できそうだが、今はデフォルトでOK
rclone config

<5>NOTICE: Config file "/home/username/.config/rclone/rclone.conf" not found - using defaults
No remotes found, make a new one?
n) New remote
s) Set configuration password
q) Quit config
n/s/q> n

Enter name for new remote.
name> new-remote-name

Option Storage.
Type of storage to configure.
Choose a number from below, or type in your own value.
 1 / 1Fichier
   \ (fichier)
 2 / Akamai NetStorage
   \ (netstorage)
 3 / Alias for an existing remote
   \ (alias)
 4 / Amazon Drive
   \ (amazon cloud drive)
 5 / Amazon S3 Compliant Storage Providers including AWS, Alibaba, ArvanCloud, Ceph, China Mobile, Cloudflare, GCS, DigitalOcean, Dreamhost, Huawei OBS, IBM COS, IDrive e2, IONOS Cloud, Liara, Lyve Cloud, Minio, Netease, Petabox, RackCorp, Scaleway, SeaweedFS, StackPath, Storj, Tencent COS, Qiniu and Wasabi
   \ (s3)
 6 / Backblaze B2
   \ (b2)
 7 / Better checksums for other remotes
   \ (hasher)
 8 / Box
   \ (box)
 9 / Cache a remote
   \ (cache)
10 / Citrix Sharefile
   \ (sharefile)
11 / Combine several remotes into one
   \ (combine)
12 / Compress a remote
   \ (compress)
13 / Dropbox
   \ (dropbox)
14 / Encrypt/Decrypt a remote
   \ (crypt)
15 / Enterprise File Fabric
   \ (filefabric)
16 / FTP
   \ (ftp)
17 / Google Cloud Storage (this is not Google Drive)
   \ (google cloud storage)
18 / Google Drive
   \ (drive)
19 / Google Photos
   \ (google photos)
20 / HTTP
   \ (http)
21 / Hadoop distributed file system
   \ (hdfs)
22 / HiDrive
   \ (hidrive)
23 / In memory object storage system.
   \ (memory)
24 / Internet Archive
   \ (internetarchive)
25 / Jottacloud
   \ (jottacloud)
26 / Koofr, Digi Storage and other Koofr-compatible storage providers
   \ (koofr)
27 / Local Disk
   \ (local)
28 / Mail.ru Cloud
   \ (mailru)
29 / Mega
   \ (mega)
30 / Microsoft Azure Blob Storage
   \ (azureblob)
31 / Microsoft OneDrive
   \ (onedrive)
32 / OpenDrive
   \ (opendrive)
33 / OpenStack Swift (Rackspace Cloud Files, Blomp Cloud Storage, Memset Memstore, OVH)
   \ (swift)
34 / Oracle Cloud Infrastructure Object Storage
   \ (oracleobjectstorage)
35 / Pcloud
   \ (pcloud)
36 / PikPak
   \ (pikpak)
37 / Put.io
   \ (putio)
38 / QingCloud Object Storage
   \ (qingstor)
39 / SMB / CIFS
   \ (smb)
40 / SSH/SFTP
   \ (sftp)
41 / Sia Decentralized Cloud
   \ (sia)
42 / Storj Decentralized Cloud Storage
   \ (storj)
43 / Sugarsync
   \ (sugarsync)
44 / Transparently chunk/split large files
   \ (chunker)
45 / Union merges the contents of several upstream fs
   \ (union)
46 / Uptobox
   \ (uptobox)
47 / WebDAV
   \ (webdav)
48 / Yandex Disk
   \ (yandex)
49 / Zoho
   \ (zoho)
50 / premiumize.me
   \ (premiumizeme)
51 / seafile
   \ (seafile)
Storage> 6

Option account.
Account ID or Application Key ID.
Enter a value.
account> xxxxxxxxxxxxxxxxxxxx

Option key.
Application Key.
Enter a value.
key> xxxxxxxxxxxxxxxxxxx
Rcloneを色々触ってみる②(同期)
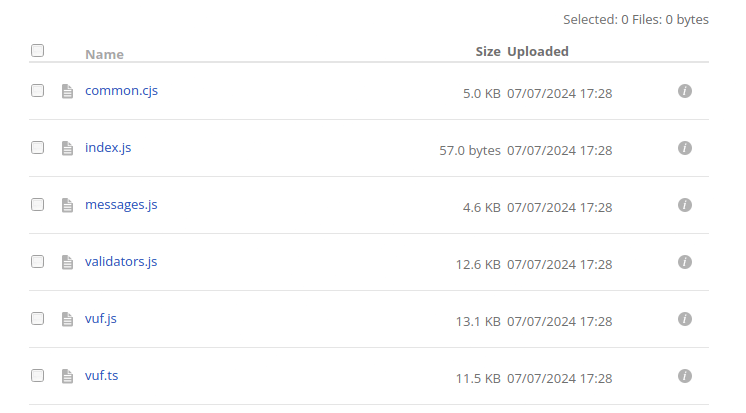
ファイルが数個入った小さいディレクトリを、
b2上に事前に作成しておいた空のバケットsync-bucketに同期してみる。
sync --interactive
1ファイルずつ対話式で同期を進めていくモード
$ rclone sync --interactive /home/username/Project/vuf/src new-remote-name:sync-bucket

rclone: copy "validators.js"?
y) Yes, this is OK (default)
n) No, skip this
s) Skip all copy operations with no more questions
!) Do all copy operations with no more questions
q) Exit rclone now.
y/n/s/!/q> !
<5>NOTICE: Doing all copy operations from now on without asking
<5>NOTICE:
Transferred:       23.505 KiB / 23.505 KiB, 100%, 0 B/s, ETA -
Checks:                 4 / 4, 100%
Transferred:            2 / 2, 100%
Elapsed time:         4.8s
同期できた。
暗号化されていないので、
次に、暗号化された状態での同期を行う
Rcloneを色々触ってみる③(暗号化)
ここを見ながら進める
Rcloneの暗号化の仕組みは、
既存のリモートをwrappingするような形で、もう一つ暗号化設定を行うリモートを作成し、
そのリモートを通して処理を行うと自動的に暗号化・復号化がかかるようになります。
新たに暗号化用のリモート(14)で作成。その際、既存のリモート+パスやバケット名を指定するようです。
今回は、上記で作成したnew-remote-name:sync-bucket と指定しました。
clone config
Current remotes:

Name                 Type
====                 ====
new-remote-name         b2

e) Edit existing remote
n) New remote
d) Delete remote
r) Rename remote
c) Copy remote
s) Set configuration password
q) Quit config
e/n/d/r/c/s/q> n

Enter name for new remote.
name> new-remote-name-cyprt


Storage> 14

Option remote.
Remote to encrypt/decrypt.
Normally should contain a ':' and a path, e.g. "myremote:path/to/dir",
"myremote:bucket" or maybe "myremote:" (not recommended).
Enter a value.
remote> new-remote-name:sync-bucket
cryptに関する様々な設定を進めていく。
ファイル名も暗号化し、パスワードは2つ手入力で指定しました。
Option filename_encryption.
How to encrypt the filenames.
Choose a number from below, or type in your own string value.
Press Enter for the default (standard).
   / Encrypt the filenames.
 1 | See the docs for the details.
   \ (standard)
 2 / Very simple filename obfuscation.
   \ (obfuscate)
   / Don't encrypt the file names.
 3 | Adds a ".bin", or "suffix" extension only.
   \ (off)

filename_encryption> 1

Option directory_name_encryption.
Option to either encrypt directory names or leave them intact.
NB If filename_encryption is "off" then this option will do nothing.
Choose a number from below, or type in your own boolean value (true or false).
Press Enter for the default (true).
 1 / Encrypt directory names.
   \ (true)
 2 / Don't encrypt directory names, leave them intact.
   \ (false)

Option password.
Password or pass phrase for encryption.
Choose an alternative below.
y) Yes, type in my own password
g) Generate random password
y/g> y
Enter the password:
password:
Confirm the password:
password:

Option password2.
Password or pass phrase for salt.
Optional but recommended.
Should be different to the previous password.
Choose an alternative below. Press Enter for the default (n).
y) Yes, type in my own password
g) Generate random password
n) No, leave this optional password blank (default)
y/g/n> y
Enter the password:
password:
Confirm the password:
password:

Edit advanced config?
y) Yes
n) No (default)
y/n> n

Configuration complete.
Options:
- type: crypt
- remote: new-remote-name:crypt
- password: *** ENCRYPTED ***
- password2: *** ENCRYPTED ***
Keep this "new-remote-name-crypt" remote?
y) Yes this is OK (default)
e) Edit this remote
d) Delete this remote
y/e/d> y

Current remotes:

Name                 Type
====                 ====
new-remote-name         b2
new-remote-name-crypt   crypt
リモート設定ができたので、同じように簡単なディレクトリで同期テスト。
rclone sync --interactive /home/username/Project/vuf/src new-remote-name-crypt:sync-bucket

rclone: copy "common.cjs"?
y) Yes, this is OK (default)
n) No, skip this
s) Skip all copy operations with no more questions
!) Do all copy operations with no more questions
q) Exit rclone now.
y/n/s/!/q> !
<5>NOTICE: Doing all copy operations from now on without asking
<5>NOTICE:
Transferred:       46.013 KiB / 46.013 KiB, 100%, 6.570 KiB/s, ETA 0s
Transferred:            6 / 6, 100%
Elapsed time:        12.7s
ファイル名が暗号化されて保存されているのでOK!

--b2-encoding
--transfers 12(default: 4)
cleanup
有効期限をもっと管理したいのであれば、rclone backend cleanup remote-name:bucket-name -o max-age=1h を実行すると、1時間以上前の未完成の大容量ファイルのアップロードをすべて削除し、古いバージョンはそのまま残します。
Rustによるファイル変更検知プログラム実装①
利用crateについて
Rustのファイル検知クレート notify(notify-debouncer-full) を使います。
notifyは、全ての変更を検知しますが、例えばファイル名変更だけでも3つのeventとして検知されます。
[2024-07-09T11:02:38Z INFO  realtime_rclone] Change: Event { kind: Modify(Name(From)), paths: ["/home/username/Project/realtime_rclone/config.json"], attr:tracker: Some(113122), attr:flag: None, attr:info: None, attr:source: None }
[2024-07-09T11:02:38Z INFO  realtime_rclone] Change: Event { kind: Modify(Name(To)), paths: ["/home/username/Project/realtime_rclone/config.json.bk"], attr:tracker: Some(113122), attr:flag: None, attr:info: None, attr:source: None }
[2024-07-09T11:02:38Z INFO  realtime_rclone] Change: Event { kind: Modify(Name(Both)), paths: ["/home/username/Project/realtime_rclone/config.json", "/home/username/Project/realtime_rclone/config.json.bk"], attr:tracker: Some(113122)
ある程度まとめて処理を行うために、Debouncer(デバウンサー)があります。
デバウンサー (Debouncer) とは
「デバウンサー (Debouncer)」は、短期間に発生する多数のイベントを1つのイベントとしてまとめる、または不要な重複イベントを排除するための仕組みです。これにより、システムは過剰な負荷を避け、効率的にイベントを処理することができます。
なぜデバウンサーが必要か
例えば、ファイルの変更を監視するアプリケーションがあるとします。ユーザーがファイルを保存するたびに、数秒間に数十回も「ファイルが変更された」というイベントが発生することがあります。これをそのまま処理すると、不必要な負荷がかかり、パフォーマンスが低下する可能性があります。
そこで、デバウンサーを使えば、一定期間内に発生した多数のイベントを一つのイベントにまとめることができます。例えば、2秒間に発生した全てのイベントを1つのイベントとして扱います。
Rust のコード例
notifyでは、notify_debouncer_full というクレートを使ってデバウンサーを設定します。このクレートは、ファイルシステムの変更通知(ファイルの変更、移動、削除など)を簡単に扱うために使用するものです。
use std::{fs, thread, time::Duration};

use notify::{RecursiveMode, Watcher};
use notify_debouncer_full::new_debouncer;
use tempfile::tempdir;

fn main() -> Result<(), Box<dyn std::error::Error>> {
    let dir = tempdir()?;
    let dir_path = dir.path().to_path_buf();

    thread::spawn(move || {
        let mut n = 1;
        let mut file_path = dir_path.join(format!("file-{n:03}.txt"));
        loop {
            for _ in 0..5 {
                fs::write(&file_path, b"Lorem ipsum").unwrap();
                thread::sleep(Duration::from_millis(500));
            }
            n += 1;
            let target_path = dir_path.join(format!("file-{n:03}.txt"));
            fs::rename(&file_path, &target_path).unwrap();
            file_path = target_path;
        }
    });

    let (tx, rx) = std::sync::mpsc::channel();

    // デバウンサーを2秒の遅延で設定
    let mut debouncer = new_debouncer(Duration::from_secs(2), None, tx)?;

    debouncer
        .watcher()
        .watch(dir.path(), RecursiveMode::Recursive)?;

    debouncer
        .cache()
        .add_root(dir.path(), RecursiveMode::Recursive);

    for result in rx {
        match result {
            Ok(events) => events.iter().for_each(|event| println!("{event:?}")),
            Err(errors) => errors.iter().for_each(|error| println!("{error:?}")),
        }
        println!();
    }

    Ok(())
}
コード解説
-
ディレクトリ作成と一時ファイル操作:
-
tempdir()を使って一時ディレクトリを作成し、そのパスを取得しています。 - スレッドを作成し、ループ内でファイルの書き込みとリネームを行っています。これにより、ファイルシステムに大量のイベントを発生させます。
-
-
デバウンサー設定:
-
new_debouncer関数を使ってデバウンサーを作成し、最大デバウンス時間を2秒に設定しています。 - デバウンサーのウォッチャーを使用して、指定されたディレクトリの変更を再帰的に監視しています。
-
-
イベント処理:
- メインスレッドでイベントを受信し、受信したイベントの内容を出力しています。
このように、デバウンサーを使うことで、短時間に発生する多数のイベントを効率的に処理することができます。
Rustによるファイル変更検知プログラム実装②
notifyによる監視の限界
ubuntuで監視したいファイルを大量に監視しょうとすると、以下のエラーが出ました。
 Running `target/debug/realtime_rclone`
Error: Error { kind: MaxFilesWat
これは、linuxのionotifyという仕組みで
ionotifyは一度に大量のファイルを監視すると負荷がかかりすぎる・パフォーマンスに影響を及ぼす観点から、制限がかかっています。
設定は
/proc/sys/fs/inotify/max_user_watchesで確認および変更できますが、
大量のフォルダを監視してバックアップを取りたい場合には使えません。
では、dropboxやnextcloudはどうやってリアルタイム監視をしているのだろう?
AIに聞いてみたところ
ファイルシステム通知の活用: Linuxにはinotifyの他に、fanotifyのようなファイルシステムレベルの監視機能があります。fanotifyは大量のファイルを監視するのに適していますが、設定や使用が少し複雑です。
とのこと。
notifyクレート内では、fanotifyを使えるのか調査。
同じ質問をissueに発見。
以下、概要。
fanotifyはファイルシステムの監視に特化しているが、root権限を必要とし、リアルタイムフィルタリングなどの複雑な機能があり、notifyのクロスプラットフォーム志向とは異なる特性を持っています。e-dantはファイルシステム全体を監視する場合にfanotifyの利用が有効であると主張しましたが、0xpr03(notifyプロジェクトのメンバー)はfanotifyがAPI設計に適合しないと反論しました。
結論: 0xpr03はfanotifyの統合がnotifyにとって適切ではないという意見を示しました。彼はfanotifyがルート権限を必要とすること、APIとの互換性が低いこと、技術的な複雑さが増すことを理由に挙げています。また、fanotifyを特化した別のクレートを作成することを提案しました。議論はfanotifyの潜在的な利点と問題点に焦点を当てており、notifyプロジェクトにおけるfanotifyのサポートの追加は、現時点では考慮されていません。
とのことで、notifyの他で使えそうなクレートを探すと、このあたりがヒット。
しかし、fanotifyの特徴として
ファイルにアクセスしているプロセスの情報が PID で取得できる。
指定ディレクトリ以下を再帰的に監視範囲にする機能はないが、マウントポイントより下の全てを監視範囲にする機能がある。
ファイルへの変更が行われる前に通知を出し、変更を許可するか不許可を制御できる。
ファイルの削除や属性の変更の検出できない。
実行に root 権限が必要。
https://www.nminoru.jp/~nminoru/programming/file_change_notification.html
削除検知ができないと、リアルタイム同期のツールとしては今ひとつ・・・
ということで、時間的な制約もあり、今回の検証はここまでとします。
恐らく、dropboxなどは高度なアルゴリズムを使って、
それぞれのOSにおいて効率的にリソースを使いリアルタイム同期を実現していると思われます。
今回の検証結論
簡単に再現できそうにないので、リアルタイムは諦めて、巡回して差分バックアップを行う方式をしばらくは採用しようと思います。
メモ
このあたりのモジュール使うと実現できるかも