Trigger.devでNotionのデータをPineconeに転送して「AIレディ」にする

こんにちは、Squadbaseでフロントエンド開発をしている三橋です。
プロダクト開発をしていると、「これってなんでこういう仕様になっているんだっけ?」や「この顧客がこういうことを言っているけど過去にも同様のチケットがあった気がする」といった瞬間が何度も訪れます。そこで、プロジェクト管理ツールのデータをセマンティック検索したい!と思いたちました。
本記事ではその第一歩として、ベクターデータベースであるPineconeに転送して内容をベクトル化し、AIとの連携準備OKとするまでを解説します。データ転送にはTrigger.devを使います。
Pineconeとは
Pineconeは、機械学習モデルが生成する高次元の埋め込みベクトルを効率的に保存・検索するフルマネージド型のベクトルデータベースです。HNSWなどの近似最近傍探索アルゴリズムにより、大規模データでも高速なセマンティック検索が可能です。APIを通じてデータのアップサートやクエリが容易に実行でき、一般的なNoSQLデータベースのような感覚で使うことができました。データをベクトル化することで、文字列マッチングではなく意味空間の類似度による検索が可能になり、AIとの相性が良いとされています。
類似のツールとしては、WeaviateやChromaがあります。
Trigger.devとは
Trigger.devは、イベントドリブンなワークフロー自動化プラットフォームです。Typescriptでバックグラウンドタスクを記述でき、CLIとWebアプリの連携によって快適にスクリプト開発ができました。タスクの発火イベントとしてはWebhookやCron記述によるスケジュール実行がサポートされています。
ナウい開発者ツールとして個人的にずっと気になっていて、この機会に使ってみたい!というのが今回の記事の目的になります。
プロジェクトを初期化する
Trigger.devのCLIを使ってプロジェクトを初期化します。Trigger.devへのログインを求められるので、サインアップしてプロジェクトを作成しておきます。
テンプレートはScheduled Taskを選択しました。
npx trigger.dev@latest init
完了すると次のようなファイルが作成されます。
// src/trigger/example.ts

import { logger, schedules, wait } from "@trigger.dev/sdk/v3";

export const firstScheduledTask = schedules.task({
  id: "first-scheduled-task",
  // Every hour
  cron: "0 * * * *",
  // Set an optional maxDuration to prevent tasks from running indefinitely
  maxDuration: 300, // Stop executing after 300 secs (5 mins) of compute
  run: async (payload, { ctx }) => {
    // The payload contains the last run timestamp that you can use to check if this is the first run
    // And calculate the time since the last run
    const distanceInMs =
      payload.timestamp.getTime() - (payload.lastTimestamp ?? new Date()).getTime();

    logger.log("First scheduled tasks", { payload, distanceInMs });

    // Wait for 5 seconds
    await wait.for({ seconds: 5 });

    // Format the timestamp using the timezone from the payload
    const formatted = payload.timestamp.toLocaleString("en-US", {
      timeZone: payload.timezone,
    });

    logger.log(formatted);
  },
});
Notionのデータを取得する

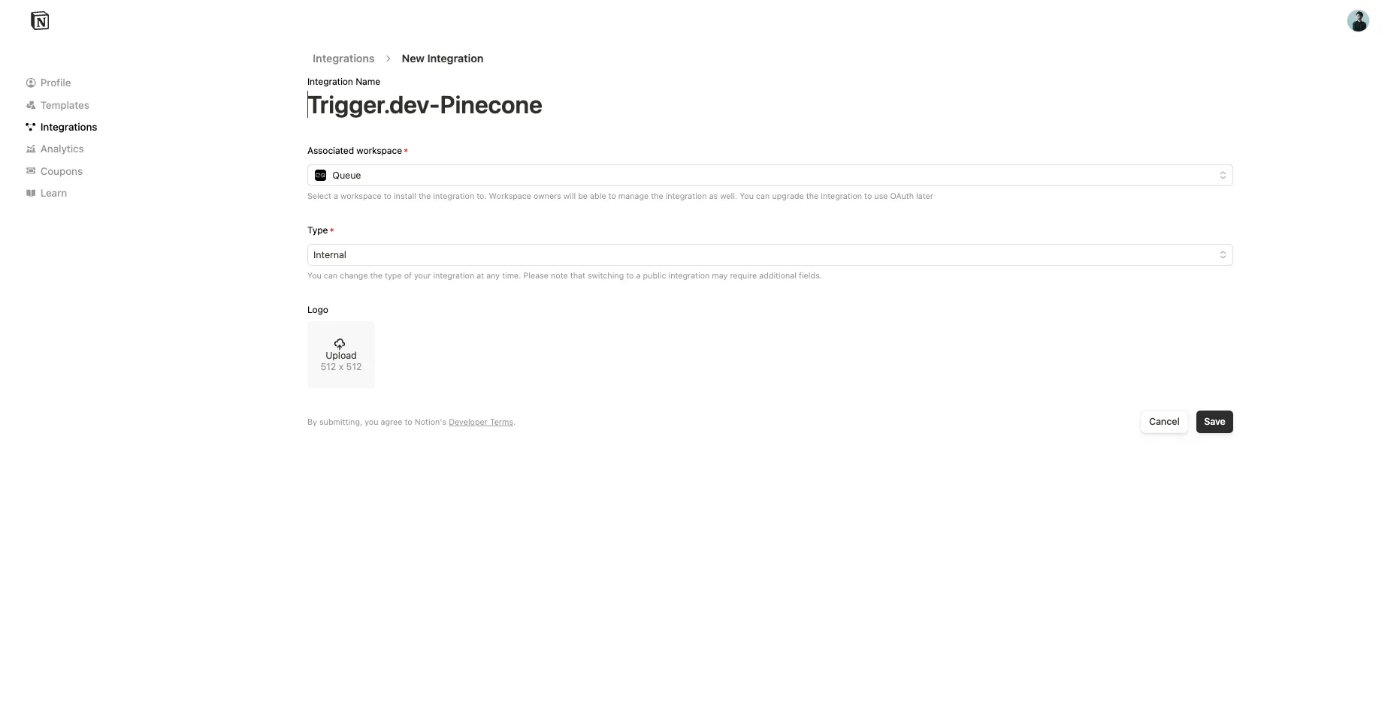
Notionとの連携には、@notionhq/client を使います。Notionのインテグレーション機能を使ってデータ連携を実現するので、ガイドを参考にインテグレーションを作成し、対象のデータベースへのアクセスを許可しておいてください。
Notion APIのレスポンスはNotionのリッチテキストのAST形式になっているので、マークダウン形式に変換するために notion-to-mdというパッケージを用います。
データベースをクエリして、各ページの中身をマークダウンで取得するのは次のようなコードになります。NOTION_API_KEYとNOTION_DATABASE_IDは.envに記載しておいてください
// src/fetch-notion.ts

import { isFullPage, Client as NotionClient } from "@notionhq/client";
import { NotionConverter } from "notion-to-md";
import { MDXRenderer } from "notion-to-md/plugins/renderer";
import { DefaultExporter } from "notion-to-md/plugins/exporter";
import { PageObjectResponse } from "@notionhq/client/build/src/api-endpoints";

const notion = new NotionClient({
  auth: process.env.NOTION_API_KEY,
});

const buffer: Record<string, string> = {};

const n2m = new NotionConverter(notion)
  .withRenderer(new MDXRenderer())
  .withExporter(
    new DefaultExporter({
      outputType: "buffer",
      buffer: buffer,
    })
  );

export async function fetchNotion() {
  const databaseId = process.env.NOTION_DATABASE_ID!;

  const notionResponse = await notion.databases.query({
    database_id: databaseId,
  });
  const pages = notionResponse.results;

  const results: (Record<string, string> & { text: string })[] = [];

  for (const page of pages) {
    // check if page is a page object
    if (!isFullPage(page)) {
      continue;
    }
    await n2m.convert(page.id);

    const bodyString = buffer[page.id];

    console.log(bodyString);
	}
}
Notionのデータを整形する
- 今回のシステムでは、1時間に1回バッチ処理を行い、その1時間で更新されたデータのみをPineconeに転送するようにします。データベースのクエリ条件をそのように調整します。
- Pineconeには数値や文字列は保存できますが、オブジェクトやnull値は保存できないので、データの整形を行います。
以上の2点を反映させると、 fetchNotion関数は次のようになります。
import { isFullPage, Client as NotionClient } from "@notionhq/client";
import { NotionConverter } from "notion-to-md";
import { MDXRenderer } from "notion-to-md/plugins/renderer";
import { DefaultExporter } from "notion-to-md/plugins/exporter";
import { PageObjectResponse } from "@notionhq/client/build/src/api-endpoints";

const notion = new NotionClient({
  auth: process.env.NOTION_API_KEY,
});

const buffer: Record<string, string> = {};

const n2m = new NotionConverter(notion)
  .withRenderer(new MDXRenderer())
  .withExporter(
    new DefaultExporter({
      outputType: "buffer",
      buffer: buffer,
    })
  );

function extractPlainText(
  property: PageObjectResponse["properties"][string]
): string {
  // Return an empty string if the property or its type is missing
  if (!property || !property.type) return "";

  switch (property.type) {
    // For title and rich_text, concatenate the plain_text from each item
    case "title":
    case "rich_text": {
      const content =
        property.type === "title" ? property.title : property.rich_text;
      if (Array.isArray(content)) {
        return content.map((item) => item.plain_text).join("");
      }
      return "";
    }

    // For select and status, return the name of the selected option
    case "select":
      return property.select ? property.select.name : "";
    case "status":
      return property.status ? property.status.name : "";

    // For date, return the start date
    case "date":
      return property.date ? property.date.start : "";

    // For created_by, return the creator's name if available
    case "created_by":
      if (property.created_by && "name" in property.created_by) {
        return property.created_by.name || "";
      }
      break;

    // For people, return a comma-separated list of user names
    case "people":
      if (Array.isArray(property.people) && property.people.length > 0) {
        return property.people.map((person: any) => person.name).join(", ");
      }
      break;

    // For relation, return a comma-separated list of relation ids (or empty string if missing)
    case "relation":
      if (Array.isArray(property.relation) && property.relation.length > 0) {
        return property.relation.map((rel: any) => rel.id || "").join(", ");
      }
      break;

    default:
      break;
  }

  // Return an empty string if no valid value is found
  return "";
}

export async function fetchNotion() {
  const databaseId = process.env.NOTION_DATABASE_ID!;

  const one_hour_ago = new Date(Date.now() - 60 * 60 * 1000).toISOString();

  const notionResponse = await notion.databases.query({
    database_id: databaseId,
    filter: {
      and: [
        {
          last_edited_time: {
            after: one_hour_ago,
          },
          timestamp: "last_edited_time",
        },
      ],
    },
  });
  const pages = notionResponse.results;

  const results: (Record<string, string> & { text: string })[] = [];

  for (const page of pages) {
    // check if page is a page object
    if (!isFullPage(page)) {
      continue;
    }
    await n2m.convert(page.id);

    const bodyString = buffer[page.id];

    results.push({
      _id: page.id,
      created_time: page.created_time,
      last_edited_time: page.last_edited_time,
      ...Object.keys(page.properties).reduce((acc, key) => {
        acc[key] = extractPlainText(page.properties[key]);
        return acc;
      }, {} as Record<string, string>),
      text: bodyString,
    });
  }

  return results;
}
Pineconeに転送する
最終ステップです。Pineconeにデータを転送します。PineconeにサインアップしてAPIキーを取得後、.envに記入します。また、Indexを初期化しておきます。Embeddingのモデルやクラウドプロバイダーは目的に合ったものを選択してください。

今回は、Integrated embeddingを使用します。ここで指定したフィールドがセマンティックサーチの検索対象になります。
準備ができたらTrigger.dev用のコードを編集していきます。非常にシンプルです。PINECONE_API_KEYとPINECONE_INDEX_NAMEは.envに記入してください。
import { logger, schedules } from "@trigger.dev/sdk/v3";
import { Pinecone } from "@pinecone-database/pinecone";
import { fetchNotion } from "../fetch-notion";

const pc = new Pinecone({
  apiKey: process.env.PINECONE_API_KEY!,
});
const index = pc.index(process.env.PINECONE_INDEX_NAME!);

export const notionToPineconeTask = schedules.task({
  id: "notion-to-pinecone-batch",
  cron: "0 * * * *",
  maxDuration: 300,
  run: async (payload, { ctx }) => {
    logger.log("Trigger task started", { payload });

    const pages = await fetchNotion();
    await index.namespace("ns1").upsertRecords(pages);

    logger.log("Notion to Pinecone transfer completed");
  },
});
テストとデプロイ
スクリプトのテストはTrigger.devのCLIとWebダッシュボードを組み合わせて行います。以下のコマンドを実行した上でTrigger.devのダッシュボードにログインしてください。
npx trigger.dev@latest dev
また、Trigger.devのダッシュボード上でも環境変数を設定します。

Testタブから、今回作成したタスクを選択し、Run Testを実行します。

これで Notion → Pineconeの転送スクリプトが完成しました!🎉
おわりに
今回は社内向けアプリの構築に合わせてTrigger.devを試したかったのですが、思った以上に快適に開発することができました。特に、Cronタスクであってもダッシュボードから簡単にテストできるのがよかったです。ただし、顧客向けの機能であればテストスクリプトを書いて品質担保をすることになると思うので、Trigger.devのテスト機能はあくまで開発補助という感じかなと思いました。社内アプリのバッチ処理にはぴったりだと思いました。
Discussion