はじめに
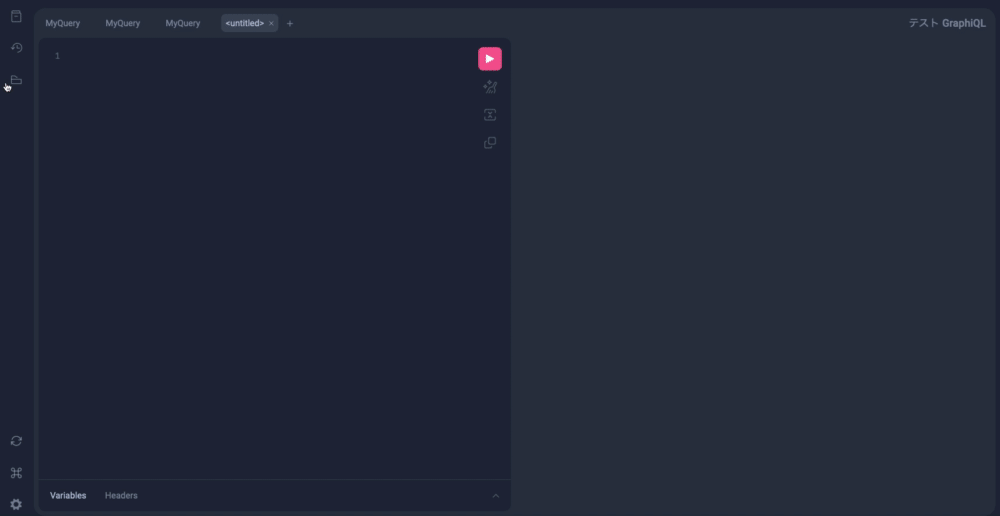
先日GraphiQLのv2がリリースされたそうです。この記事では、GraphiQLのカスタマイズやプラグインについて、あらためて調べたことをまとめてみました。
graphiql-explorer 導入してるdemoがすごく便利そうだったので、手元の環境で動かしてみるところまで試してみました。
V2リリースの変更点
GraphiQLとは
- グラフィカルでインタラクティブなブラウザー内 GraphQL IDE
- GraphQL APIを叩いたり、スキーマを確認できる便利ツール
事前準備
GraphiQLを動かすにあたって、GraphiQLを導入するフロント環境とGraphQLAPIを提供するサーバーを準備します。
GraphQLサーバー環境
以前 Supabaseのローカル環境でGraphQLサーバーを動かしてみた記事を書いたのですが、今回もこの環境を再利用します。
GraphiQLを動かすフロントの環境
GraphiQLは、ライブラリが提供してくれてる GraphiQL のコンポーネントを ReactDOM.render でマウントするだけで利用できるようになります。
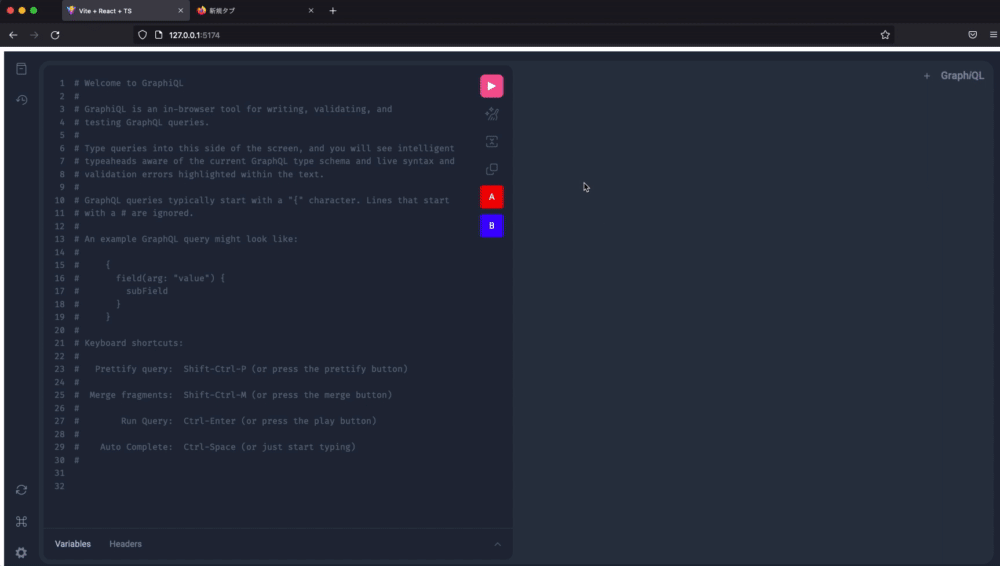
GraphiQLを動かすフロントエンドの環境の準備します。 yarn create vite する。
$ yarn create vite
`yarn create vite` 実行結果
$ yarn create vite
yarn create v1.22.19
[1/4] 🔍  Resolving packages...
[2/4] 🚚  Fetching packages...
[3/4] 🔗  Linking dependencies...
[4/4] 🔨  Building fresh packages...

success Installed "create-vite@3.0.2" with binaries:
      - create-vite
      - cva
✔ Project name: … sample-graphiql
✔ Select a framework: › react
✔ Select a variant: › react-ts

Scaffolding project in /Users/shimabukuromeg/work/sample-graphiql...

Done. Now run:

  cd sample-graphiql
  yarn
  yarn dev

✨  Done in 7.71s.
導入してみる
GraphiQLの README を参考に導入します。
- パッケージ導入
$ yarn add graphiql react react-dom graphql
-
src/main.tsxを編集します。
import { createGraphiQLFetcher } from '@graphiql/toolkit';
import { GraphiQL } from 'graphiql';
import React from 'react';
import ReactDOM from 'react-dom';

import 'graphiql/graphiql.css';

const fetcher = createGraphiQLFetcher({
  url: import.meta.env.VITE_API_URL,
  headers: {
    Authorization: `Bearer ${import.meta.env.VITE_API_KEY}`,
    apikey: import.meta.env.VITE_API_KEY
  },
});

ReactDOM.render(<div style={{ height: "100vh" }}>
  <GraphiQL fetcher={fetcher} />
</div>, document.body);
- 起動
$ yarn dev
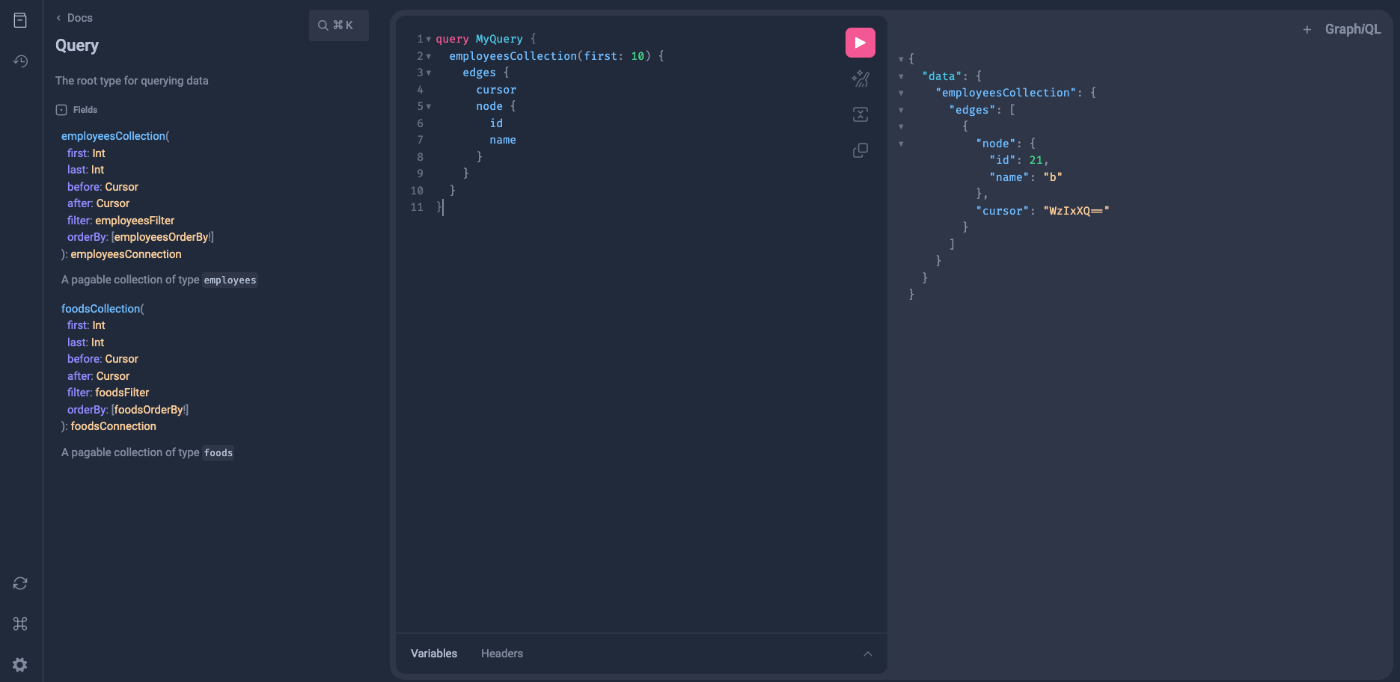
- Query叩けた
カスタマイズしてみる
続いてカスタマイズしてみます。
ツールバーにボタンをつけてみる
ToolbarButton コンポーネントが提供されてるのでそれを使ってみます。
-
src/main.tsxを編集します。
import { createGraphiQLFetcher } from '@graphiql/toolkit';
import { GraphiQL } from 'graphiql';
import React from 'react';
import ReactDOM from 'react-dom';
import {  ToolbarButton } from '@graphiql/react'; // 追加

import 'graphiql/graphiql.css';

const fetcher = createGraphiQLFetcher({
  url: import.meta.env.VITE_API_URL,
  headers: {
    Authorization: `Bearer ${import.meta.env.VITE_API_KEY}`,
    apikey: import.meta.env.VITE_API_KEY
  },
});

// 追加
const toolbar = {
  additionalContent: (
    <div className="button-group">
    <ToolbarButton
      label="ボタンA"
      onClick={() => window.alert('ボタンA')}
      style={{ backgroundColor: "red", color: "white", justifyContent: "center", alignItems: "center", display: "flex", flexDirection: "column", marginBottom: "10px" }}
    >A</ToolbarButton>
    <ToolbarButton
      label="ボタンB"
      onClick={() => window.alert('ボタンB')}
      style={{ backgroundColor: "blue", color: "white", justifyContent: "center", alignItems: "center", display: "flex", flexDirection: "column", marginBottom: "10px" }}
    >B</ToolbarButton>
  </div>
  ),
};

ReactDOM.render(<div style={{ height: "100vh" }}>
  <GraphiQL fetcher={fetcher} toolbar={toolbar} /> // 追加
</div>, document.body);
ツールバーにボタンがついた
GraphiQLのコンポーネントコード読んでみた
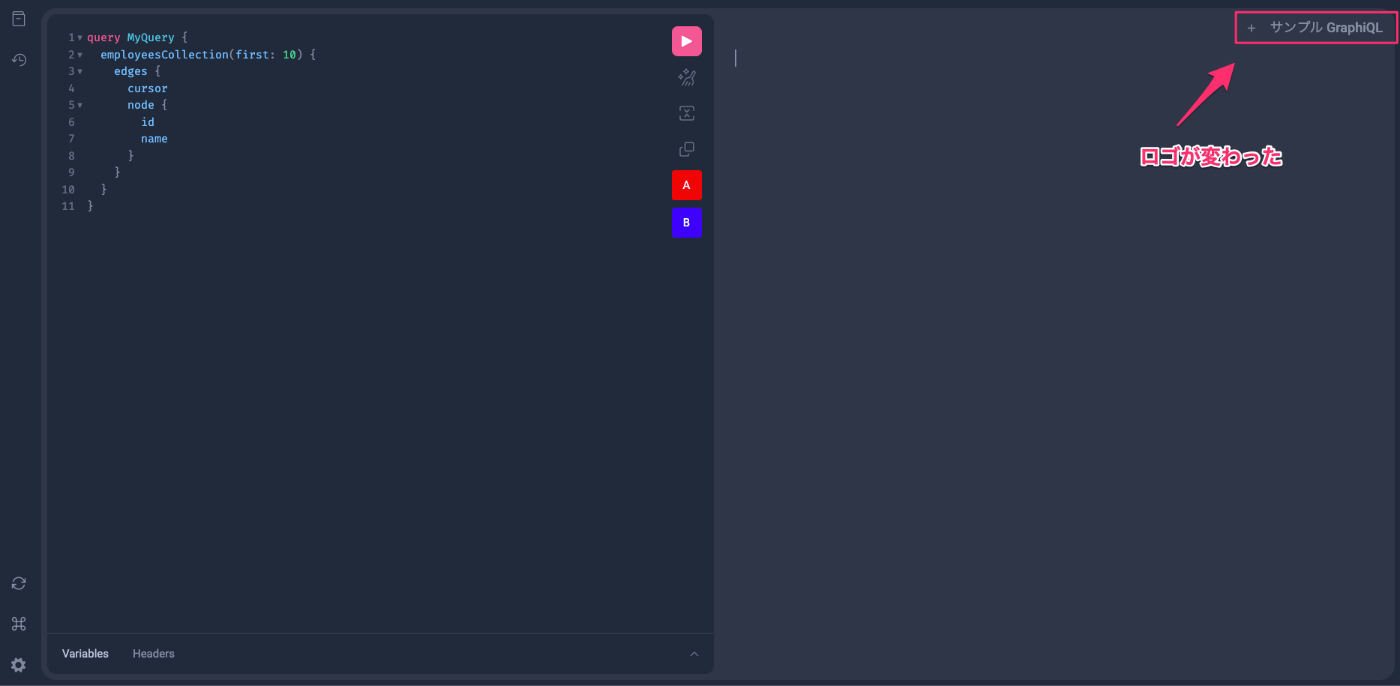
ロゴを変更してみる
ロゴの変更は、GrapiQL コンポーネントの子要素に GraphiQL.Logo を追加します。
-
src/main.tsxを編集します。
~ 省略 ~
ReactDOM.render(<div style={{ height: "100vh" }}>
  <GraphiQL fetcher={fetcher} toolbar={toolbar}>
    <GraphiQL.Logo>サンプル GraphiQL</GraphiQL.Logo>
  </GraphiQL>
</div>, document.body);
プラグインを使ってみる
READMEを読んでみると、プラグインを使うには title と icon と content のプロパティを持つオブジェクトが必要なようです。
title: プラグインの固有のタイトル (サイドバー アイコンにカーソルを合わせると、ツールチップに表示されます)
icon: サイドバーに含まれるアイコンをレンダリングする React コンポーネント
content: プラグインを開いたときにサイドバーの横に表示されるプラグインのコンテンツをレンダリングする React コンポーネント
-
src/main.tsxを編集します。サイドバーに helloという文字列が表示されるだけのプラグインを作ってみます。
import { createGraphiQLFetcher } from '@graphiql/toolkit';
import { GraphiQL, } from 'graphiql';
import React from 'react';
import ReactDOM from 'react-dom';
import {
  ToolbarButton, GraphiQLPlugin //追加
} from '@graphiql/react';

// プラグイン追加
const explorerPluginExample: GraphiQLPlugin = {
  title: 'GraphiQL Explorer Example',
  icon: () => (
    <svg height="1em" strokeWidth="1.5" viewBox="0 0 24 24" fill="none">
      <path
        d="M18 6H20M22 6H20M20 6V4M20 6V8"
        stroke="current Color"
        strokeLinecap="round"
        strokeLinejoin="round"
      />
      <path
        d="M21.4 20H2.6C2.26863 20 2 19.7314 2 19.4V11H21.4C21.7314 11 22 11.2686 22 11.6V19.4C22 19.7314 21.7314 20 21.4 20Z"
        stroke="currentColor"
        strokeLinecap="round"
        strokeLinejoin="round"
      />
      <path
        d="M2 11V4.6C2 4.26863 2.26863 4 2.6 4H8.77805C8.92127 4 9.05977 4.05124 9.16852 4.14445L12.3315 6.85555C12.4402 6.94876 12.5787 7 12.722 7H14"
        stroke="currentColor"
        strokeLinecap="round"
        strokeLinejoin="round"
      />
    </svg>
  ),
  content: () => <div>hello</div>,
};

ReactDOM.render(<div style={{ height: "100vh" }}>
  <GraphiQL
    fetcher={fetcher}
    toolbar={toolbar}
    plugins={[explorerPluginExample]} // プラグイン追加
  >
    <GraphiQL.Logo>サンプル GraphiQL</GraphiQL.Logo>
  </GraphiQL>
</div>, document.body);
サイドバーにプラグインのコンテンツが表示されるようになった
プラグインにexploerをつけてみる
今回一番試したかったことなのですが、graphiql-explorerをプラグインで表示させるようにします。
コンテンツとして表示さえるコード自体は example の実装を参考にします。
- graphiql-explorer を導入します。
$ yarn add graphiql-explorer
- プラグインを導入するディレクトリ作成
$ mkdir -p src/graphiql-plugin/explorer
プラグインのcontentに表示する graphiql-explorer を作成する
-
src/graphiql-plugin/explorer/ExplorerPlugin.tsxの編集
import {
    useEditorContext,
    useExecutionContext,
    useSchemaContext,
} from '@graphiql/react';

import { useContext } from 'react';
import GraphiQLExplorer from 'graphiql-explorer';
import { QueryContext } from './QueryContext';

export function ExplorerPlugin() {
    const { setOperationName } = useEditorContext({ nonNull: true });
    const { schema } = useSchemaContext({ nonNull: true });
    const { run } = useExecutionContext({ nonNull: true });

    const { query, setQuery } = useContext(QueryContext);

    return (
        <GraphiQLExplorer
            schema={schema}
            query={query}
            onEdit={(newQuery: string) => setQuery(newQuery)}
            onRunOperation={(operationName: string | undefined) => {
                if (operationName) {
                    setOperationName(operationName);
                }
                run();
            }}
            explorerIsOpen
            colors={{
                keyword: 'hsl(var(--color-primary))',
                def: 'hsl(var(--color-tertiary))',
                property: 'hsl(var(--color-info))',
                qualifier: 'hsl(var(--color-secondary))',
                attribute: 'hsl(var(--color-info))',
                number: 'hsl(var(--color-success))',
                string: 'hsl(var(--color-warning))',
                builtin: 'hsl(var(--color-success))',
                string2: 'hsl(var(--color-secondary))',
                variable: 'hsl(var(--color-secondary))',
                atom: 'hsl(var(--color-tertiary))',
                meta: 'hsl(var(--color-tertiary))',
            }}
            arrowOpen={
                <svg
                    viewBox="0 -4 13 15"
                    style={{
                        color: 'hsla(var(--color-neutral), 0.4)',
                        marginRight: 'var(--px-4)',
                        height: 'var(--px-16)',
                        width: 'var(--px-16)',
                    }}
                >
                    <path
                        d="M3.35355 6.85355L6.14645 9.64645C6.34171 9.84171 6.65829 9.84171 6.85355 9.64645L9.64645 6.85355C9.96143 6.53857 9.73835 6 9.29289 6L3.70711 6C3.26165 6 3.03857 6.53857 3.35355 6.85355Z"
                        fill="currentColor"
                    />
                </svg>
            }
            arrowClosed={
                <svg
                    viewBox="0 -2 13 15"
                    style={{
                        color: 'hsla(var(--color-neutral), 0.4)',
                        marginRight: 'var(--px-4)',
                        height: 'var(--px-16)',
                        width: 'var(--px-16)',
                    }}
                >
                    <path
                        d="M6.35355 11.1464L9.14645 8.35355C9.34171 8.15829 9.34171 7.84171 9.14645 7.64645L6.35355 4.85355C6.03857 4.53857 5.5 4.76165 5.5 5.20711V10.7929C5.5 11.2383 6.03857 11.4614 6.35355 11.1464Z"
                        fill="currentColor"
                    />
                </svg>
            }
            checkboxUnchecked={
                <svg
                    viewBox="0 0 15 15"
                    style={{
                        color: 'hsla(var(--color-neutral), 0.4)',
                        marginRight: 'var(--px-4)',
                        height: 'var(--px-16)',
                        width: 'var(--px-16)',
                    }}
                >
                    <circle cx="7.5" cy="7.5" r="6" stroke="currentColor" fill="none" />
                </svg>
            }
            checkboxChecked={
                <svg
                    viewBox="0 0 15 15"
                    style={{
                        color: 'hsl(var(--color-info))',
                        marginRight: 'var(--px-4)',
                        height: 'var(--px-16)',
                        width: 'var(--px-16)',
                    }}
                >
                    <circle cx="7.5" cy="7.5" r="7.5" fill="currentColor" />
                    <path
                        d="M4.64641 7.00106L6.8801 9.23256L10.5017 5.61325"
                        fill="none"
                        stroke="white"
                        strokeWidth="1.5"
                    />
                </svg>
            }
            styles={{
                buttonStyle: {
                    backgroundColor: 'transparent',
                    border: 'none',
                    color: 'hsla(var(--color-neutral), 0.6)',
                    cursor: 'pointer',
                    fontSize: '1em',
                },
                explorerActionsStyle: {
                    padding: 'var(--px-8) var(--px-4)',
                },
                actionButtonStyle: {
                    backgroundColor: 'transparent',
                    border: 'none',
                    color: 'hsla(var(--color-neutral), 0.6)',
                    cursor: 'pointer',
                    fontSize: '1em',
                },
            }}
        />
    );
}
graphiql-explorer のプラグインからクエリをセットできるようにコンテキストを作成する
-
src/graphiql-plugin/explorer/QueryContext.tsxの編集
import {
    createContext,
    Dispatch,
    SetStateAction,
} from 'react';

export type QueryContextType = {
    query: string;
    setQuery: Dispatch<SetStateAction<string>>;
};

export const QueryContext = createContext<QueryContextType>({
    query: '',
    setQuery: () => { },
});
graphiql-explorerの型定義ファイル作成する
-
src/graphiql-explorer.d.tsの編集
declare module 'graphiql-explorer' {
  import { GraphQLEnumType, GraphQLScalarType, ValueNode } from 'graphql';
  import { ComponentType } from 'react';

  const GraphiQLExplorer: ComponentType<any> & {
    defaultValue: (arg: GraphQLEnumType | GraphQLScalarType) => ValueNode;
  };

  export default GraphiQLExplorer;
}
スタイリングする
-
src/index.cssの編集
body {
  margin: 0;
}
#root {
  height: 100vh;
}
.docExplorerWrap {
  height: unset !important;
  min-width: unset !important;
  width: unset !important;
}
.doc-explorer-title {
  font-size: var(--font-size-h2);
  font-weight: var(--font-weight-medium);
}
.doc-explorer-rhs {
  display: none;
}
.graphiql-explorer-root {
  font-family: var(--font-family-mono) !important;
  font-size: var(--font-size-body) !important;
  padding: 0 !important;
}
.graphiql-explorer-root > div:first-child {
  padding-left: var(--px-8);
}
.graphiql-explorer-root input {
  background: hsl(var(--color-base));
}
.graphiql-explorer-root select {
  background-color: hsl(var(--color-base));
  border: 1px solid hsla(var(--color-neutral), 0.6);
  border-radius: var(--border-radius-4);
  color: hsl(var(--color-neutral));
  margin: 0 var(--px-4);
  padding: var(--px-4) var(--px-6);
}
GraphiQLコンポーネントにgraphiql-explorerのプラグインを渡す
-
src/main.tsxの編集
import { createGraphiQLFetcher } from '@graphiql/toolkit';
import { GraphiQL, } from 'graphiql';
import React, { useMemo, useState } from 'react';
import ReactDOM from 'react-dom';
import {
  GraphiQLPlugin
} from '@graphiql/react';
import 'graphiql/graphiql.css';
import { ExplorerPlugin } from './graphiql-plugin/explorer/ExplorerPlugin';
import { QueryContext } from './graphiql-plugin/explorer/QueryContext';

const fetcher = createGraphiQLFetcher({
  url: import.meta.env.VITE_API_URL,
  headers: {
    Authorization: `Bearer ${import.meta.env.VITE_API_KEY}`,
    apikey: import.meta.env.VITE_API_KEY
  },
});

const explorerPlugin: GraphiQLPlugin = {
  title: 'GraphiQL Explorer',
  icon: () => (
    <svg height="1em" strokeWidth="1.5" viewBox="0 0 24 24" fill="none">
      <path
        d="M18 6H20M22 6H20M20 6V4M20 6V8"
        stroke="current Color"
        strokeLinecap="round"
        strokeLinejoin="round"
      />
      <path
        d="M21.4 20H2.6C2.26863 20 2 19.7314 2 19.4V11H21.4C21.7314 11 22 11.2686 22 11.6V19.4C22 19.7314 21.7314 20 21.4 20Z"
        stroke="currentColor"
        strokeLinecap="round"
        strokeLinejoin="round"
      />
      <path
        d="M2 11V4.6C2 4.26863 2.26863 4 2.6 4H8.77805C8.92127 4 9.05977 4.05124 9.16852 4.14445L12.3315 6.85555C12.4402 6.94876 12.5787 7 12.722 7H14"
        stroke="currentColor"
        strokeLinecap="round"
        strokeLinejoin="round"
      />
    </svg>
  ),
  content: () => <ExplorerPlugin />,
};

const GraphiQLApp = () => {
  const [query, setQuery] = useState<string>('');
  return (
    <QueryContext.Provider
      value={useMemo(() => ({ query, setQuery }), [query])}
    >
      <div style={{ height: "100vh" }}>
        <GraphiQL fetcher={fetcher} plugins={[explorerPlugin]} query={query}
          onEditQuery={newQuery => setQuery(newQuery)}>
          <GraphiQL.Logo>サンプル GraphiQL</GraphiQL.Logo>
        </GraphiQL>
      </div>
    </QueryContext.Provider>
  )
}

ReactDOM.render(<GraphiQLApp />, document.body);
完成!!!
おわりに
- Graphiqlがカスタマイズできると知らなかったので、コンポーネントを色々編集したらカスタマイズ可能だということを知れて良かった
- クエリ書くの地味に手間だったりすので、graphiql-explorer で画面ぽちぽちしてるだけでクエリ作れるのは便利
参考

Discussion
久しぶりにgraphiqlのリポジトリみたらgraphiql-plugin-explorerの導入がめっちゃ簡単になってた