GKEで構築したアプリケーションに指定ドメイン&IAP有効の状態でアクセスする
以下のやりたいことを実現するためのhow toについて紹介します。
やりたいこと
- GKEで構築したWebアプリケーションに指定のドメインでHTTPSアクセスしたい
- その上で、IAPを適用して指定のユーザーのみアクセスできる様にしたい
今回は hello-web というアプリケーション名で gcr.io/google-samples/hello-app:2.0 というサンプルのDocker imageを利用して構築したいと思います。
前提条件
- cloud DNSでゾーンを作成してレジストラにNSレコードを登録していること
- gcloudコマンドが使えること&権限があること
- kubectlが使えること
- k8sの基礎知識があること
- Kubernetesの各コンポーネントについて解説しません。コピペでも作成はできますが基礎を理解していると応用が効くと思います。
ソースコード
手順
GKEクラスタの作成
まず、以下の様なコマンドでGKEクラスタを作成します
gcloud container clusters create hello-web \
--machine-type=n1-standard-1 \
--num-nodes=1 \
--disk-size=100 \
--region=asia-northeast1 \
--preemptible \
--scopes=cloud-platform \
--enable-cloud-logging \
--enable-stackdriver-kubernetes \
--image-type "COS"
作成が終わったらgkeへの接続をしておきます
gcloud container clusters get-credentials hello-web --region asia-northeast1 --project <your-project>
次に、namespaceを作成します。以降紹介するマニフェストやkubectlには以下で作成したnamespaceが入っています
kubectl create namespace hello-web
Deployment,Service, Ingressのapply
まず、静的IPアドレスの用意をします
gcloud compute addresses create hello-web-static-ip --global
任意のディレクトリを作成し、その下にdeploymentとserviceのマニフェストを用意します
deployment.yaml
apiVersion: apps/v1
kind: Deployment
metadata:
  name: web
  namespace: hello-web
spec:
  selector:
    matchLabels:
      run: web
  template:
    metadata:
      labels:
        run: web
    spec:
      containers:
      - image: gcr.io/google-samples/hello-app:2.0
        imagePullPolicy: IfNotPresent
        name: web
        ports:
        - containerPort: 8080
          protocol: TCP
service.yaml
apiVersion: v1
kind: Service
metadata:
  name: web
  namespace: hello-web
spec:
  ports:
  - port: 8080
    protocol: TCP
    targetPort: 8080
  selector:
    run: web
  type: NodePort
ingress.yaml
apiVersion: extensions/v1beta1
kind: Ingress
metadata:
  name: hello-web-ingress
  namespace: hello-web
  annotations:
    kubernetes.io/ingress.global-static-ip-name: "hello-web-static-ip"
spec:
  backend:
    serviceName: web
    servicePort: 8080
作成したマニフェストをapplyします
kubectl apply -f .
static-ipでアクセスできることを確認します。static-ipは以下のコマンドで確認出来ます
# static-ipの確認(describeにて表示されたIPを使用)
gcloud compute addresses describe hello-web-static-ip --global

# アクセス
curl -i http://<hello-web-static-ip>
ManagedCertificateのapply
sert.yaml
apiVersion: networking.gke.io/v1beta1
kind: ManagedCertificate
metadata:
  name: hello-web-iap
  namespace: hello-web
spec:
  domains:
    - your-domain.com
ingress.yaml(managed-certificatesの追記)
apiVersion: extensions/v1beta1
kind: Ingress
metadata:
  name: basic-ingress
  namespace: hello-web
  annotations:
    kubernetes.io/ingress.global-static-ip-name: "hello-web-static-ip"
    networking.gke.io/managed-certificates: "hello-web-iap"
spec:
  backend:
    serviceName: web
    servicePort: 8080
kubectl apply -f .
ManagedCertificateの反映に数十分時間がかかりますが、これによりhttpsでのアクセスができる様になります。またTLS証明書はGoogleによって管理されます。
# managedcertificateの確認。StatusがActiveになっていればOK
kubectl get managedcertificate -n hello-web
curl -i https://your-domain.com

OAuthの同意、認証情報の作成
ここまでで指定ドメインによるHTTPSアクセスはできている状態です、最後にIAPを有効にする準備をしたいと思います。
まず、以下より OAuth同意画面 の作成を行い、 OAuth 2.0 クライアント ID の認証情報を作成します
OAuth同意画面の作成


OAuth 2.0 クライアント IDの認証情報を作成

認証情報を作成すると発行されるクライアントidとシークレットを控えます

作成した認証情報の編集画面から、「承認済のリダイレクトURI」に以下を追記します
https://iap.googleapis.com/v1/oauth/clientIds/<your-client-td>:handleRedirect
最後に、BackendConfigで使用するシークレットを作成します
kubectl create secret generic hello-web-iap-oauth-client-id \
-n hello-web \
--from-literal=client_id=<先ほどのクライアントid> \
--from-literal=client_secret=<先ほどのシークレット>
BackendConfigのapply
backend-config.yaml
apiVersion: cloud.google.com/v1beta1
kind: BackendConfig
metadata:
  name: hello-web-backend-config
  namespace: hello-web
spec:
  iap:
    enabled: true
    oauthclientCredentials:
      secretName: hello-web-iap-oauth-client-id
ingress.yaml(allow-httpの追記)
apiVersion: extensions/v1beta1
kind: Ingress
metadata:
  name: basic-ingress
  namespace: hello-web
  annotations:
    kubernetes.io/ingress.global-static-ip-name: "hello-web-static-ip"
    networking.gke.io/managed-certificates: "hello-web-iap"
    kubernetes.io/ingress.allow-http: "false"
spec:
  backend:
    serviceName: web
    servicePort: 8080
service.yaml(annotationsの追記)
apiVersion: v1
kind: Service
metadata:
  name: web
  namespace: hello-web
  annotations:
    beta.cloud.google.com/backend-config: '{"default": "hello-web-backend-config"}'
spec:
  ports:
  - port: 8080
    protocol: TCP
    targetPort: 8080
  selector:
    run: web
  type: NodePort
kubectl apply -f .
最後に、IAPの画面からhello-webのバックエンドサービスにおけるIAPを有効にします
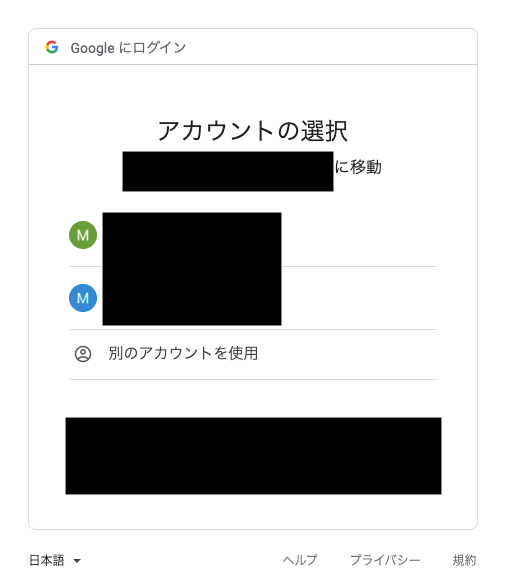
これでyour-doamin.comへ改めてアクセスすると以下の様に認証を求められる様になりました 🎉

参考記事
Discussion