RailsでService Workerを使ってIOSにPWA通知を送信する
Rails7でService Workerを導入し、プッシュ通知を実装する手順をまとめました。
環境
ruby: 3.3.6
Rails: 7.2.2
web-push: 3.0.1
1. Railsプロジェクトの作成
まずは新しいRailsプロジェクトを作成します。
rails new pwa_notification
cd pwa_notification
2. serviceworker-rails の追加
Gemfileに以下を追記します。
gem 'serviceworker-rails'
記述後、インストールと初期ファイルを作成します。
bundle install
rails g serviceworker:install
rails g serviceworker:install で初期ファイルを作成するのですが、そのまま実行すると以下のようなエラーが出る場合があります。
これは rack が3系だと発生するエラーのようで、Gemfileをバージョンを2系に固定することで今回は解決しました。
gem 'rack', '~> 2.2'
Gemfileの変更内容をbundle installで反映してください。
参考:
3. Service Worker関連ファイルの設定
3.1 Service Workerコンパニオンの移動
作成されたapp/assets/javascripts/serviceworker-companion.js を rails7の環境で管理しやすいようapp/javascript/ 配下に移動します。
3.2 JSファイルへのインポート
app/javascript/application.jsでService Worker周りの設定を読み込むように以下の内容を記述します。
import "./serviceworker-companion"
3.3 Service Workerファイルを /public に作成
public/service_worker.js を作成し、以下のように記述します。
self.addEventListener('install', function(event) {
  console.log('[Service Worker] Installing Service Worker...');
});

self.addEventListener('activate', function(event) {
  console.log('[Service Worker] Activating Service Worker...');
});

self.addEventListener('fetch', function(event) {
  console.log('[Service Worker] Fetching something....', event.request.url);
});
serviceworkerが正常に動作をしていることを開発者ツールから確認します。

4. WebPushの導入とVAPID鍵の設定
4.1 web-push のインストール
Gemfileに web-push を追加し、bundle installでインストールします。
gem "web-push"
4.2 VAPID鍵の生成
rails cでコンソールを開き、VAPID鍵を生成します。
vapid_key = WebPush.generate_key

vapid_key.public_key
vapid_key.private_key
上記を実行し作成されたVAPID鍵をコピーしておきます。
4.3 Rails.credentialsへのキー設定
以下コマンドで資格情報ファイルを開きます。
EDITOR="vim" rails credentials:edit
開いたファイルに下記形式で先ほど生成したキーを記述します。
webpush:
  public_key: "xxxxx"
  private_key: "xxxxx"
5. PushSubscriptionモデルの作成とマイグレーション
プッシュ通知を送る際に必要なサブスクリプション情報(endpoint, p256dh, authなど)を保存するためのモデルを作成します。
rails g model PushSubscription endpoint:text p256dh:text auth:text
rails db:migrate
6. コントローラとルーティングの準備
6.1 PushSubscriptionsコントローラ
クライアント側から取得したプッシュサブスクリプション情報をPOSTで受け取るコントローラを作成します。
rails generate controller PushSubscriptions
createメソッドを作成します。
def create
    subscription = PushSubscription.new(
      endpoint: params[:endpoint],
      p256dh: params[:p256dh],
      auth: params[:auth]
    )

    if subscription.save
      head :created
    else
      head :unprocessable_entity
    end
  end
config/routes.rb に以下を追記し、createアクションだけを受け付けるルーティングを作ります。
resources :push_subscriptions, only: [:create]
6.2 Homeコントローラとビュー
適当なコントローラを作成し、indexアクションからフロント側のボタンなどを操作できるようにします。
rails g controller Home index
7. フロントエンドでのプッシュサブスクリプションの取得
app/javascript/controllers/home_controller.js を作成します。
Stimulusを使って、ボタンをクリックしたタイミングでプッシュサブスクリプションを登録する流れを記述しています。
import { Controller } from "@hotwired/stimulus"

export default class extends Controller {
  connect() {
    const button = document.getElementById('subscribe-btn');
    if (!button) return;

    const pushSubscriptionsPath = button.dataset.pushSubscriptionsPath;
    const vapidPublicKey = button.dataset.vapidPublicKey;

    console.log(pushSubscriptionsPath);
    console.log(vapidPublicKey);

    button.addEventListener('click', async () => {
      if (!('serviceWorker' in navigator)) return;

      const permission = await Notification.requestPermission();
      if (permission !== 'granted') return;

      // Service Workerの準備ができるまで待機
      const registration = await navigator.serviceWorker.ready;

      // PushManager.subscribe() でサブスクリプションを取得
      const subscription = await registration.pushManager.subscribe({
        userVisibleOnly: true,
        applicationServerKey: this.urlBase64ToUint8Array(vapidPublicKey)
      });

      // サーバーへサブスクリプション情報をPOST
      const response = await fetch(pushSubscriptionsPath, {
        method: 'POST',
        headers: { 'Content-Type': 'application/json' },
        body: JSON.stringify({
          endpoint: subscription.endpoint,
          p256dh: btoa(String.fromCharCode.apply(null, new Uint8Array(subscription.getKey('p256dh')))),
          auth: btoa(String.fromCharCode.apply(null, new Uint8Array(subscription.getKey('auth'))))
        })
      });

      if (response.ok) {
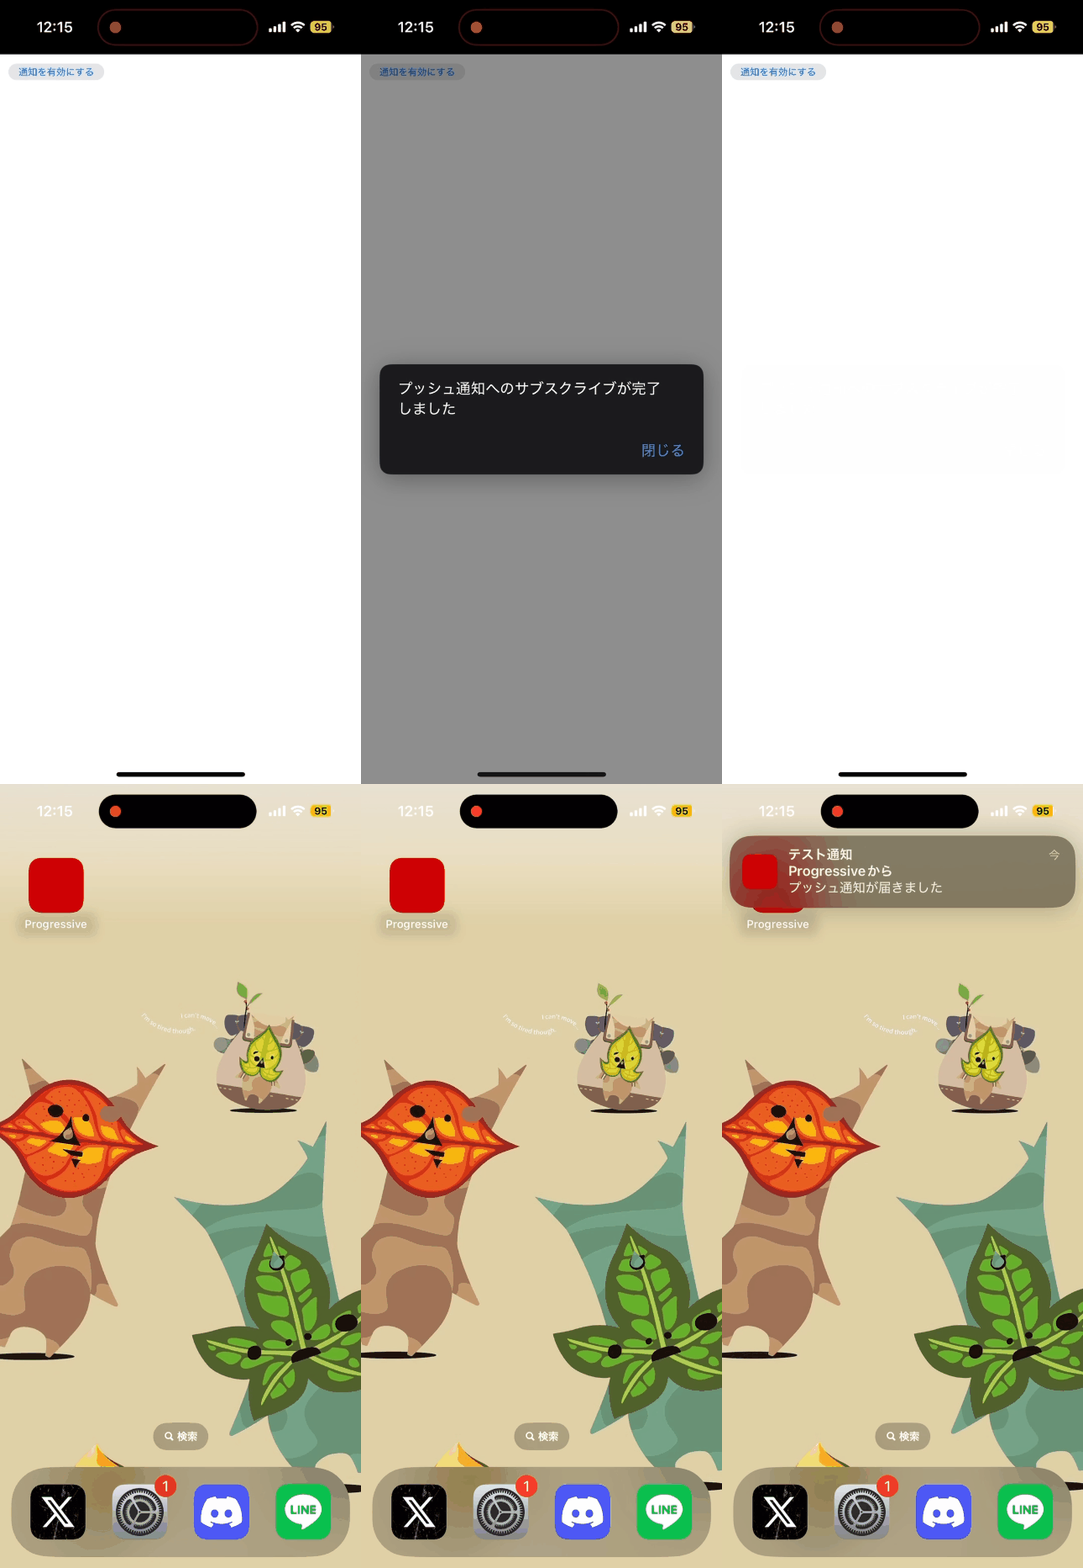
        alert('プッシュ通知へのサブスクライブが完了しました');
      } else {
        alert('サブスクライブに失敗しました');
      }
    });
  }

  urlBase64ToUint8Array(base64String) {
    const padding = '='.repeat((4 - base64String.length % 4) % 4);
    const base64 = (base64String + padding)
      .replace(/-/g, '+')
      .replace(/_/g, '/');
    const rawData = window.atob(base64);
    const outputArray = new Uint8Array(rawData.length);
    for (let i = 0; i < rawData.length; ++i) {
      outputArray[i] = rawData.charCodeAt(i);
    }
    return outputArray;
  }
}
8. HTTPS通信の用意 (ngrokなど)
8.1 ngrokの設定
localhostでは通知は動作せずHTTPS通信下でのみ動作します。
なのでローカル開発時は ngrok などをつかってHTTPSとして動作させます。
https://dashboard.ngrok.com/signup でサインアップをし、表示されるngrok config add-authtoken xxxコマンドを実行し認証をしてください。
brew install ngrok
ngrok config add-authtoken xxx
ngrok http 3000
8.2 hostsの設定
Rails側でhostsを設定しておかなければブロックされてしまうので、config/environments/development.rbに
config.hosts << '.ngrok-free.app'
を追記しngrokを接続先として許可をしておきます。
その後ngrok http 3000 の出力に表示されるURL(https://***.ngrok-free.app)からアクセスするとHTTPS下で動作します。
9. Service Workerでプッシュ通知を受け取る処理
先ほど作成したpublic/service_worker.js にプッシュ通知を受け取った時の処理を記述しておきます。
self.addEventListener('push', event => {
  const data = event.data ? event.data.json() : {};
  const title = data.title || 'タイトル未設定';
  const options = {
    body: data.body || '本文未設定',
    icon: '/images/icons/icon-192x192.png'
  };
  event.waitUntil(
    self.registration.showNotification(title, options)
  );
});
通知を送る
最後に、rails cでサブスクリプションを使った通知送信をテストしてみます。
通知を受け取るにはsafariだと共有>ホーム画面に追加を行いPWAとして動作させてください。
また、本体設定の通知で追加したPWAの通知がオフになっていないことを確認してください。
sub = PushSubscription.last

Webpush.payload_send(
  endpoint: sub.endpoint,
  message: JSON.generate({ title: "テスト通知", body: "プッシュ通知が届きました" }),
  p256dh: sub.p256dh,
  auth: sub.auth,
  vapid: {
    subject: "mailto:you@example.com",
    public_key: Rails.application.credentials.webpush[:public_key],
    private_key: Rails.application.credentials.webpush[:private_key]
  }
)
上記を実行するとプッシュ通知が届きます。
ブラウザでサービスワーカーが稼働中であれば、指定したタイトルや本文がポップアップで表示されるはずです。

参考:


Discussion