Elastic Beanstalk で RDSあり環境 を CLI のみで立ち上げて、接続確認するまで
eb cli のインストール
AWS コンソールでぽちぽちやらずに、手元の Terminal からデプロイして、設定ファイルなどをgit管理下におきたいので CLI ツールを使います。
git clone git@github.com:aws/aws-elastic-beanstalk-cli-setup.git
python ./aws-elastic-beanstalk-cli-setup/scripts/ebcli_installer.py
完了すると、下記のように PATH を通してくれと言われるので、忘れずに設定しておきます。
Success!

    Note: To complete installation, ensure `eb` is in PATH. You can ensure this by executing:

    1. Bash:

       echo 'export PATH="/xxxxx/.ebcli-virtual-env/executables:$PATH"' >> ~/.bash_profile && source ~/.bash_profile

    2. Zsh:

       echo 'export PATH="/xxxxx/.ebcli-virtual-env/executables:$PATH"' >> ~/.zshenv && source ~/.zshenv
何かトラブルあれば troubleshootingをみてもらえると。
アプリケーションを作っていく
eb init
eb init をして Region、アプリケーション名、プラットフォームを指定する
$ eb init

Select a default region
1) us-east-1 : US East (N. Virginia)
2) us-west-1 : US West (N. California)
3) us-west-2 : US West (Oregon)
4) eu-west-1 : EU (Ireland)
5) eu-central-1 : EU (Frankfurt)
6) ap-south-1 : Asia Pacific (Mumbai)
7) ap-southeast-1 : Asia Pacific (Singapore)
8) ap-southeast-2 : Asia Pacific (Sydney)
9) ap-northeast-1 : Asia Pacific (Tokyo)
10) ap-northeast-2 : Asia Pacific (Seoul)
11) sa-east-1 : South America (Sao Paulo)
12) cn-north-1 : China (Beijing)
13) cn-northwest-1 : China (Ningxia)
14) us-east-2 : US East (Ohio)
15) ca-central-1 : Canada (Central)
16) eu-west-2 : EU (London)
17) eu-west-3 : EU (Paris)
18) eu-north-1 : EU (Stockholm)
19) eu-south-1 : EU (Milano)
20) ap-east-1 : Asia Pacific (Hong Kong)
21) me-south-1 : Middle East (Bahrain)
22) il-central-1 : Middle East (Israel)
23) af-south-1 : Africa (Cape Town)
24) ap-southeast-3 : Asia Pacific (Jakarta)
25) ap-northeast-3 : Asia Pacific (Osaka)
(default is 3): 9


Enter Application Name
(default is "ebeb"):
Application ebeb has been created.
Select a platform.
1) .NET Core on Linux
2) .NET on Windows Server
3) Docker
4) Go
5) Java
6) Node.js
7) PHP
8) Packer
9) Python
10) Ruby
11) Tomcat
(make a selection): 5

Select a platform branch.
1) Corretto 17 running on 64bit Amazon Linux 2023
2) Corretto 11 running on 64bit Amazon Linux 2023
3) Corretto 8 running on 64bit Amazon Linux 2023
4) Corretto 17 running on 64bit Amazon Linux 2
5) Corretto 11 running on 64bit Amazon Linux 2
6) Corretto 8 running on 64bit Amazon Linux 2
(default is 1): 1

Cannot setup CodeCommit because there is no Source Control setup, continuing with initialization
Do you want to set up SSH for your instances?
(Y/n): Y

Select a keypair.
1) [ Create new KeyPair ]
(default is 1): 1
eb create
eb create で実際に環境を作っていく. このタイミングで database オプションを指定することでデータベースが作成されます
$ eb create -db --database.username myusername --database.password mypassword -db.engine postgres --database.instance db.t3.micro --database.version 15.4

Enter Environment Name
(default is ebeb-dev):  <-- Enter
Enter DNS CNAME prefix
(default is ebeb-dev):  <-- Enter

Select a load balancer type
1) classic
2) application
3) network
(default is 2): 2


Would you like to enable Spot Fleet requests for this environment? (y/N):
NOTE: The current directory does not contain any source code. Elastic Beanstalk is launching the sample application instead.
Do you want to download the sample application into the current directory? (Y/n): Y
...
接続確認
パブリックURLを確認する
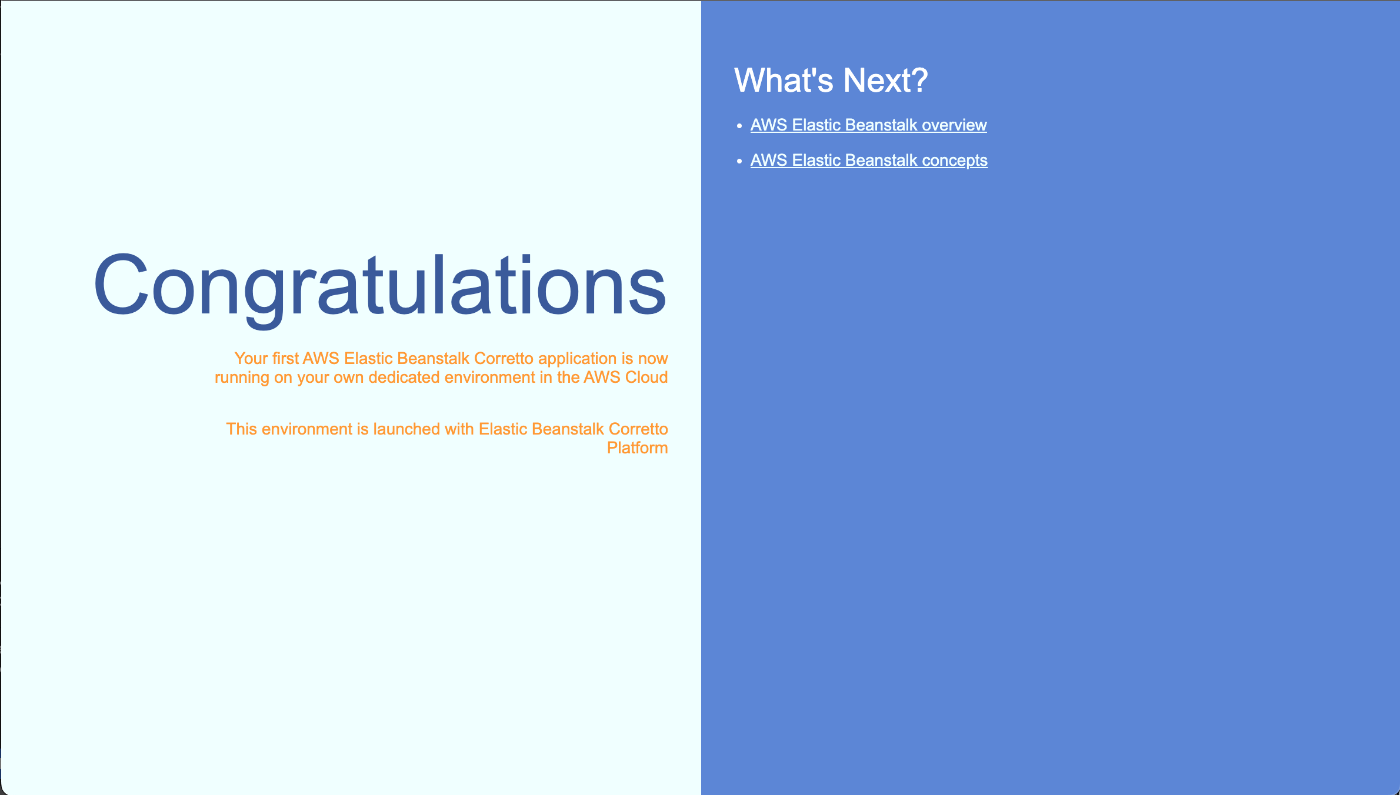
eb open を実行するとブラウザが開きパブリックURLが開きます。
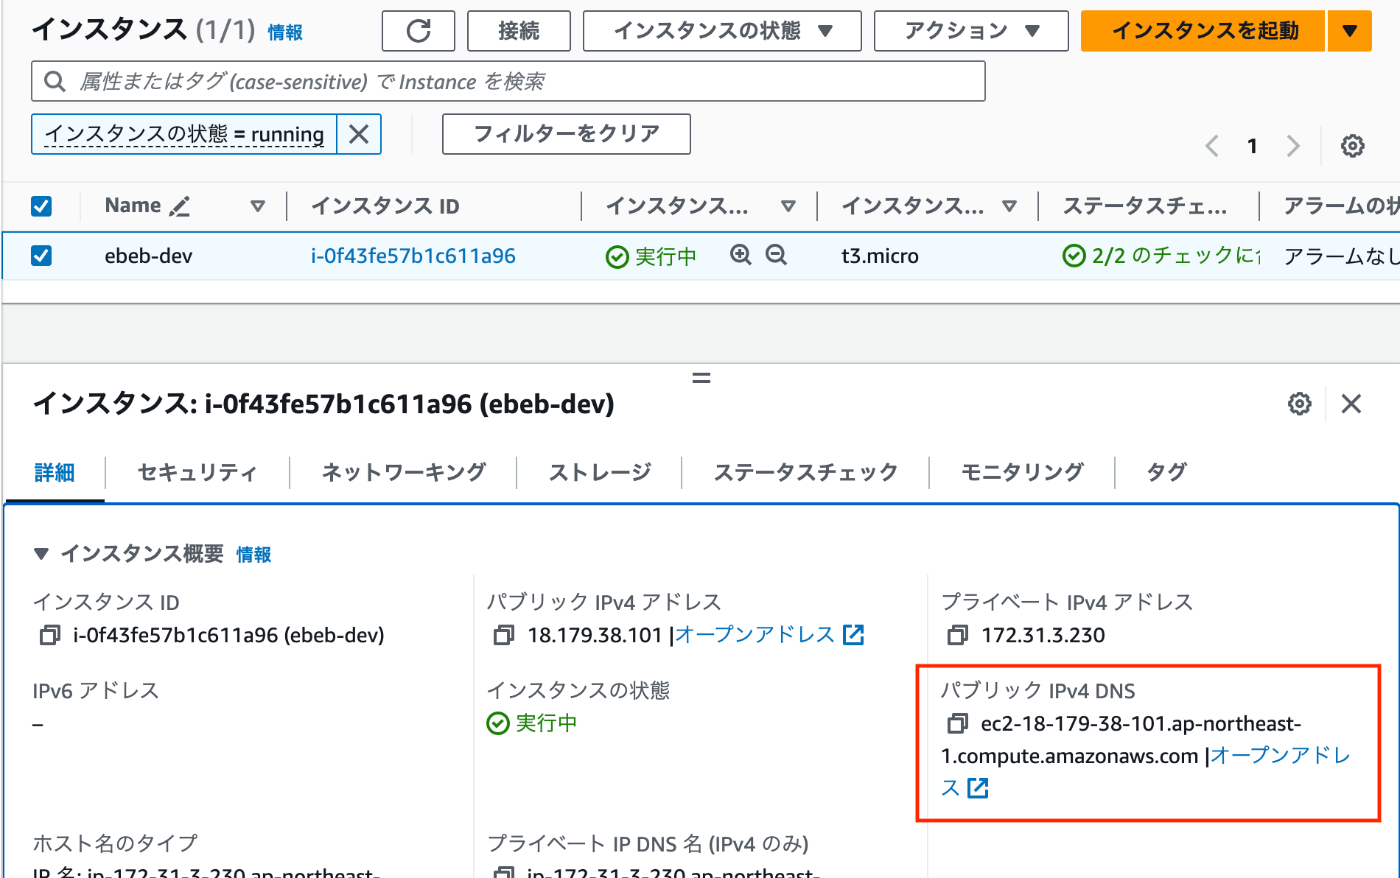
ec2 インスタンスに ssh で入る
作った EC2 インスタンスの パブリックDNS をメモします。
これと eb init の時に指定した KeyPair をもとに ssh コマンドを叩きます。
$ ssh -i {{KeyPairのファイルパス}} ec2-user@{{先ほどメモしたパブリックDNS}}
  _____ _           _   _      ____                       _        _ _
 | ____| | __   ___| |_(_) ___| __ )  ___  __ _ _ __  ___| |_ __ _| | | __
 |  _| | |/ _ \/ __| __| |/ __|  _ \ / _ \/ _\ | '_ \/ __| __/ _\ | | |/ /
 | |___| | (_| \__ \ |_| | (__| |_) |  __/ (_| | | | \__ \ || (_| | |   <
 |_____|_|\__,_|___/\__|_|\___|____/ \___|\__,_|_| |_|___/\__\__,_|_|_|\_\

 Amazon Linux 2023 AMI

 This EC2 instance is managed by AWS Elastic Beanstalk. Changes made via SSH
 WILL BE LOST if the instance is replaced by auto-scaling. For more information
 on customizing your Elastic Beanstalk environment, see our documentation here:
 http://docs.aws.amazon.com/elasticbeanstalk/latest/dg/customize-containers-ec2.html

   ,     #_
   ~\_  ####_        Amazon Linux 2023
  ~~  \_#####\
  ~~     \###|
  ~~       \#/ ___   https://aws.amazon.com/linux/amazon-linux-2023
   ~~       V~' '->
    ~~~         /
      ~~._.   _/
         _/ _/
       _/m/'
Last login: Sun Nov 19 01:48:25 2023 from 106.184.52.161
[ec2-user@ip-172-31-3-230 ~]$
postgres への接続確認
セキュリティグループなどを除く限りは問題なさそうですが、EC2 から RDSへの接続ができるのかを確認します。
まずは必要な情報を取得します。
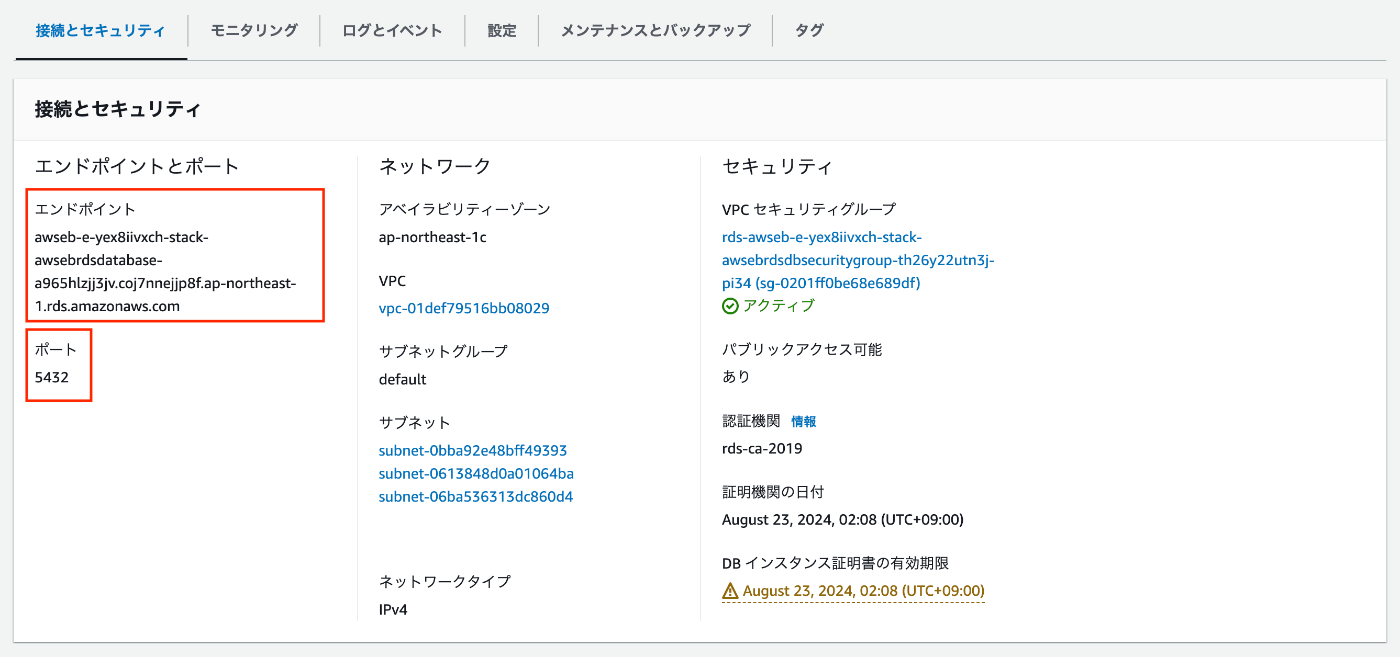
AWS Console で作成した RDS のデータベースのページを表示します。
「接続とセキュリティ」のタブに「エンドポイント」と「ポート」があるのでこれをメモ。
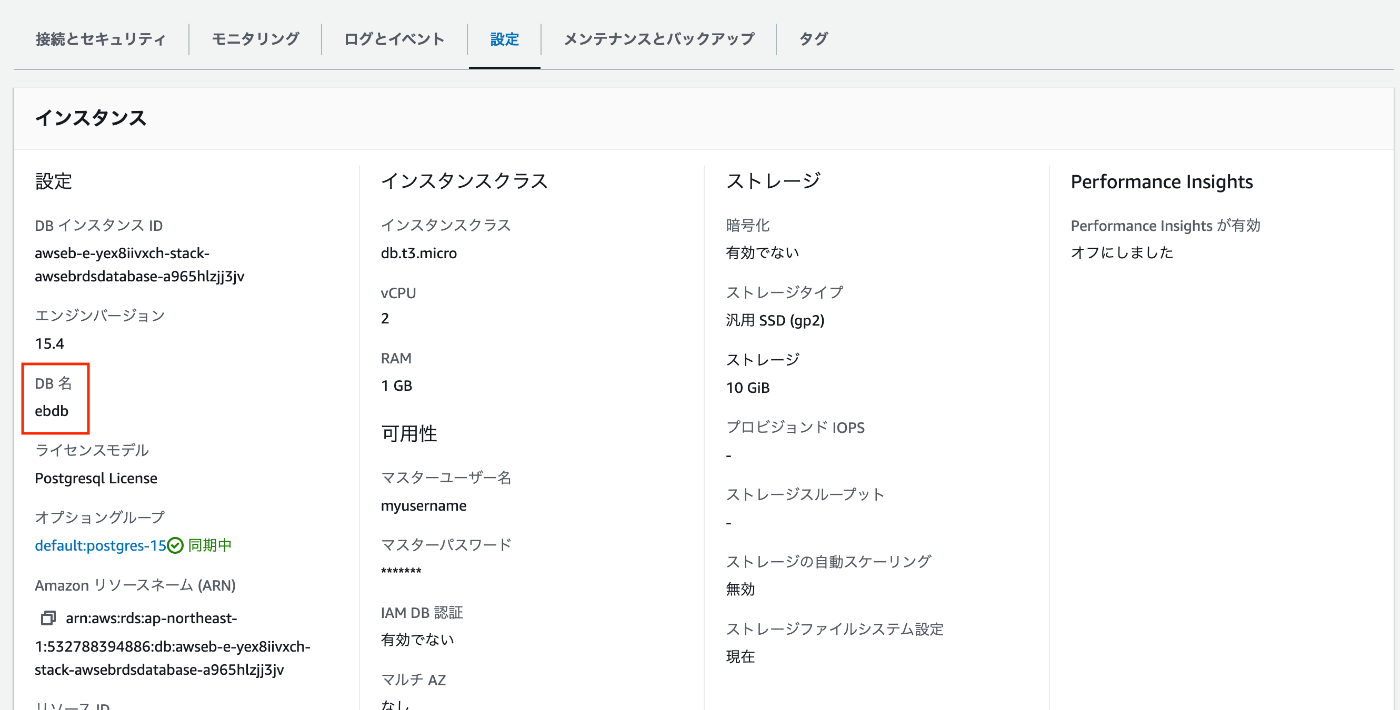
さらに「設定」のタブに「DB名」があるのでこれもメモします。
あとは、ユーザー名とパスワードが必要なのですが、これは eb create した際に指定したものです。
準備が整ったので実際に接続確認します。
先ほど同様 EC2に ssh に入って、まずは psql コマンドをインストールして、接続を試みます。
まずは postgresql のインストールをします。
[ec2-user@ip-172-31-3-230 ~]$ sudo yum -y install postgresql15.x86_64
postgresql15 が見つからない場合は、 sudo yum search postgresql などで posgresqlを探してみてください。
接続は次のようなコマンドを打ちます。打つとパスワードを求められるので eb create 時に指定したパスワードを入力します。
psql \
   --host={{先ほどメモしたデータベースのエンドポイント}} \
   --port={{先ほどメモしたデータベースのポート}} \
   --username={{eb create時に指定したユーザー名}} \
   --dbname={{先ほどメモしたデータベース名}}
実際に試してみました。
[ec2-user@ip-172-31-3-230 ~]$ psql --host=awseb-e-yex8iivxch-stack-awsebrdsdatabase-a965hlzjj3jv.coj7nnejjp8f.ap-northeast-1.rds.amazonaws.com --port=5432 --username=myusername --dbname=ebdb
Password for user myusername:
psql (15.4)
SSL connection (protocol: TLSv1.2, cipher: ECDHE-RSA-AES256-GCM-SHA384, compression: off)
Type "help" for help.

ebdb=> SELECT CURRENT_TIMESTAMP;
       current_timestamp
-------------------------------
 2023-11-19 02:28:19.631892+00
(1 row)
問題なく接続できてそうです。
(補足) 全て削除する
下記コマンドで全てのリソースを削除できます。
eb terminate --all
Discussion