VS Code で AWS Application Composer を使ってみる
この記事は mob Advent Calendar 8日目の記事です。
Visual Studio Codeで Application Composer が使えるようになったので実際に使ってみたいと思います。
ツール類のインストール
AWS SAM CLI のインストール
まずは AWS SAM CLI のインストールをします。
下記から いくつかの手段でインストールする方法が提示されているので好きな手法でインストールしてください。
プラグインのダウンロード
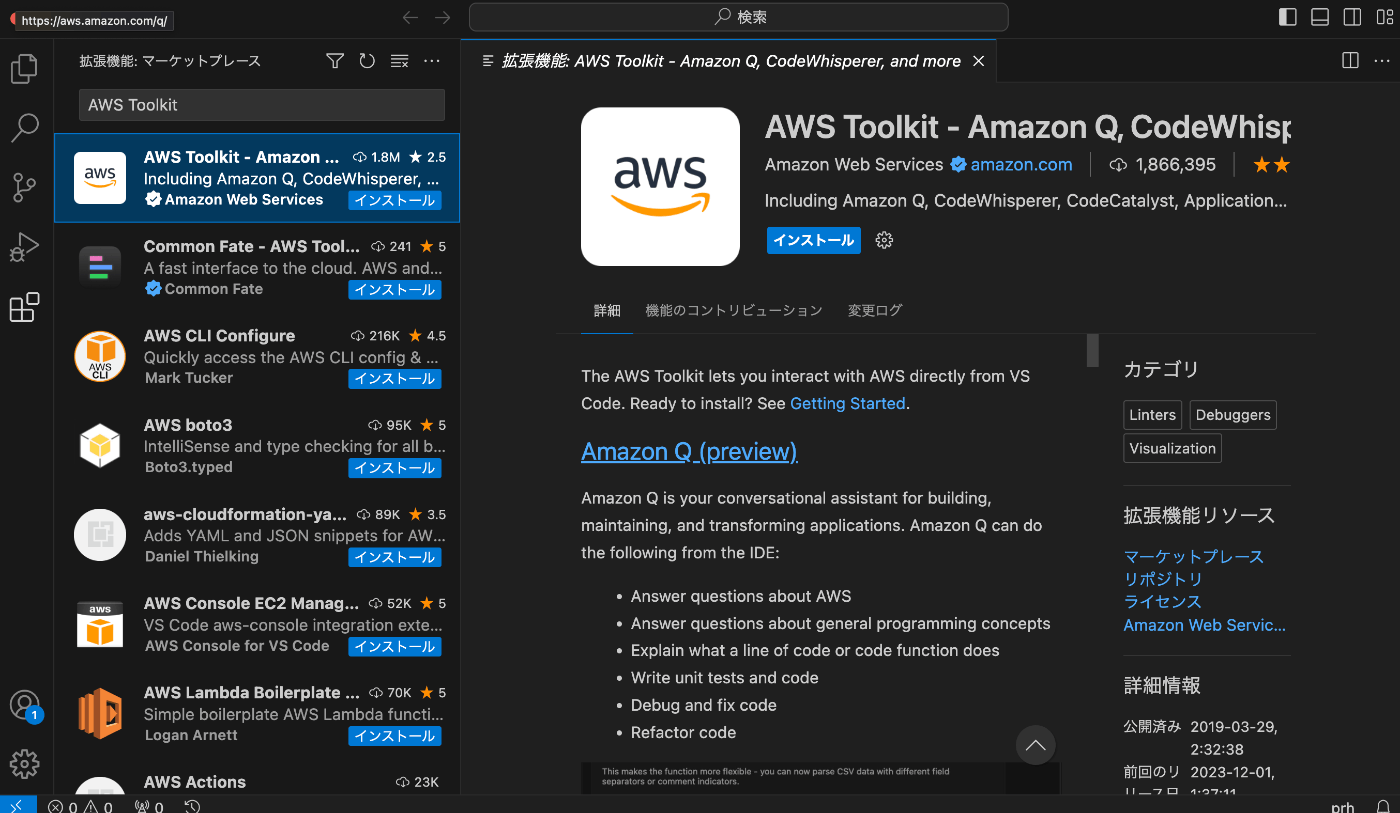
VS Codeのプラグインページから AWS Toolkit を検索してインストールします。
使ってみる
Lambda から 別の Lambda を実行してその結果をクライアントに返却するようなものを作ってみます。
まずは プロジェクトを作ってみる
まずは sam init してプロジェクトを作ってみます。
$ sam init

You can preselect a particular runtime or package type when using the `sam init` experience.
Call `sam init --help` to learn more.

Which template source would you like to use?
	1 - AWS Quick Start Templates
	2 - Custom Template Location
Choice: 1

Choose an AWS Quick Start application template
	1 - Hello World Example
	2 - Data processing
	...
Template: 1

Use the most popular runtime and package type? (Python and zip) [y/N]:

Which runtime would you like to use?
	1 - aot.dotnet7 (provided.al2)
	2 - dotnet6
	...
	13 - nodejs20.x
	14 - nodejs18.x
	...
Runtime: 13

What package type would you like to use?
	1 - Zip
	2 - Image
Package type: 1

Based on your selections, the only dependency manager available is npm.
We will proceed copying the template using npm.

Select your starter template
	1 - Hello World Example
	2 - Hello World Example TypeScript
Template: 2

Would you like to enable X-Ray tracing on the function(s) in your application?  [y/N]:

Would you like to enable monitoring using CloudWatch Application Insights?
For more info, please view https://docs.aws.amazon.com/AmazonCloudWatch/latest/monitoring/cloudwatch-application-insights.html [y/N]:

Would you like to set Structured Logging in JSON format on your Lambda functions?  [y/N]:

Project name [sam-app]:

    -----------------------
    Generating application:
    -----------------------
    Name: sam-app
    Runtime: nodejs20.x
    Architectures: x86_64
    Dependency Manager: npm
    Application Template: hello-world-typescript
    Output Directory: .
    Configuration file: sam-app/samconfig.toml

    Next steps can be found in the README file at sam-app/README.md


Commands you can use next
=========================
[*] Create pipeline: cd sam-app && sam pipeline init --bootstrap
[*] Validate SAM template: cd sam-app && sam validate
[*] Test Function in the Cloud: cd sam-app && sam sync --stack-name {stack-name} --watch
Application Composer を使うと、意図せぬ変更があったりするのでこのタイミングで git init しておきます。
$ cd sam-app/
$ git init
$ git add .
$ git commit -m "init
ここまでできたらひとまず sam build して sam deploy --guided で deploy しておきます。
Application Composer を使ってみる
template.yaml で右クリックして Open with Application Composer を選択すると
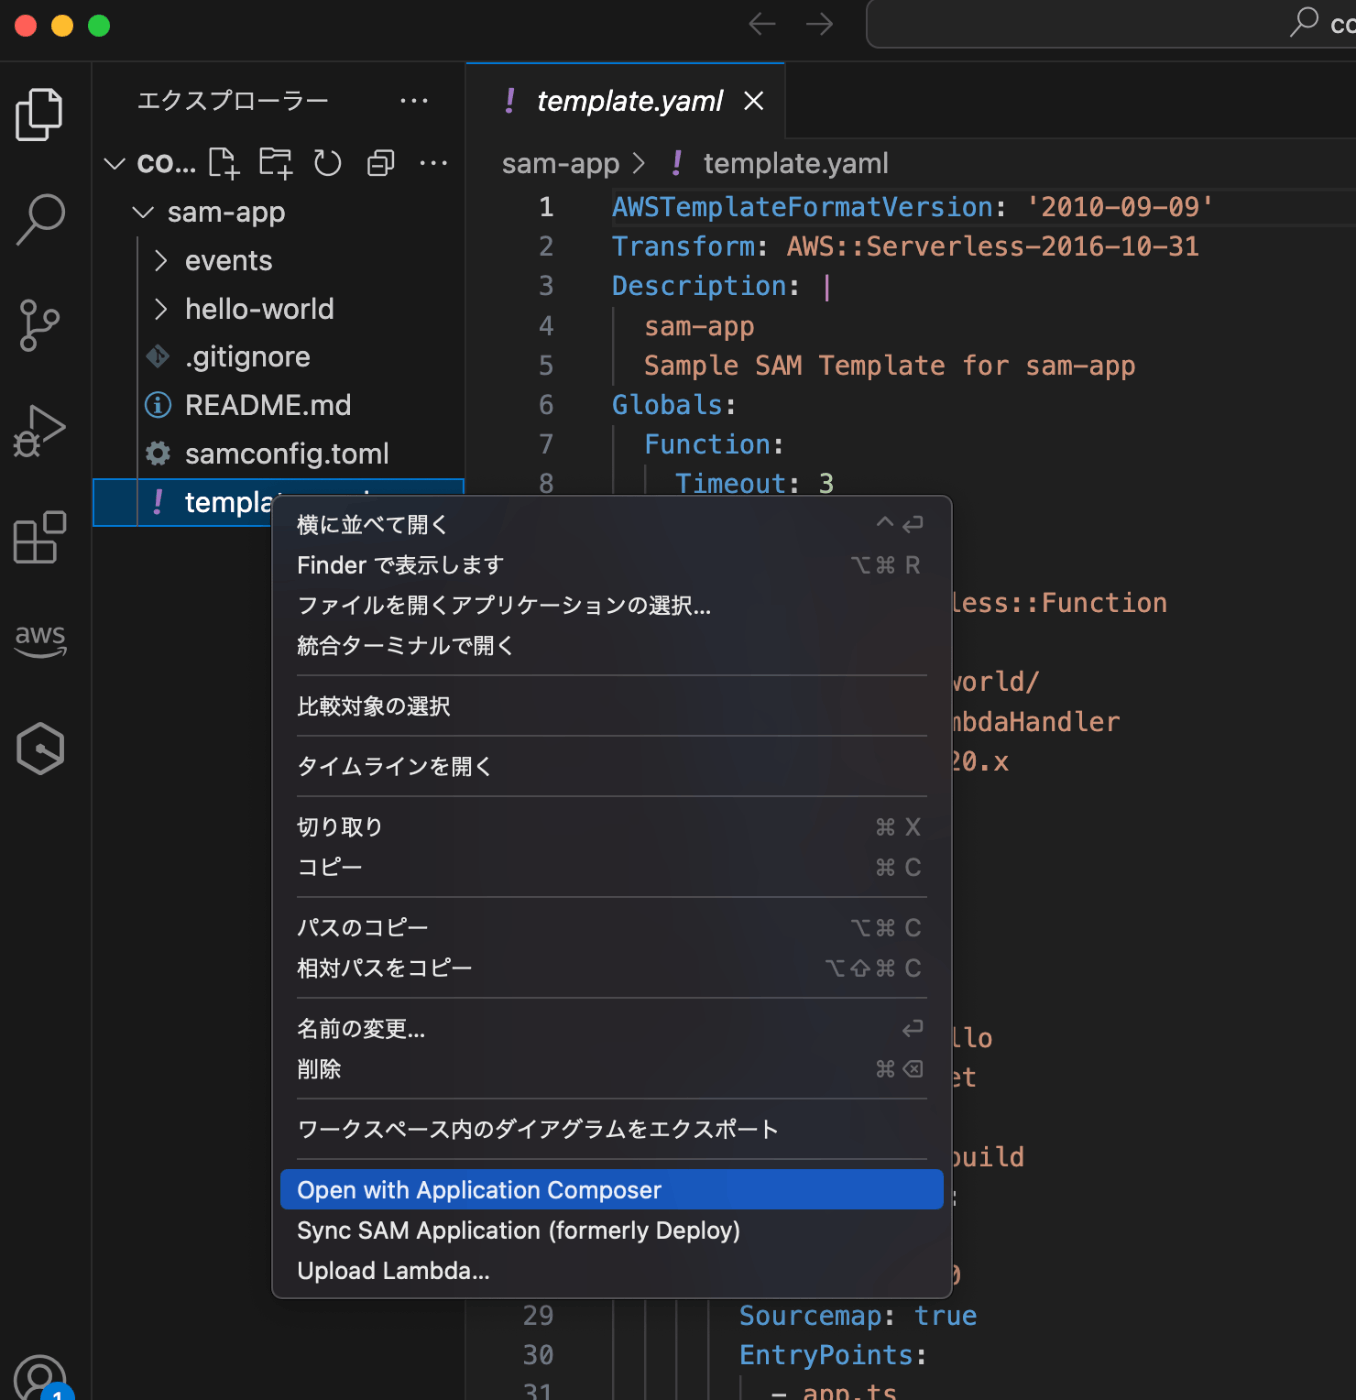
こんな感じで表示されます。
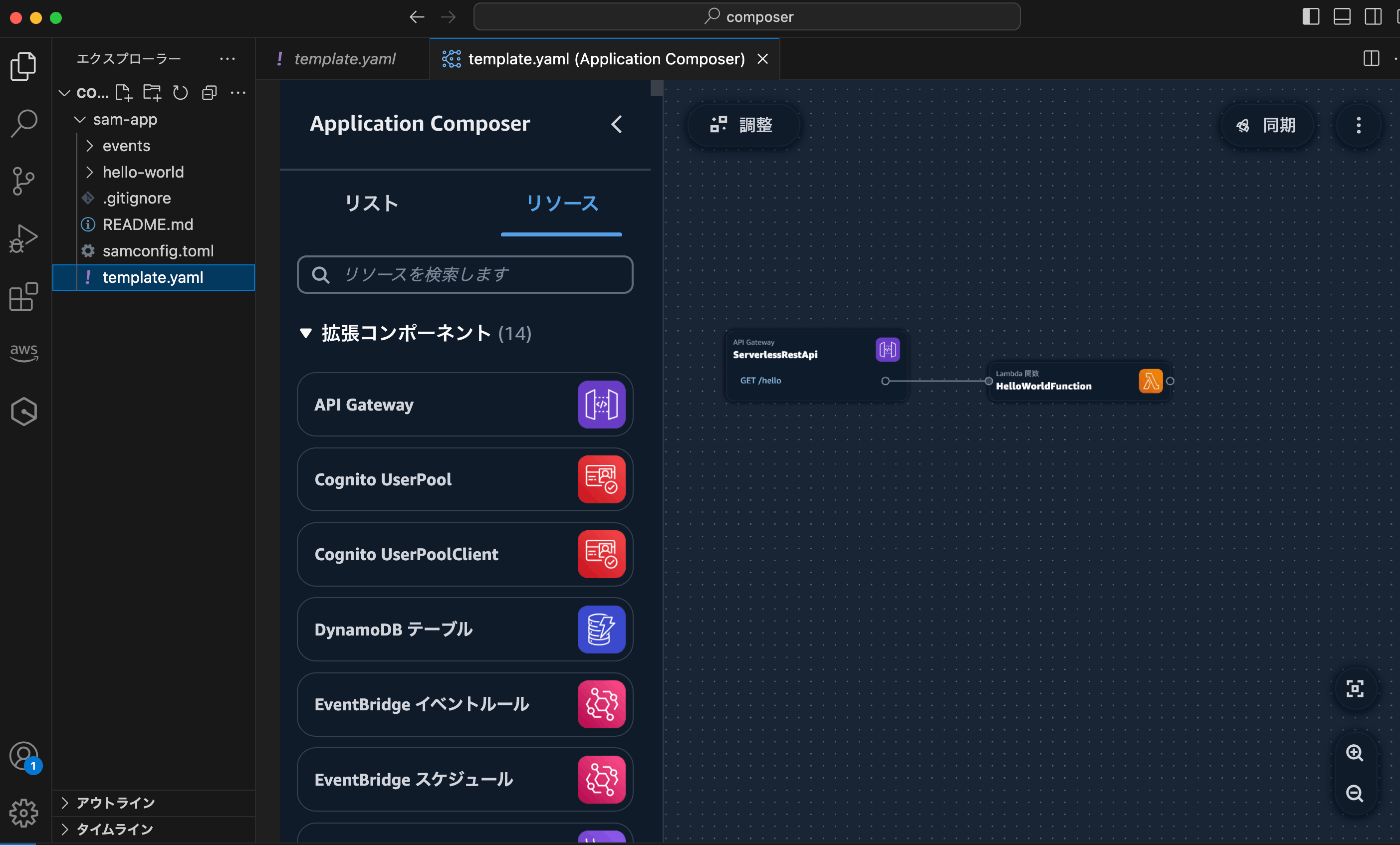
Lambda を追加して、

リソースプロパティはこのように入力します。
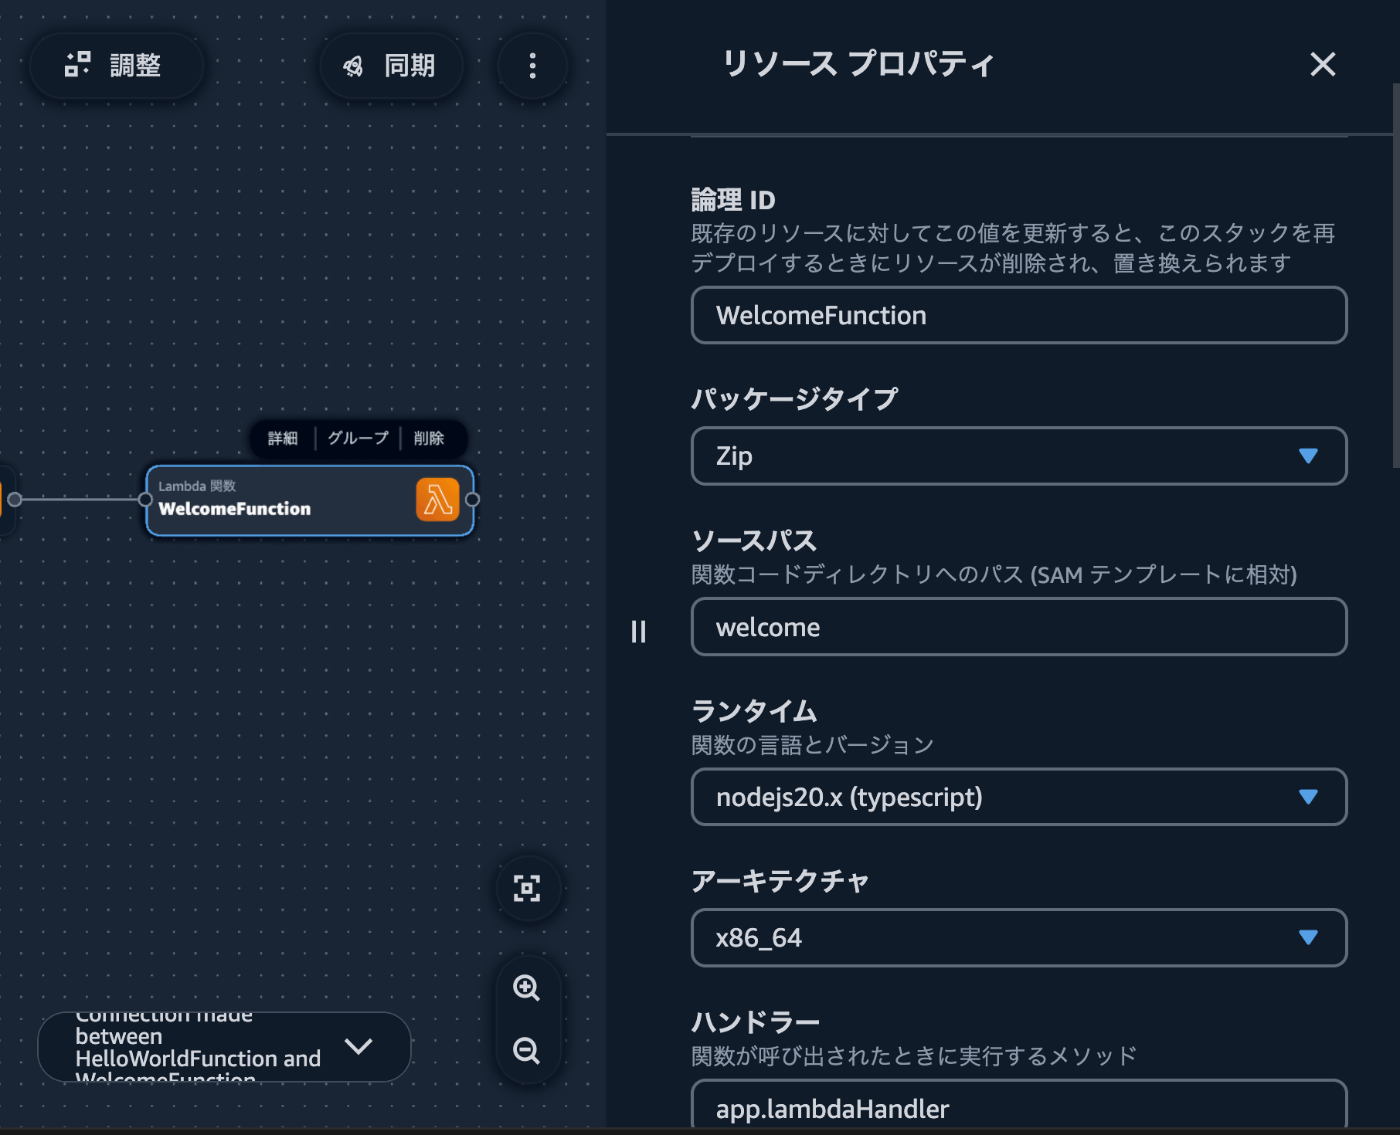
welcomeのディレクトリができて、 いくつかファイルができます。
ただ、 hello-world と中身が同じでいいので、生成されたファイルは全て削除して hello-world の中身をこのディレクトリにコピーして、 app.ts の一部だけ変更しておきます。
export const lambdaHandler = async (event: APIGatewayProxyEvent): Promise<APIGatewayProxyResult> => {
    try {
        return {
            statusCode: 200,
            body: JSON.stringify({
                message: 'welcome', // <= hello world を welcome に変更
            }),
        };
    } catch (err) {
        console.log(err);
        return {
            statusCode: 500,
            body: JSON.stringify({
                message: 'some error happened',
            }),
        };
    }
};
template.yaml に戻ります。 Application Composer ではなくてエディタで開きます。
ここが先ほど追加した WelcomeFunction はこのようになっています。
  WelcomeFunction:
    Type: AWS::Serverless::Function
    Properties:
      Description: !Sub
        - Stack ${AWS::StackName} Function ${ResourceName}
        - ResourceName: WelcomeFunction
      CodeUri: welcome
      Handler: app.lambdaHandler
      Runtime: nodejs20.x
      MemorySize: 3008
      Timeout: 30
      Tracing: Active
    Metadata:
      BuildMethod: esbuild
      BuildProperties:
        EntryPoints:
          - index.mts
        External:
          - '@aws-sdk/*'
          - aws-sdk
        Minify: false
Metadataの部分が index.mts になっているのですが、ここを app.ts に変更したいです。これに関しては Application Composer 側で変更できなそうなので、手で変更します。
  WelcomeFunction:
    Type: AWS::Serverless::Function
    Properties:
      Description: !Sub
        - Stack ${AWS::StackName} Function ${ResourceName}
        - ResourceName: WelcomeFunction
      CodeUri: welcome
      Handler: app.lambdaHandler
      Runtime: nodejs20.x
      MemorySize: 3008
      Timeout: 30
      Tracing: Active
    Metadata:
      BuildMethod: esbuild
      BuildProperties:
-       EntryPoints:
-         - index.mts
-       External:
-         - '@aws-sdk/*'
-         - aws-sdk
-       Minify: false
+       Minify: true
+       Target: es2020
+       Sourcemap: true
+       EntryPoints:
+         - app.ts
hello-world Function側のソースコードを編集していないですが、この段階で一度同期します。Application Composer の右上のボタンです。ここでの同期は AWS 側からローカルへの同期ではなくて、ローカルの状態を AWS 側に同期させるということをさします。ほぼほぼデプロイです。
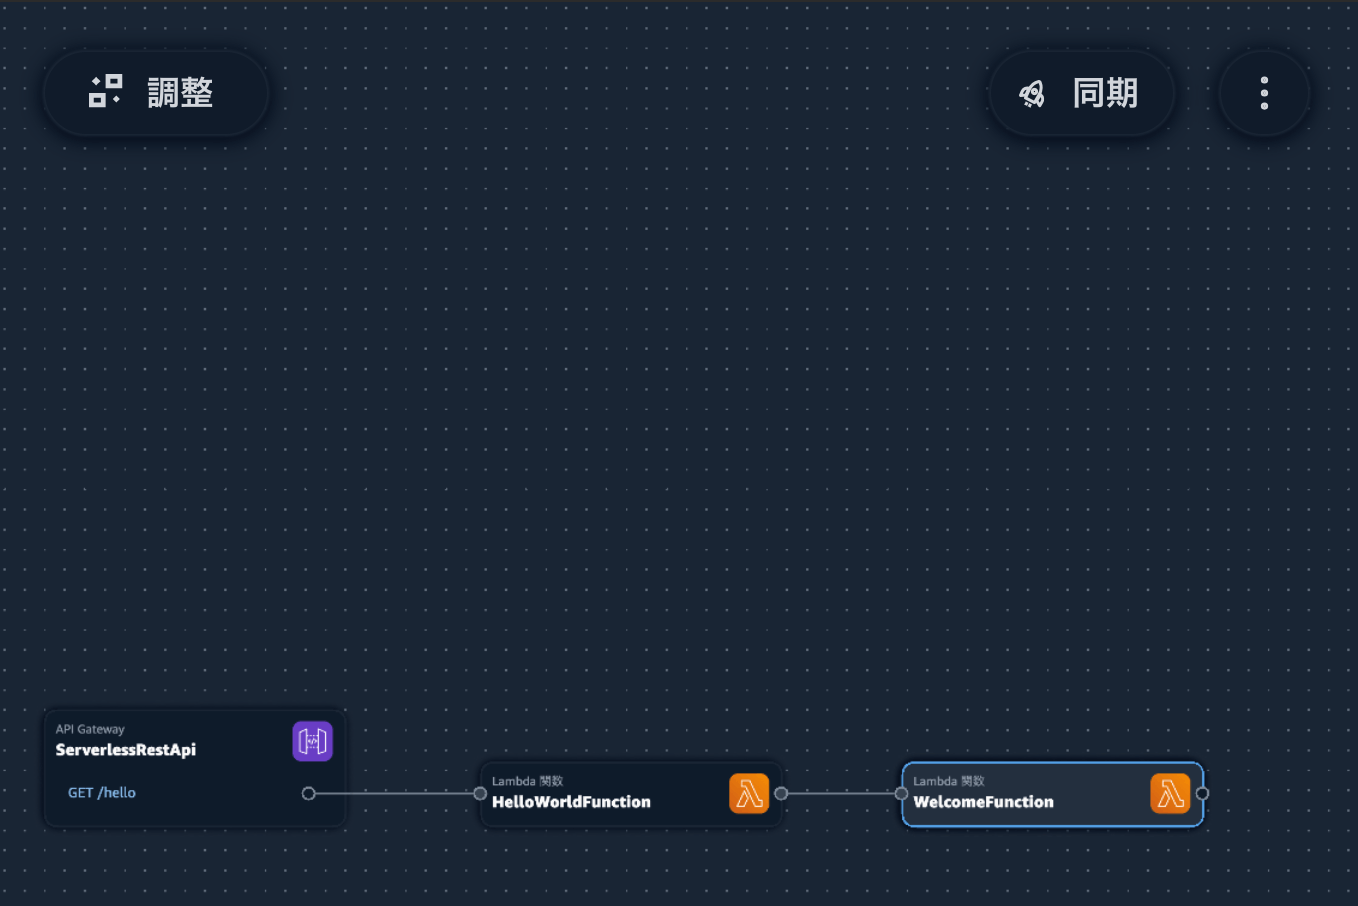
AWS Console の方で確認すると、 WelcomeFunction ができていることが確認できます。
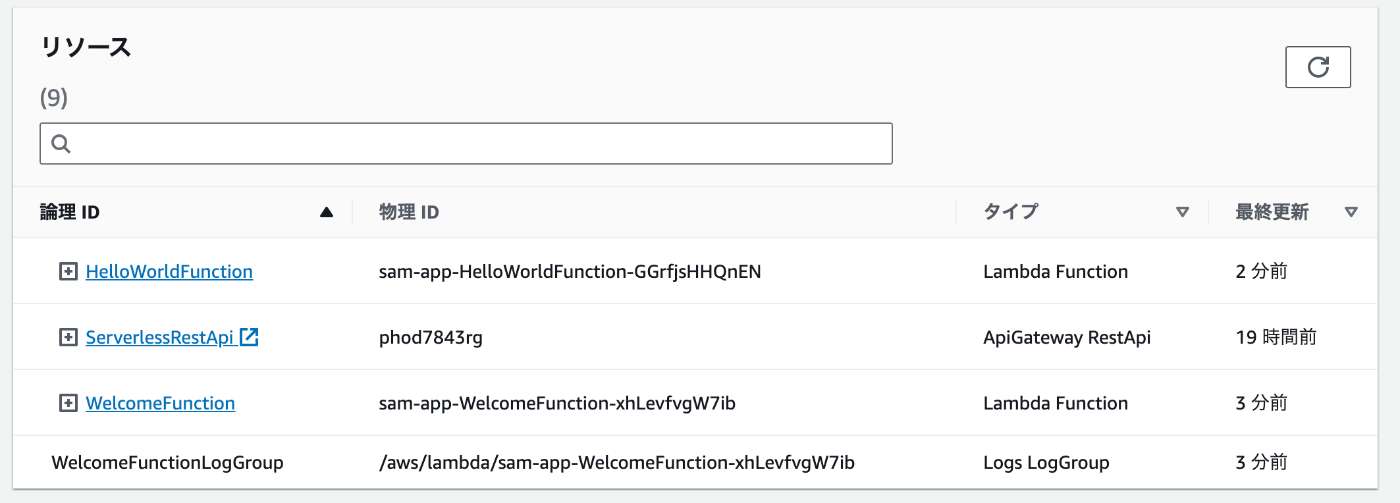
この際に、 WelcomeFunctionの 物理ID( 上の場合は sam-app-WelcomeFunction-xhLevfvgW7ib) をコピーしておきます。
HelloWorldFunction から WelcomeFunction を invoke する
HelloWorldFunction 側で aws-sdk を追加します。
npm install aws-sdk
コードを次のように編集します。
import { APIGatewayProxyEvent, APIGatewayProxyResult } from 'aws-lambda';
import { Lambda } from 'aws-sdk';

const lambda = new Lambda();

export const lambdaHandler = async (event: APIGatewayProxyEvent): Promise<APIGatewayProxyResult> => {
    try {
+       const response = await lambda
+           .invoke({
+               FunctionName: 'sam-app-WelcomeFunction-xhLevfvgW7ib', // <- 先ほどコピーした WelcomeFunction の物理ID
+           })
+           .promise();

        return {
            statusCode: 200,
            body: JSON.stringify({
+               message: 'hello world, ' + JSON.stringify(JSON.parse(response.Payload as string)),
            }),
        };
    } catch (err) {
        ...
    }
};
これで完了です。もう一度、 Application Composer の同期をしてみましょう。
同期が完了したら、エンドポイントを呼び出してみます。すると、 このような結果が返ってきます。
{"message": "Internal server error"}
原因を調べるために、AWS Console の HelloWorldFunction の方でテストをしてみると、このような結果になりました。どうやらタイムアウトしているようです。
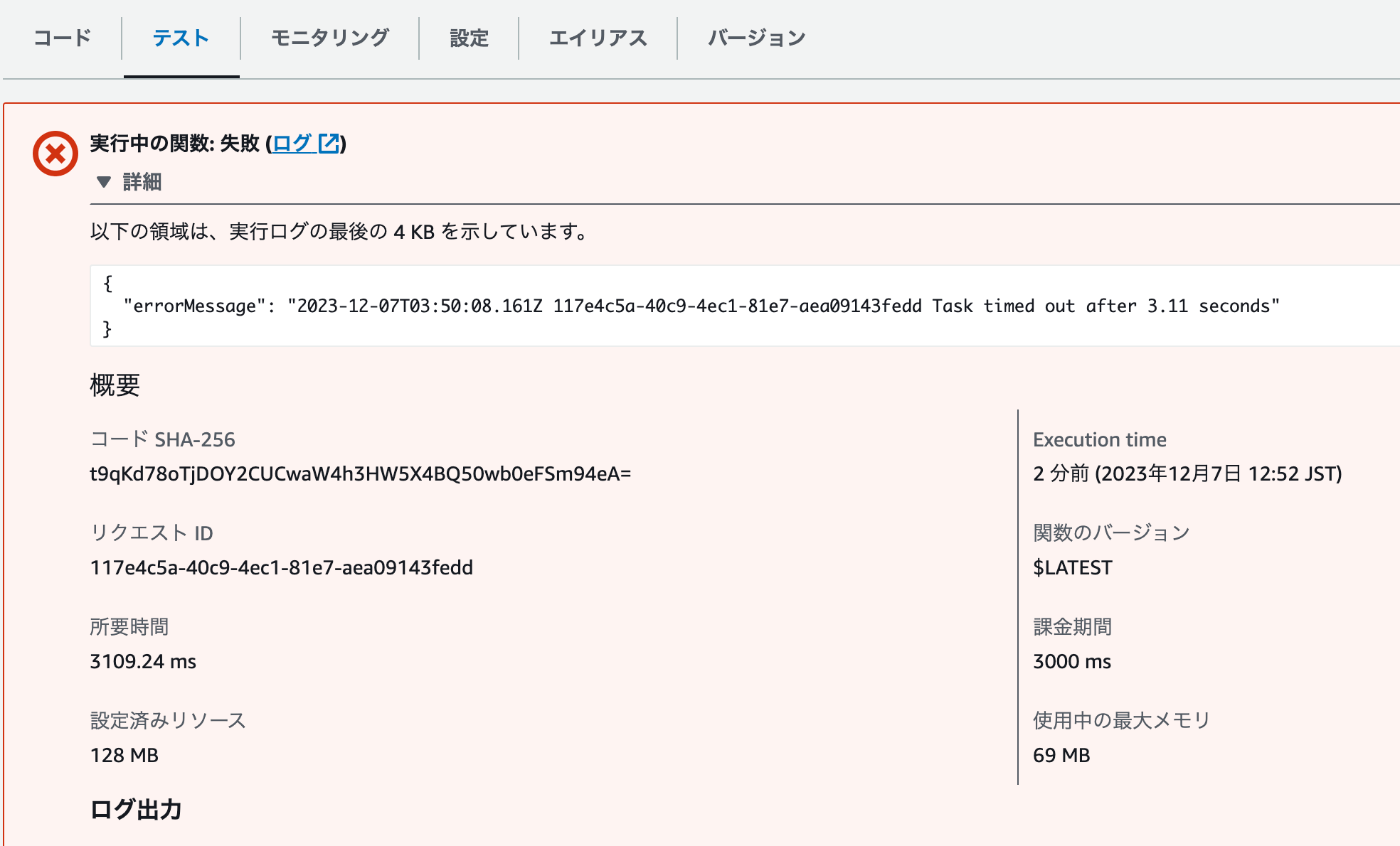
Application Composer で HelloWorldFunction のタイムアウトを眺めると 30(s) になってるので、3秒でタイムアウトになることはないはずですが、、、
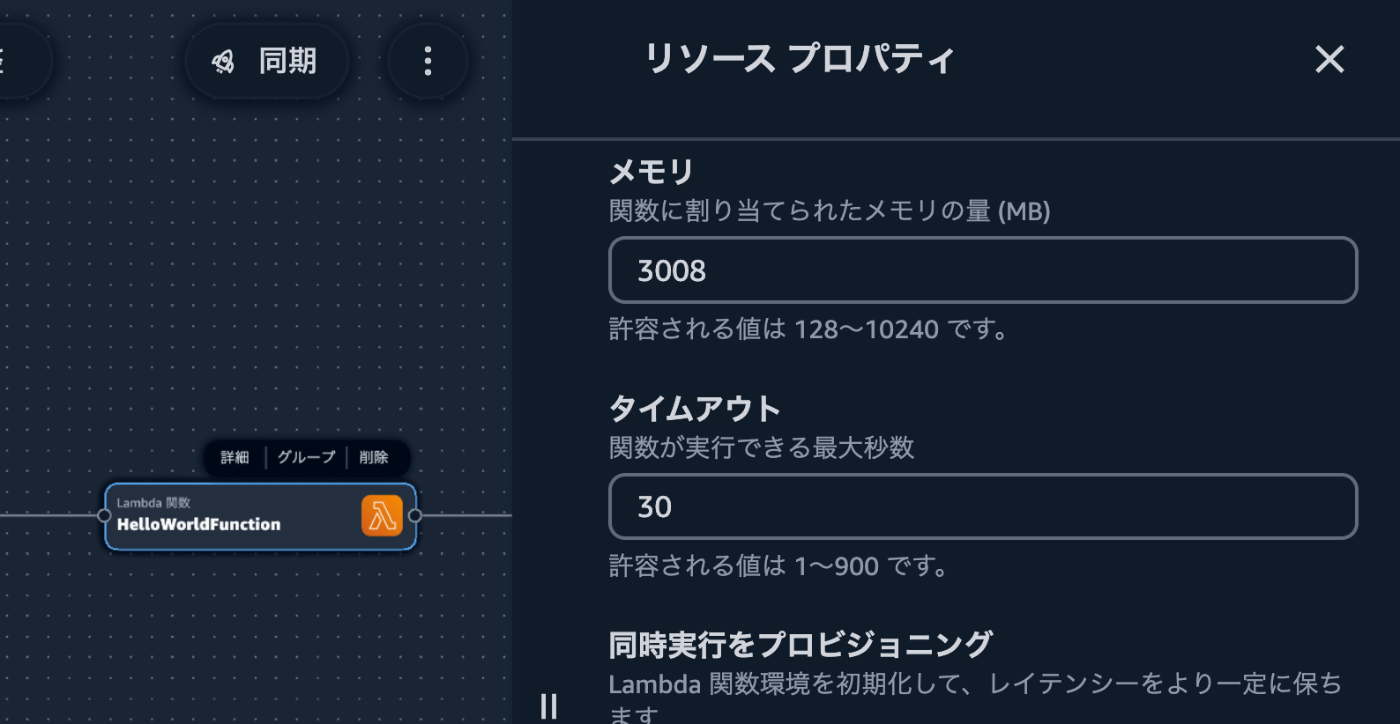
yamlの方を眺めると、タイムアウトの設定がされていません...
  HelloWorldFunction:
    Type: AWS::Serverless::Function
    Properties:
      CodeUri: hello-world/
      Handler: app.lambdaHandler
      Runtime: nodejs20.x
      Architectures:
        - x86_64
      Events:
        HelloWorld:
          Type: Api
          Properties:
            Path: /hello
            Method: get
      Environment:
        Variables:
          WELCOMEFUNCTION_FUNCTION_NAME: !Ref WelcomeFunction
          WELCOMEFUNCTION_FUNCTION_ARN: !GetAtt WelcomeFunction.Arn
      Policies:
        - LambdaInvokePolicy:
            FunctionName: !Ref WelcomeFunction
    Metadata:
      BuildMethod: esbuild
      BuildProperties:
        Minify: true
        Target: es2020
        Sourcemap: true
        EntryPoints:
          - app.ts
Application Composerの方で タイムアウトを 30から31にして、また30にして保存すると次のようにタイムアウトが設定されました。
  HelloWorldFunction:
    Type: AWS::Serverless::Function
    Properties:
      CodeUri: hello-world/
      Handler: app.lambdaHandler
      Runtime: nodejs20.x
      Events:
        HelloWorld:
          Type: Api
          Properties:
            Path: /hello
            Method: get
      Environment:
        Variables:
          WELCOMEFUNCTION_FUNCTION_NAME: !Ref WelcomeFunction
          WELCOMEFUNCTION_FUNCTION_ARN: !GetAtt WelcomeFunction.Arn
      Policies:
        - LambdaInvokePolicy:
            FunctionName: !Ref WelcomeFunction
+     MemorySize: 3008
+     Timeout: 30
    Metadata:
      BuildMethod: esbuild
      BuildProperties:
        EntryPoints:
+         - index.mts
+       External:
+         - '@aws-sdk/*'
+         - aws-sdk
+       Minify: false
ただ、変えてほしくない EntryPoints 周りも変わってしまいます。
さらに言うと の HelloWorldFunction のpackage .json が下記の内容で上書きされてしまっています。
{
  "name": "function",
  "version": "1.0.0",
  "type": "module",
  "devDependencies": {
    "@types/aws-lambda": "~8"
  }
}
これらを元に戻して、再度「同期」します。すると、結果がこのようになり無事動いていることがわかりました。
{"message":"hello world, {\"statusCode\":200,\"body\":\"{\\\"message\\\":\\\"welcome\\\"}\"}"}
感想まとめ
良いところ
- 視覚的でわかりやすい
- 権限周りは勝手にやってくれるので助かる
- 今回で言うと HelloWorldFunction に WelcomeFunction の InvokeAction を設定してくれるところ
微妙なところ
- デフォルト値(設定していない値)がAWS側とズレてるものがある
- 今回で言うと Lambdaのタイムアウトが Application Composer では 30s だが、AWS側では 3s
- 意図しないタイミングでソースコードの上書きがある
- 勝手に EntryPoint の設定がずれたり、 package.json の中身が空になったり
- Lambdaの EntryPoint などは Application Composer 側で設定できない
自分としての結論は、初期でまだソースコードがない時に AWS 側の構築をするのにはかなり役立つんだろうと思いました。一方で既にデプロイしており、そこに編集かけていく場合は意図しない変更が生まれやすいツールになってるので、 差分を注視する必要がありそうです。
Discussion