📝
さくっと amplify を使って Swagger-UI をホスティングする
さくっと amplify を使って Swagger-UI をホスティングしていきます。
下記の 前提 の部分が完了してれば、場合によっては10minちょいでいけるかも?
前提
- openapi.yml が手元にある
- AWSのアカウントがある
- Amplify CLI をインストールして、
amplify configureが完了している
swagger-ui のソースコードをダウンロード
- swagger-uiの latest を開いて、zipをダウンロードする
- zipを解答して
distディレクトリを確認し、これ以外削除する - openapi.yml を
distディレクトリに配置する -
swagger-initializer.js内のhttps://petstore.swagger.io/v2/swagger.jsonを./openapi.ymlに修正する
window.onload = function() {
  //<editor-fold desc="Changeable Configuration Block">

  // the following lines will be replaced by docker/configurator, when it runs in a docker-container
  window.ui = SwaggerUIBundle({
    url: "https://petstore.swagger.io/v2/swagger.json", <-- ここを"./openapi.yml"に修正する
    dom_id: '#swagger-ui',
    deepLinking: true,
    presets: [
      SwaggerUIBundle.presets.apis,
      SwaggerUIStandalonePreset
    ],
    plugins: [
      SwaggerUIBundle.plugins.DownloadUrl
    ],
    layout: "StandaloneLayout"
  });

  //</editor-fold>
};
ローカルで確認
HTTP Server が動けばなんでも良いです。
自分の場合は http-server を使いました。この場合、やり方は簡単でdist ディレクトリの場所で http-server を実行するだけです。
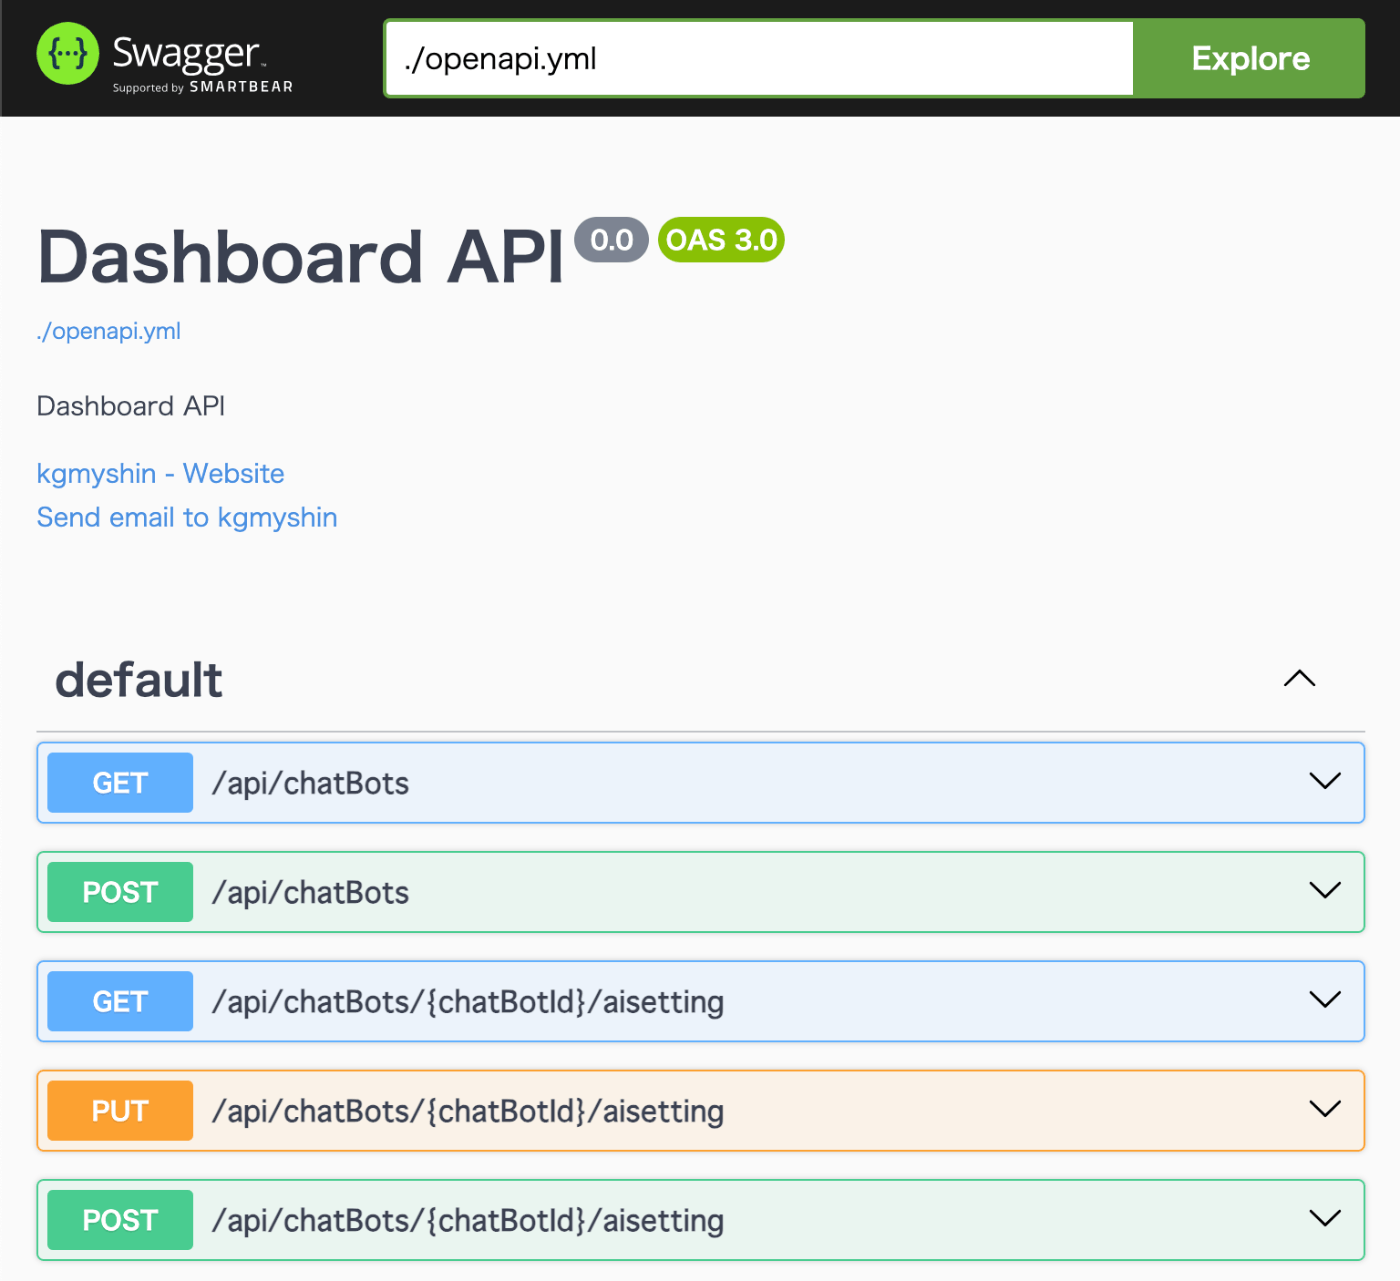
無事動いてます。
amplifyを使ってAWSでホスティングする
amplify init
distディレクトリを適当な空のディレクトリに配置します.ここでは swagger ディレクトリとします。
そのディレクトリで amplify initを実行.
swagger$ amplify init
Note: It is recommended to run this command from the root of your app directory
? Enter a name for the project {{プロジェクト名}}
The following configuration will be applied:

Project information
| Name: {{プロジェクト名}}
| Environment: dev
| Default editor: Visual Studio Code
| App type: javascript
| Javascript framework: none
| Source Directory Path: src
| Distribution Directory Path: dist
| Build Command: npm run-script build
| Start Command: npm run-script start

? Initialize the project with the above configuration? Yes <-- YESを選択
...
amplify add hosting
そのまま amplify add hosting を実行します.
swagger$ amplify add hosting
? Select the plugin module to execute
  Hosting with Amplify Console (Managed hosting with custom domains, Continuous deployment)
❯ Amazon CloudFront and S3 <-- こちらを選択
package.json を作成
下記の package.json を作って、swaggerディレクトリに配置します。
{
  "name": "Swagger-UI",
  "version": "1.0.0",
  "description": "Swagger-UI",
  "dependencies": {},
  "devDependencies": {},
  "scripts": {
    "start": "",
    "build": ""
  }
}
これがないと publish 時に Missing build command で失敗します。
amplify publish
swagger$ amplify publish
✔ Successfully pulled backend environment dev from the cloud.

    Current Environment: dev

┌──────────┬─────────────────┬───────────┬───────────────────┐
│ Category │ Resource name   │ Operation │ Provider plugin   │
├──────────┼─────────────────┼───────────┼───────────────────┤
│ Hosting  │ S3AndCloudFront │ Create    │ awscloudformation │
└──────────┴─────────────────┴───────────┴───────────────────┘
✔ Are you sure you want to continue? (Y/n) · yes

...
✔ Uploaded files successfully.
Your app is published successfully.
https://xxxxxxxxxxx.cloudfront.net <-- 最後に url が表示されます
これで 無事 Swagger-UI をホスティングできていることを確認します。
git管理下に置く場合
.gitignore で dist が ignore されてるので、今回の場合はそれを削除する。
#amplify-do-not-edit-begin
amplify/\#current-cloud-backend
amplify/.config/local-*
amplify/logs
amplify/mock-data
amplify/mock-api-resources
amplify/backend/amplify-meta.json
amplify/backend/.temp
build/
dist/  <---- これを削除 or コメントアウト
node_modules/
aws-exports.js
awsconfiguration.json
amplifyconfiguration.json
amplifyconfiguration.dart
amplify-build-config.json
amplify-gradle-config.json
amplifytools.xcconfig
.secret-*
**.sample
#amplify-do-not-edit-end
(付録) 全部削除したい場合
-
amplify remove hostingを実行 -
amplify deleteを実行 - S3 に該当バケットが残ってたら空にして削除(消えないことがあるっぽい?)
Discussion