今から始める Elastic Beanstalk 入門 #4
今から始める Elastic Beanstalk 入門シリーズの 4 回目です。
各回については以下のリンクからご覧ください。
前回は環境作成時の設定を紹介しました。
今回は EB CLI について紹介します。
EB CLI とは
Using the Elastic Beanstalk command line interface (EB CLI) - AWS Elastic Beanstalk
The EB CLI is a command line interface for AWS Elastic Beanstalk that provides interactive commands that simplify creating, updating and monitoring environments from a local repository.
Elastic Beanstalk に関する操作をコマンドラインから実行できる公式コマンドラインツールです。
- EB CLI のソースコードは OSS であり GitHub で公開されている
- コマンド実行環境にインストールして使用する
AWS CLI との違い
Using the Elastic Beanstalk command line interface (EB CLI) - AWS Elastic Beanstalk
The AWS CLI is great for scripting, but is not as easy to use from the command line because of the number of commands that you need to run and the number of parameters on each command.
AWS CLI より簡潔にコマンドでの操作が可能な点が EB CLI のメリットです。
なお、AWS CLI のコマンド一覧については以下のリファレンスをご参照ください。
elasticbeanstalk — AWS CLI 2.24.24 Command Reference
インストール方法
Install the Elastic Beanstalk Command Line Interface - AWS Elastic Beanstalk
The easiest and recommended way to install the EB CLI is to use the EB CLI setup scripts available on GitHub.
セットアップスクリプトでインストールする方法と手動でインストールする方法がありますが、前者でのインストールが推奨されています。
手動でインストールする手順についてもドキュメントで紹介されているため、必要に応じてご参照ください。
Manually install the EB CLI - AWS Elastic Beanstalk
今回は以下のブログと同様にセットアップスクリプトで CloudShell にインストールします。
Elastic Beanstalk のサンプルアプリを EB CLI からデプロイしてみた
CloudShell へのインストール方法
AWS マネジメントコンソールにサインインし、CloudShell をひらきます。

EB CLI の GitHub リポジトリをクローンします。
$ git clone https://github.com/aws/aws-elastic-beanstalk-cli-setup.git
Cloning into 'aws-elastic-beanstalk-cli-setup'...
remote: Enumerating objects: 325, done.
remote: Counting objects: 100% (30/30), done.
remote: Compressing objects: 100% (21/21), done.
remote: Total 325 (delta 9), reused 22 (delta 6), pack-reused 295 (from 1)
Receiving objects: 100% (325/325), 533.74 KiB | 2.92 MiB/s, done.
Resolving deltas: 100% (172/172), done.
セットアップスクリプトを実行します。
$ python ./aws-elastic-beanstalk-cli-setup/scripts/ebcli_installer.py

***********************************
1. Locating virtualenv installation
***********************************
ERROR: Could not find and "virtualenv" installed. Ensurevirtualenv is installed and that it is in PATH before executingthis script.

******************************************
2. Creating exclusive virtualenv for EBCLI
******************************************
/bin/sh: line 1: virtualenv: command not found
エラーが発生しますが問題ないのでパスの追加に進みます。
$ echo 'export PATH="/home/ec2-user/.ebcli-virtual-env/executables:$PATH"' >> ~/.bash_profile && source ~/.bash_profile
インストールされたことを確認します。
$ eb --version
EB CLI 3.21.0 (Python 3.9.20 (main, Dec 11 2024, 00:00:00)
[GCC 11.4.1 20230605 (Red Hat 11.4.1-2)])
EB CLI の主なコマンド
EB CLI command reference - AWS Elastic Beanstalk
コマンド一覧は上記ドキュメントに記載されていますが、ここでは主なコマンドを紹介します。
-
eb init: EB CLI プロジェクトの初期化- リージョンや認証情報などの基本的な設定を行います
-
eb create: 環境の作成- Elastic Beanstalk 環境を作成します
-
eb status:ステータスの確認- 現在の環境情報の概要を確認できます
-
eb health: EC2 インスタンスの状態を確認- EC2 インスタンスのステータスなどを確認できます
-
eb events: イベントの確認- Elastic Beanstalk 環境の作成や更新などのイベントを確認できます
-
eb log: ログの取得- Elastic Beanstalk 環境内の EC2 インスタンスからログを取得できます
-
eb deploy: 環境にコードをデプロイ- Elastic Beanstalk 環境にローカル環境のコードをデプロイします
-
eb terminate: 環境の終了- Elastic Beanstalk 環境を削除します
EB CLI でサンプルアプリを作成してみる
Elastic Beanstalk のサンプルアプリを EB CLI からデプロイしてみた
上記ブログの手順と同様のため、詳細は上記ブログをご参照ください。
以下、実行するコマンドです。
事前準備
ディレクトリ作成
$ mkdir nodejs
$ cd nodejs
サンプルアプリ取得
$ wget https://docs.aws.amazon.com/ja_jp/elasticbeanstalk/latest/dg/samples/nodejs.zip
$ unzip nodejs.zip
$ rm nodejs.zip
config ファイル作成
$ nano .ebextensions/my_environment.config
# 以下の内容でファイルを作成
option_settings:
  - namespace: "aws:autoscaling:launchconfiguration"
    option_name: "RootVolumeType"
    value: "gp3"

$ cat .ebextensions/my_environment.config
option_settings:
  - namespace: "aws:autoscaling:launchconfiguration"
    option_name: "RootVolumeType"
    value: "gp3"
Elastic Beanstalk 環境の初期設定
eb init -i コマンドで初期設定を行います。
-i オプションを付与することで対話形式で環境を設定できます。
リージョン以外はデフォルト設定なのでそのままエンターで OK です。
$ eb init -i

# リージョン選択
Select a default region
1) us-east-1 : US East (N. Virginia)
2) us-west-1 : US West (N. California)
3) us-west-2 : US West (Oregon)
4) eu-west-1 : EU (Ireland)
5) eu-central-1 : EU (Frankfurt)
6) ap-south-1 : Asia Pacific (Mumbai)
7) ap-southeast-1 : Asia Pacific (Singapore)
8) ap-southeast-2 : Asia Pacific (Sydney)
9) ap-northeast-1 : Asia Pacific (Tokyo)
10) ap-northeast-2 : Asia Pacific (Seoul)
11) sa-east-1 : South America (Sao Paulo)
12) cn-north-1 : China (Beijing)
13) cn-northwest-1 : China (Ningxia)
14) us-east-2 : US East (Ohio)
15) ca-central-1 : Canada (Central)
16) eu-west-2 : EU (London)
17) eu-west-3 : EU (Paris)
18) eu-north-1 : EU (Stockholm)
19) eu-south-1 : EU (Milano)
20) ap-east-1 : Asia Pacific (Hong Kong)
21) me-south-1 : Middle East (Bahrain)
22) af-south-1 : Africa (Cape Town)
23) ap-southeast-3 : Asia Pacific (Jakarta)
24) ap-northeast-3 : Asia Pacific (Osaka)
(default is 3): 9

# アプリケーション名設定
Enter Application Name
(default is "nodejs"):
Application nodejs has been created.

# プラットフォームの確認
It appears you are using Node.js. Is this correct?
(Y/n):
Select a platform branch.
1) Node.js 22 running on 64bit Amazon Linux 2023
2) Node.js 20 running on 64bit Amazon Linux 2023
3) Node.js 18 running on 64bit Amazon Linux 2023
4) Node.js 18 running on 64bit Amazon Linux 2
(default is 1):

# SSH キーペアの設定
Cannot setup CodeCommit because there is no Source Control setup, continuing with initialization
Do you want to set up SSH for your instances?
(Y/n):

Type a keypair name.
(Default is aws-eb):
Generating public/private rsa key pair.
Enter passphrase (empty for no passphrase):
Enter same passphrase again:
Your identification has been saved in /home/cloudshell-user/.ssh/aws-eb
Your public key has been saved in /home/cloudshell-user/.ssh/aws-eb.pub
The key fingerprint is:
SHA256:S9DXOpNhdLQ/TVeYkuxxe2Zsd6l0m4PX92QjN1AtHBs aws-eb
The key's randomart image is:
+---[RSA 3072]----+
|          .oooE+o|
|       . . o=.*+o|
|      . . +.o+o++|
|       . o +.+.=X|
|        S = . B=B|
|       . . o + X=|
|        .     +o*|
|                .|
|                 |
+----[SHA256]-----+
WARNING: Uploaded SSH public key for "aws-eb" into EC2 for region ap-northeast-1.
Elastic Beanstalk 環境の作成
eb creat --single コマンドで環境を作成します。
--single オプションを付与することで単一インスタンスのプリセットでの作成となります
すべてデフォルト設定なのでそのままエンターで OK です。
$ eb create --single

# 環境名の設定
Enter Environment Name
(default is nodejs-dev):

Enter DNS CNAME prefix
(default is nodejs-dev22):

Would you like to enable Spot Fleet requests for this environment? (y/N):
Creating application version archive "app-250315_064830050359".
Uploading nodejs/app-250315_064830050359.zip to S3. This may take a while.
Upload Complete.
Environment details for: nodejs-dev
  Application name: nodejs
  Region: ap-northeast-1
  Deployed Version: app-250315_064830050359
  Environment ID: e-pys6yihkwp
  Platform: arn:aws:elasticbeanstalk:ap-northeast-1::platform/Node.js 22 running on 64bit Amazon Linux 2023/6.4.3
  Tier: WebServer-Standard-1.0
  CNAME: nodejs-dev22.ap-northeast-1.elasticbeanstalk.com
  Updated: 2025-03-15 06:48:31.983000+00:00
Printing Status:
2025-03-15 06:48:31    INFO    createEnvironment is starting.
2025-03-15 06:48:32    INFO    Using elasticbeanstalk-ap-northeast-1-012345678901 as Amazon S3 storage bucket for environment data.
2025-03-15 06:49:00    INFO    Created security group named: awseb-e-pys6yihkwp-stack-AWSEBSecurityGroup-AmtE8AMUZ0u4
2025-03-15 06:49:16    INFO    Created EIP: 18.178.73.79
2025-03-15 06:49:47    INFO    Waiting for EC2 instances to launch. This may take a few minutes.
2025-03-15 06:50:55    INFO    Instance deployment completed successfully.
2025-03-15 06:51:10    INFO    Application available at nodejs-dev22.ap-northeast-1.elasticbeanstalk.com.
2025-03-15 06:51:11    INFO    Successfully launched environment: nodejs-dev
「Successfully launched environment」が表示されれば環境の作成は完了です。
コンソールで確認してみる
Elastic Beanstalk コンソールに新しい環境が作成されていることを確認できます。
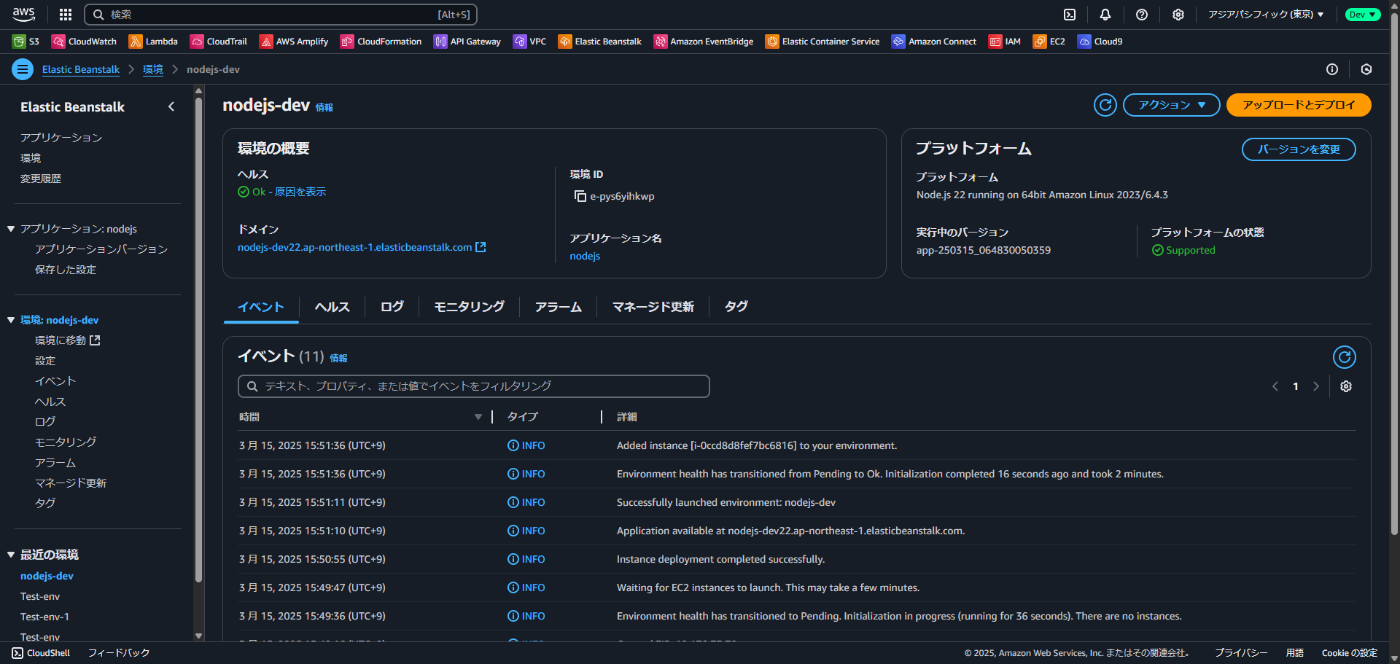
各種コマンドも試してみましょう。
$ eb status
Environment details for: nodejs-dev
  Application name: nodejs
  Region: ap-northeast-1
  Deployed Version: app-250315_064830050359
  Environment ID: e-pys6yihkwp
  Platform: arn:aws:elasticbeanstalk:ap-northeast-1::platform/Node.js 22 running on 64bit Amazon Linux 2023/6.4.3
  Tier: WebServer-Standard-1.0
  CNAME: nodejs-dev22.ap-northeast-1.elasticbeanstalk.com
  Updated: 2025-03-15 06:51:11.374000+00:00
  Status: Ready
  Health: Green
$ eb health
nodejs-dev                        Ok                        2025-03-15 06:54:52
WebServer                    Node.js 22 running on 64bit Amazon Linux 2023/6.4.3
  total      ok    warning  degraded  severe    info   pending  unknown
    1        1        0        0        0        0        0        0

  instance-id           status     cause                                health
    Overall             Ok
  i-0ccd8d8fef7bc6816   Ok

  instance-id           r/sec    %2xx   %3xx   %4xx   %5xx      p99      p90
    Overall             0.0         -      -      -      -         -        -       -       -       -
  i-0ccd8d8fef7bc6816   0.0         -      -      -      -         -        -       -       -       -

  instance-id           type       az   running     load 1  load 5      user %
  i-0ccd8d8fef7bc6816   t3.micro   1a   5 mins        0.02    0.14         0.2     0.0       0.1    99.8        0.0

  instance-id           status     id   version                   ago
  i-0ccd8d8fef7bc6816   Deployed   1    app-250315_064830050359   4 mins
$ eb events
2025-03-15 06:48:31    INFO    createEnvironment is starting.
2025-03-15 06:48:32    INFO    Using elasticbeanstalk-ap-northeast-1-012345678901 as Amazon S3 storage bucket for environment data.
2025-03-15 06:49:00    INFO    Created security group named: awseb-e-pys6yihkwp-stack-AWSEBSecurityGroup-AmtE8AMUZ0u4
2025-03-15 06:49:16    INFO    Created EIP: 18.178.73.79
2025-03-15 06:49:36    INFO    Environment health has transitioned to Pending. Initialization in progress (running for 36 seconds). There are no instances.
2025-03-15 06:49:47    INFO    Waiting for EC2 instances to launch. This may take a few minutes.
2025-03-15 06:50:55    INFO    Instance deployment completed successfully.
2025-03-15 06:51:10    INFO    Application available at nodejs-dev22.ap-northeast-1.elasticbeanstalk.com.
2025-03-15 06:51:11    INFO    Successfully launched environment: nodejs-dev
2025-03-15 06:51:36    INFO    Environment health has transitioned from Pending to Ok. Initialization completed 16 seconds ago and took 2 minutes.
2025-03-15 06:51:36    INFO    Added instance [i-0ccd8d8fef7bc6816] to your environment.
$ eb logs --all
Retrieving logs...
Logs were saved to /home/cloudshell-user/nodejs/.elasticbeanstalk/logs/250315_065703
Logs were saved to /home/cloudshell-user/nodejs/.elasticbeanstalk/logs/250315_065703
Updated symlink at /home/cloudshell-user/nodejs/.elasticbeanstalk/logs/latest
ログのパスはプラットフォームによって異なります。
Viewing logs from Amazon EC2 instances in your Elastic Beanstalk environment - AWS Elastic Beanstalk
今回の Amazon Linux 2023 では以下のパスにログが保存されています。
$ ls /home/cloudshell-user/nodejs/.elasticbeanstalk/logs/250315_065703/i-0ccd8d8fef7bc6816/var/log
cfn-hup.log       cfn-init.log  cloud-init.log         cron                  eb-cfn-init.log  eb-hooks.log    healthd   nginx
cfn-init-cmd.log  cfn-wire.log  cloud-init-output.log  eb-cfn-init-call.log  eb-engine.log    eb-publish.log  messages  web.stdout.log
ログをダウンロードしたい場合は S3 からバンドルログをダウンロードすることもできます。
Viewing logs from Amazon EC2 instances in your Elastic Beanstalk environment - AWS Elastic Beanstalk
When you request tail or bundle logs from your environment, or when instances upload rotated logs, they're stored in your Elastic Beanstalk bucket in Amazon S3

サンプルアプリを変更して再デプロイ
サンプルアプリの index.html を一部変更して再デプロイしてみましょう。
今回は <h1>Congratulations</h1> を <h1>Hello</h1> に変更してみます。
$ nano index.html

# html の任意の箇所を変更してください
<h1>Hello</h1>
ファイルの変更後、再デプロイします。
# eb deploy
Creating application version archive "app-250315_070925301958".
Uploading nodejs/app-250315_070925301958.zip to S3. This may take a while.
Upload Complete.
2025-03-15 07:09:26    INFO    Environment update is starting.
2025-03-15 07:09:31    INFO    Deploying new version to instance(s).
2025-03-15 07:09:43    INFO    Instance deployment completed successfully.
2025-03-15 07:09:49    INFO    New application version was deployed to running EC2 instances.
2025-03-15 07:09:49    INFO    Environment update completed successfully.
Elastic Beanstalk 環境のコンソールからドメインにアクセスすると変更が反映されていることを確認できます。


最初にデプロイしたサンプルアプリはアプリケーションバージョンから確認できます。

ソースをクリックすれば zip ファイルとしてダウンロードすることもできます。
このバージョニング機能が前回紹介したアプリケーションのバージョニング機能です。
もし新しいコードをデプロイして問題が発生した場合には、古いコードをアップロードすることでロールバックすることができます。
環境の終了
動作確認が済んだら eb terminate --all コマンドで環境を削除します。
--all オプションを付与することで環境だけでなくアプリケーションも削除できます。
$ eb terminate --all
The application "nodejs" and all its resources will be deleted.
This application currently has the following:
Running environments: 1
Configuration templates: 0
Application versions: 2

To confirm, type the application name: nodejs
Removing application versions from s3.
2025-03-15 07:16:05    INFO    deleteApplication is starting.
2025-03-15 07:16:05    INFO    Validating environment before performing delete
2025-03-15 07:16:06    INFO    Environment validation complete
2025-03-15 07:16:06    INFO    Invoking Environment Termination workflows.
2025-03-15 07:18:38    INFO    The environment termination step is done.
2025-03-15 07:18:39    INFO    The application has been deleted successfully.
これで環境の削除も完了です。
まとめ
今回は今から始める Elastic Beanstalk 入門シリーズの 4 回目として、EB CLI について紹介しました。
次回は config ファイルについて紹介します。
今から始める Elastic Beanstalk 入門 #5 へ続く
参考資料
- Using the Elastic Beanstalk command line interface (EB CLI) - AWS Elastic Beanstalk
- GitHub - aws/aws-elastic-beanstalk-cli: The EB CLI is a command line interface for Elastic Beanstalk that provides interactive commands that simplify creating, updating and monitoring environments from a local repository.
- elasticbeanstalk — AWS CLI 2.24.24 Command Reference
- Install the Elastic Beanstalk Command Line Interface - AWS Elastic Beanstalk
- Manually install the EB CLI - AWS Elastic Beanstalk
- Managing Elastic Beanstalk environments with the EB CLI - AWS Elastic Beanstalk
- EB CLI command reference - AWS Elastic Beanstalk
- Viewing logs from Amazon EC2 instances in your Elastic Beanstalk environment - AWS Elastic Beanstalk
Discussion