📝
Elastic Beanstalk にソースコードをデプロイして更新する処理を Step Functions で自動化してみた
Step Functions のみで完結させてみました。
前提
- コマンド実行環境は CloudShell
- Elastic Beanstalk 環境は作成済み
- プラットフォーム: Node.js 22 running on 64bit Amazon Linux 2023/6.5.2
処理フロー
- ローカル端末で作成したソースバンドルを zip 化
- 1 の zip ファイルを S3 バケットにアップロード
- S3 イベント通知 > EventBridge > Step Functions でステートマシンを実行
- ステートマシンでアプリケーションバージョンの作成と環境の更新を実行
1. ローカル端末で作成したソースバンドルを zip 化
Tutorials and samples - AWS Elastic Beanstalk
今回は上記ドキュメントの Node.js のサンプルを使用しました。
$ wget https://docs.aws.amazon.com/ja_jp/elasticbeanstalk/latest/dg/samples/nodejs.zip

$ unzip nodejs.zip
$ rm nodejs.zip

$ nano index.html
# 任意の内容に書き換え
<h1>From Step Functions</h1>

$ zip sourcebundle.zip *
2. 1 の zip ファイルを S3 バケットにアップロード
この時点では S3 イベント通知を設定していないので、いったんアップロードできるかどうかだけの確認です。
$ aws s3 cp sourcebundle.zip s3://elasticbeanstalk-ap-northeast-1-123456789012/my-app/sourcebundle.zip

$ aws s3 ls s3://elasticbeanstalk-ap-northeast-1-123456789012/my-app/
2025-06-10 01:25:03       4453 sourcebundle.zip
後述の動作検証のためにアップロードしたファイルは削除しておきます。
3. S3 イベント通知 > EventBridge > Step Functions でステートマシンを実行
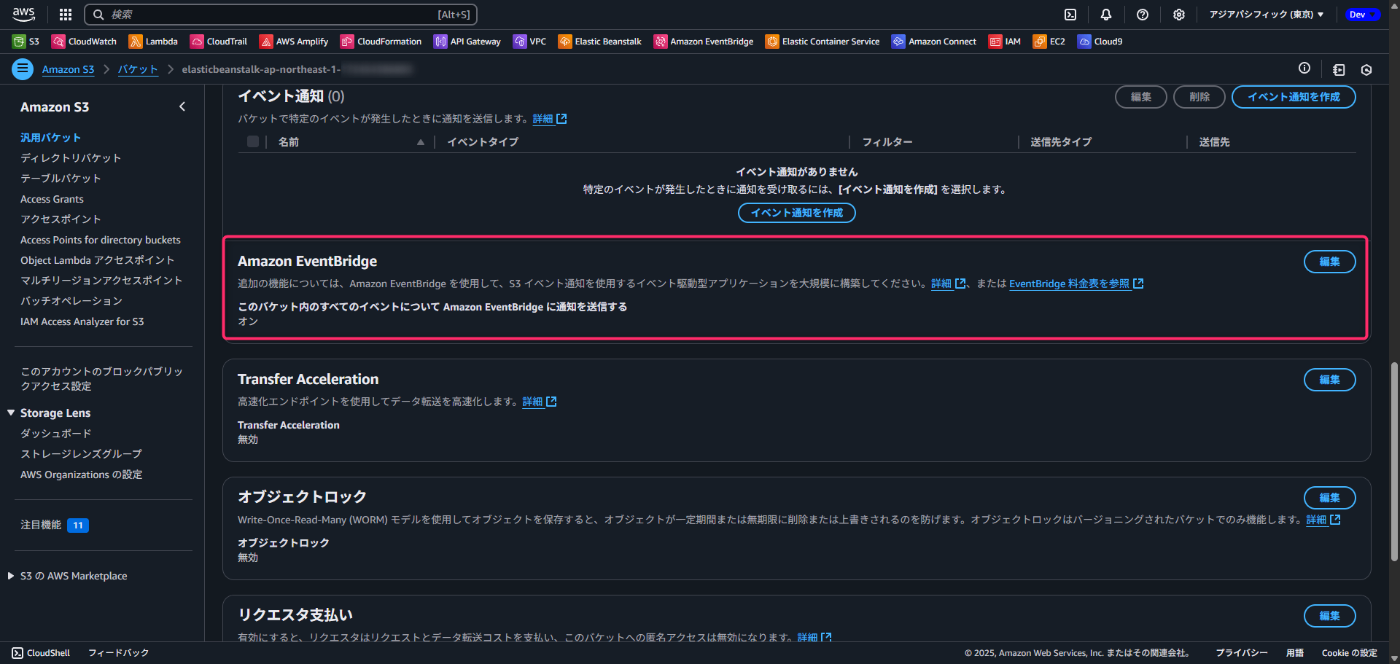
S3 バケットで EventBridge への通知の送信を有効化します。
以下のステートマシン定義で Step Functions のステートマシンを作成します。
Elastic Beanstalk のアプリケーション名と環境名はハードコードしています。
{
  "Comment": "Elastic Beanstalk deployment using Step Functions",
  "StartAt": "ExtractS3Info",
  "States": {
    "ExtractS3Info": {
      "Type": "Pass",
      "Parameters": {
        "bucket.$": "$.detail.bucket.name",
        "key.$": "$.detail.object.key",
        "timestamp.$": "$$.State.EnteredTime"
      },
      "Next": "CreateVersionLabel"
    },
    "CreateVersionLabel": {
      "Type": "Pass",
      "Parameters": {
        "bucket.$": "$.bucket",
        "key.$": "$.key",
        "versionLabel.$": "States.Format('v-{}', $.timestamp)"
      },
      "Next": "CreateApplicationVersion"
    },
    "CreateApplicationVersion": {
      "Type": "Task",
      "Resource": "arn:aws:states:::aws-sdk:elasticbeanstalk:createApplicationVersion",
      "Parameters": {
        "ApplicationName": "test",
        "VersionLabel.$": "$.versionLabel",
        "Description.$": "States.Format('Version {} deployed from Step Functions', $.versionLabel)",
        "SourceBundle": {
          "S3Bucket.$": "$.bucket",
          "S3Key.$": "$.key"
        },
        "AutoCreateApplication": false
      },
      "ResultPath": "$.createVersionResult",
      "Next": "Wait10Seconds"
    },
    "Wait10Seconds": {
      "Type": "Wait",
      "Seconds": 10,
      "Next": "UpdateEnvironment"
    },
    "UpdateEnvironment": {
      "Type": "Task",
      "Resource": "arn:aws:states:::aws-sdk:elasticbeanstalk:updateEnvironment",
      "Parameters": {
        "ApplicationName": "test",
        "EnvironmentName": "Test-env",
        "VersionLabel.$": "$.versionLabel"
      },
      "ResultPath": "$.updateEnvironmentResult",
      "Next": "Success"
    },
    "Success": {
      "Type": "Pass",
      "Parameters": {
        "statusCode": 200,
        "message.$": "States.Format('Successfully deployed version {} to Test-env', $.versionLabel)",
        "deployedVersion.$": "$.versionLabel",
        "createVersionResult.$": "$.createVersionResult",
        "updateEnvironmentResult.$": "$.updateEnvironmentResult"
      },
      "End": true
    }
  }
}
ステートマシンの実行ロールには AdministratorAccess 権限を付与しました。
EventBridge ルールで以下のイベントパターンを定義します。
{
  "source": ["aws.s3"],
  "detail-type": ["Object Created"],
  "detail": {
    "bucket": {
      "name": ["my-bucket-name"]
    }
  }
}
- ステートマシンでアプリケーションバージョンの作成と環境の更新を実行
再度 S3 バケットにソースバンドルをアップロードして動作確認します。
$ aws s3 cp sourcebundle.zip s3://elasticbeanstalk-ap-northeast-1-123456789012/my-app/sourcebundle.zip
ステートマシンの実行が成功し、Elastic Beanstalk 環境が更新されていれば成功です。


エラーが発生した場合はステートマシンの実行ログを確認してください。
まとめ
今回は Elastic Beanstalk にソースコードをデプロイして更新する処理を Step Functions で自動化してみました。
どなたかの参考になれば幸いです。
Discussion