Cognito で認証して IoT Core に接続してみた
- Amazon Cognito identities - AWS IoT Core
- Authorization with Amazon Cognito identities - AWS IoT Core
証明書を使用せずに Cognito で認証してみました。
01. Cognito ユーザープールの作成
以下の設定でユーザープールを作成します。
- サインイン識別子のオプション: メールアドレス
上記以外はデフォルト設定です。

上記設定でユーザープールを作成するとアプリケーションクライアントも自動的に作成されますが、今回はシークレットを使用しないので、既存のクライアントを削除して新しいクライアントを作成します。
$ aws cognito-idp delete-user-pool-client \
--user-pool-id your-userpool-id \
--client-id your-clien-id

$ aws cognito-idp create-user-pool-client \
--user-pool-id your-userpool-id \
--client-name iot \
--no-generate-secret \
--explicit-auth-flows "ALLOW_REFRESH_TOKEN_AUTH" "ALLOW_USER_SRP_AUTH" "ALLOW_USER_AUTH" "ALLOW_USER_PASSWORD_AUTH"
後述の手順でユーザーが必要になるので、Cognito ユーザーを作成しておきます。

ユーザー作成後、確認ステータスを変更します。
$ aws cognito-idp admin-set-user-password \
--user-pool-id your-userpool-id \
--username your-mail-address \
--password your-new-passward \
--permanent

02. Cognito ID プールの作成
以下の設定で ID プールを作成します。
- ユーザーアクセス: 認証されたアクセス
- 認証された ID ソース: Amazon Cognito ユーザープール
- 認証されたロール: 新しい IAM ロールを作成
- IAM ロール名: Auth_Role
- ユーザープール ID: 手順 01 のユーザープール
- アプリクライアント ID: 手順 01 で新規に作成したクライアント ID
- ID プール名: 任意の名称
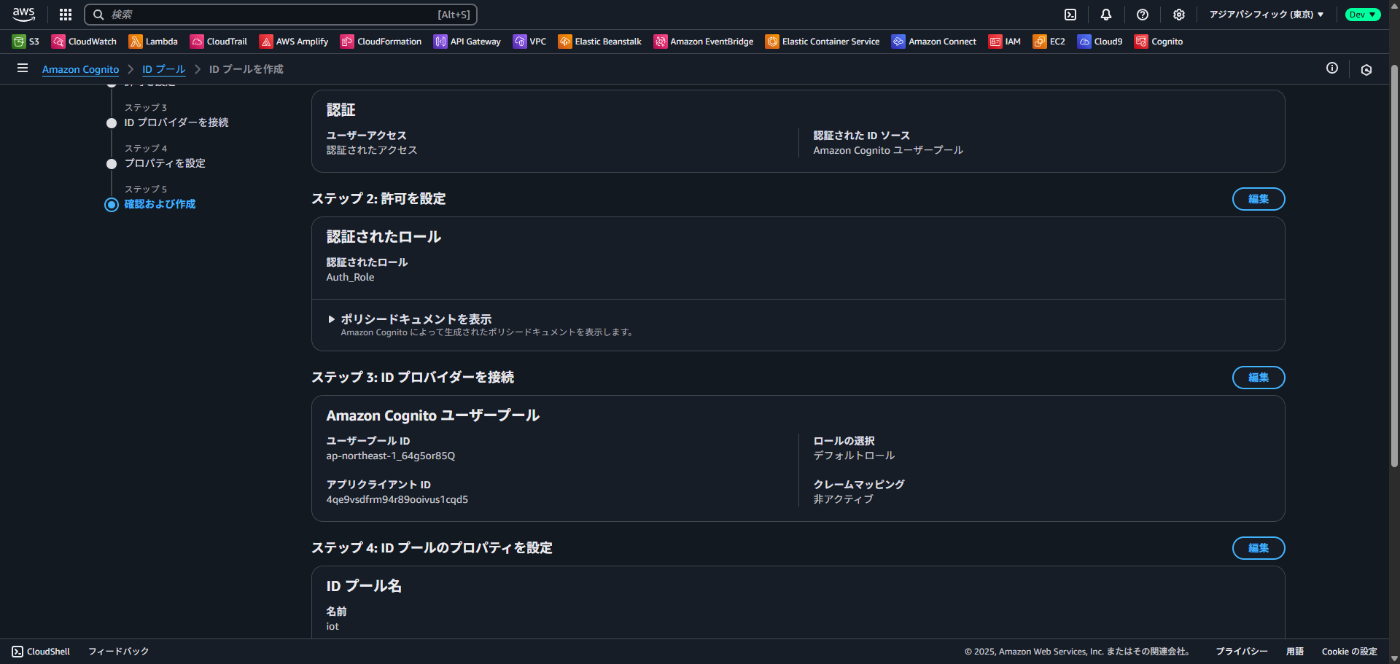
ID プール作成後、Auth_Role に AdministratorAccess 権限を付与しておきます。

03. IoT Core でモノの作成
以下の設定でモノを作成します。
- 作成するモノの数: 1 つのモノを作成
- モノの名前: test-device
- デバイス証明書: 今回の証明書の作成をスキップ
続いて以下の設定で IoT ポリシーを作成します。
- ポリシー名: 任意の名称
- ポリシードキュメント
{
  "Version": "2012-10-17",
  "Statement": [
    {
      "Effect": "Allow",
      "Action": "iot:Connect",
      "Resource": "*"
    },
    {
      "Effect": "Allow",
      "Action": "iot:Publish",
      "Resource": "arn:aws:iot:*:*:topic/my/topic"
    },
    {
      "Effect": "Allow",
      "Action": "iot:Subscribe",
      "Resource": "arn:aws:iot:*:*:topicfilter/my/topic"
    },
    {
      "Effect": "Allow",
      "Action": "iot:Receive",
      "Resource": "arn:aws:iot:*:*:topic/my/topic"
    }
  ]
}
上記ポリシーは後述の手順で Cognito アイデンティティにアタッチします。
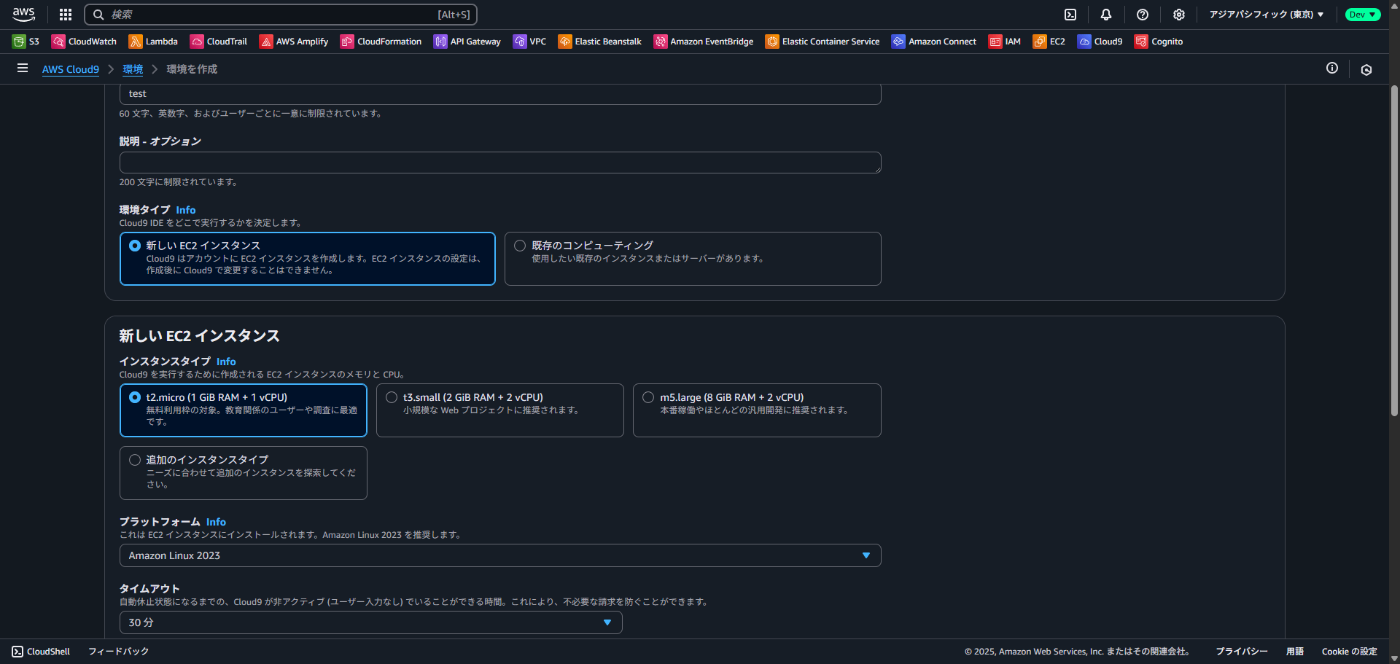
04. Cloud9 環境の作成
デフォルト設定で Cloud9 環境を作成します。
環境作成後、IDE のターミナルで以下のコマンドを実行します。
$ mkdir iot-cognito-test
$ cd iot-cognito-test
$ npm init -y
$ npm install amazon-cognito-identity-js @aws-sdk/client-cognito-identity @aws-sdk/credential-providers aws-iot-device-sdk npm install node-fetch@2
05. コードの作成
IoT Core に接続するコードを作成します。
- 環境設定の部分はこれまでの手順で作成したリソースに合わせて変更
-
iotEndpointは IoT Core のドメイン設定から確認できるエンドポイント - コメントアウト部分は後述の手順で解除するためこの時点ではコメントアウトのままで OK
コード
const {
  CognitoUserPool,
  CognitoUser,
  AuthenticationDetails,
} = require('amazon-cognito-identity-js');
const {
  CognitoIdentityClient,
} = require('@aws-sdk/client-cognito-identity');
const {
  fromCognitoIdentityPool,
} = require('@aws-sdk/credential-providers');
const awsIot = require('aws-iot-device-sdk');
const fetch = require('node-fetch');

global.fetch = fetch;

global.fetch = fetch;

// 環境設定
const region = 'your-region';
const userPoolId = 'your-userPoolId';
const clientId = 'your-clientId';
const identityPoolId = 'your-identityPoolId';
const username = 'your-mailAddress';
const password = 'your-password';
const iotEndpoint = 'your-iotEndpoint';

const authenticationData = { Username: username, Password: password };
const authenticationDetails = new AuthenticationDetails(authenticationData);
const poolData = { UserPoolId: userPoolId, ClientId: clientId };
const userPool = new CognitoUserPool(poolData);
const userData = { Username: username, Pool: userPool };
const cognitoUser = new CognitoUser(userData);

console.log('🔐 認証開始...');
cognitoUser.authenticateUser(authenticationDetails, {
  onSuccess: async function (result) {
    console.log('✅ 認証成功');

    const idToken = result.getIdToken().getJwtToken();
    const cognitoCredentials = fromCognitoIdentityPool({
      client: new CognitoIdentityClient({ region }),
      identityPoolId: identityPoolId,
      logins: {
        [`cognito-idp.${region}.amazonaws.com/${userPoolId}`]: idToken,
      },
    });

    try {
      const creds = await cognitoCredentials();

      console.log('✅ 認証情報取得成功');

      // const device = awsIot.device({
      //   region,
      //   protocol: 'wss',
      //   host: iotEndpoint,
      //   accessKeyId: creds.accessKeyId,
      //   secretKey: creds.secretAccessKey,
      //   sessionToken: creds.sessionToken,
      //   clientId: 'myClient_' + Date.now(),
      // });

      // device.on('connect', () => {
      //   console.log('✅ MQTT 接続成功!');
      //   device.publish('my/topic', JSON.stringify({ msg: 'Hello from aws-iot-device-sdk!' }));
      //   console.log('📤 メッセージ送信済み');
      // });

      // device.on('error', (err) => {
      //   console.error('❌ MQTT 接続エラー:', err);
      // });

      // device.on('close', () => {
      //   console.log('⚠️ MQTT 接続クローズ');
      // });

      // device.on('reconnect', () => {
      //   console.log('⏳ MQTT 再接続中...');
      // });

    } catch (err) {
      console.error('❌ 認証情報取得エラー:', err);
    }
  },

  onFailure: function (err) {
    console.error('❌ 認証失敗:', err);
  },
});
上記コードを実行して以下の結果を取得できることを確認します。
$ node connect.js
🔐 認証開始...
✅ 認証成功
{
  identityId: 'identityId',
  accessKeyId: 'xxx',
  secretAccessKey: 'xxx',
  sessionToken: 'xxx',
  expiration: xxx
}
✅ 認証情報取得成功
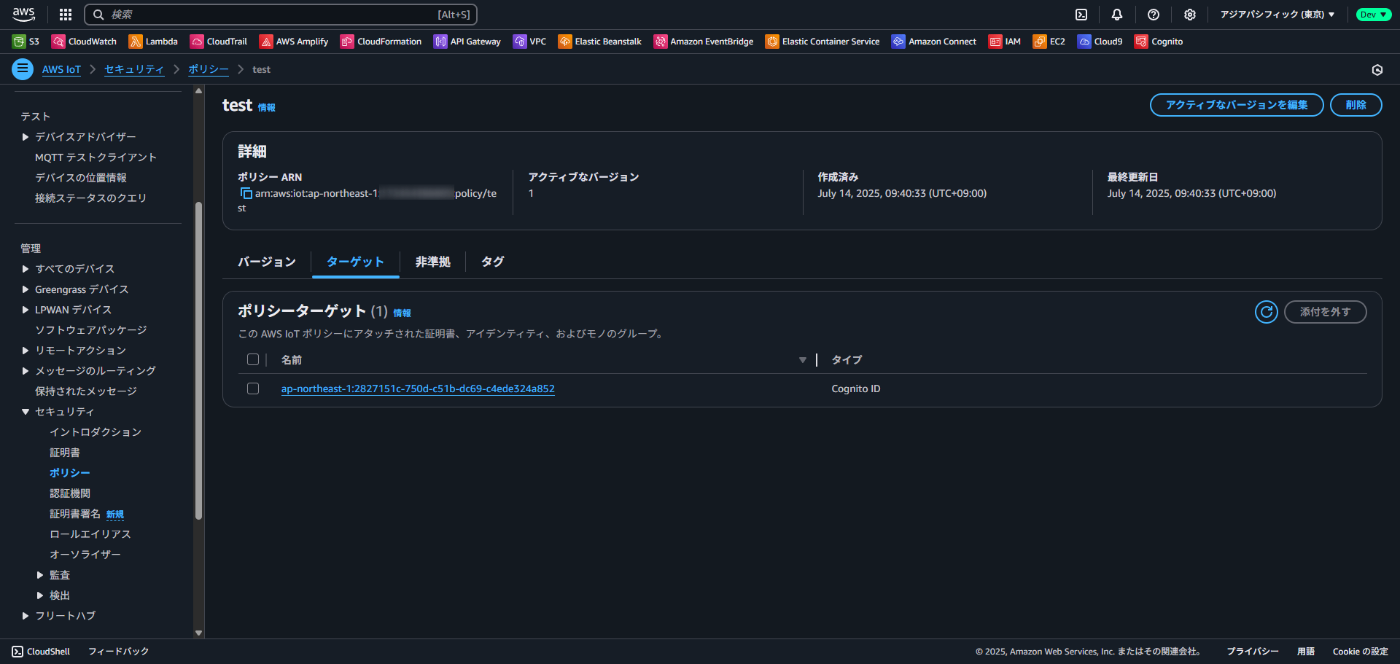
06. IoT ポリシーを Cognito アイデンティティにアタッチ
以下のコマンドでアタッチします。
$ aws iot attach-policy \
--policy-name your-policy-name \
--target <手順 05 で取得した identityId>
上記コマンド実行後、IoT ポリシーのターゲットに Cognito アイデンティティが登録されます。
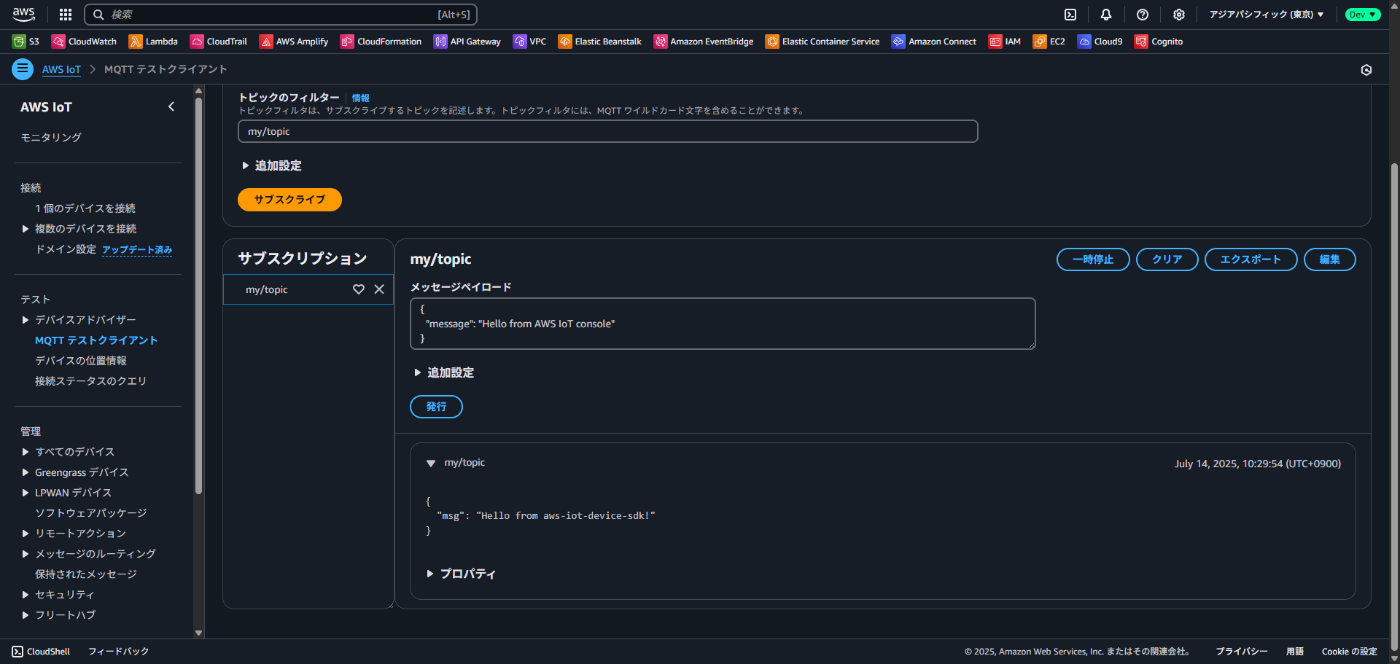
07. IoT Core への接続
手順 05 でコメントアウトしていた部分を解除して再度コードを実行し、以下のメッセージが出力されれば IoT Core にメッセージを送信できています。
$ node connect.js
🔐 認証開始...
✅ 認証成功
✅ 認証情報取得成功
✅ MQTT 接続成功!
📤 メッセージ送信済み
IoT Core コンソールの MQTT テストクライアントで my/topic をサブスクライブした状態でコードを実行すると、IoT Core 側でもメッセージを確認できます。
証明書を使用せずに IoT Core に接続できました。
まとめ
今回は Cogito で認証して IoT Core に接続してみました。
どなたかの参考になれば幸いです。
Discussion