Terraformを利用してTiDB Cloudリソースをデプロイする


Terraformを使用してTiDB Cloudリソースをデプロイする
こちらの手順を見ながら実際にやってみます。
事前準備
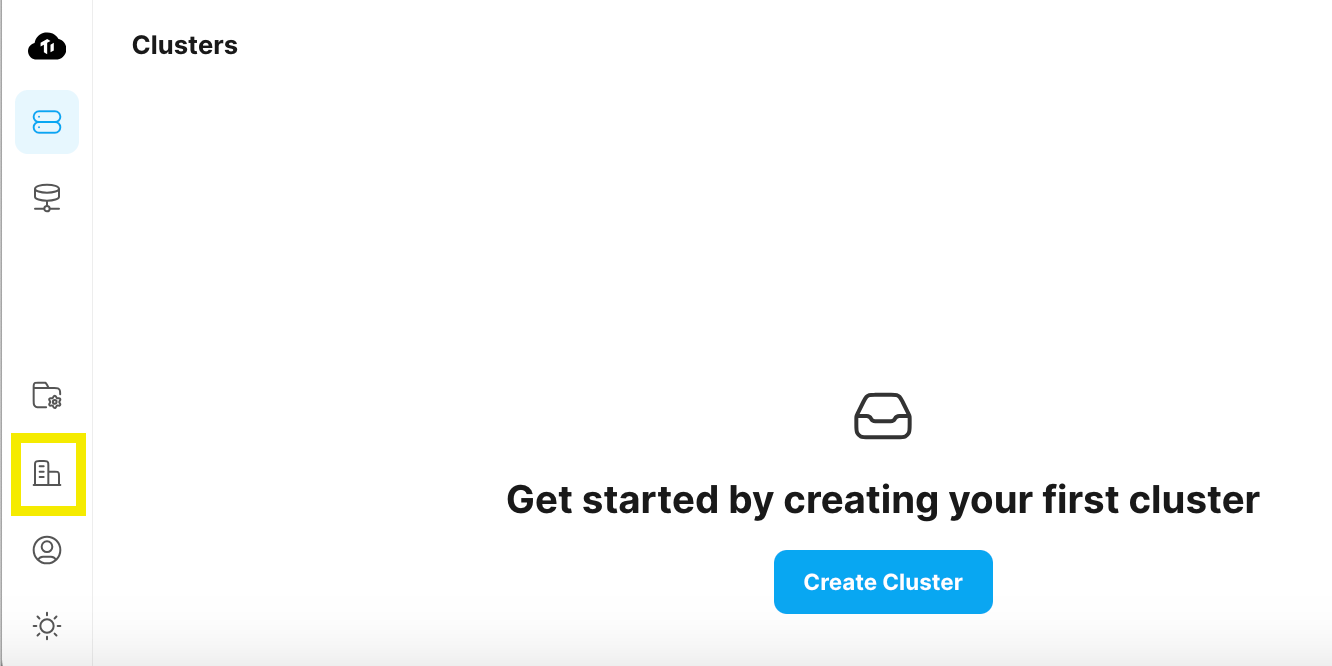
サインアップ
サインアップ手順は以下記事前半部分をご覧いただければ幸いです。
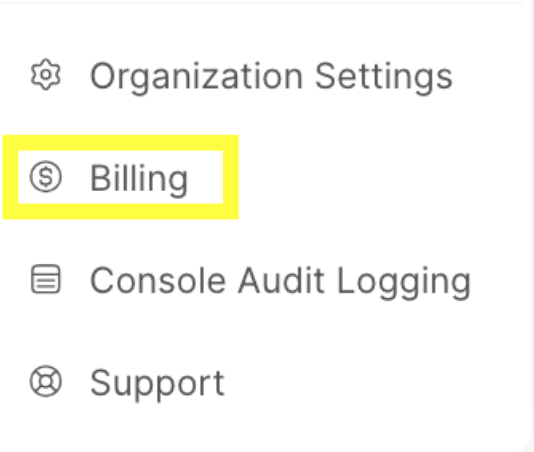
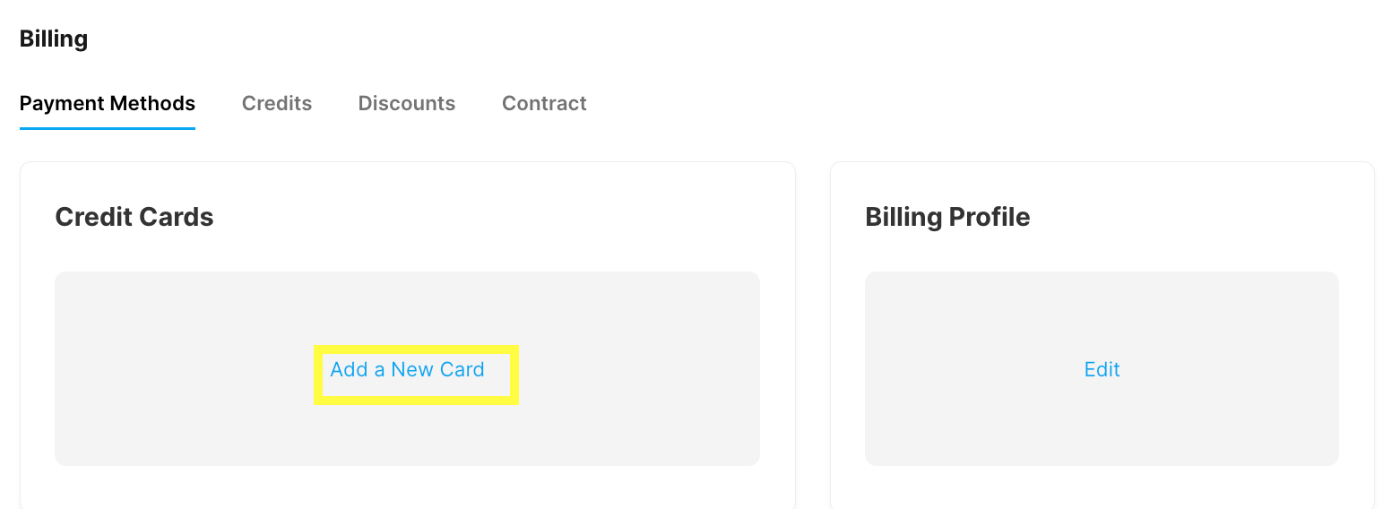
支払い方法の登録
↓
↓
↓
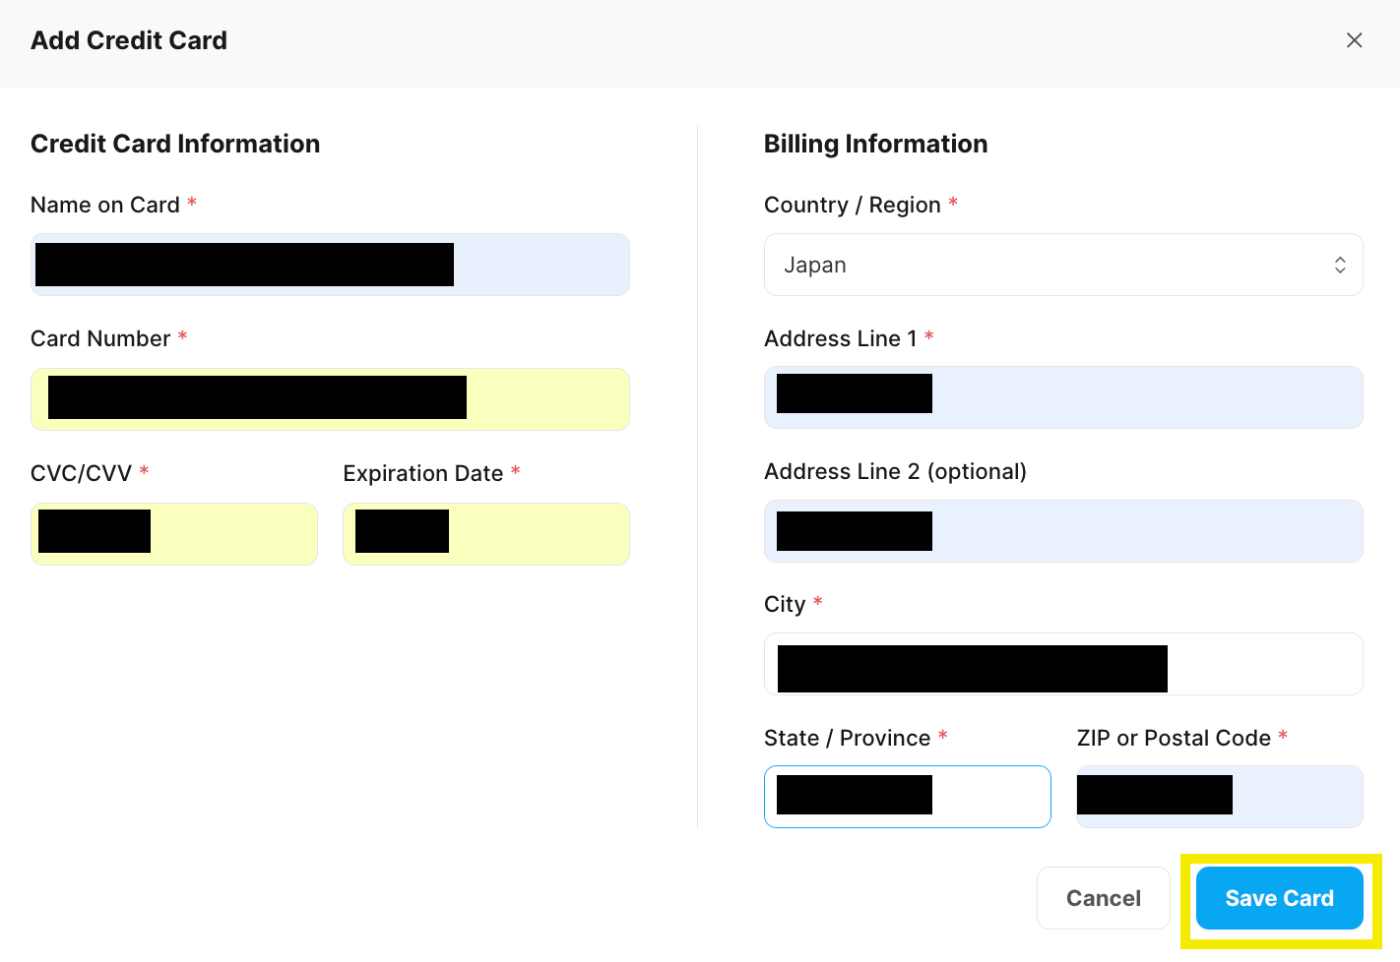
これで完了です。
Terraform をインストール
済んでいる方はスキップしてください。
$ brew tap hashicorp/tap
$ brew install hashicorp/tap/terraform
開始
API キーを作成する
手順はこちらにあります。
APIキーを作成する
組織の所有者のみが API キーを作成できます。
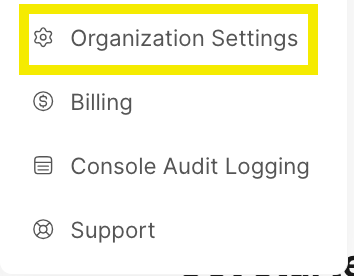
1.TiDB Cloud コンソールの左下隅にある 組織をクリックします。
2.[組織の設定] をクリックします。組織設定ページが表示されます。
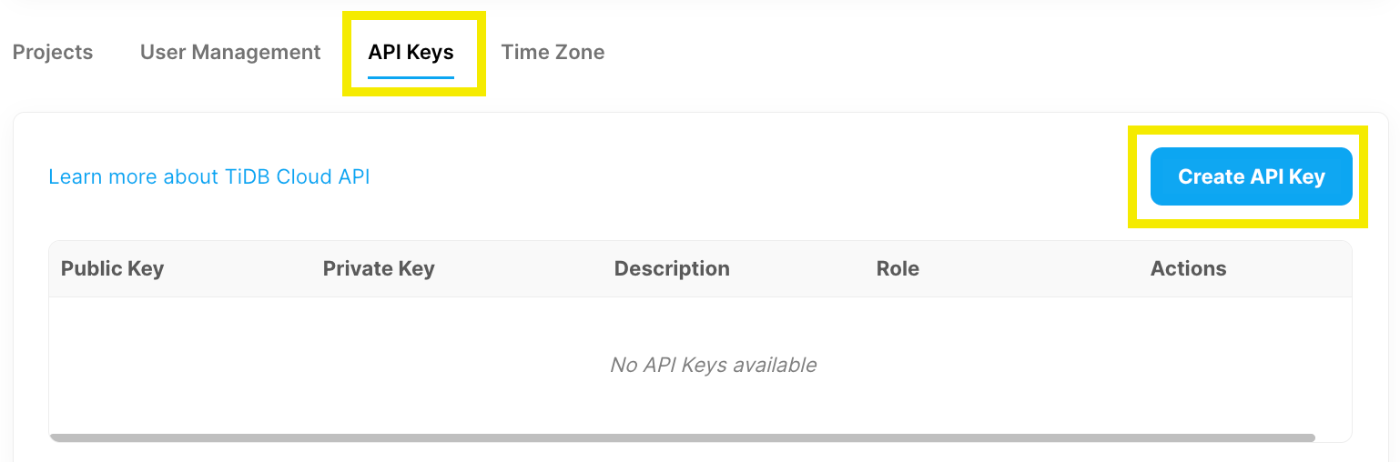
3.[API キー] タブをクリックし、[API キーの作成] をクリックします.
4.API キーの説明を入力します。現在、API キーの役割は常に Owner です。
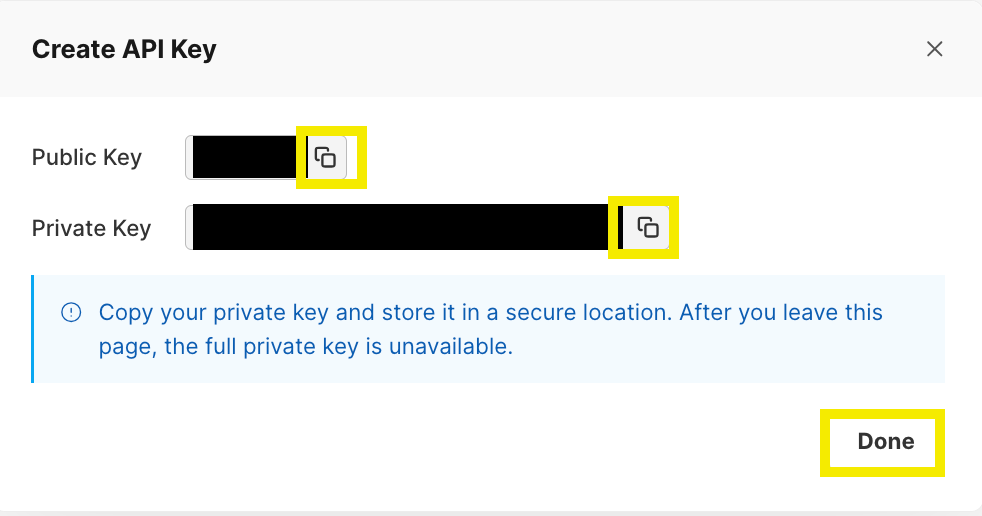
5.[次へ] をクリックします。公開キーと秘密キーをコピーして保存します。
6.秘密キーをコピーして安全な場所に保存したことを確認してください。秘密キーは作成時にのみ表示されます。このページを離れると、完全な秘密キーを再度取得することはできなくなります。
7.[完了] をクリックします。
早速やってみます。
TDBコンソールにアクセスします。
↓
↓
↓
↓

↓
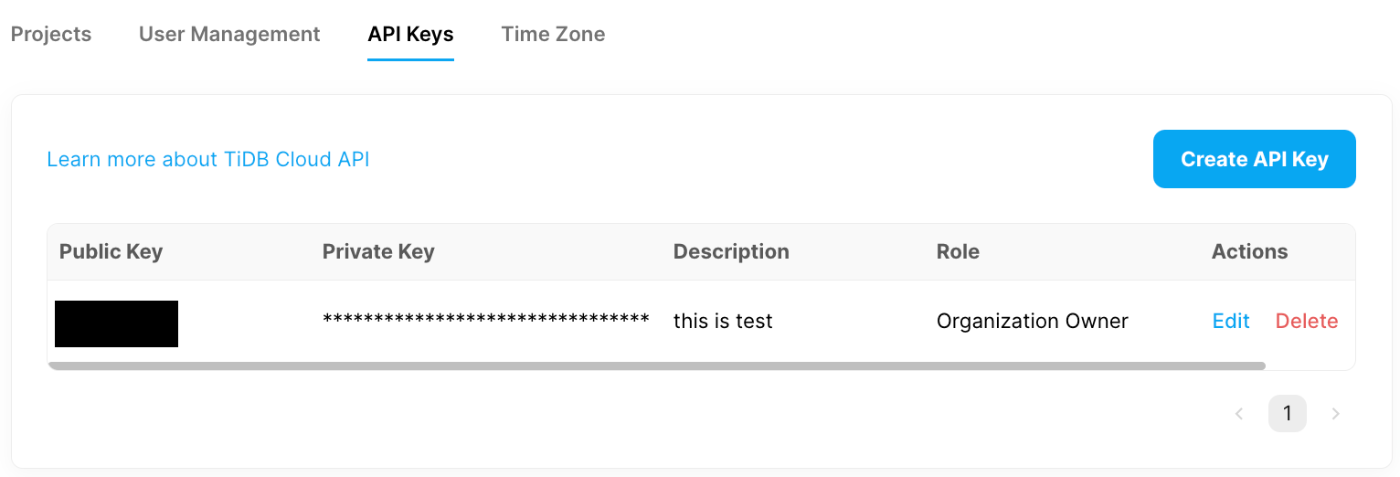
手元に控えておきましょう。
↓
TiDB Cloud Terraform プロバイダーをダウンロードする
任意の場所にディレクトリを作成し移動、main.tf ファイルを作成し内容を変更します。
$ mkdir TiDBCloudTest && cd TiDBCloudTest && touch main.tf && vim main.tf
↓
以下を貼付して「:wq」で保存します。
terraform {
  required_providers {
    tidbcloud = {
      source = "tidbcloud/tidbcloud"
      version = "~> 0.1.0"
    }
  }
  required_version = ">= 1.0.0"
}
これ以降ファイルの内容の変更結果は適宜cat等で確認しつつ進めてください。
terraform init コマンドを実行
$ terraform init

Initializing the backend...

Initializing provider plugins...
- Finding tidbcloud/tidbcloud versions matching "~> 0.1.0"...
- Installing tidbcloud/tidbcloud v0.1.2...
- Installed tidbcloud/tidbcloud v0.1.2 (signed by a HashiCorp partner, key ID XXXXXXXXXXXXXXXX)

Partner and community providers are signed by their developers.
If you'd like to know more about provider signing, you can read about it here:
https://www.terraform.io/docs/cli/plugins/signing.html

Terraform has created a lock file .terraform.lock.hcl to record the provider
selections it made above. Include this file in your version control repository
so that Terraform can guarantee to make the same selections by default when
you run "terraform init" in the future.

Terraform has been successfully initialized!

You may now begin working with Terraform. Try running "terraform plan" to see
any changes that are required for your infrastructure. All Terraform commands
should now work.

If you ever set or change modules or backend configuration for Terraform,
rerun this command to reinitialize your working directory. If you forget, other
commands will detect it and remind you to do so if necessary.
API キーを使用して TiDB Cloud Terraform プロバイダーを構成 & tidbcloud_projects データ ソースを使用してプロジェクト ID を取得
$ vim main.tf
↓
iで-- INSERT --にして11行目から以下を追加するように貼付し:wqで保存します。
※先ほど作成したAPIキーの情報をそれぞれに埋めるように変更してください。
provider "tidbcloud" {
  public_key = "your_public_key"
  private_key = "your_private_key"
}

data "tidbcloud_projects" "example_project" {
  page      = 1
  page_size = 10
}

output "projects" {
  value = data.tidbcloud_projects.example_project.items
}
↓
以下コマンドを実行。
$ terraform apply --auto-approve
data.tidbcloud_projects.example_project: Reading...
data.tidbcloud_projects.example_project: Read complete after 1s [id=XXXXXXXXXXXXXXXXXXX]

Changes to Outputs:
  + projects = [
      + {
          + cluster_count    = 0
          + create_timestamp = "1700032198"
          + id               = "1372813089xxxxxxxxx"
          + name             = "default project"
          + org_id           = "1372813089xxxxxxxxx"
          + user_count       = 1
        },
    ]

You can apply this plan to save these new output values to the Terraform state, without changing
any real infrastructure.

Apply complete! Resources: 0 added, 0 changed, 0 destroyed.

Outputs:

projects = tolist([
  {
    "cluster_count" = 0
    "create_timestamp" = "1700032198"
    "id" = "1372813089xxxxxxxxx"
    "name" = "default project"
    "org_id" = "1372813089xxxxxxxxx"
    "user_count" = 1
  },
])
こちらも手元に控えておきます。
tidbcloud_cluster_specs データ ソースを使用してクラスタ仕様情報を取得
vim main.tf
↓
dataとoutput部分を以下のように書き換えます。
data "tidbcloud_cluster_specs" "example_cluster_spec" {
}
output "cluster_spec" {
  value = data.tidbcloud_cluster_specs.example_cluster_spec.items
}
クラスタ仕様情報
長いので結果を載せるのは割愛しますが、以下を実行するとクラスタ仕様情報を取得できます。
$ terraform apply --auto-approve
クラスターを作成する
クラスターを作成。
$ touch cluster.tf && vim cluster.tf
↓
iで-- INSERT --にして以下を追加するように貼付し:wqで保存します。
※project_idやroot_passwordなど適宜変更してください。
resource "tidbcloud_cluster" "example_cluster" {
  project_id     = "1372813089XXXXXXXXX"
  name           = "firstCluster"
  cluster_type   = "DEDICATED"
  cloud_provider = "AWS"
  region         = "ap-northeast-1"
  config = {
    root_password = "Your_root_password1."
    port = 4000
    components = {
      tidb = {
        node_size : "8C16G"
        node_quantity : 1
      }
      tikv = {
        node_size : "8C32G"
        storage_size_gib : 500,
        node_quantity : 3
      }
    }
  }
}
↓
$ terraform apply
↓
コンソールを確認すると作成が開始されていました。

↓
数分で「Availlable」に変わります。

↓

以上でした。
有難うございました。
Discussion