このことに気づくまでに時間がかかってしまい、かつドキュメントを読んでもいまいちわかりづらかったのでメモ。
kaniko とは
Docker build 時に、ビルドの中間キャッシュを GCR 等の Docker Repository に push することで、CI/CD 系サービスの上でもキャッシュを聞かせた状態で Docker build ができるツールです。
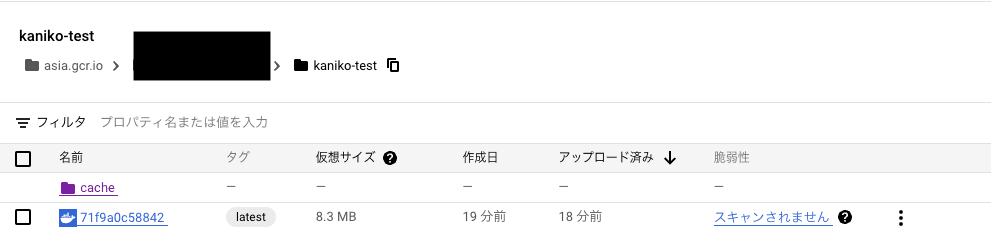
kaniko でビルドを行なうと、 asia.gcr.io/[project_id]/[repository_name] の位置に Docker image が push される他、 asia.gcr.io/[project_id]/[repository_name]/cache の位置にキャッシュが push され、次回以降の kaniko build 時に使われます。
くわしくは Google のドキュメントをご覧ください。
発生した現象
こういうファイル/フォルダ構造を用意し、
.
├── Dockerfile
├── cloudbuild.yaml
└── files
    ├── 1.txt
    ├── 2.txt
    ├── 3.txt
    ├── 4.txt
    ├── 5.txt
    └── 6.txt
こんな Dockerfile を用意します。
FROM bash:5.1-alpine3.17

RUN apk add tree

COPY files/1.txt /workspace/
RUN echo '===1===' && tree /workspace && echo '===1==='
COPY files/2.txt /workspace/nested/
RUN echo '===2===' && tree /workspace && echo '===2==='
COPY files/3.txt /app/
RUN echo '===3===' && tree /workspace && tree /app && echo '===3==='
COPY files/4.txt /app/nested/
RUN echo '===4===' && tree /workspace && tree /app && echo '===4==='
COPY files/5.txt /workspace/
COPY files/6.txt /workspace/nested
# 5,6 の後に RUN しないようにする

CMD ["sh", "-c", "tree /workspace && tree /app"]
- すべてのファイルはここにあります https://github.com/gecko655/kaniko-test
これを kaniko を使わずに普通にビルドすると…
❯ docker build . -t gecko655/kaniko-test --no-cache --progress=plain
# 出力が長いので適宜省略しています。
#8 0.138 ===1===
#8 0.139 /workspace
#8 0.139 └── 1.txt
#8 0.139
#8 0.139 0 directories, 1 file
#8 0.139 ===1===

#10 0.197 ===2===
#10 0.198 /workspace
#10 0.198 ├── 1.txt
#10 0.198 └── nested
#10 0.198     └── 2.txt
#10 0.198
#10 0.198 1 directory, 2 files
#10 0.198 ===2===

#12 0.222 ===3===
#12 0.223 /workspace
#12 0.223 ├── 1.txt
#12 0.223 └── nested
#12 0.223     └── 2.txt
#12 0.223
#12 0.223 1 directory, 2 files
#12 0.224 /app
#12 0.224 └── 3.txt
#12 0.224
#12 0.224 0 directories, 1 file
#12 0.224 ===3===

#14 0.198 ===4===
#14 0.199 /workspace
#14 0.199 ├── 1.txt
#14 0.199 └── nested
#14 0.199     └── 2.txt
#14 0.199
#14 0.199 1 directory, 2 files
#14 0.200 /app
#14 0.200 ├── 3.txt
#14 0.200 └── nested
#14 0.200     └── 4.txt
#14 0.200
#14 0.200 1 directory, 2 files
#14 0.200 ===4===
Dockerfile に書いた COPY コマンドの通りファイルがイメージ内に追加されます。
また、 docker run しても、 COPY コマンドで追加したファイルがすべてあることがわかります。
❯ docker run -it --rm gecko655/kaniko-test
/workspace
├── 1.txt
├── 5.txt
└── nested
    ├── 2.txt
    └── 6.txt

1 directory, 4 files
/app
├── 3.txt
└── nested
    └── 4.txt

1 directory, 2 files
この Dockerfile を、 kaniko を使ってビルドしようとしてみます。
Google の kaniko ドキュメントに従うと、以下のように cloudbuild.yaml を作って、 ❯ gcloud builds submit . のように実行すれば kaniko によるキャッシュを使ったビルドができそうです。
steps:
  - id: build-docker-image
    name: gcr.io/kaniko-project/executor:latest
    args:
      - --dockerfile=Dockerfile
      - --destination=asia.gcr.io/$PROJECT_ID/kaniko-test
      - --cache=true
      - --cache-ttl=24h
これを、キャッシュのない状態で実行すると……
❮ gcloud builds submit .
Creating temporary tarball archive of 7 file(s) totalling 694 bytes before compression.
Uploading tarball of [.] to [gs://[project_id]_cloudbuild/source/1681805778.655241-1a467fc971064060bf73cdb3da068f9e.tgz]

# 以下、長いので標準出力以外は省略します

===1===
/workspace
├── 1.txt
├── Dockerfile
├── cloudbuild.yaml
└── files
    ├── 1.txt
    ├── 2.txt
    ├── 3.txt
    ├── 4.txt
    ├── 5.txt
    └── 6.txt

1 directory, 7 files
===1===

===2===
/workspace
├── 1.txt
├── Dockerfile
├── cloudbuild.yaml
├── files
│   ├── 1.txt
│   ├── 2.txt
│   ├── 3.txt
│   ├── 4.txt
│   ├── 5.txt
│   └── 6.txt
└── nested
    └── 2.txt

2 directories, 8 files
===2===

===3===
/workspace
├── 1.txt
├── Dockerfile
├── cloudbuild.yaml
├── files
│   ├── 1.txt
│   ├── 2.txt
│   ├── 3.txt
│   ├── 4.txt
│   ├── 5.txt
│   └── 6.txt
└── nested
    └── 2.txt

2 directories, 8 files
/app
└── 3.txt

0 directories, 1 file
===3===

===4===
/workspace
├── 1.txt
├── Dockerfile
├── cloudbuild.yaml
├── files
│   ├── 1.txt
│   ├── 2.txt
│   ├── 3.txt
│   ├── 4.txt
│   ├── 5.txt
│   └── 6.txt
└── nested
    └── 2.txt

2 directories, 8 files
/app
├── 3.txt
└── nested
    └── 4.txt

1 directory, 2 files
===4===
どうやら kaniko は /workspace フォルダにリポジトリ全体のファイルを配置して作業を行っているようで、その上で Dockerfile 上に書かれた COPY コマンドによりファイルが配置されていってしまっています。
では、作成された docker image はどうなっているかというと…
❯ docker run --rm asia.gcr.io/[project_id]/kaniko-test@sha256:05e30e914af8cbbbd11f182abeae0a21e26e186421fd4707d68d68d6a23fe706
/workspace
├── 5.txt
└── nested
    └── 6.txt

1 directory, 2 files
/app
├── 3.txt
└── nested
    └── 4.txt

1 directory, 2 files
/workspace フォルダ内のファイルのうち、1.txt, 2.txtが消え、 3.txt 〜 6.txt のみが残りました。
何が起きたか
- kaniko は
--contextオプションで指定したフォルダを作業フォルダとして、リポジトリ全体を同名の PATH にマウントする。--contextが無指定の場合は、ホストマシンの/workspaceフォルダを、 kaniko container 内の/workspaceにマウントする - GCP cloud build では
/workspaceの位置にリポジトリ全体がマウントされる( このへんに書いてあるがわかりにくい)。 - 以上のことから、 kaniko の
--contextオプションを無指定にしておけば、何も意識せずに cloud build 上で(ホストマシンの)/workspaceにマウントされたリポジトリ全体を、 kaniko 上でも利用することができるようになっている。
ここまでが、ドキュメントから読み取れたことです。
以下が、ドキュメントから読み取れなかったが挙動的にこうなっているんじゃないかというものです。
-
/workspaceフォルダ以下のファイルは kaniko によって ビルド終了時に勝手に消される- もともと kaniko を使っていない Dockerfile に対して kaniko を後で導入しようとして、その Dockerfile が
/workspaceフォルダ内にファイルを配置しようとしていると、勝手に消されるので気をつける必要がある
- もともと kaniko を使っていない Dockerfile に対して kaniko を後で導入しようとして、その Dockerfile が
- ただし、
COPYコマンド後にRUNコマンドを実行していない場合、そのCOPYコマンドでコピーしたファイルは なぜか 消えない- もともと kaniko を使っていない Dockerfile に対して kaniko を後で導入しようとして、 すべての
COPY some_file /workspace/のようなコマンドがすべてのRUNコマンドよりも後にあった場合、「/workspace配下にファイルを置くと消える」という事実に気づくことなく kaniko を導入できてしまう。(kaniko 導入後、関係ないタイミングで問題になってしまう) - しかも発生条件が直感的でなく、再現しないことがあるため、原因究明に苦労しました(この記事を書きながら発生条件を絞るまで、「ネストしたフォルダのファイルは消えない」のだと誤解していましたし…)
- もともと kaniko を使っていない Dockerfile に対して kaniko を後で導入しようとして、 すべての
対処法
可能であれば、作成する docker image で /workspace フォルダを使わないように変更するのが良いです。
- e.g.) 必要なファイルをすべて
/app等のフォルダに配置するなど
すでに docker image の /workspace 配下にファイルを配置することを前提とした運用をしてしまい、 docker image 内のフォルダ名を変えることが難しい場合、Cloud Buildのリポジトリのマウント位置は変更できないことや、 --context コマンドでローカルディレクトリを指定するとマウントされるホストマシンの フォルダ PATH と マウントする kaniko container の PATH は一致していないといけない&オプションで変更することもできない(下記引用参照) ことから、「 ホストマシンの /workspace にマウントされたリポジトリを自分で /my-workspace などに移動させる」→「 --context /my-workspace で kaniko container を起動する」のようにしないとダメそうです。
Note about Local Directory: this option refers to a directory within the kaniko container. If you wish to use this option, you will need to mount in your build context into the container as a directory.
https://github.com/GoogleContainerTools/kaniko#kaniko-build-contexts
まとめ
GCP の kaniko ドキュメントを読んでるだけではわからない落とし穴に引っかかり、かつ Google 検索してもいまいち解決方法がわからない状態でした。
- 似たような問題に困っている人は居て、これのおかげで
/workspaceフォルダがなにかおかしいことに気づきました。 https://github.com/GoogleContainerTools/kaniko/issues/1508
同じ問題が発生して、この記事が Google 検索で引っかかった人々が少しでも救われればいいなと思います……
ちなみに、これの原因究明の際ChatGPTくんも頼ったのですが、ChatGPTくんは役に立つ回答を返してくれませんでした。

Discussion
久しぶりに見たら、kaniko は現在では
/kanikoフォルダを使っているみたいなことが書かれている。(検証していないが)現在はこのような問題は発生しない…?