Cloudflareやっていき
以下のコマンドだけでWorkersを作れる。
% npm create cloudflare@latest

using create-cloudflare version 2.21.1

╭ Create an application with Cloudflare Step 1 of 3
│
├ In which directory do you want to create your application?
│ dir ./first
│
├ What type of application do you want to create?
│ type "Hello World" Worker
│
├ Do you want to use TypeScript?
│ yes typescript
│
├ Copying template files
│ files copied to project directory
│
├ Updating name in `package.json`
│ updated `package.json`
│
├ Installing dependencies
│ installed via `npm install`
│
╰ Application created

╭ Configuring your application for Cloudflare Step 2 of 3
│
├ Installing @cloudflare/workers-types
│ installed via npm
│
├ Adding latest types to `tsconfig.json`
│ added @cloudflare/workers-types/2023-07-01
│
├ Retrieving current workerd compatibility date
│ compatibility date 2024-04-23
│
├ Do you want to use git for version control?
│ yes git
│
├ Initializing git repo
│ initialized git
│
├ Committing new files
│ git commit
│
╰ Application configured

╭ Deploy with Cloudflare Step 3 of 3
│
├ Do you want to deploy your application?
│ yes deploy via `npm run deploy`
│
├ Logging into Cloudflare checking authentication status
│ not logged in
│
├ Logging into Cloudflare This will open a browser window
│ allowed via `wrangler login`
│
├ Selecting Cloudflare account retrieving accounts
│ account xxxxxxxxxxx@gmail.com's Account
│
├ Deploying your application
│ deployed via `npm run deploy`
│
├  SUCCESS  View your deployed application at https://first.xxxxxxxxx.workers.dev
│
│ Navigate to the new directory cd first
│ Run the development server npm run start
│ Deploy your application npm run deploy
│ Read the documentation https://developers.cloudflare.com/workers
│ Stuck? Join us at https://discord.cloudflare.com
│
├ Waiting for DNS to propagate
│ DNS propagation complete.
│
├ Waiting for deployment to become available
│ deployment is ready at: https://first.xxxxxxxxx.workers.dev
│
├ Opening browser
│
╰ See you again soon!
出来たファイル
/**
 * Welcome to Cloudflare Workers! This is your first worker.
 *
 * - Run `npm run dev` in your terminal to start a development server
 * - Open a browser tab at http://localhost:8787/ to see your worker in action
 * - Run `npm run deploy` to publish your worker
 *
 * Bind resources to your worker in `wrangler.toml`. After adding bindings, a type definition for the
 * `Env` object can be regenerated with `npm run cf-typegen`.
 *
 * Learn more at https://developers.cloudflare.com/workers/
 */

export default {
	async fetch(request: Request, env: Env, ctx: ExecutionContext): Promise<Response> {
		return new Response('Hello World!');
	},
};
テストコードもサンプルファイルがある
// test/index.spec.ts
import { env, createExecutionContext, waitOnExecutionContext, SELF } from 'cloudflare:test';
import { describe, it, expect } from 'vitest';
import worker from '../src/index';

// For now, you'll need to do something like this to get a correctly-typed
// `Request` to pass to `worker.fetch()`.
const IncomingRequest = Request<unknown, IncomingRequestCfProperties>;

describe('Hello World worker', () => {
	it('responds with Hello World! (unit style)', async () => {
		const request = new IncomingRequest('http://example.com');
		// Create an empty context to pass to `worker.fetch()`.
		const ctx = createExecutionContext();
		const response = await worker.fetch(request, env, ctx);
		// Wait for all `Promise`s passed to `ctx.waitUntil()` to settle before running test assertions
		await waitOnExecutionContext(ctx);
		expect(await response.text()).toMatchInlineSnapshot(`"Hello World!"`);
	});

	it('responds with Hello World! (integration style)', async () => {
		const response = await SELF.fetch('https://example.com');
		expect(await response.text()).toMatchInlineSnapshot(`"Hello World!"`);
	});
});
定期実行のcronジョブを作成する
基本実行コードに scheduled を利用した関数を使用して、
interface Env {}
export default {
  async scheduled(controller: ScheduledController, env: Env, ctx: ExecutionContext) {
    console.log("cron processed");
  },
};
wrangler.tomlにcron実行タイミングの定義を書くだけ。
[triggers]
# Schedule cron triggers:
# - At every 3rd minute
# - At 3PM on first day of the month
# - At 11:59PM on the last weekday of the month
crons = [ "*/3 * * * *", "0 15 1 * *", "59 23 LW * *" ]
CloudflareのリソースそのものをコントロールするAPIもある。
例えば、このAPIにリクエストするだけで、新規にWorkersをデプロイすることが出来る。っょぃ。
例えば
curl --request PUT \
  --url https://api.cloudflare.com/client/v4/accounts/account_id/workers/scripts/script_name \
  --header 'Authorization: Bearer token' \
  --header 'Content-Type: application/javascript' \
  --data 'addEventListener("scheduled",e=>{console.log("cron job fired!"),console.log(e.scheduledTime)});'
↑でWorkerをデプロイして、
curl --request PUT \
  --url https://api.cloudflare.com/client/v4/accounts/account_id/workers/scripts/script_name/schedules \
  --header 'Authorization: Bearer token' \
  --header 'Content-Type: application/json' \
  --data '[{"cron": "*/30 * * * *"}]'
↑でcronを仕込むこともできる。
では本命。
LLMを使ってBotのような処理を自然言語で作成&デプロイ出来ないか?
ChatGPTに以下のように聞く。
以下のコードをQiitaのRSSからトレンドの記事を取得し、指定するDiscordのWebhookに投稿するような処理に修正してください。
コード:
addEventListener("scheduled",e=>{console.log("cron job fired!"),console.log(e.scheduledTime)});
DiscordのWebhookURL:
'https://discord.com/api/webhooks/11112222222/XXXXXXXXXXXXXXXXXXX'
制約事項:
- 動作させる環境はCloudflareのService Worker上で稼働させられるようにしてください。
- ライブラリは一切使用せずに、標準のJavaScriptのみで実装してください。
1発ではエラーのないコードは出なかったが、微調整して、REST-APIでデプロイする。
curl --request PUT \
  --url https://api.cloudflare.com/client/v4/accounts/xxxxxxxxxx/workers/scripts/xxxxxxxx \
  --header 'Authorization: Bearer xxxxxxxxxxxxxxxxxxxxxxxxx' \
  --header 'Content-Type: application/javascript' \
  --data 'async function handleScheduledEvent(t){try{console.log("Scheduled event fired at:",t.scheduledTime);let e=await fetch("https://qiita.com/popular-items/feed"),i=await e.text(),o=extractTitlesFromRSS(i);await postToDiscord(o)}catch(a){console.error("Failed to handle scheduled event:",a)}}function extractTitlesFromRSS(t){let e=/<title>(.*?)<\/title>/g,i=[],o;for(;null!==(o=e.exec(t));)"Qiitaの人気の投稿"!==o[1]&&i.push(o[1]);return i}async function postToDiscord(t){for(let e of t){let i={content:`Qiita Trending Article: **${e}**`};await fetch("https://discord.com/api/webhooks/1872317826837121/xxxxxxxxxxxxxxxxxx",{method:"POST",headers:{"Content-Type":"application/json"},body:JSON.stringify(i)})}}addEventListener("scheduled",t=>{t.waitUntil(handleScheduledEvent(t))});'
これでcronも仕込むと
curl --request PUT \
  --url https://api.cloudflare.com/client/v4/accounts/xxxxxxxxxxxxxxx/workers/scripts/xxxxxxxx/schedules \
  --header 'Authorization: Bearer xxxxxxxxxxxxxxx' \
  --header 'Content-Type: application/json' \
  --data '[{"cron": "*/30 * * * *"}]'
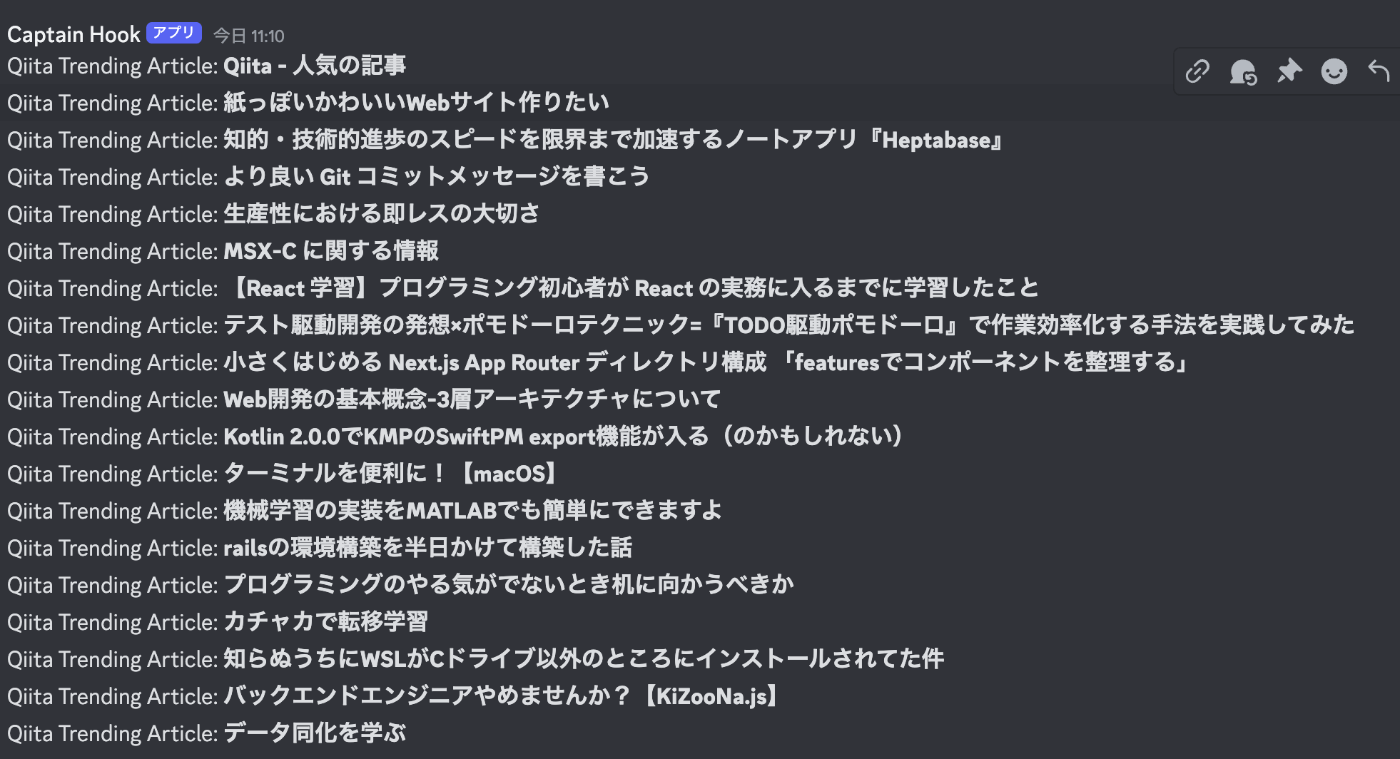
こんな感じ。
ずっとわからなかった事がわかったのでメモ。
wranglerでデプロイすると*.workers.devのパスでroutesがデフォルトで有効化され、該当のパスにアクセスすることでworkersを動かすリクエストを投げることができる。
コンソールでいうと↓
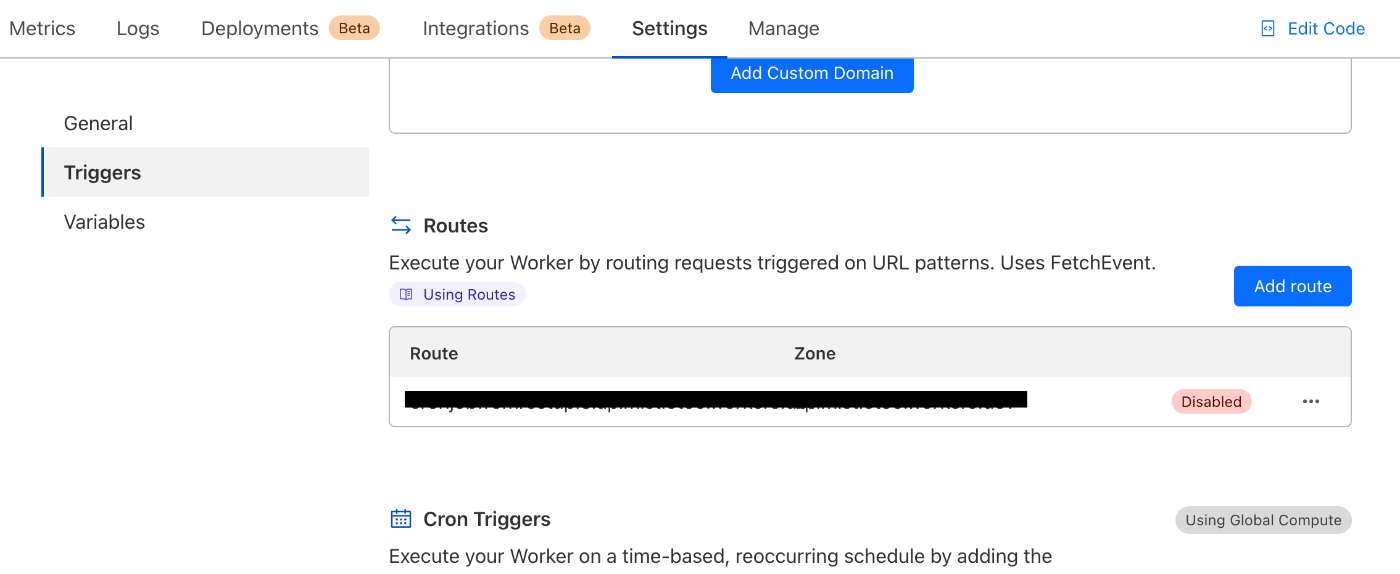
が、API経由でデプロイした場合、デフォルトで有効化にならず、有効化させる情報がずっとわからなかった。
API仕様書にも記載がなかったけど、wlangerのソースコードからわかった。
以下のapiリクエストで有効化できる。
curl --request POST \
--url https://api.cloudflare.com/client/v4/accounts/{account_id}/workers/scripts/{script_name}/subdomain \
--header 'Authorization: Bearer {auth_token}' \
--header 'Content-Type: application/json' \
-d '{"enabled":true}'
wlangerの実装箇所は以下↓
// Enable the `workers.dev` subdomain.
deployments.push(
    fetchResult(`${workerUrl}/subdomain`, {
        method: "POST",
        body: JSON.stringify({ enabled: true }),
        headers: {
            "Content-Type": "application/json",
        },
    })
        .then(() => [scriptURL])
        // Add a delay when the subdomain is first created.
        // This is to prevent an issue where a negative cache-hit
        // causes the subdomain to be unavailable for 30 seconds.
        // This is a temporary measure until we fix this on the edge.
        .then(async (url) => {
            await sleep(3000);
            return url;
        })
);