LaravelでのInertiaの基本を実際に使って把握する
LaravelのInertia勉強記録です。
jetstreamを入れてみたら、web.phpにこんな記述がされていました。
Route::get('/', function () {
    return Inertia::render('Welcome', [
        'canLogin' => Route::has('login'),
        'canRegister' => Route::has('register'),
        'laravelVersion' => Application::VERSION,
        'phpVersion' => PHP_VERSION,
    ]);
});
Inertia::renderという関数は
第一引数にコンポーネント、第二引数にプロパティ配列を渡すみたいです。
@method static Response render($component, array $props = [])
つまり上記のコードはWelcomeコンポーネントに、canLogin,canRegister,laravelVersion,phpVersionが渡されることになります。
resources/js/PagesのWelcome.vueを見ると、propsの記載があります。
<script>
    import { defineComponent } from 'vue'
    import { Head, Link } from '@inertiajs/inertia-vue3';

    export default defineComponent({
        components: {
            Head,
            Link,
        },

        props: {
            canLogin: Boolean,
            canRegister: Boolean,
            laravelVersion: String,
            phpVersion: String,
        }
    })
</script>
試しに自分で定義したpropsを渡して表示してみます。
Route::get('/', function () {
    return Inertia::render('Welcome', [
        'canLogin' => Route::has('login'),
        'canRegister' => Route::has('register'),
        'laravelVersion' => Application::VERSION,
        'phpVersion' => 'PHP_VERSION',
        'name' => '御坂美琴',
    ]);
});
<div class="ml-12">
    <div class="mt-2 text-gray-600 dark:text-gray-400 text-sm">
        {{name}}Misaka Laravel has wonderful, thorough documentation covering every aspect of the framework. Whether you are new to the framework or have previous experience with Laravel, we recommend reading all of the documentation from beginning to end.
    </div>
</div>
省略
<script>
    import { defineComponent } from 'vue'
    import { Head, Link } from '@inertiajs/inertia-vue3';

    export default defineComponent({
        components: {
            Head,
            Link,
        },

        props: {
            canLogin: Boolean,
            canRegister: Boolean,
            laravelVersion: String,
            phpVersion: String,
            name: String,
        }
    })
</script>
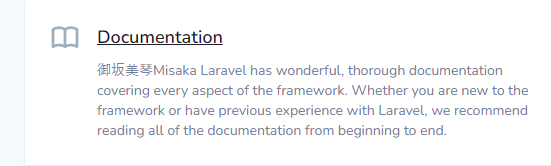
しっかり値の受け渡しができていることを確認しました。
※このときに npm run watch しておきます。
というような感じでInertiaってなんだ?というところからの勉強記録記事になります。
ドキュメント | LaravelJetstream
ドキュメント | Laravel Jetstream 1.0 Inertia
ドキュメント | Inertia documentation
Inertiaの特徴をざっくりまとめてみました
- Vueをテンプレート言語として利用
- Vueルータの代わりにLaravelのルータを利用する
- Laravelからコンポーネントのpropsへデータを受け渡します
Laravelのルータ機能を使いつつVue.jsをフルパワーで使うそうです。
また、resources/js/Jetstreamに便利なUIコンポーネントを用意してくれているそうです。
例えば以下のresources/js/PagesのDashboard.vueで<welcome />というコンポーネントを利用しています。
        <div class="py-12">
            <div class="max-w-7xl mx-auto sm:px-6 lg:px-8">
                <div class="bg-white overflow-hidden shadow-xl sm:rounded-lg">
                    <welcome />
                </div>
            </div>
        </div>
このwelcomeはresources/js/JetstreamにあるWelcome.vueが該当します。
試しにWelcome.vueを修正して画面を確認すると変更が反映されています。
            <div class="mt-8 text-2xl">
                Welcome to your Jetstream Misaka application!
            </div>

自分で定義してみる
自分で定義したVueを表示させるようにしてみます。
まずはPages/MypageにSample.vueを作成します。
以下を行います
- 便利なUIのActionMessageを利用する
- porpsとしてtimeを利用する
<template>
    <div>
        <h1>サンプルページ</h1>
        <P>{{time}}</P>
        <action-message :on=true>鬼滅の刃</action-message>
    </div>
</template>

<script>
    import { defineComponent } from 'vue'
    import ActionMessage from '@/Jetstream/ActionMessage.vue'
    export default defineComponent({
        components: {
            ActionMessage,
        },
        props: {
            time: String,
        }
    })
</script>
ActionMessageは便利なUIコンポーネントでpropsとしてonを受取ってslotの内容を表示するかどうかを判断しています。
また、Sample.vue自体はtimeというpropsをコントローラーから受取る想定です。
web.phpに直截書くのはあまりしないので、SampleControllerを作成して利用します。
web.phpにはコントローラーを呼出す記載をします。コメントアウトしている処理と同じことをコントローラーで行います。
/*
Route::get('/sample',function(){
    return Inertia::render('Mypage/Sample', [
        'time' => Carbon::now(),
    ]);
});
*/
Route::get('/sample',[SampleController::class, 'sample']);
コントローラーです
    public function sample()
    {
        return Inertia::render('Mypage/Sample',[
            'time' => Carbon::now(),
        ]);
    }
/sampleにアクセスすると以下のように表示されます。

モーダルの利用
ドキュメントにモーダルに関する記載があったので使ってみます。
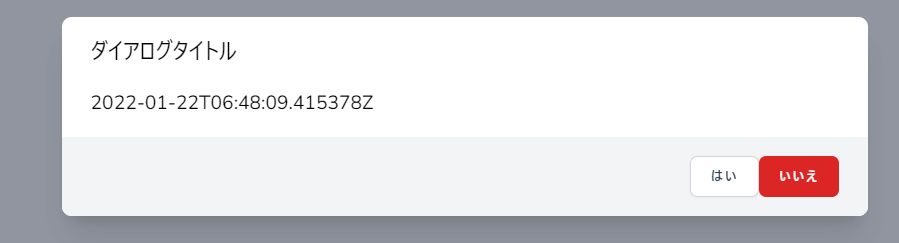
利用するモーダルはDialogModalです
DialogModalはshowというpropsによって表示するかしないかを判断します。
またtitleとcontentとfooterという名前付きスロットで構成されています。
<template>
    <div>
        <dialog-modal :show="isopen" @close="isopen = false">
            <template #title>
                ダイアログタイトル
            </template>

            <template #content>
                {{time}}
            </template>

            <template #footer>

                <secondary-button @click.native="isopen = false">
                    はい
                </secondary-button>

                <danger-button @click.native="cancel">
                    いいえ
                </danger-button>

            </template>

        </dialog-modal>
    </div>
</template>

<script>
    import { defineComponent } from 'vue'
    import DialogModal from '@/Jetstream/DialogModal.vue'
    import DangerButton from '@/Jetstream/DangerButton.vue'
    import SecondaryButton from '@/Jetstream/SecondaryButton.vue'

    export default defineComponent({
        components: {
            DialogModal,
            DangerButton,
            SecondaryButton
        },
        data() {
            return {
                isopen: true
            }
        },
        props: {
            time: String,
        },
        methods: {
            cancel(){
                console.log("cancel");
            }
        }
    })
</script>
以下のように表示されて、はいを押すとモーダルが閉じて、いいえを押すとcancelがログに出力されます。
フォーム
フォームの送信についてもシンプルな方法で見ていきます。
以下のようなpostに対するルートの設定を行っておきます。
Route::post('/testpost',[SampleController::class, 'testpost']);
コントローラーは入力値のnameを必須項目にして、requestの内容をddするだけの記載にしています。
    public function testpost(Request $request)
    {
        $request->validate([
            'name' => 'required',
        ]);

        dd($request);
    }
vueは以下のように記載します
<template>
    <div>
        <ul>
            <li v-for="error in form.errors" :key="error.id">
                {{ error }}
            </li>
        </ul>
        <form @submit.prevent="send">

            <label>Name</label>
            <input type="text" name="name" v-model="form.name" />
            <label>Email</label>
            <input type="text" name="name" v-model="form.email" />
            <secondary-button :type="submit">
                テストする
            </secondary-button>
        </form>
    </div>
</template>

<script>
    import { defineComponent } from 'vue'
    import SecondaryButton from '@/Jetstream/SecondaryButton.vue'

    export default defineComponent({
        components: {
            SecondaryButton
        },
        data() {
            return {
                submit: "submit",
                form: this.$inertia.form({
                    name: "",
                    email: "",
                }),
            }
        },
        methods: {
            send(){
                console.log("send");
                this.form.post('/testpost'); // フォームのnameとemailがパラメータに設定されます
            }
        }
    })
</script>
Laravel Jetstream 1.0 Inertiaのドキュメントにもありますが、$inertiaオブジェクトのformメソッドは"エラーメッセージに簡単にアクセスできる新しいフォームオブジェクトを作成"します。
またフォームの送信が成功したときにフォームの状態をリセットするなどの利便性も提供します。
とのことです。
この新しいフォームオブジェクトをdataにて定義しています。
dataで定義したformはpostメソッドを利用して通信を行います。
this.form.postとすることで定義してるformのnameとemailがパラメータとして送信されます。
また、これらはtemplateの中でinput要素にバインドして入力内容が反映されるようにしています。
<input type="text" name="name" v-model="form.name" />
またdataで定義したformにはerrorsにコントローラーのバリデーション結果が入っています。
これが、エラーメッセージに簡単にアクセスできるということですね!
なのでnameを空白で送信した場合は以下のように表示されます。

バリデーションを通過する送信を行った場合はddまで処理がきちんと流れます。

Inertiaの基本的な動きとかは把握できたかと思います。
laravelのルータ機能でvueファイルを表示できたり、値の受け渡しや、フォームについても扱いやすいので、jetstreamを使う際には一緒に使えればと思います。
Discussion
Inertiaについて調べていたので、大変参考になりました!ありがとうございました。