SpringでMarkdown形式の文字列をHTML形式にしてメール送信する
SpringBootを使ってメール送信を行ってみます。
やること
- MailHogを使ってメール送信テストをする
- Markdown形式の文字列をHTML形式にして送信する
開発段階で実際のメールを使ったら大変な事になっちゃうのでMailHogを利用します。
MailHogの準備
dockerを使ってMailHogを利用開始します
version: '3'
services:
  mailhog:
    image: mailhog/mailhog
    ports:
      - 1025:1025
      - 8025:8025
- 1025
- smtpserver
- 8025
- WebUI
以下のコマンドでコンテナを立ち上げます
docker-compose up -d
完了後はWebUIのポートからメール画面を見ることができます
ttp://localhost:8025/
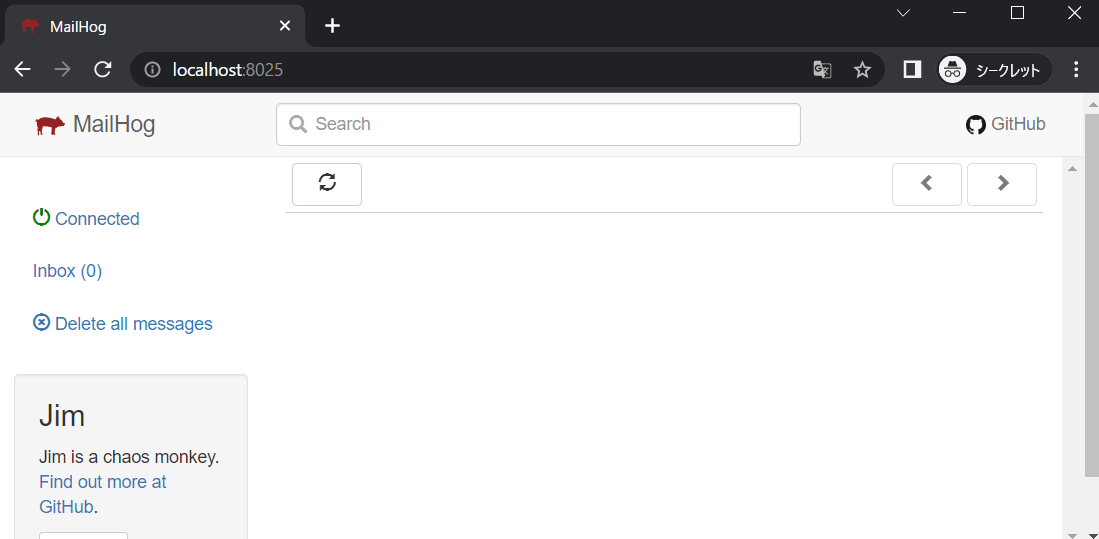
これにてMailHogの準備は完了です。
SpringBootアプリケーションの作成
以下のサイトでgradleのアプリケーションを作成します
メールの設定
とりあえずメールの送信を試したいのでspring-boot-starter-mailの依存を追加しておきます
dependencies {
	implementation 'org.springframework.boot:spring-boot-starter-mail'
	testImplementation 'org.springframework.boot:spring-boot-starter-test'
}
メールの設定をapplication.yamlに行います
spring:
  mail:
    host: 192.168.11.13
    port: 1025
hostの部分はマシンのIPアドレスを入力します
portの部分はsmtpserverのポート
メールの作成
メールを利用するには以下のようなクラスが必要です
- JavaMailSender
- MimeMessageHelper
- MimeMessage
MimeMessageはMimeMessageHelperを介して宛先や本文などのメール情報を作成します。
MimeMessageHelperでは設定する値のチェックや、HTMLメールにするかどうかなどの処理を行います。
JavaMailSenderがMimeMessageを送信します
参考
MimeMessageHelperで行う処理はConsumer系に任せるような実装にします
例外を扱うので関数型インターフェースを新たに定義しておきます
@FunctionalInterface
public interface UseInstance <T,X extends Throwable>{
    void accept(T instance) throws X;
}
上記の関数型インターフェースを利用してメール送信を行うクラスを作成します
import org.springframework.beans.factory.annotation.Autowired;
import org.springframework.mail.javamail.JavaMailSender;
import org.springframework.mail.javamail.MimeMessageHelper;
import org.springframework.stereotype.Component;

import javax.mail.MessagingException;
import javax.mail.internet.MimeMessage;

@Component
public class SendMail {

    private static JavaMailSender sender;

    @Autowired
    public void setJavaMailSender(JavaMailSender sender){
        SendMail.sender = sender;
    }

    public static void sendMail(UseInstance<MimeMessageHelper, MessagingException> block){
        MimeMessage message = SendMail.sender.createMimeMessage();
        try {
            MimeMessageHelper messageHelper = new MimeMessageHelper(message,true);
            block.accept(messageHelper);
            SendMail.sender.send(message);
        } catch (MessagingException e) {
            e.printStackTrace();
        }
    }
}
簡単にメール送信ができるかどうかだけテストしてみます
import org.junit.jupiter.api.Test;
import org.springframework.beans.factory.annotation.Autowired;
import org.springframework.boot.test.context.SpringBootTest;

import static org.junit.jupiter.api.Assertions.*;

@SpringBootTest
class SendMailTest {

    @Autowired
    private SendMail sendMail;

    @Test
    public void test_sendMail(){
        SendMail.sendMail( helper -> {
            helper.setFrom("toma@kamijo.com");
            helper.setTo("mikoto@misaka.com");
            helper.setSubject("メールタイトルのテスト");
            helper.setText("本文のテスト");
        });
        assertTrue(true);
    }
}
実行して先ほどのmailhogの画面を更新するとメール履歴があることがわかります
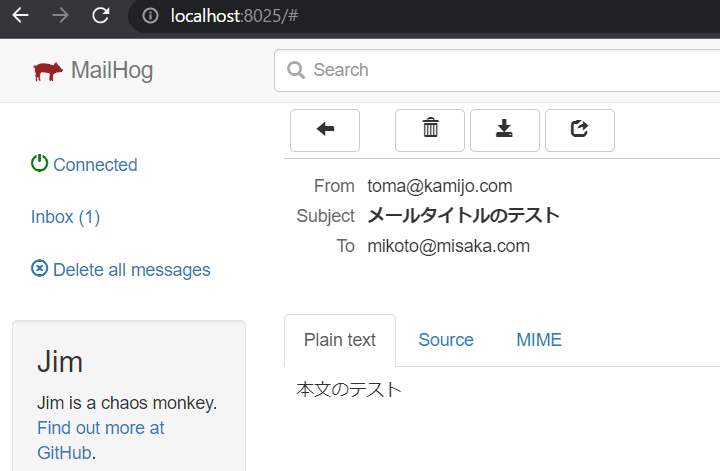
先ほど設定した内容でメールが送信されています。
これにてメール送信の確認は完了です。
Markdown形式
Markdown形式の文字列を扱うために以下の依存モジュールを追加しておきます
dependencies {
	implementation 'org.springframework.boot:spring-boot-starter-mail'
	// 追加
	implementation 'com.vladsch.flexmark:flexmark-all:0.64.0'
	testImplementation 'org.springframework.boot:spring-boot-starter-test'
}
Markdown形式の文字列からHtml形式の文字列に変換できるクラスを作っておきます
import com.vladsch.flexmark.html.HtmlRenderer;
import com.vladsch.flexmark.parser.Parser;
import com.vladsch.flexmark.util.ast.Node;
import com.vladsch.flexmark.util.data.MutableDataSet;

public class Html {
    public static String toHtml(String markdown) {
        MutableDataSet options = new MutableDataSet();
        Parser parser = Parser.builder(options).build();
        HtmlRenderer renderer = HtmlRenderer.builder(options).build();
        Node document = parser.parse(markdown);
        String html = renderer.render(document);
        return html;
    }
}
テストにて利用してメール送信してみます
@SpringBootTest
class SendMailTest {

    @Autowired
    private SendMail sendMail;

    @Test
    public void test_sendMail(){
        String message = "# Title\n"
                + "* one\n"
                + "* two\n"
                + "* three\n";
        SendMail.sendMail( helper -> {
            helper.setFrom("toma@kamijo.com");
            helper.setTo("mikoto@misaka.com");
            helper.setSubject("メールタイトルのテスト");
            helper.setText(Html.toHtml(message),true);
        });
        assertTrue(true);
    }
}
- setTextメソッドの第二引数をtrueにするとHTMLメールとして送信できます
実行してメールを確認するとHTML形式で表示されています

とても簡単に扱えることが確認できました
これにてMarkdown形式の文字列をHtmlに変換して表示する確認は完了です
メール送信画面を作ってメールを送信する
既に今回の目標は達成していますが、折角なのでメール送信画面を作って、メール送信を行ってみます。
まずは以下の依存を追加しておきます。
dependencies {
	implementation 'org.springframework.boot:spring-boot-starter-mail'
	implementation 'com.vladsch.flexmark:flexmark-all:0.64.0'
	// 追加
	implementation 'org.springframework.boot:spring-boot-starter-thymeleaf'
	// 追加
	implementation 'org.springframework.boot:spring-boot-starter-web'
	testImplementation 'org.springframework.boot:spring-boot-starter-test'
}
次にメールフォーム用のクラスを作成します
public class MailForm {

    private String subject;

    private String message;

    public String getSubject(){
        return this.subject;
    }

    public void setSubject(String subject){
        this.subject = subject;
    }

    public String getMessage(){
        return this.message;
    }

    public void setMessage(String message){
        this.message = message;
    }
}
- 本当はLombokを使うと楽です
- このクラスとHTMLのformタグ内の要素が紐づきます
コントローラーを作成します
import org.springframework.stereotype.Controller;
import org.springframework.web.bind.annotation.GetMapping;
import org.springframework.web.bind.annotation.PostMapping;

@Controller
public class MailController {

    @GetMapping("/mail")
    public String mail(MailForm mailForm){
        return "mail";
    }

    @PostMapping("/mail/send")
    public String send(MailForm mailForm){
        SendMail.sendMail(helper -> {
            helper.setFrom("kakine@teitoku.com");
            helper.setTo("measure@heart.com");
            helper.setSubject(mailForm.getSubject());
            helper.setText(Html.toHtml(mailForm.getMessage()),true);
        });
        return "redirect:/mail";
    }
}
- GetMappingの方
- htmlファイルのmail.htmlは後で作成します
- htmlファイルからフォームを扱うため、紐づくフォームクラスを引数に取っています
- PostMappingの方
- 本来はここでバリデーション処理など行います
- mailFormには画面から渡された値がバインドされています
次に画面を作成します
<!doctype html>
<html xmlns:th="http://www.thymeleaf.org">
<head>
    <meta charset="UTF-8" />
    <title>メール送信</title>
</head>
<body>
<h1>メール送信</h1>
<form th:action="@{/mail/send}" th:object="${mailForm}" method="post">
    <div>
        <input th:type="text" th:field="*{subject}" />
    </div>
    <div>
        <textarea th:field="*{message}" rows="20" cols="50"></textarea>
    </div>
    <div>
        <button type="submit">送信する</button>
    </div>
</form>
</body>
</html>
以下にアクセスするとフォームが表示されます
ttp://localhost:8080/mail
試しに送信してメールを確認してみます

送信

簡単にメール送信とMarkdown形式の文字列をHTML形式に変換することができました。
Discussion