Unityで3Dゲームを作成
右クリックしてWASDで移動が可能
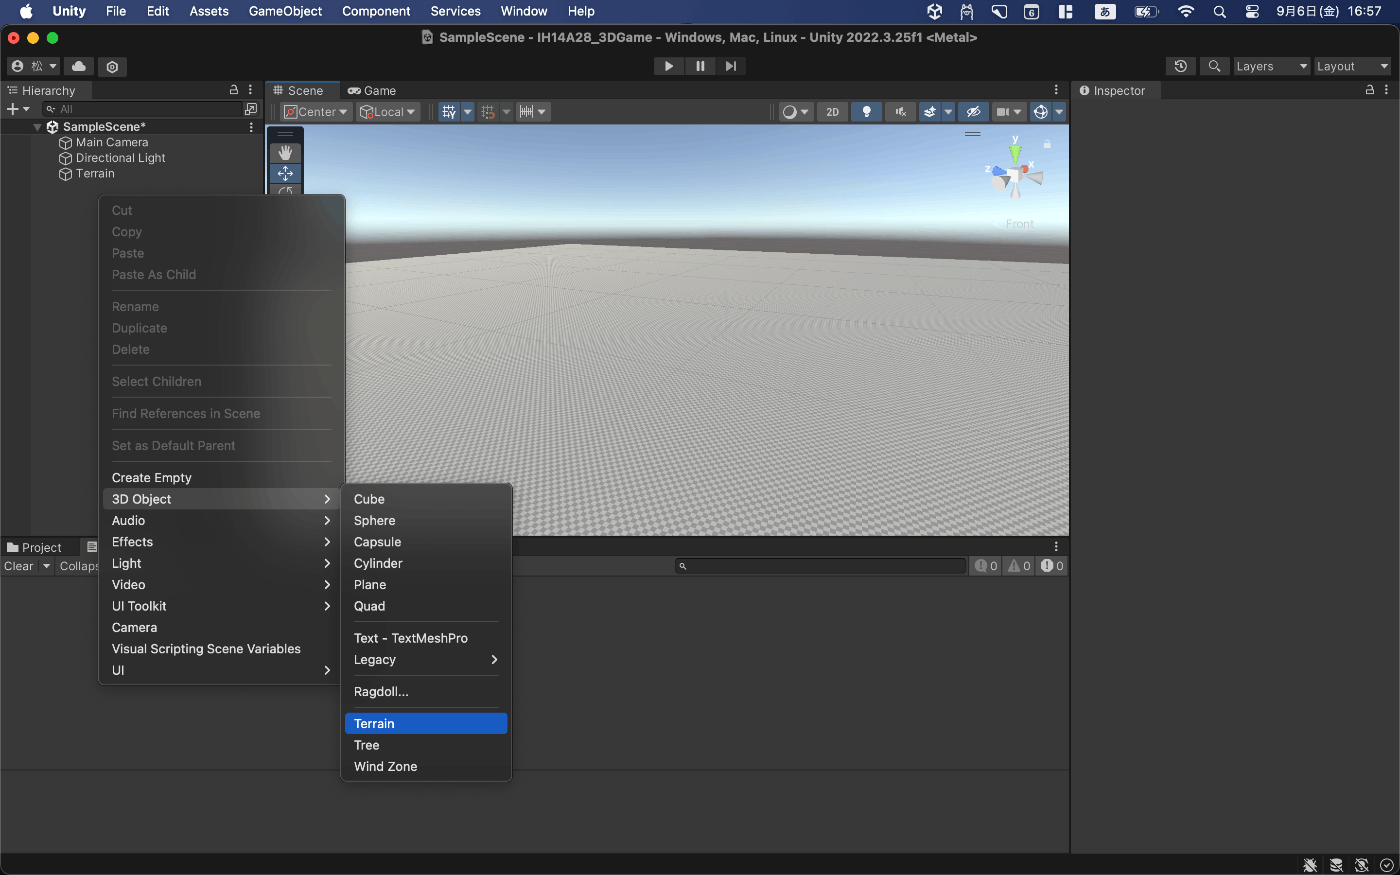
フィールドの大きさを変更する
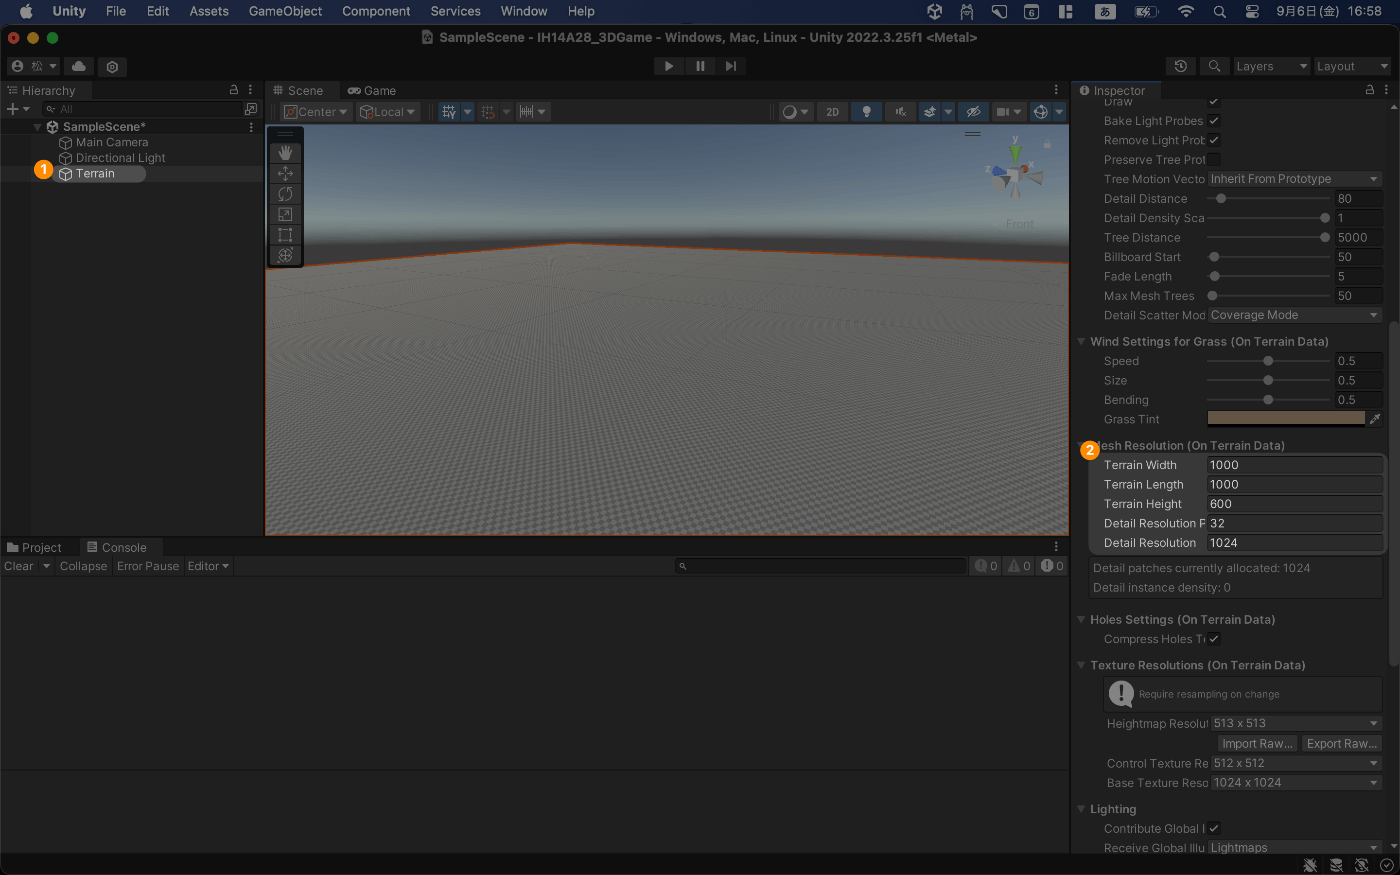
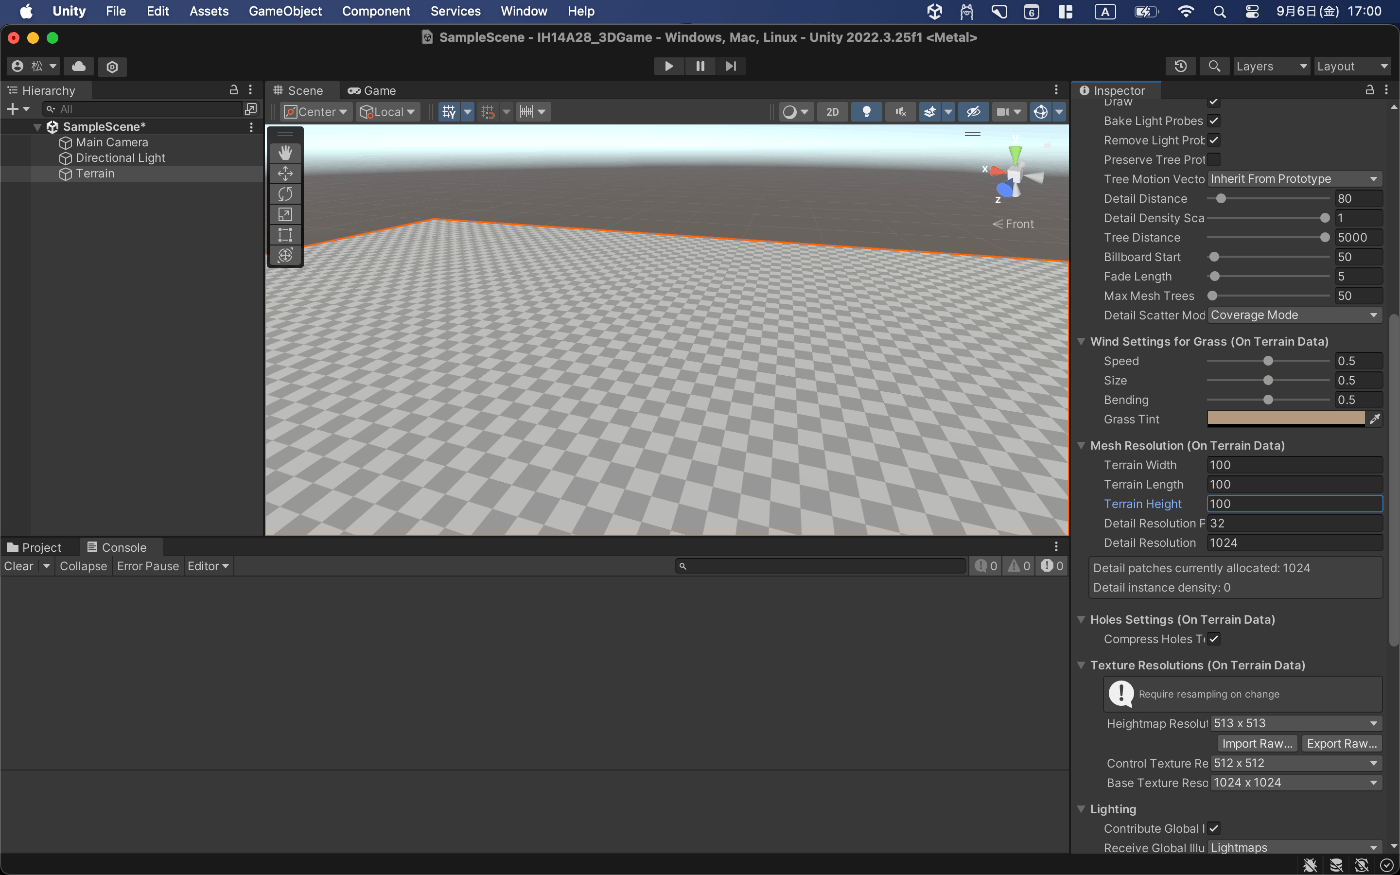
全部100にする
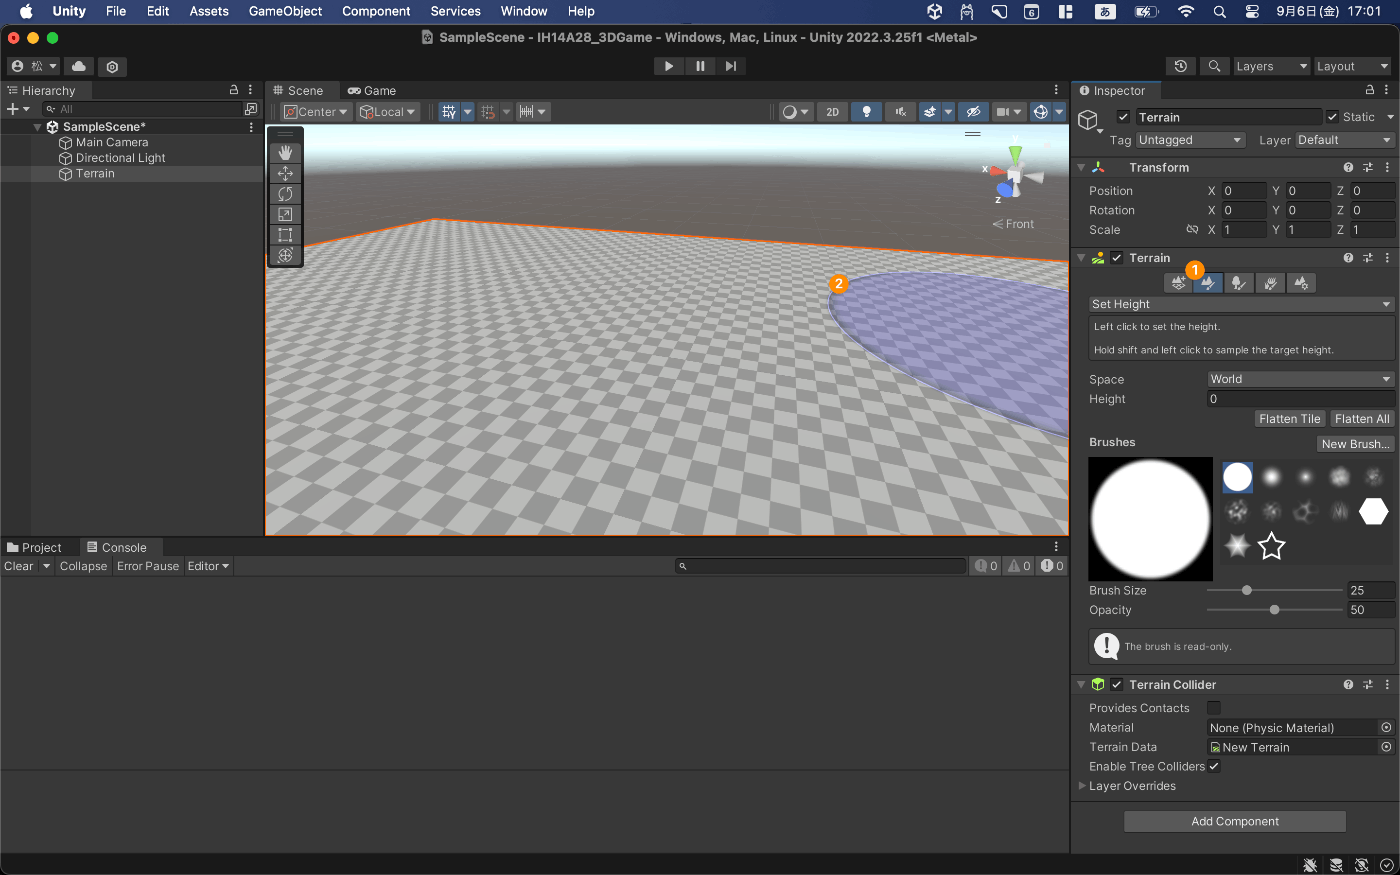
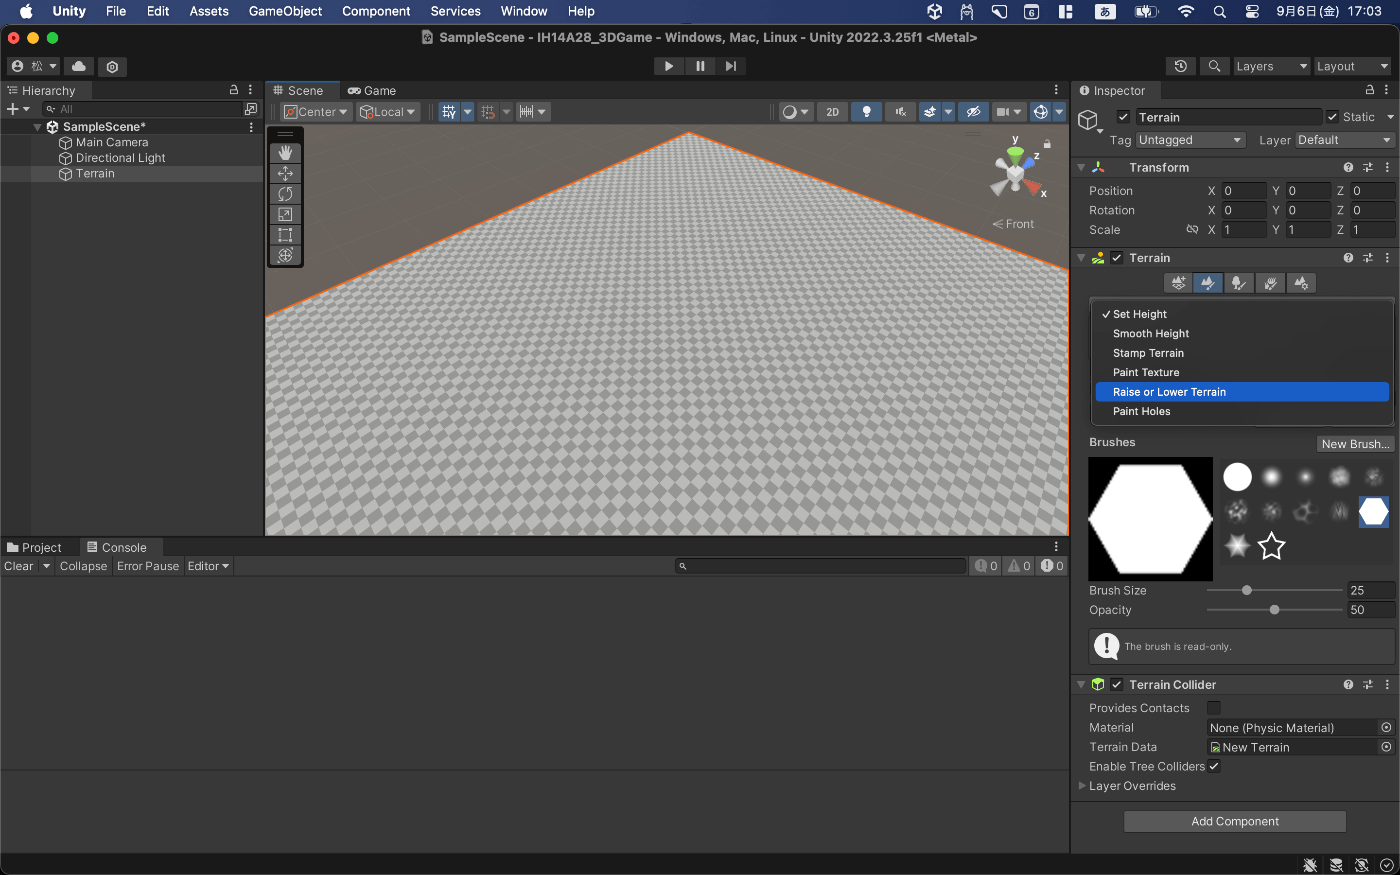
地形を作れる
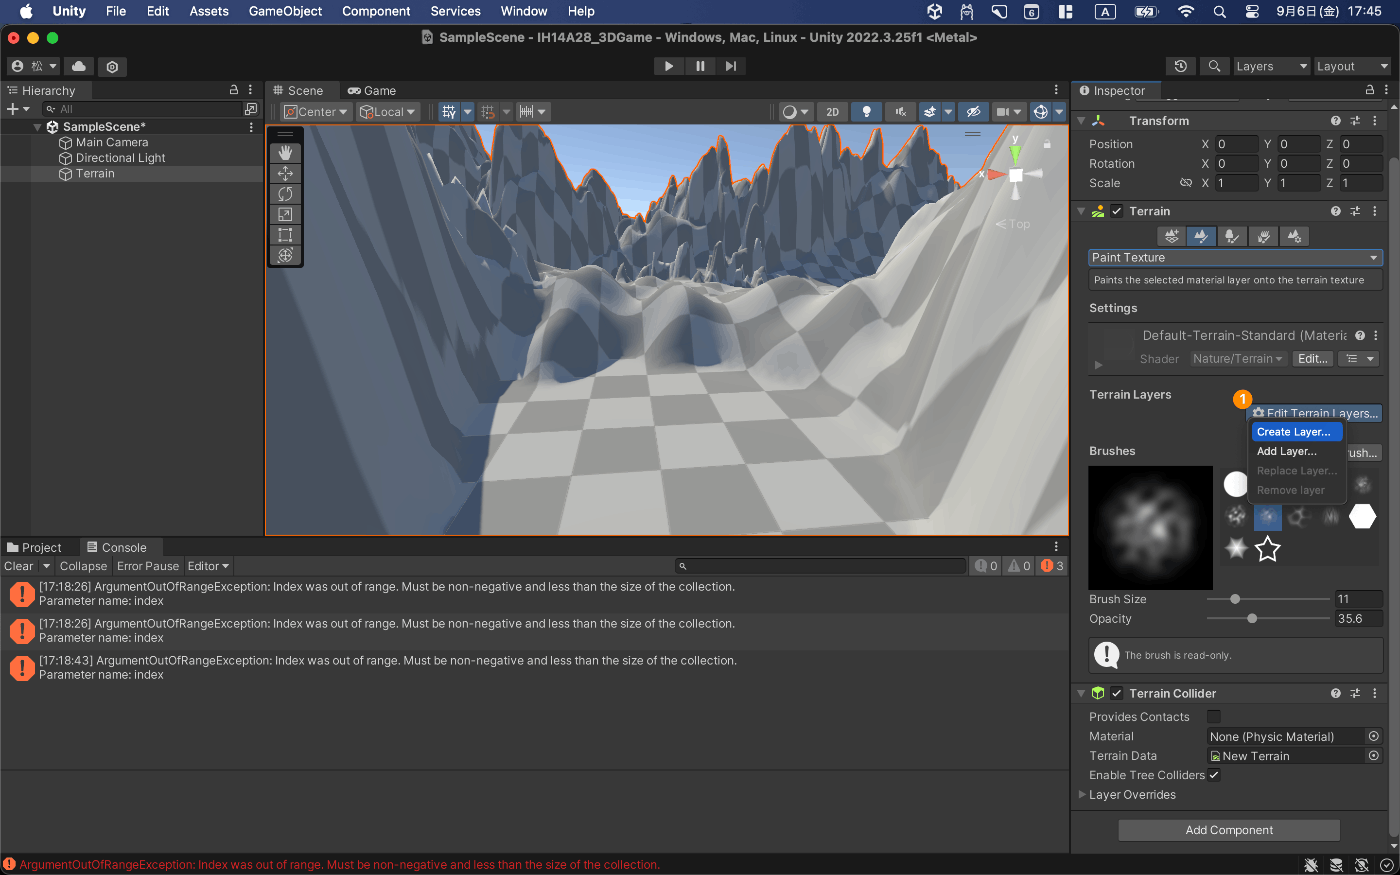
色をつける
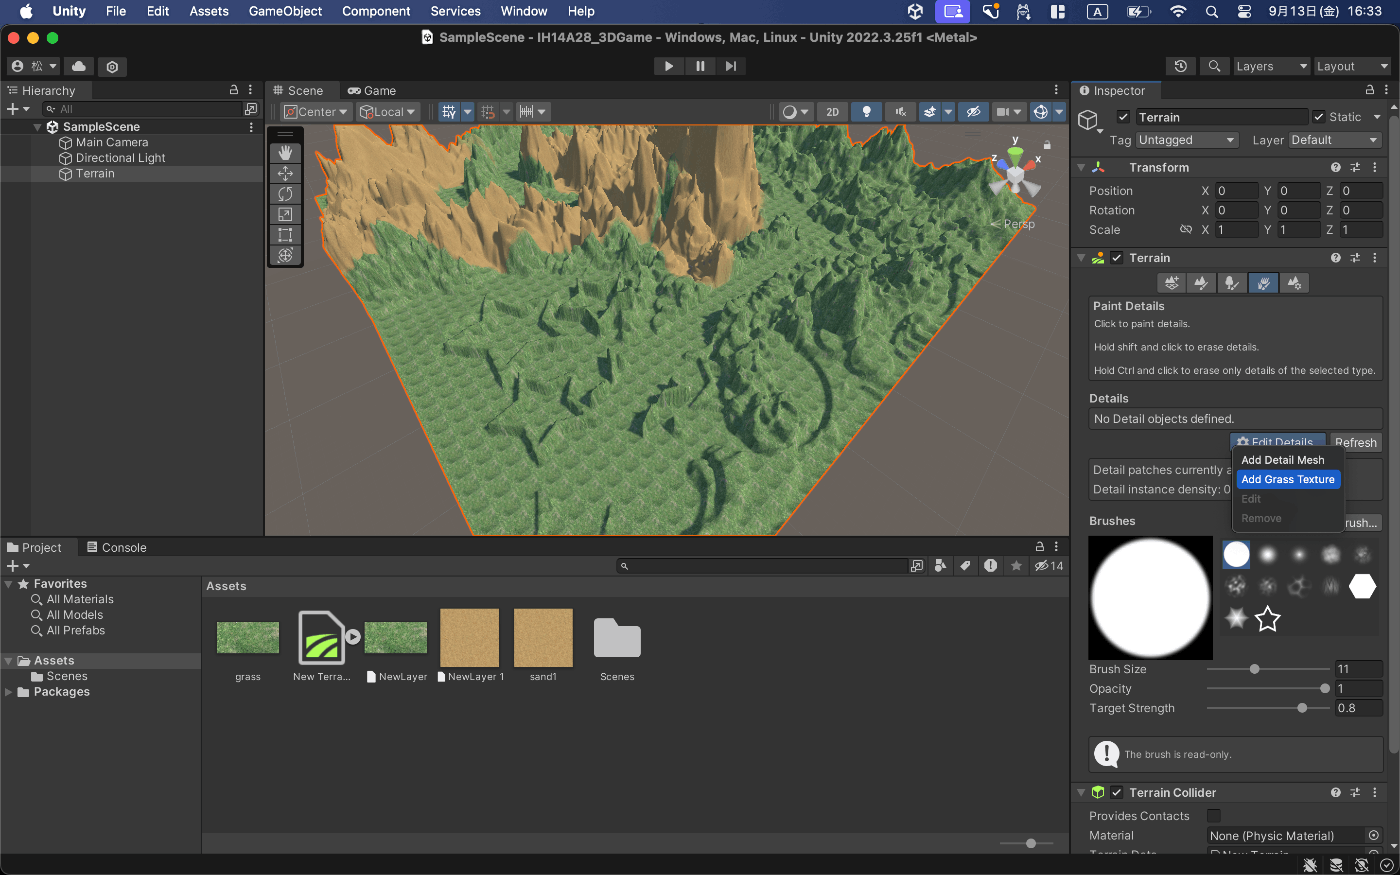
ディティールこれは地面に草を生やすことができる

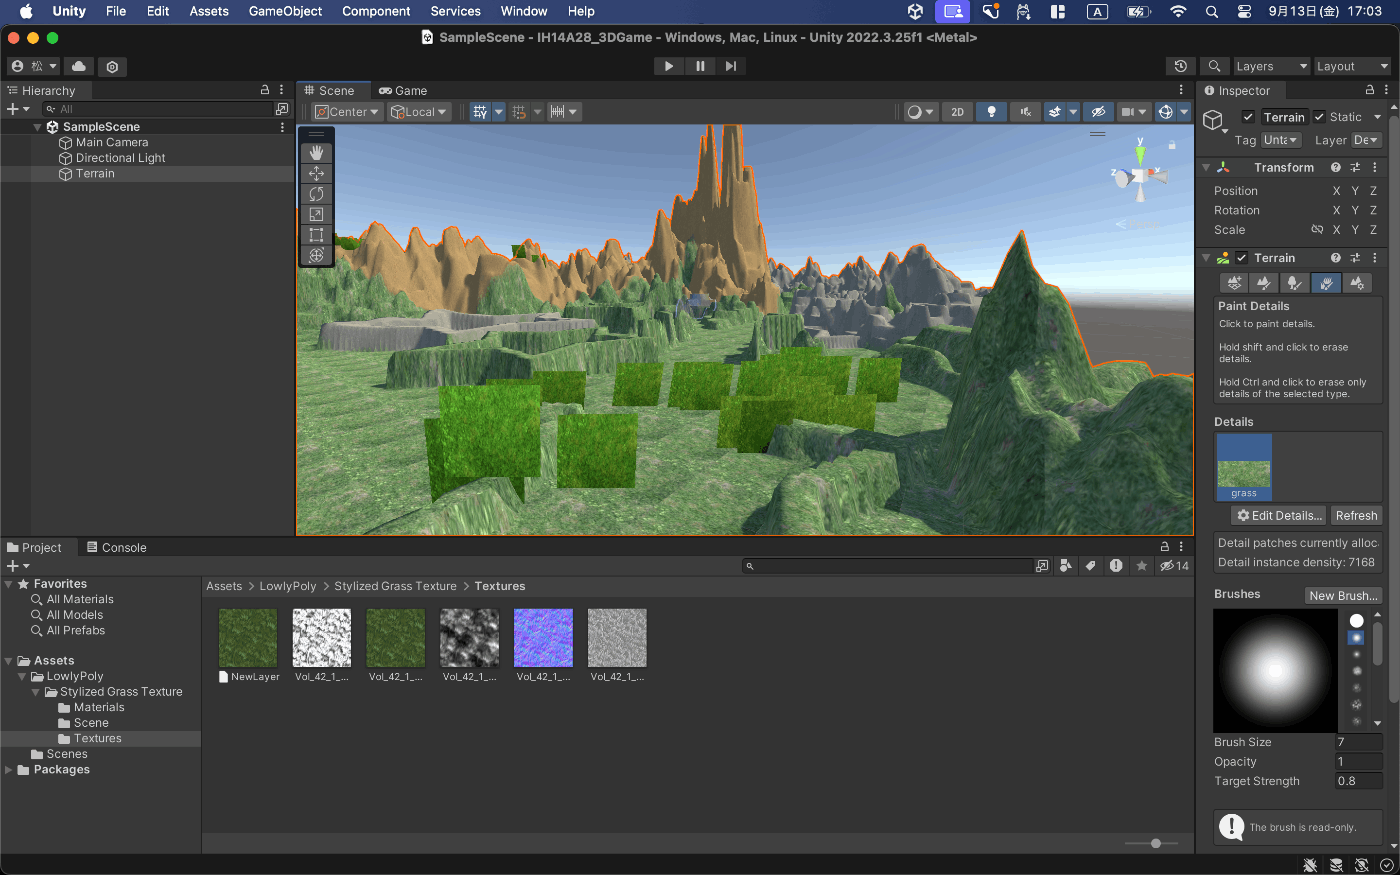
草を生やした結果がこれ
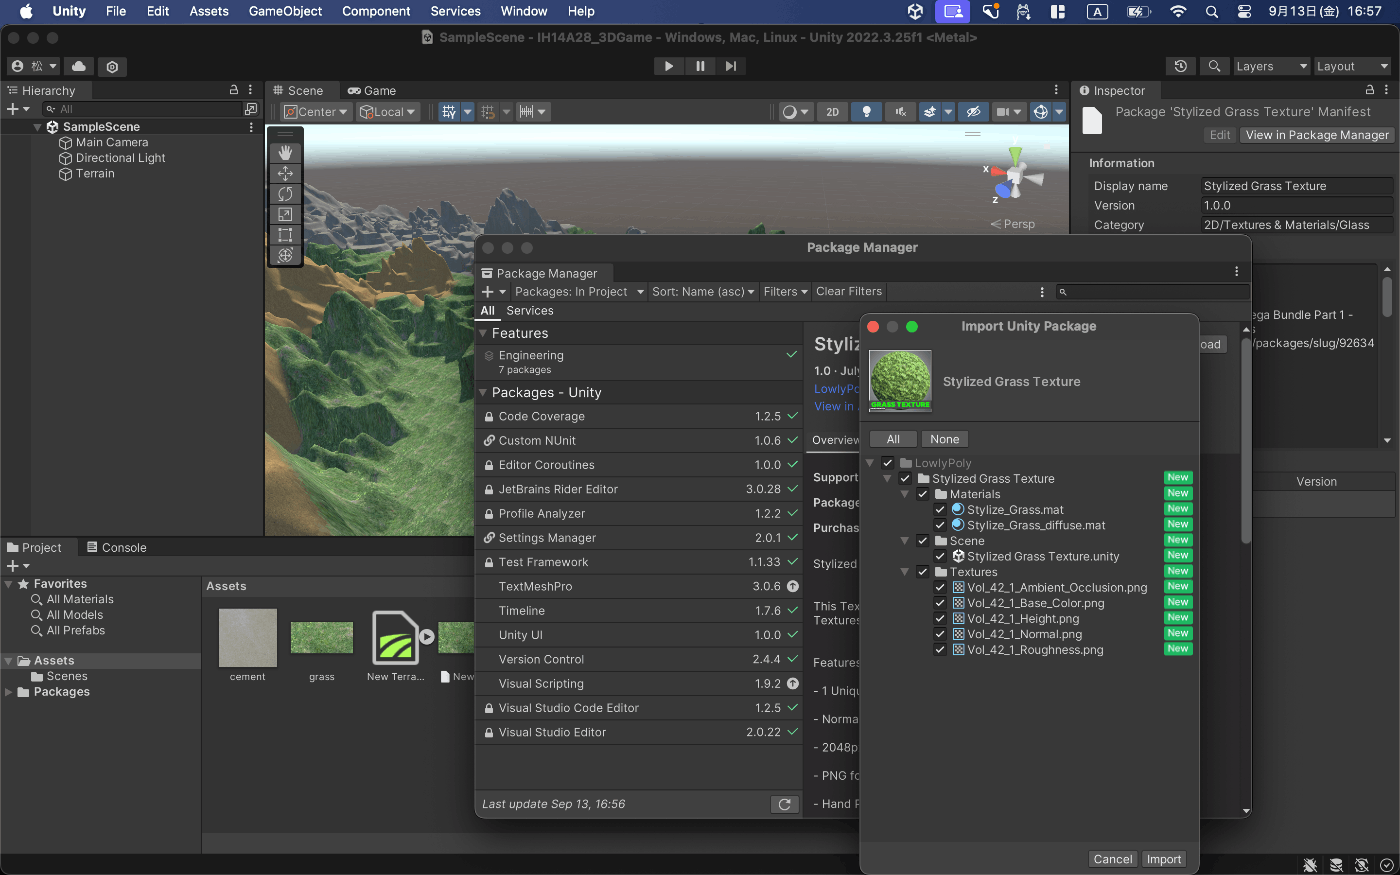
Unityアセットストアからダウンロードする

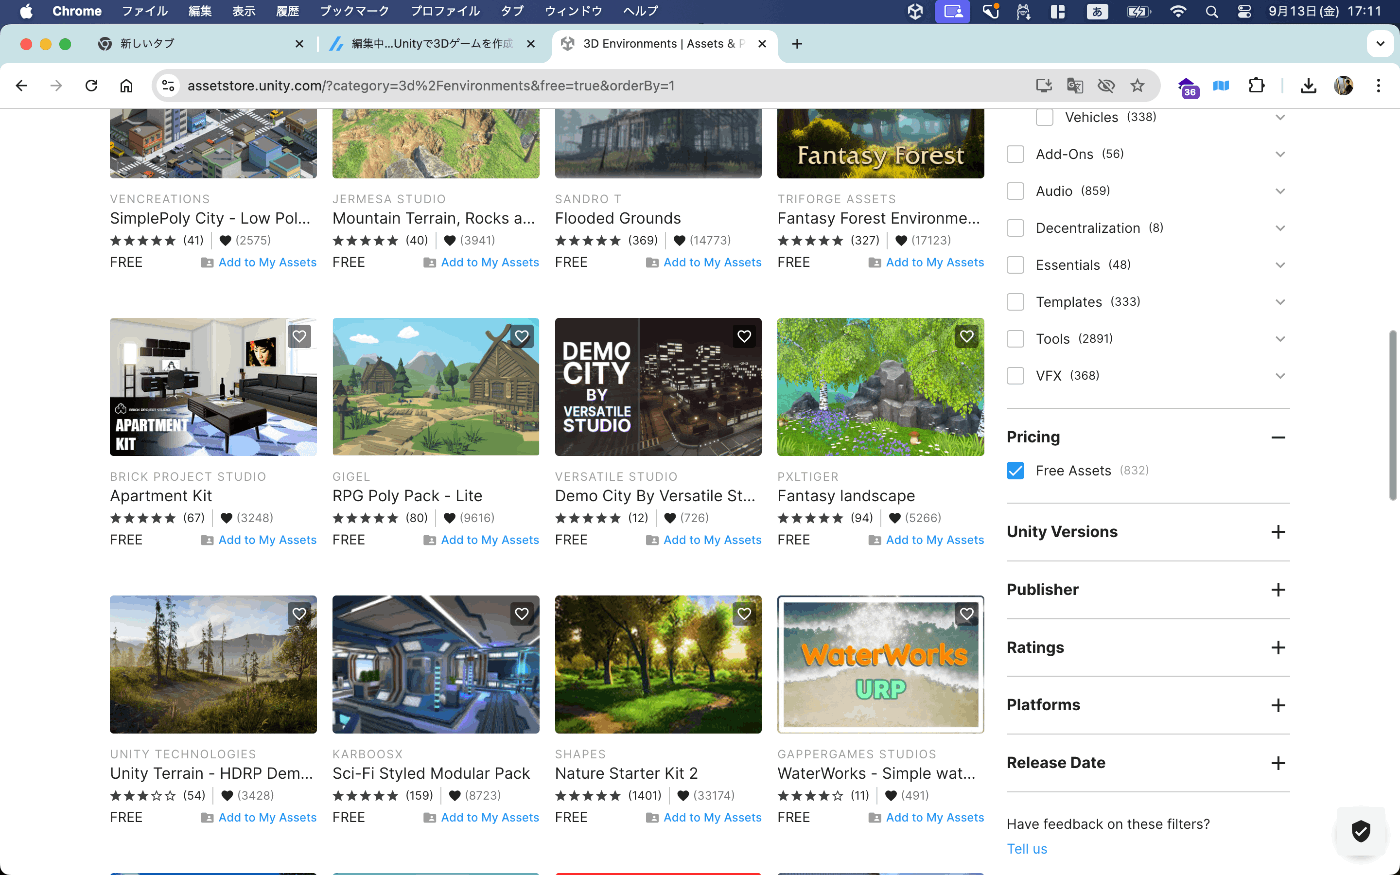
Add My Asetをクリック
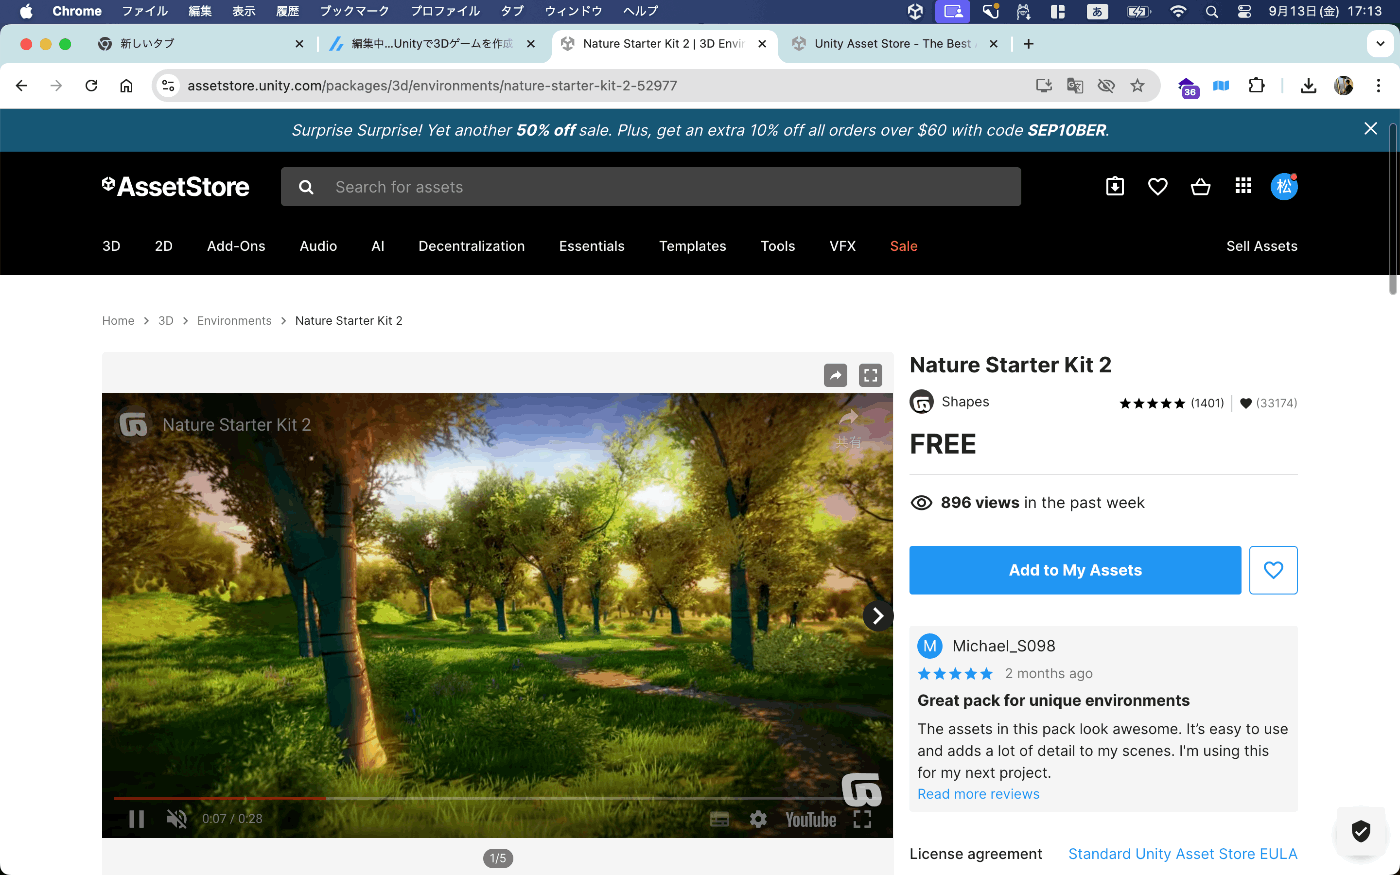
Open in Unityをクリック
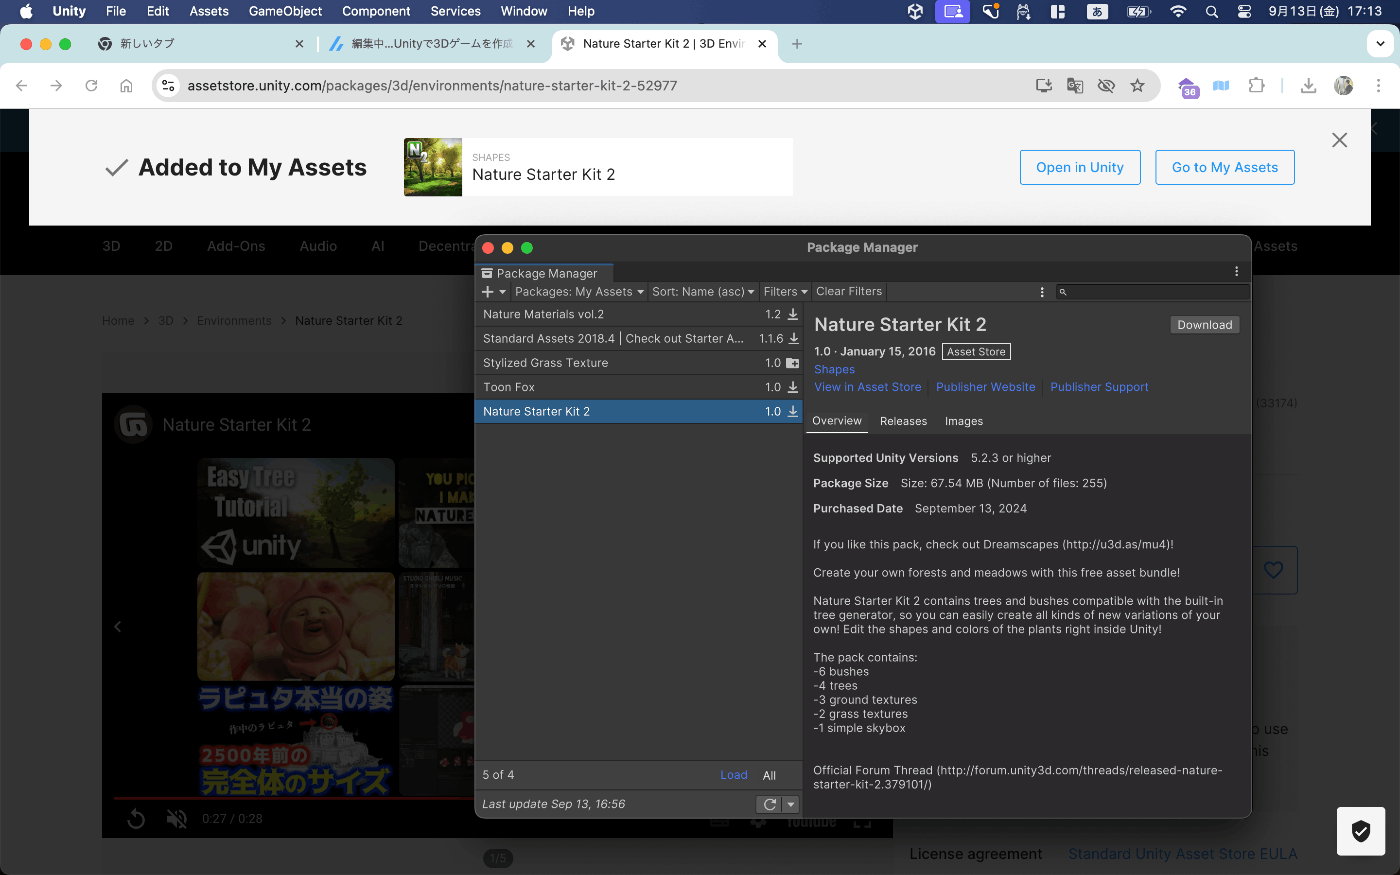
ダウンロードします
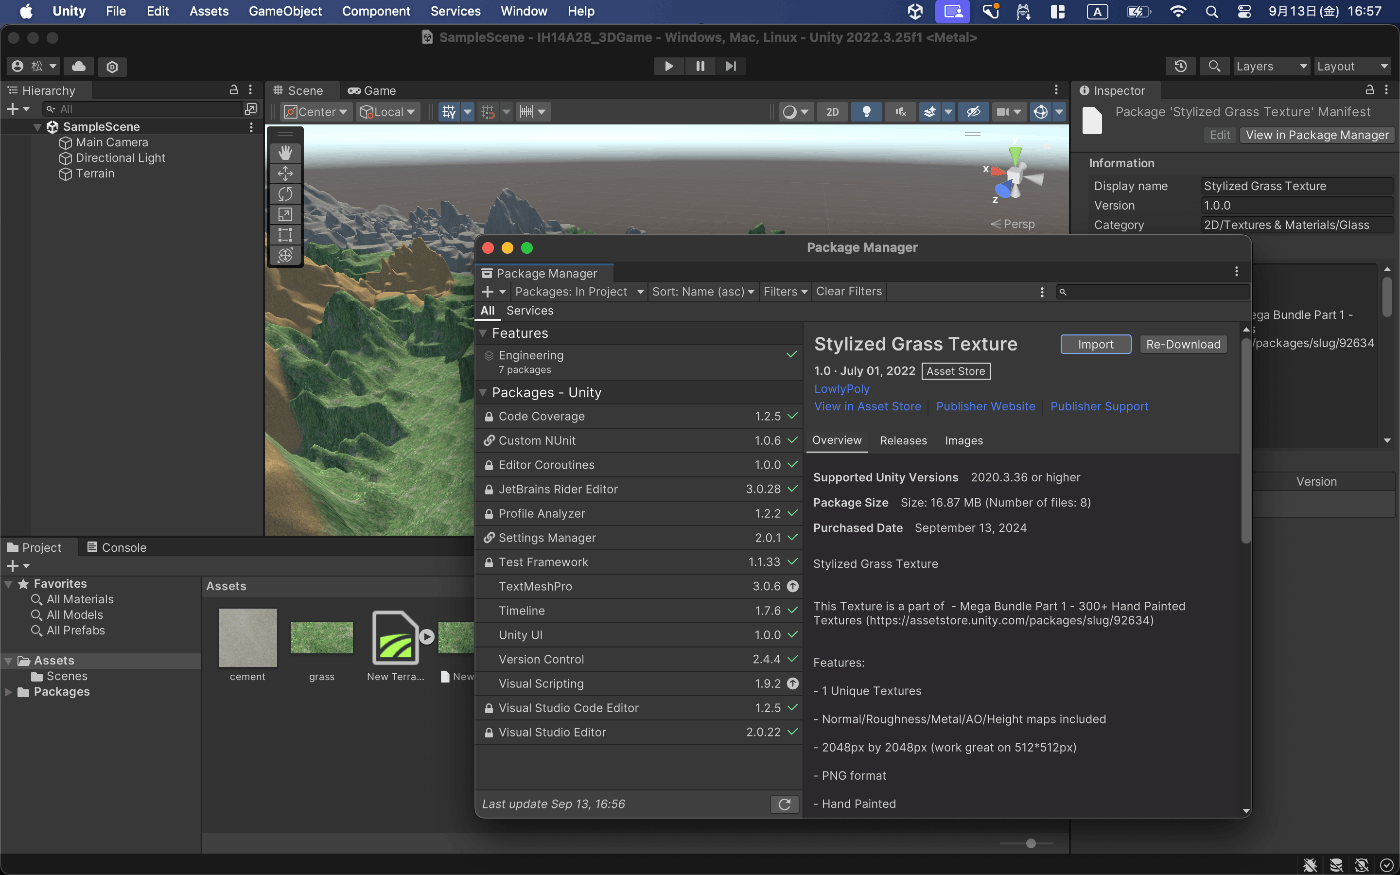
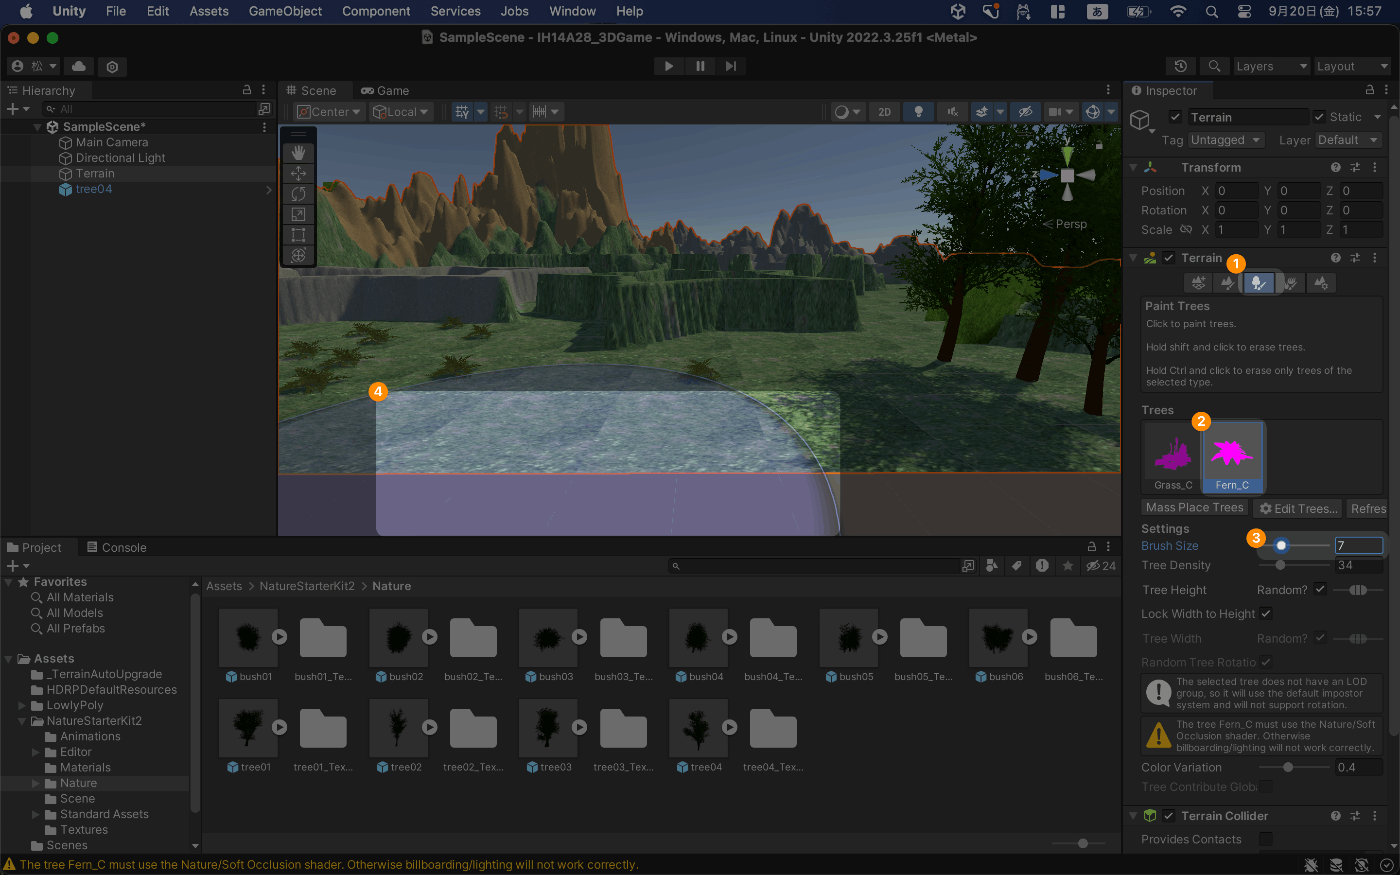
木を生やす
真ん中のマークをクリックしてEdit Trees->Add Treeをクリックして木のモデルを選択します。
Brush Sizeを決めてステージをなぞると木を生やせます!!
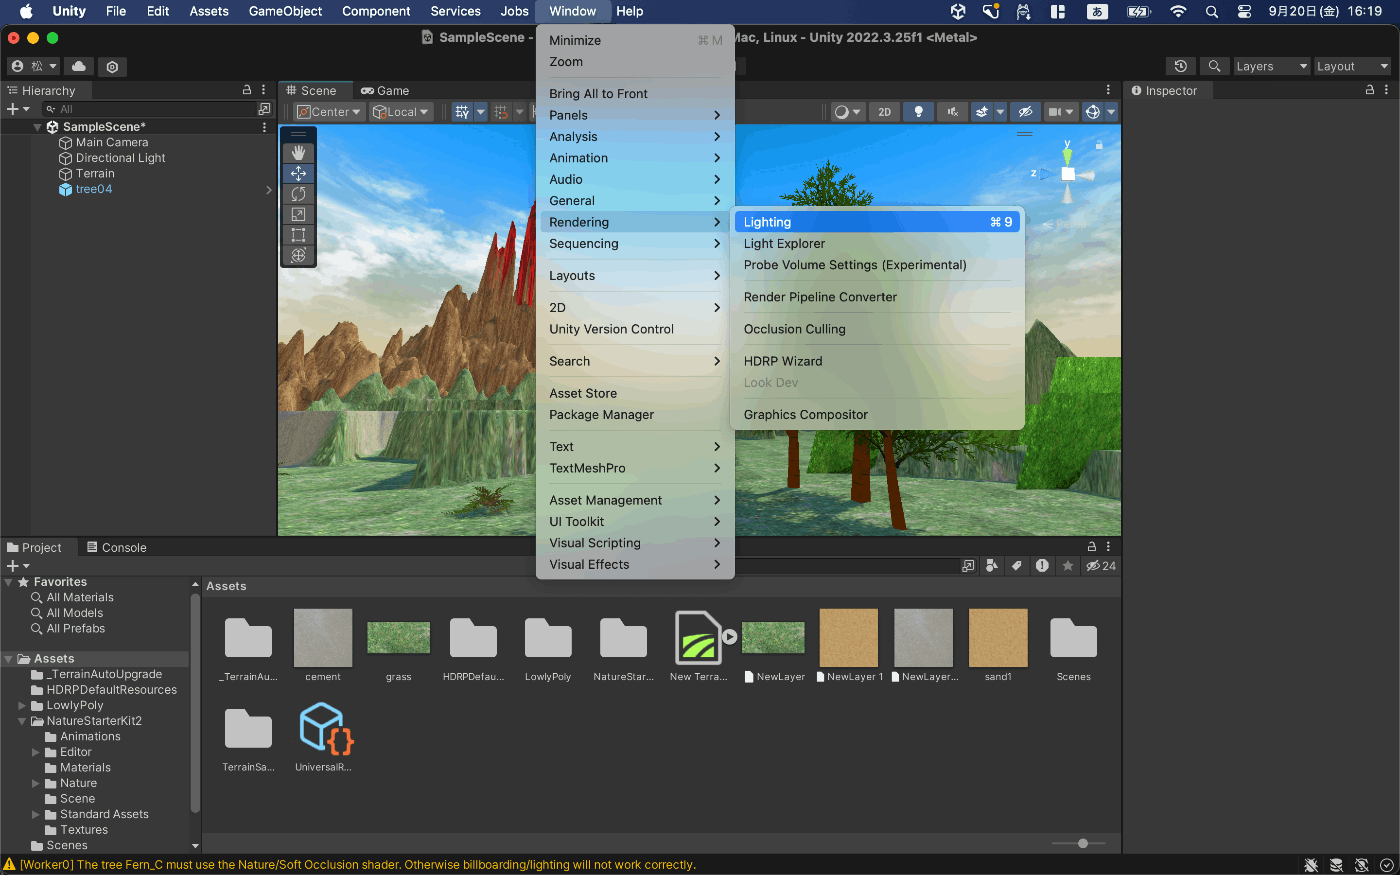
空を選択する
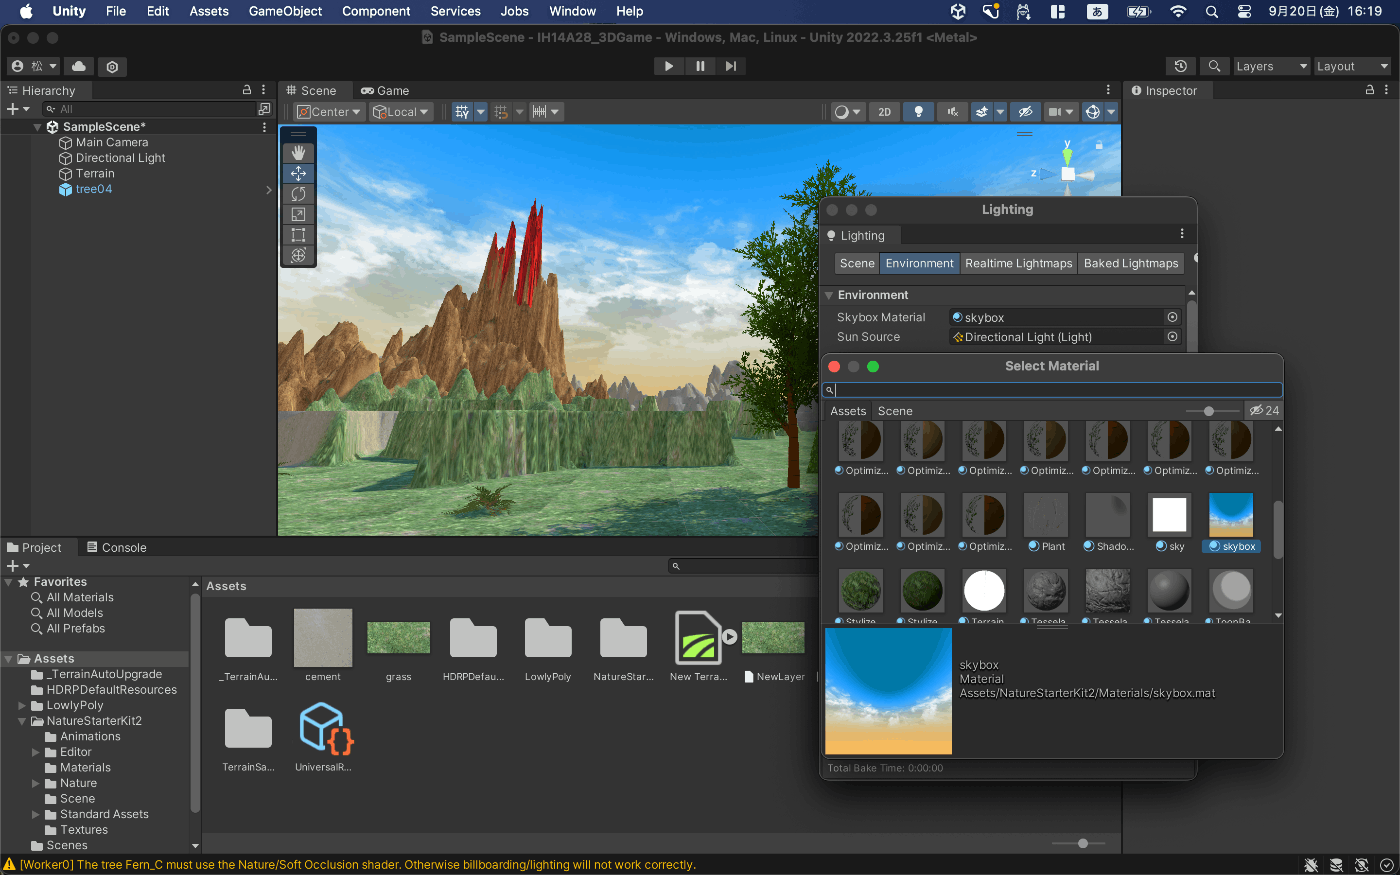
window->rendering->Environment->Skyboxを選択することで空を変えることができます
好きなスカイボックスを選択しましょう!!
Unityちゃんを配置する
ダウンロードすると色んなフォルダがありますが、今回使用するのはPrefabを使います。

ピンク色になっているので手直しが必要です。
一つはただのモデル
もう一つはdynamicになっています
Modelsを選択して

マテリアルズを開いてbodyを選択します

エラーシェーダーになっているのを治していきます
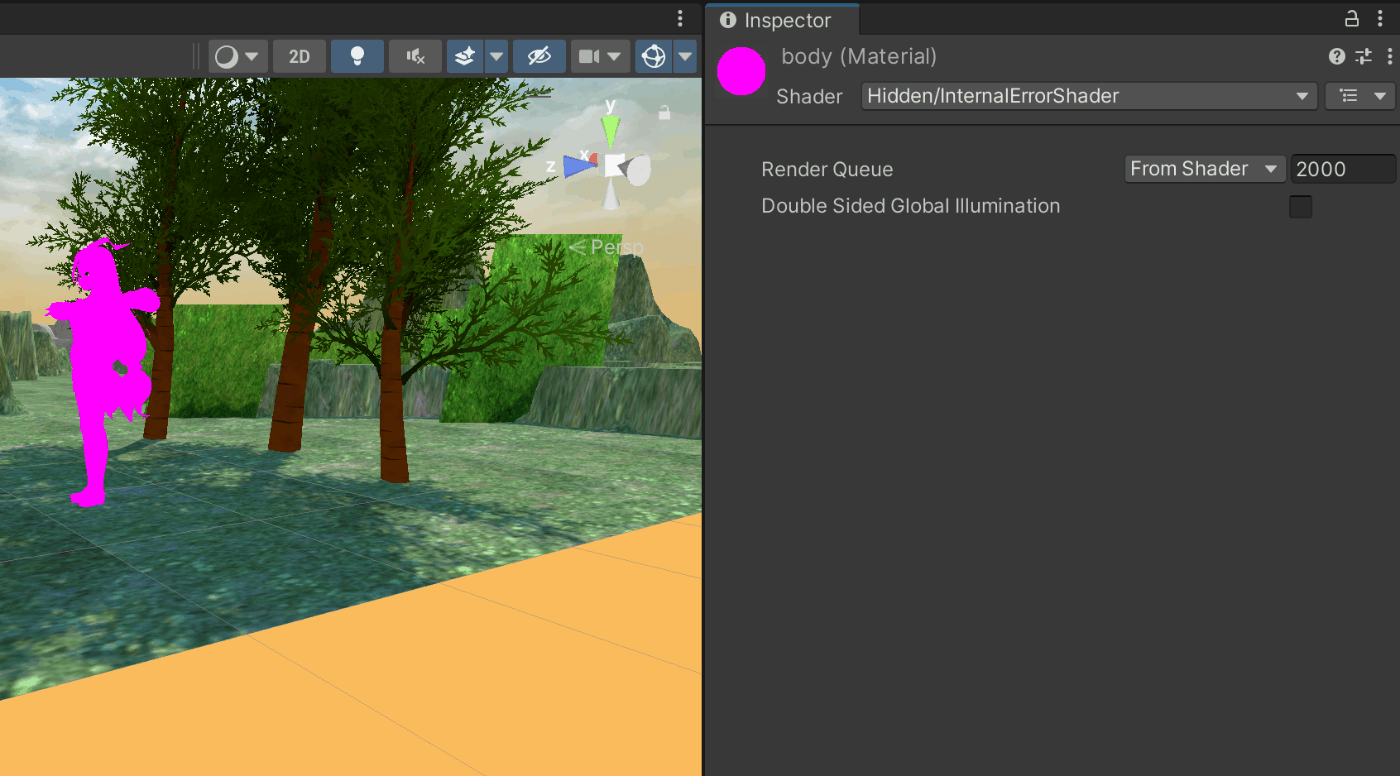
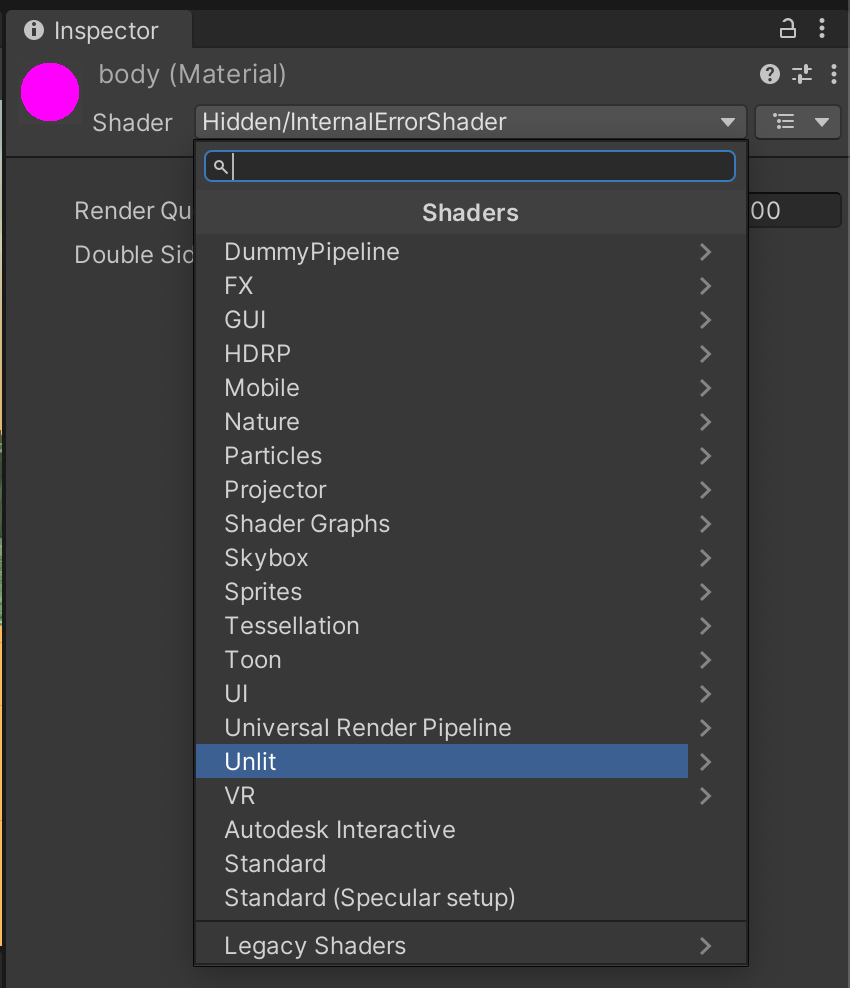

ボディー以外にもエラーシェーダーになっているものを修正していきます。
transpanrentじゃなくてstandardにすることで目が見えるようになります
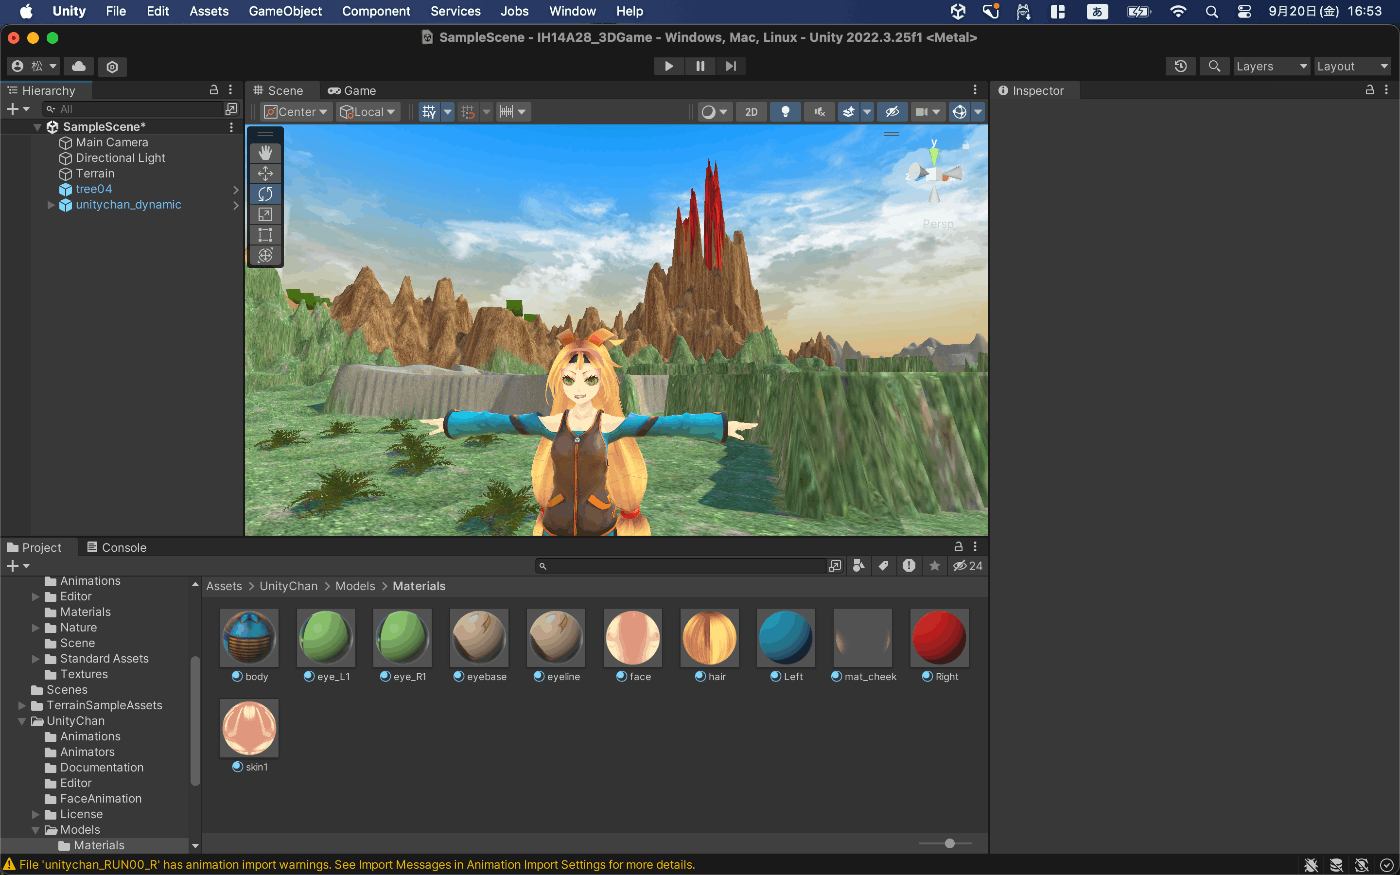
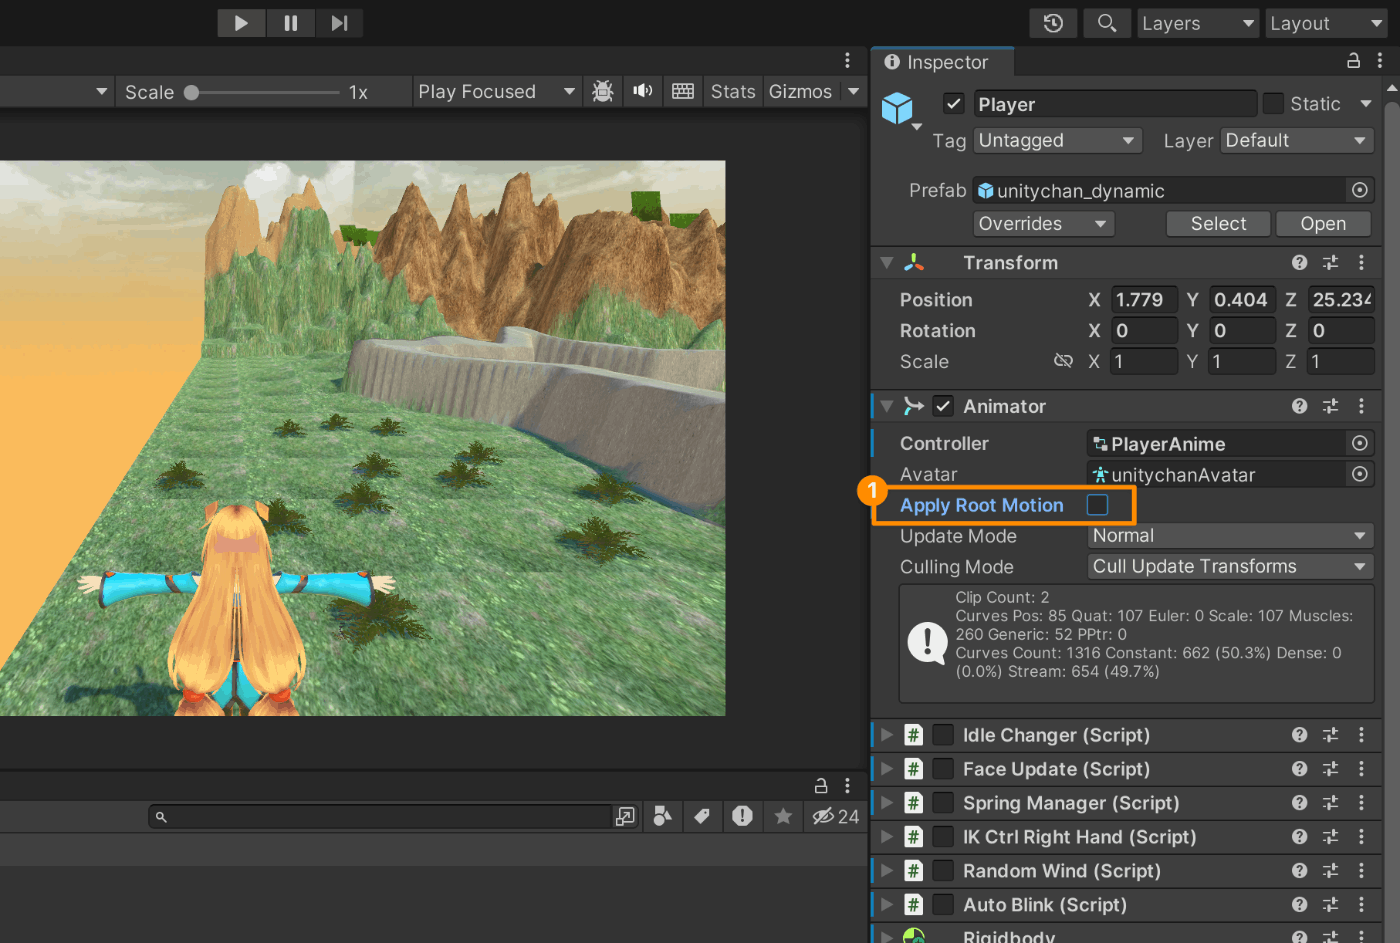
Unityちゃんを自分たちで制御するためにインスペクターでチェックを外します
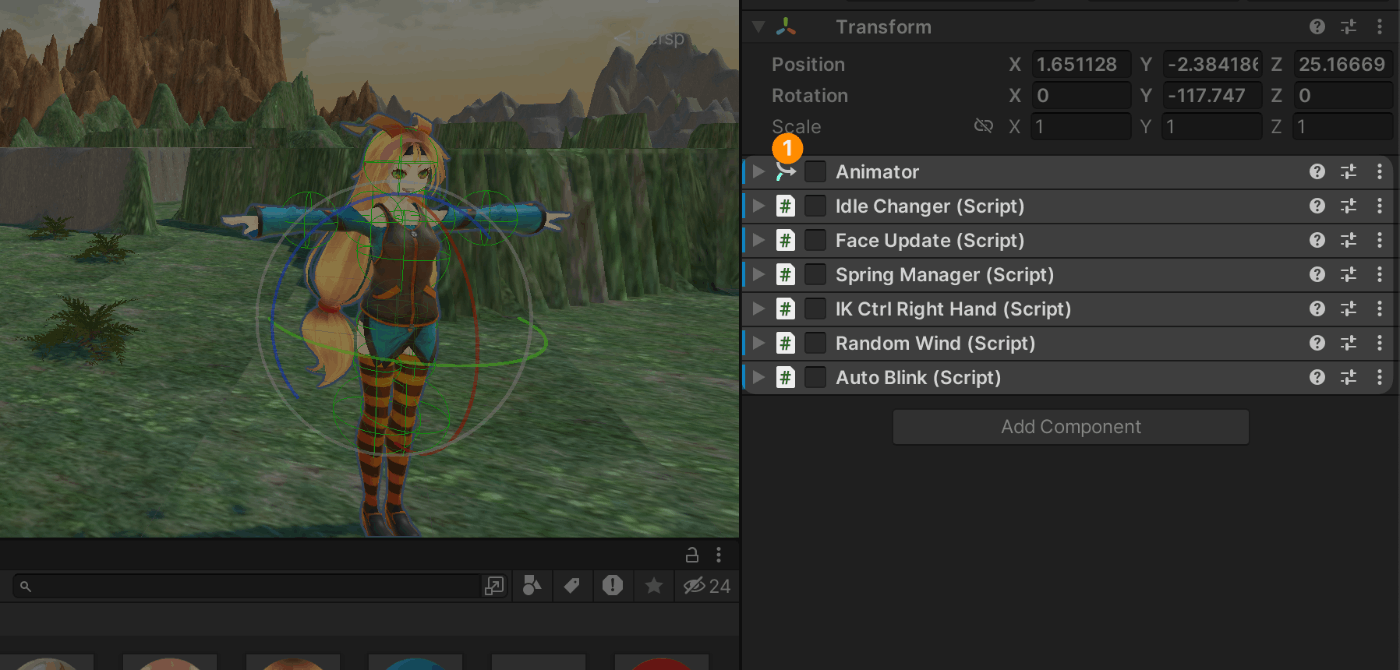
このままでは宙に浮いているので重力を設定してあげます

当たり判定を追加します

Edit Colliderで当たり判定を編集します
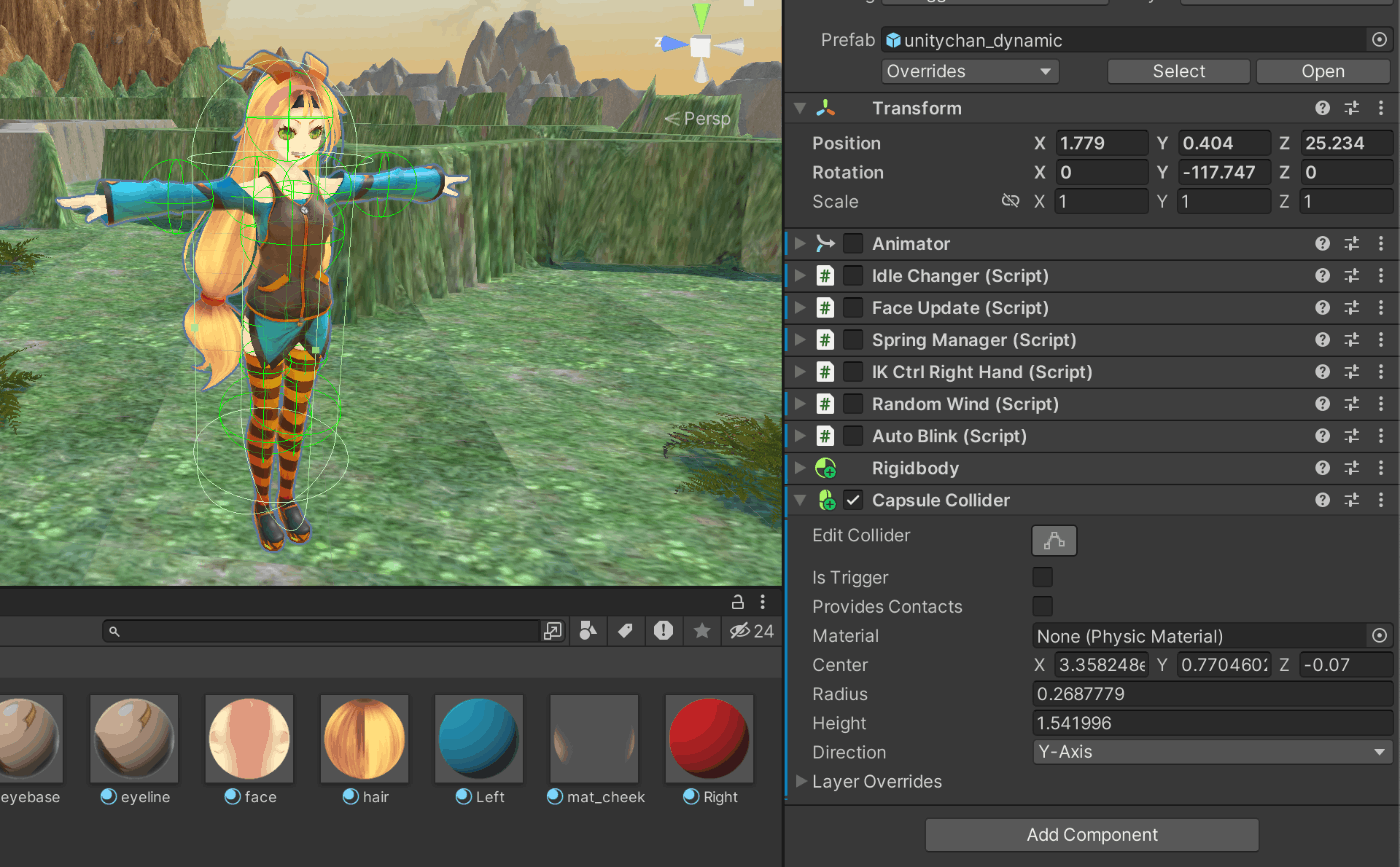
足元が丸くて転けちゃうのを防ぐ
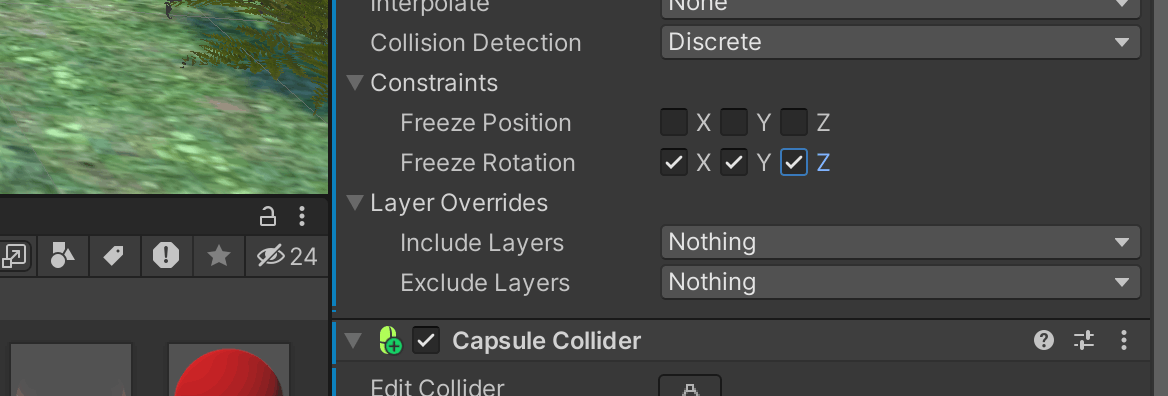
スクリプトを追加する
アセットの下にscriptフォルダを作成する
ファイル名をPlayerMoveにして作成する
using System.Collections;
using System.Collections.Generic;
using UnityEngine;

public class PlayerMove : MonoBehaviour
{
    // Start is called before the first frame update
    void Start()
    {

    }

    // Update is called once per frame
    void FixedUpdate()
    {
        // 移動量を表す変数
        // XYZの3Dを表すための型です
        Vector3 move = Vector3.zero;

        // 前に移動
        // 指定されたキーば押されているか判定
        if (Input.GetKey(KeyCode.W)) {
            move.z = 50.0f;
        }
        // 後ろに移動
        if (Input.GetKey(KeyCode.S)) {
            move.z = -50.0f;
        }
        // 左に移動
        if (Input.GetKey(KeyCode.A)) {
            move.x = -50.0f;
        }
        // 右に移動
        if (Input.GetKey(KeyCode.D)) {
            move.x = 50.0f;
        }

        // moveの移動量をもとにキャラクターを移動
        Rigidbody rb = GetComponent<Rigidbody>();
        rb.AddForce(move);
    }
}
Add Componentで先ほど書いたスクリプトを追加します
カメラを制御する
カメラの情報を取得するスクリプトを書きます
GameObject camera;
// Start is called before the first frame update
void Start()
{
    // カメラの情報を取得
    camera = GameObject.Find("Main Camera");

}
カメラのベクトルに合わせてキャラクターを移動させるようにプログラムを修正しましょう。
void FixedUpdate()
{
    // XYZの3Dを表すための型です
    Vector3 move = Vector3.zero;

    // 移動量を表す変数
    // 正面
    Vector3 front = camera.transform.forward;
    // 右方向
    Vector3 side = camera.transform.right;
}
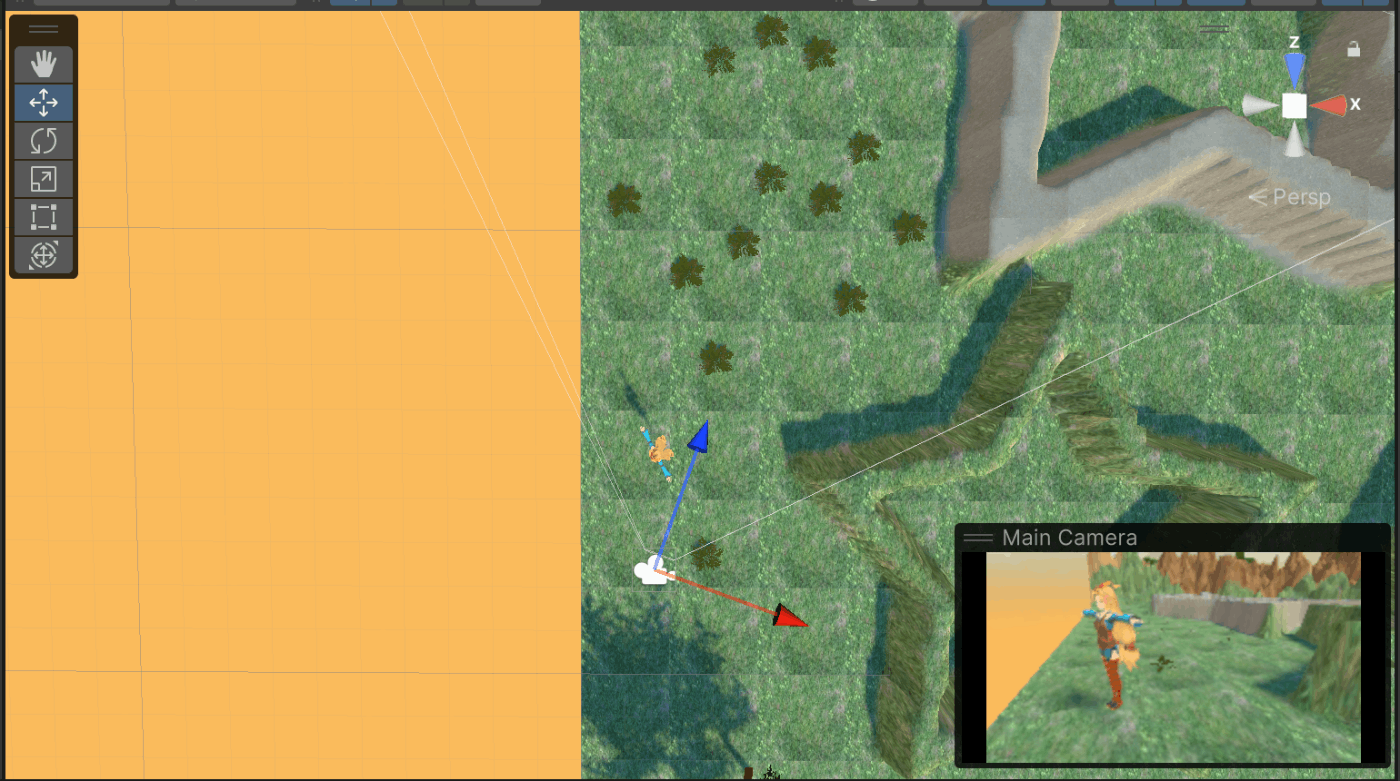
if (Input.GetKey(KeyCode.W)) {
    // 軸に沿っての移動しかできない
    // move.z = 15.0f;

    // ベクトルで示された方向に移動
    move += front * 15.0f;
}
カメラをキャラクターに追随するようにする
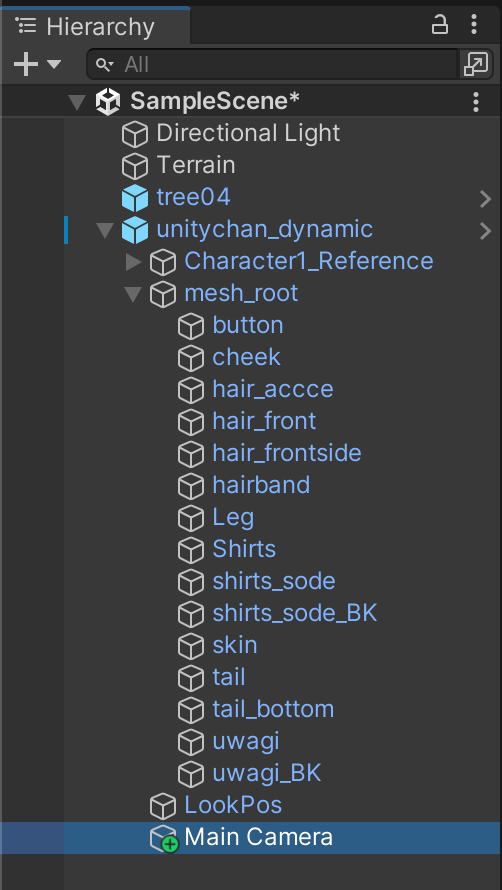
ヒエラルキーからカメラをキャラクターの下に移動する
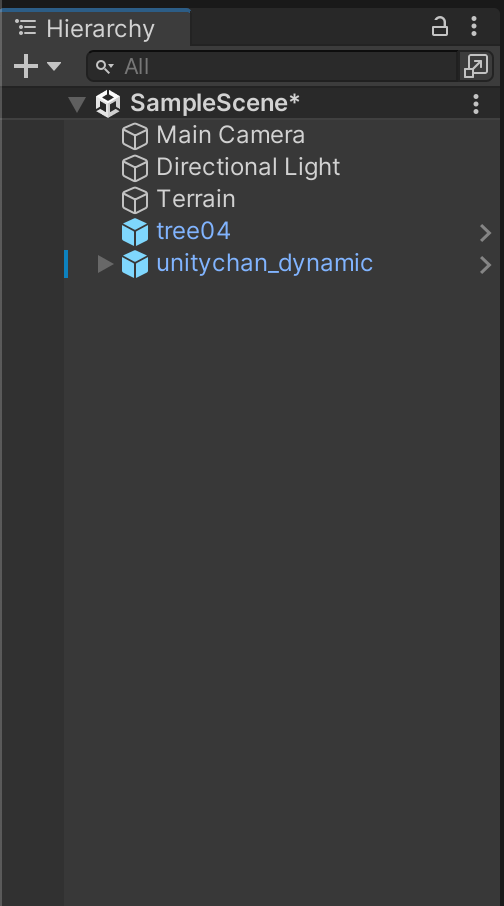
カメラをマウスに合わせて操作する
まずはマウスの感度を調整する
using System.Collections;
using System.Collections.Generic;
using UnityEngine;

public class CameraMove : MonoBehaviour
{
    // カメラ感度の調整
    public float mouseSpeedX = 1.0f;
    public float mouseSpeedY = 1.0f;
    // Start is called before the first frame update
    void Start()
    {
        // この中で書くのがゲームのロード画面
    }

    // Update is called once per frame
    void Update()
    {
        // マウスの移動量を取得
        float mx = Input.GetAxis("Mouse X");
        float my = Input.GetAxis("Mouse Y");

        // カメラを回転させる
        transform.RotateAround(Vector3.up, mx * mouseSpeedX);
    }
}
transform.RotateAround(Vector3.up, mx * mouseSpeedX);
一つ目の引数では回転する軸を指定して、二つ目では回転量を表します
しかしこのコードではカメラがキャラクターの位置に関係なく、回転してしまいます。
キャラクターを中心に回転させるように修正していきましょう
public class CameraMove : MonoBehaviour
{
    // カメラ感度の調整
    public float mouseSpeedX = 1.0f;
    public float mouseSpeedY = 0.5f;

    GameObject player; // プレイヤーの情報
    // Start is called before the first frame update
    void Start()
    {
        player = GameObject.Find("Player");
    }

    // Update is called once per frame
    void Update()
    {
        // マウスの移動量を取得
        float mx = Input.GetAxis("Mouse X");
        float my = Input.GetAxis("Mouse Y");

        // カメラを回転させる
        transform.RotateAround(
            Vector3.up, // 回転する軸の指定
            mx * mouseSpeedX // 回転する量
        );
        // 横回転した後に縦回転
        // 上下45度まで回転できるように制限
        transform.RotateAround(
            transform.right, //カメラの右方向
            my * mouseSpeedY
        );

        // カメラの位置を調整
        // カメラをプレイヤーと同じ位置に配置
        transform.position = player.transform.position;
        // 足元を映してしまうので、胸の高さまで移動
        transform.position += Vector3.up * 1.5f;

        // カメラの正面方向と反対の方向に移動
        // カメラをプレイヤーの後ろに配置
        transform.position += transform.forward * -3.0f;
    }
}
キャラクターにアニメーションをつける
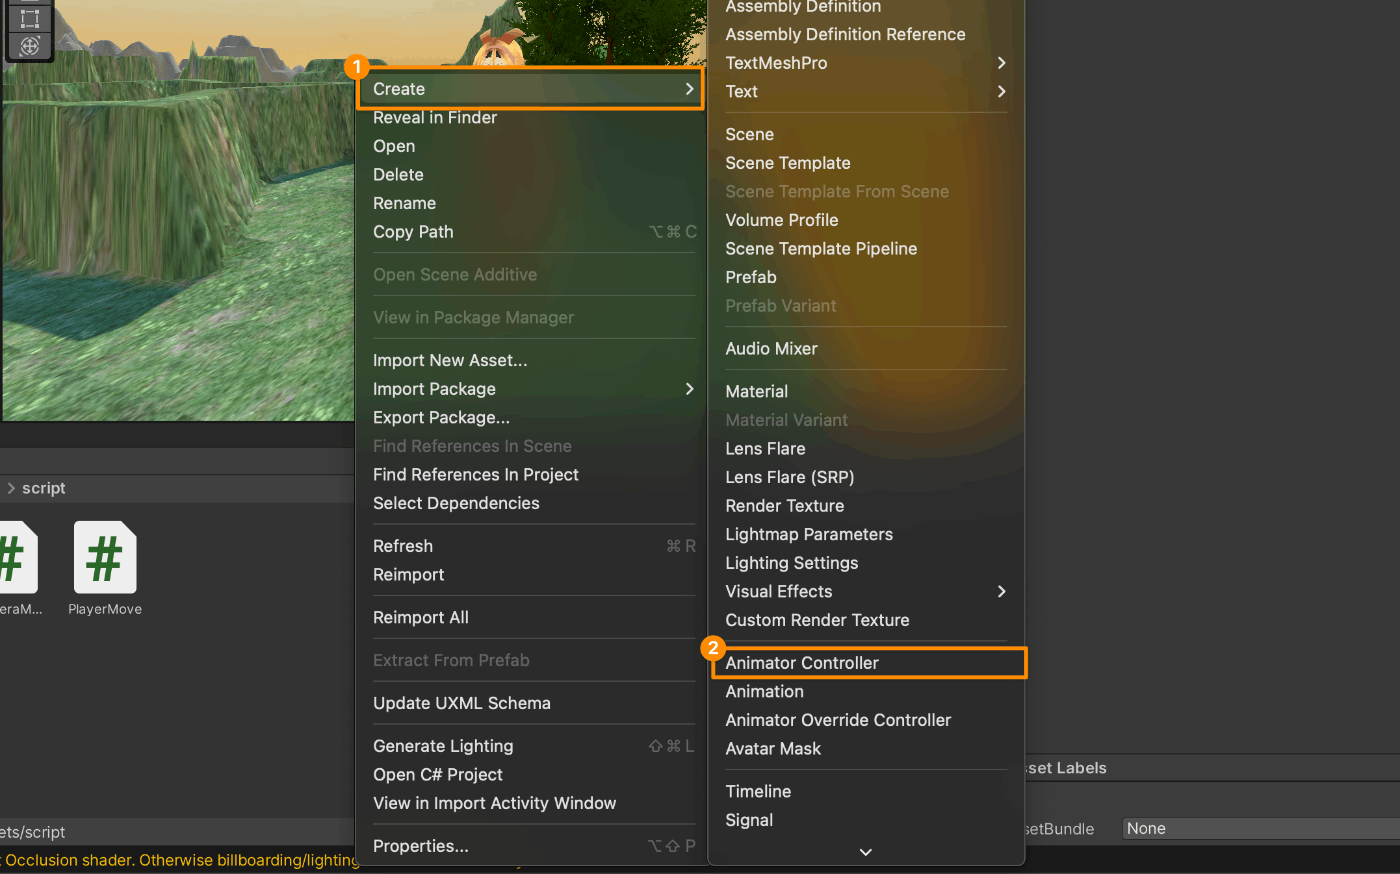
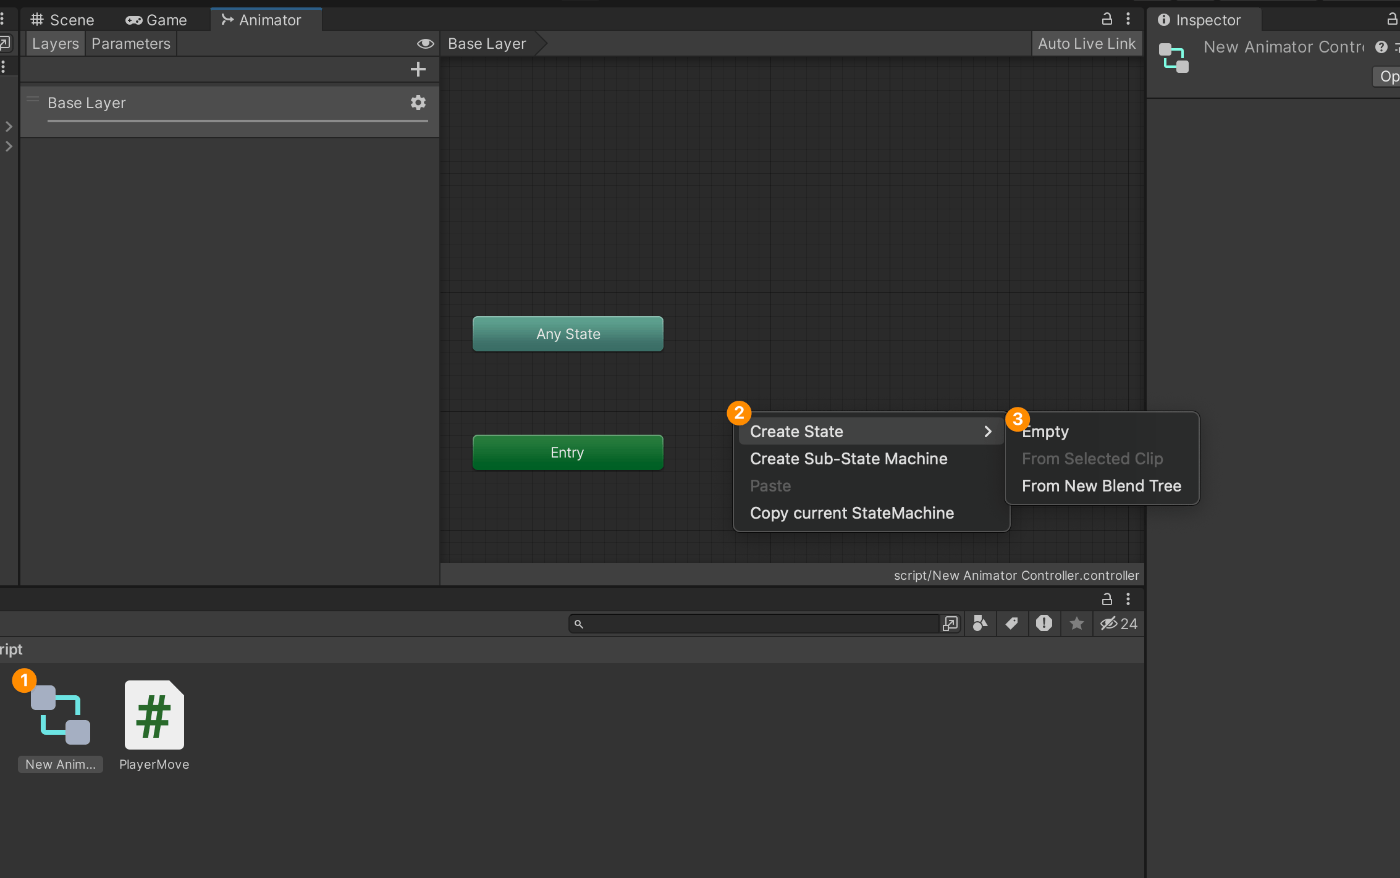
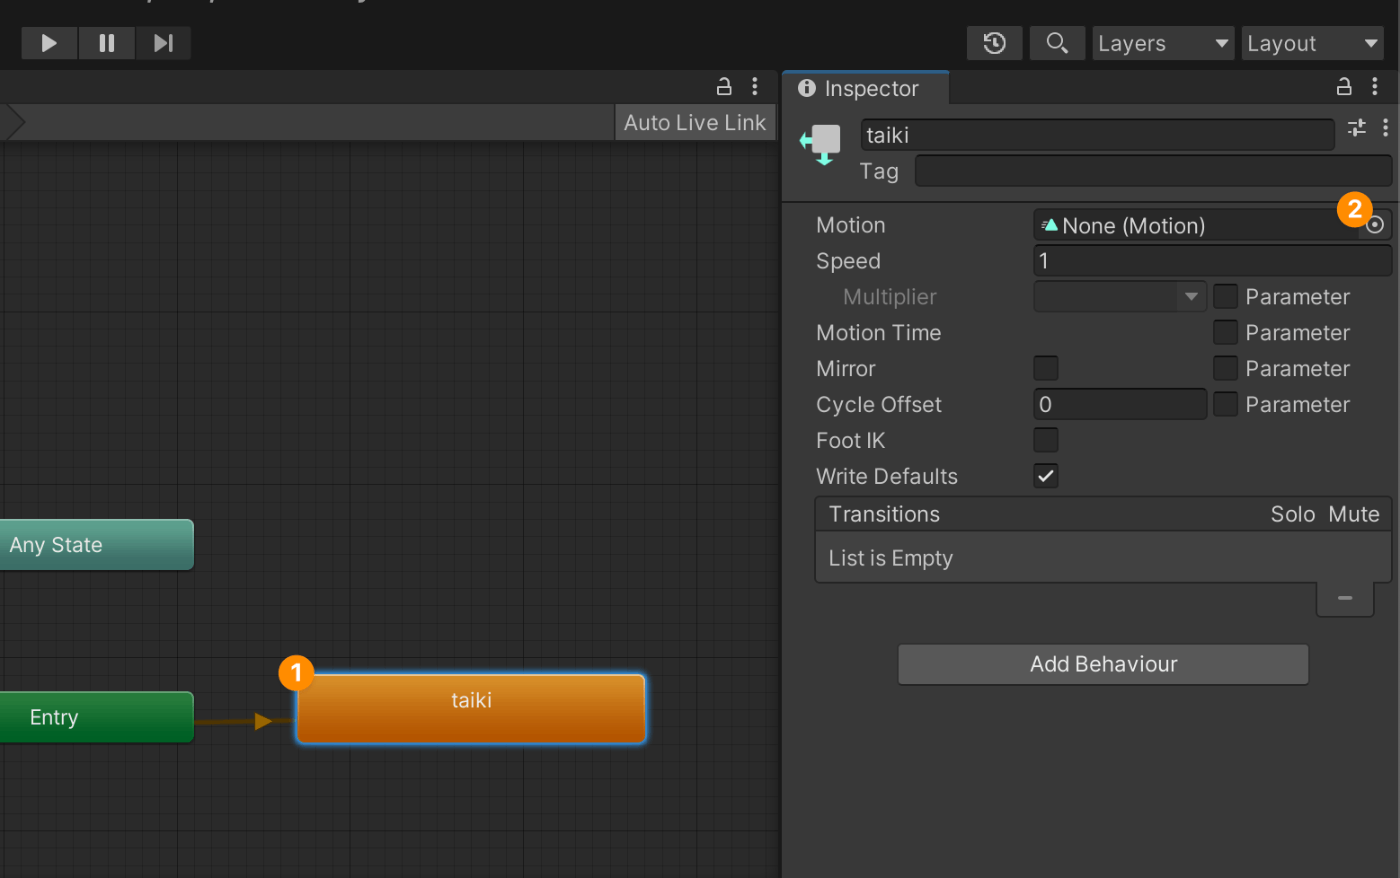
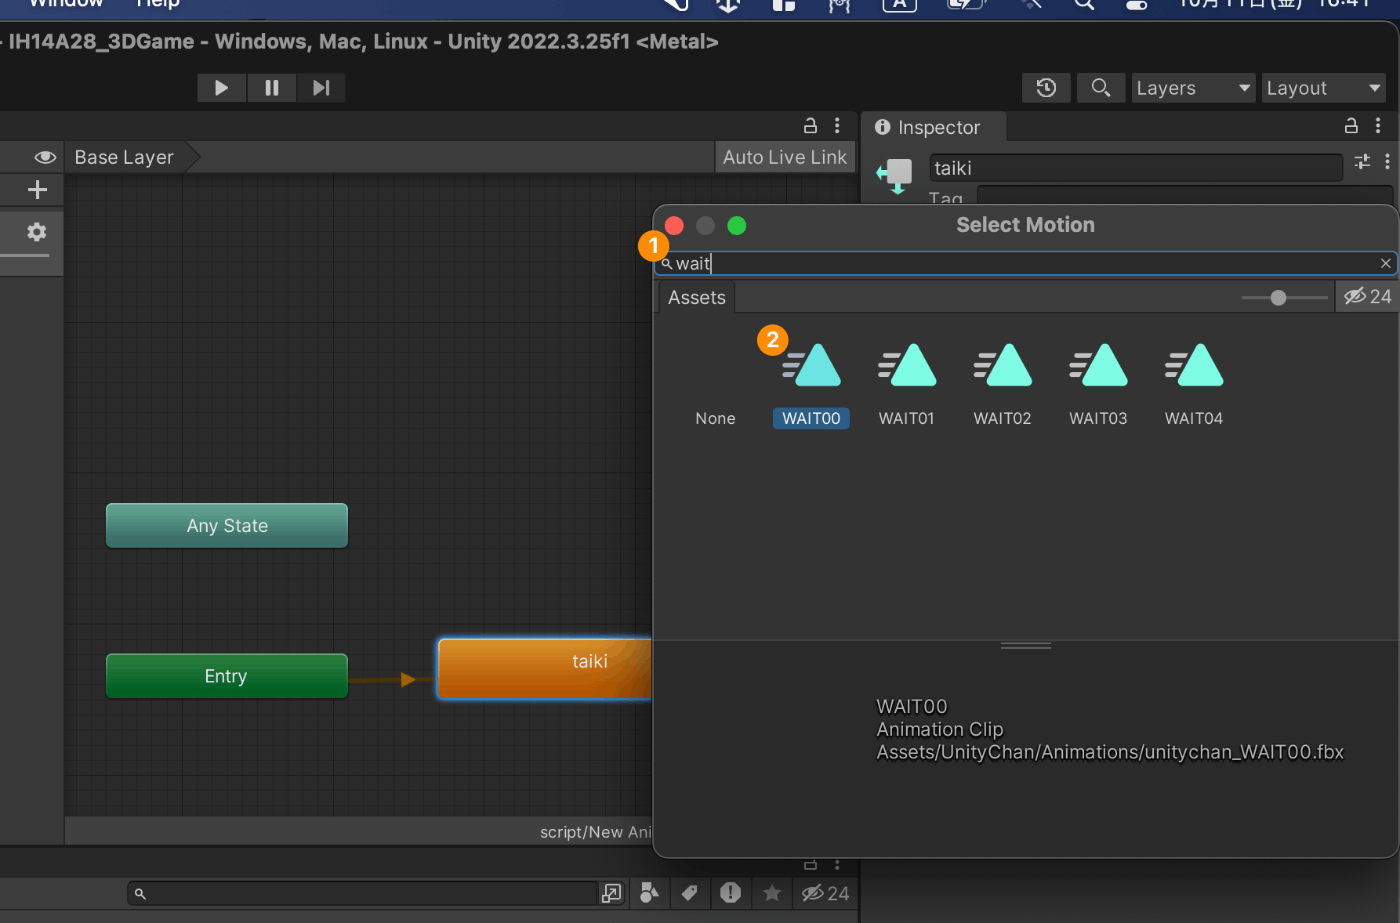
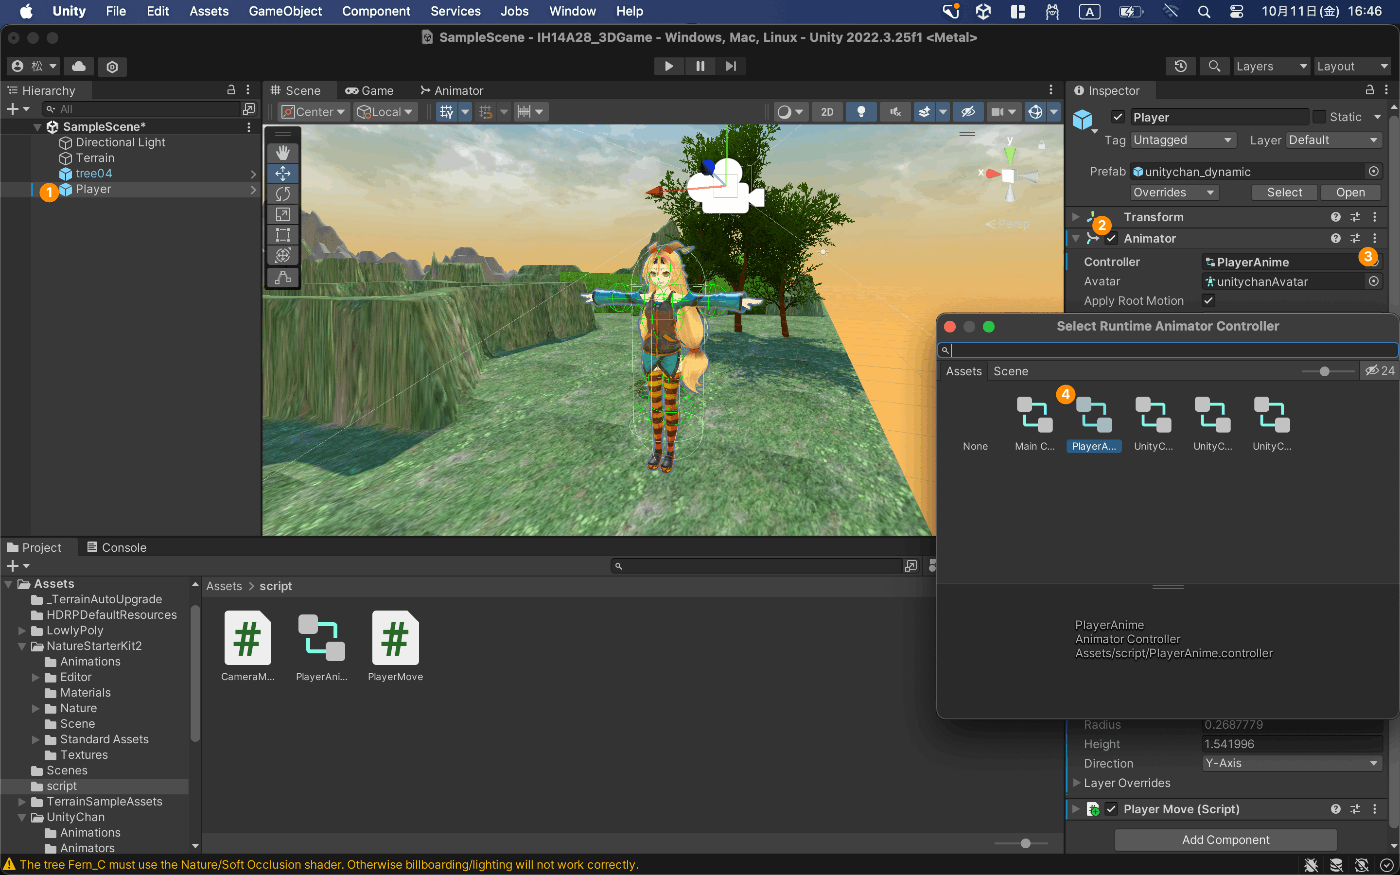
右クリックしてMake トランディションで線を繋げるとアニメーションを切り替えることができる

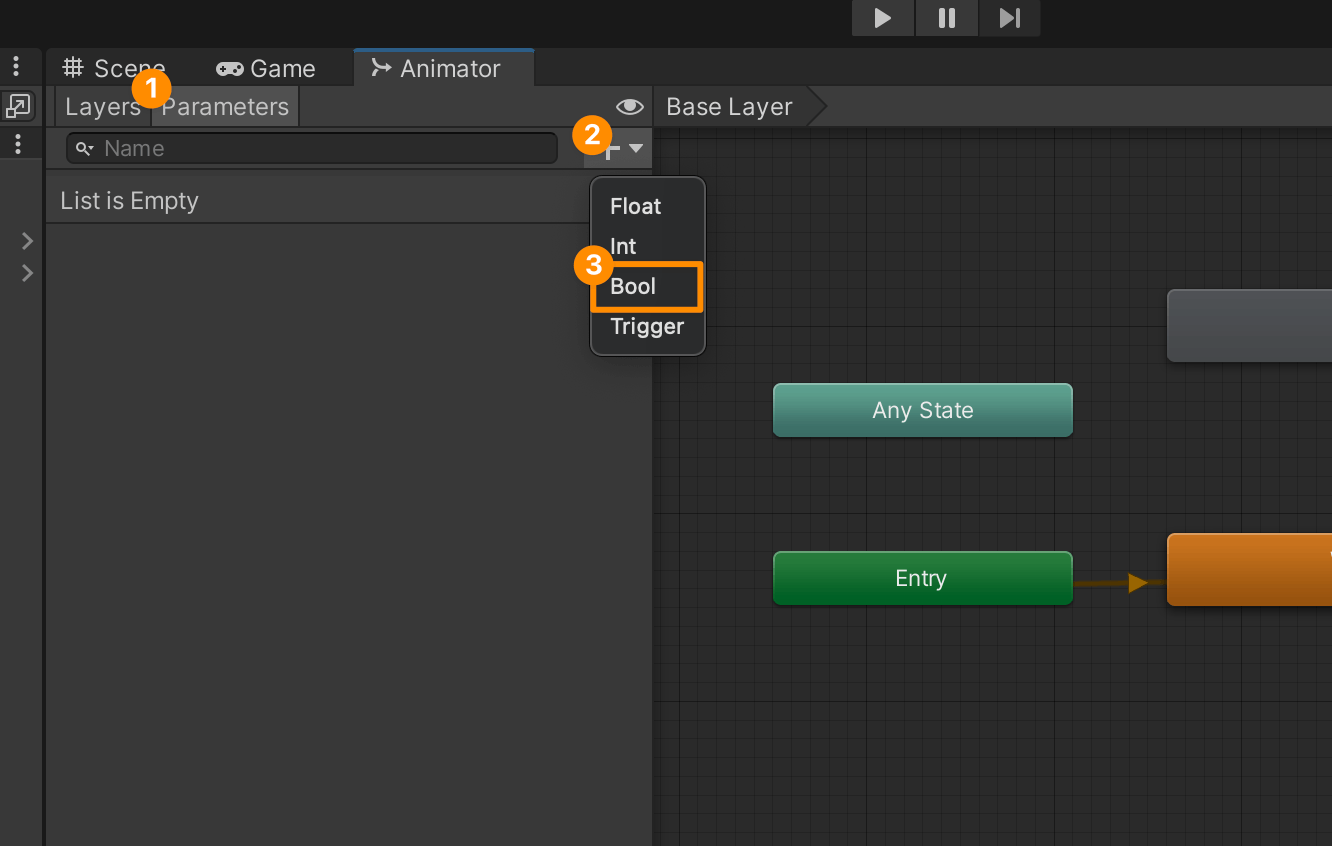
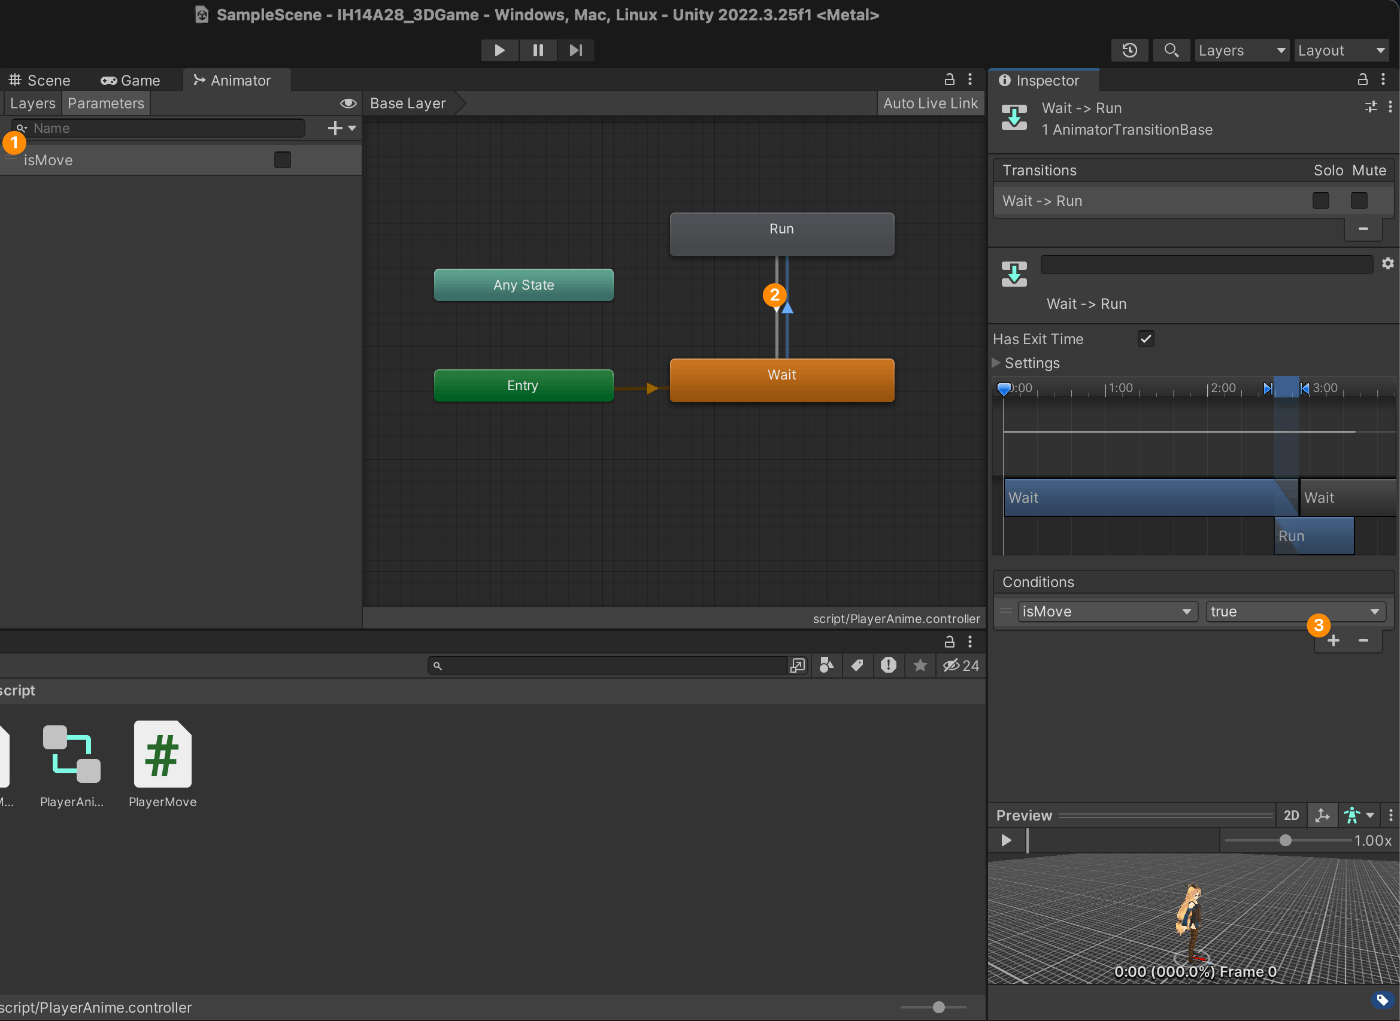
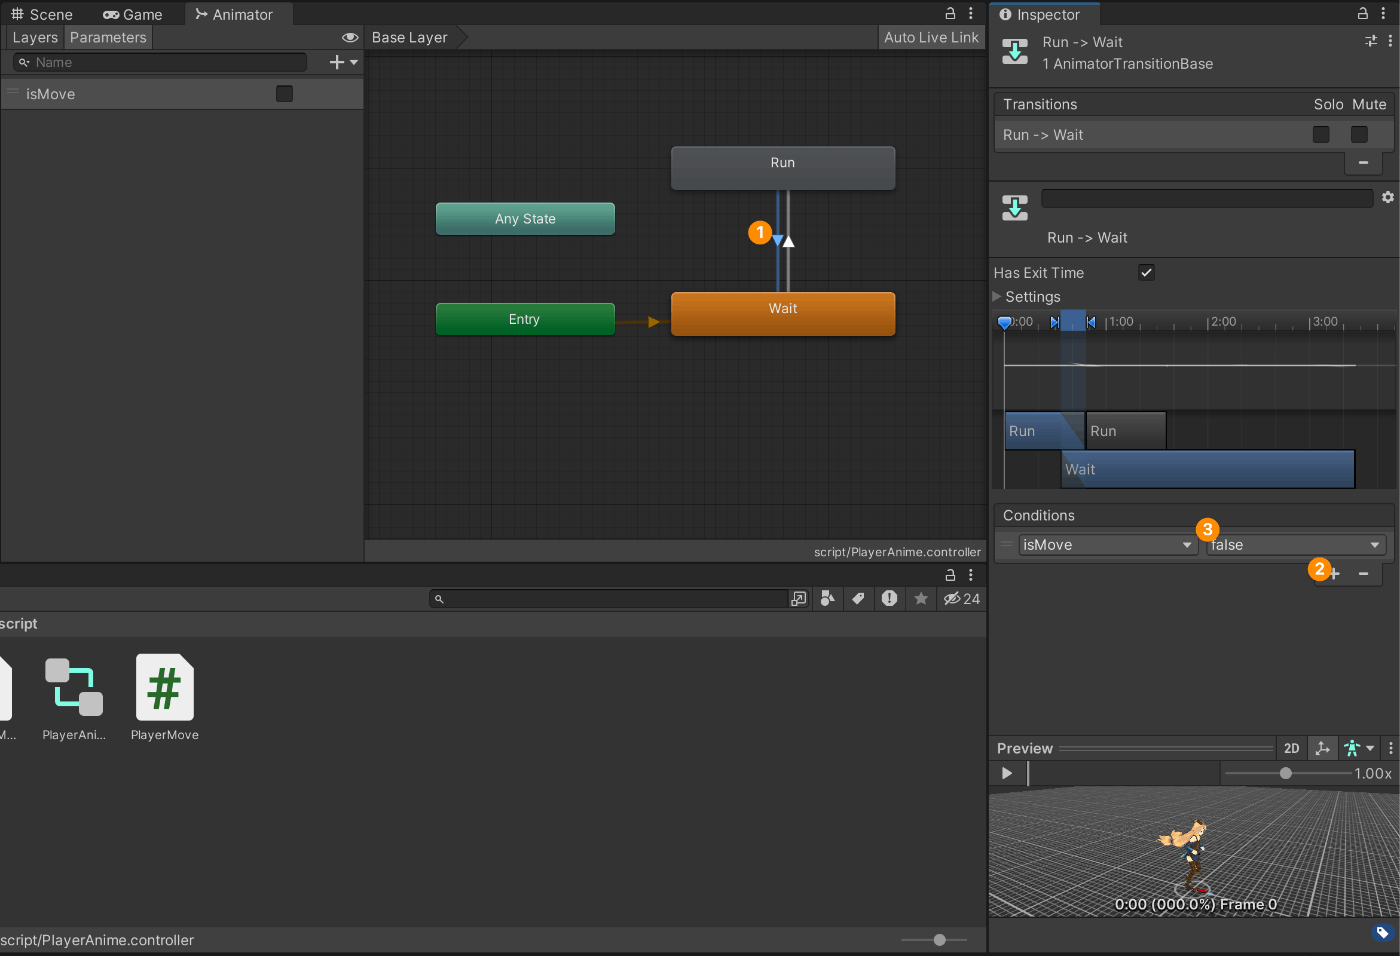
手動でUnityのエディタで切り替えることはできますが、プログラムでやらせたいです。
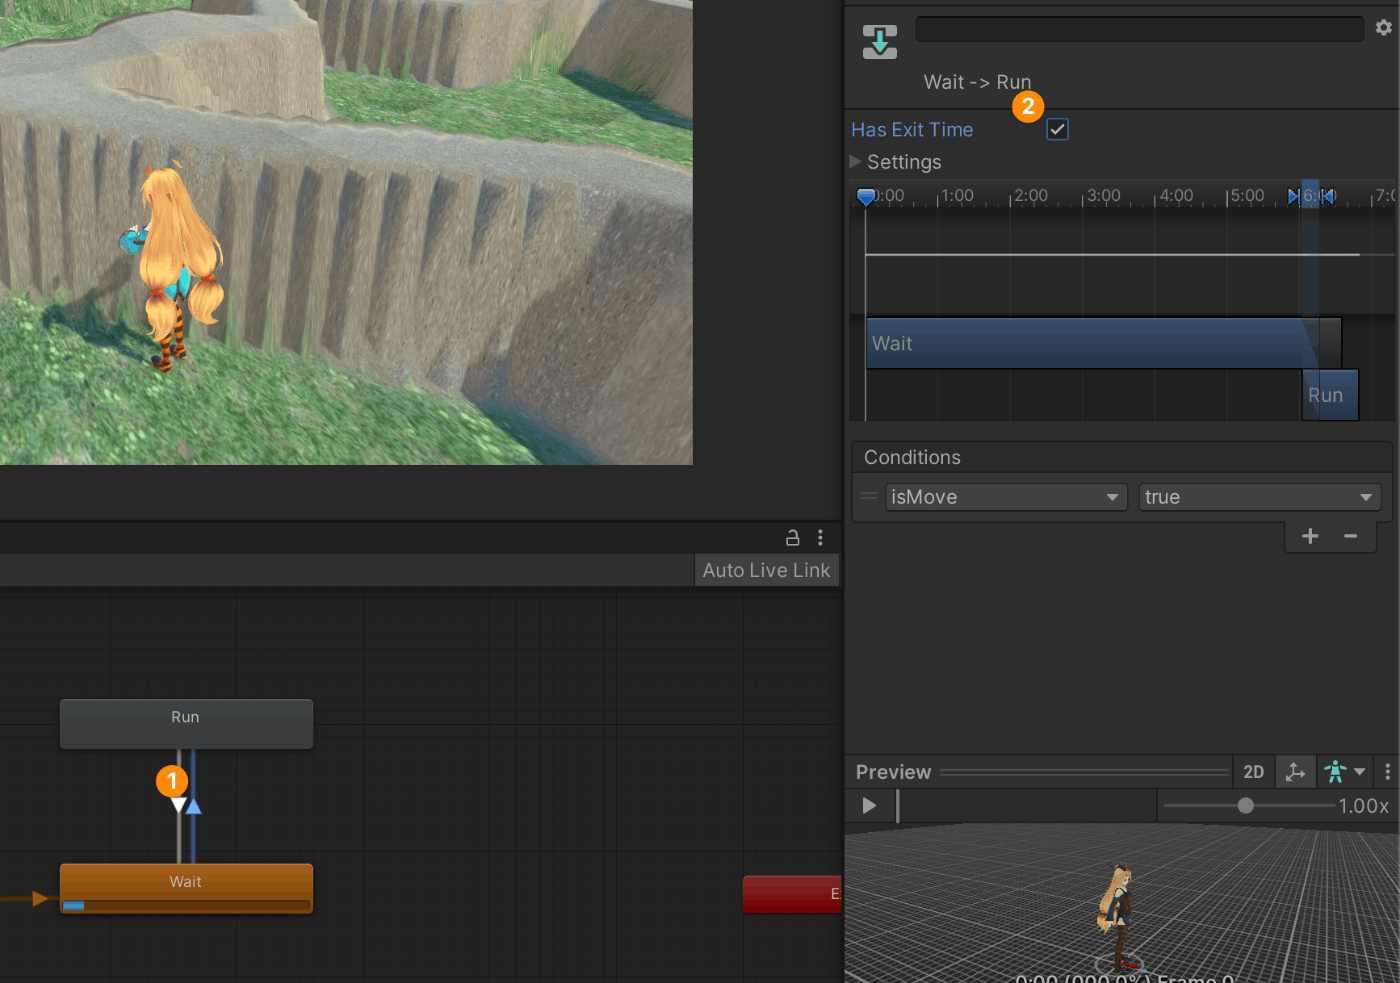
アニメーションが1週してからじゃないと切り替わらないのを修正します
ここのチェックを外します
プレイヤーにジャンプさせる
ファイル名をPlayerMoveを編集
using System.Collections;
using System.Collections.Generic;
using UnityEngine;

public class PlayerMove : MonoBehaviour
{
    // Start is called before the first frame update
    void Start()
    {...}

    // UpdateはEditor上ではPCが出せる最高性能で動作する
    // FixedUpdateは実行ファイルと同じ速度で動作する
    void Update() {
        // ジャンプを追加する
        Rigidbody rd = GetComponent<Rigidbody>();
        if(Input.GetKeyDown(KeyCode.Space)) {
                rb.AddForce(0.0f, 10.0f, 0.0f, ForceMode.Impulse);
        }
    }

    void FixedUpdate()
    {...}
}
このままでは空中でもジャンプできてしまいます。そのため、地面に触れているかの判定でRayを飛ばして判定します。レーザーを足から飛ばして帰ってくる時間?で判定するものです。
using System.Collections;
using System.Collections.Generic;
using UnityEngine;

public class PlayerMove : MonoBehaviour
{
    // Start is called before the first frame update
    void Start()
    {...}

    // UpdateはEditor上ではPCが出せる最高性能で動作する
    // FixedUpdateは実行ファイルと同じ速度で動作する
    void Update() {
        // Ray(直線, 光線)
        // 地面にいるか判定
        Ray ray = new Ray(
            transform.position,
            new Vector3(0.0f, -1.0f, 0.0f) // 光線の出発点、光線の方向
        );

        // Rayのレーザーを使用して何かにぶつかったか判定
        RaycastHit result;
        bool isGround = false; // 地面にいるかフラグ
        // ray - 飛ばす光線の元データ
        // result - ぶつかった時の詳細な情報
        // 3.0f - 光線を飛ばす距離
        if(Physics.Raycast(ray, out result, 3.0f)) {
            // 地面までの距離を調べる
            if(result.distance < 0.3f) {
                isGround = true;
            } else {
                isGround = false;
            }
        }

        // ジャンプを追加する
        Rigidbody rd = GetComponent<Rigidbody>();
        if(isGround && Input.GetKeyDown(KeyCode.Space)) {
                rb.AddForce(0.0f, 10.0f, 0.0f, ForceMode.Impulse);
        }
    }

    void FixedUpdate()
    {...}
}
敵キャラクターを追加する

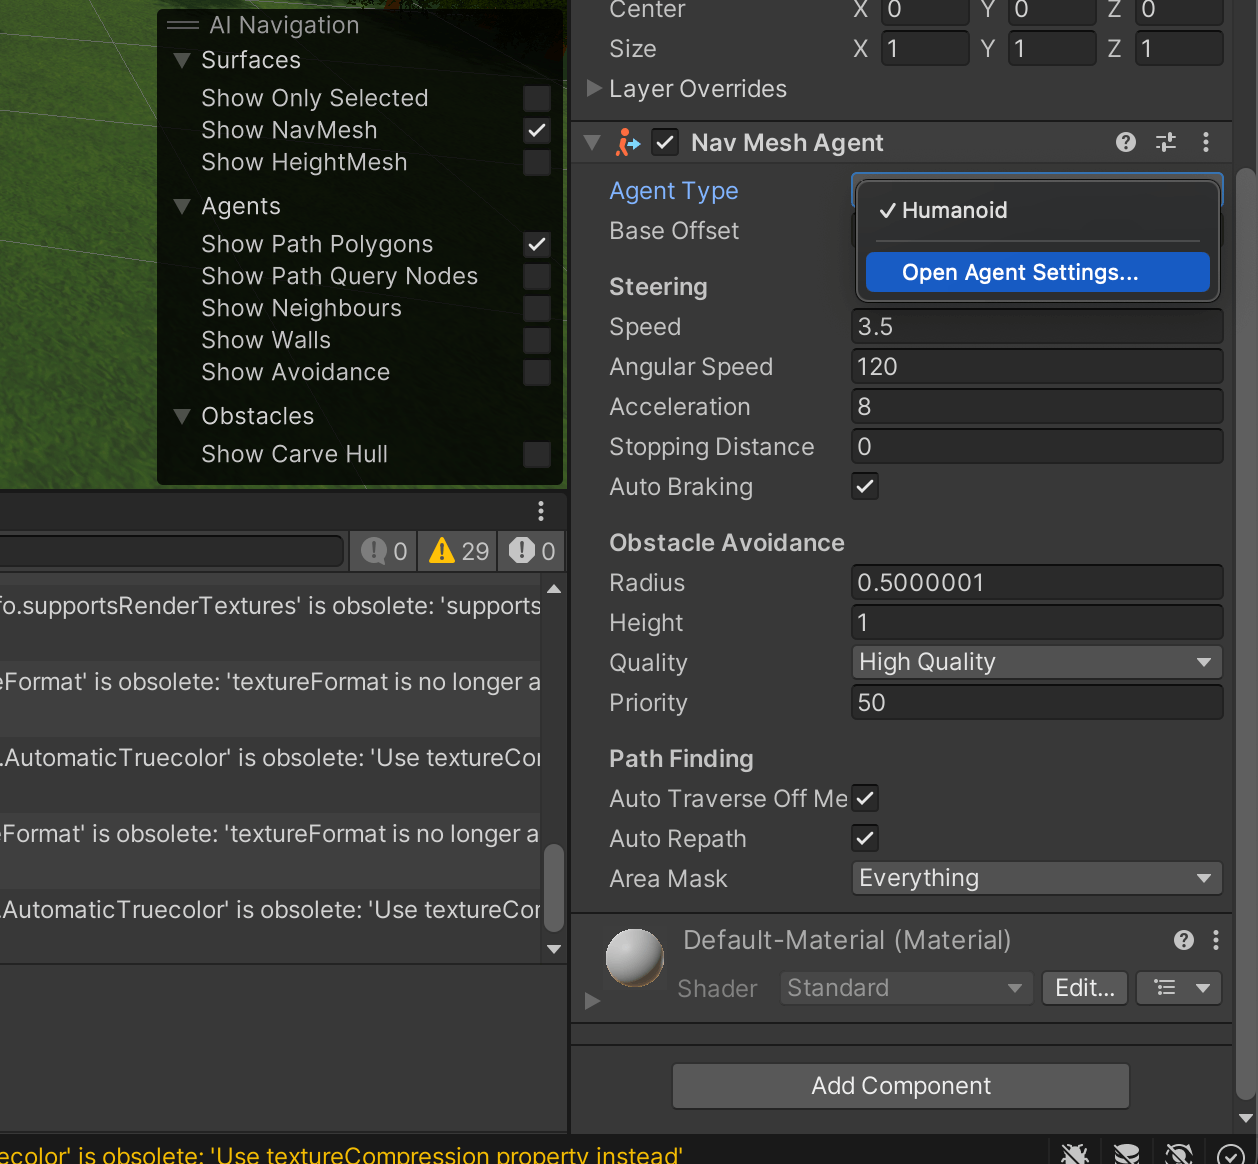

using System.Collections;
using System.Collections.Generic;
using UnityEngine;

using UnityEngine.AI;

public class Enemy : MonoBehaviour
{
    NavMeshAgent ai;
    GameObject player;
    // Start is called before the first frame update
    void Start()
    {
        ai = GetComponent<NavMeshAgent>();
        player = GameObject.Find("Player");
    }

    // Update is called once per frame
    void Update()
    {
        ai.SetDestination(player.transform.position);
    }
}
攻撃用のたまを追加する
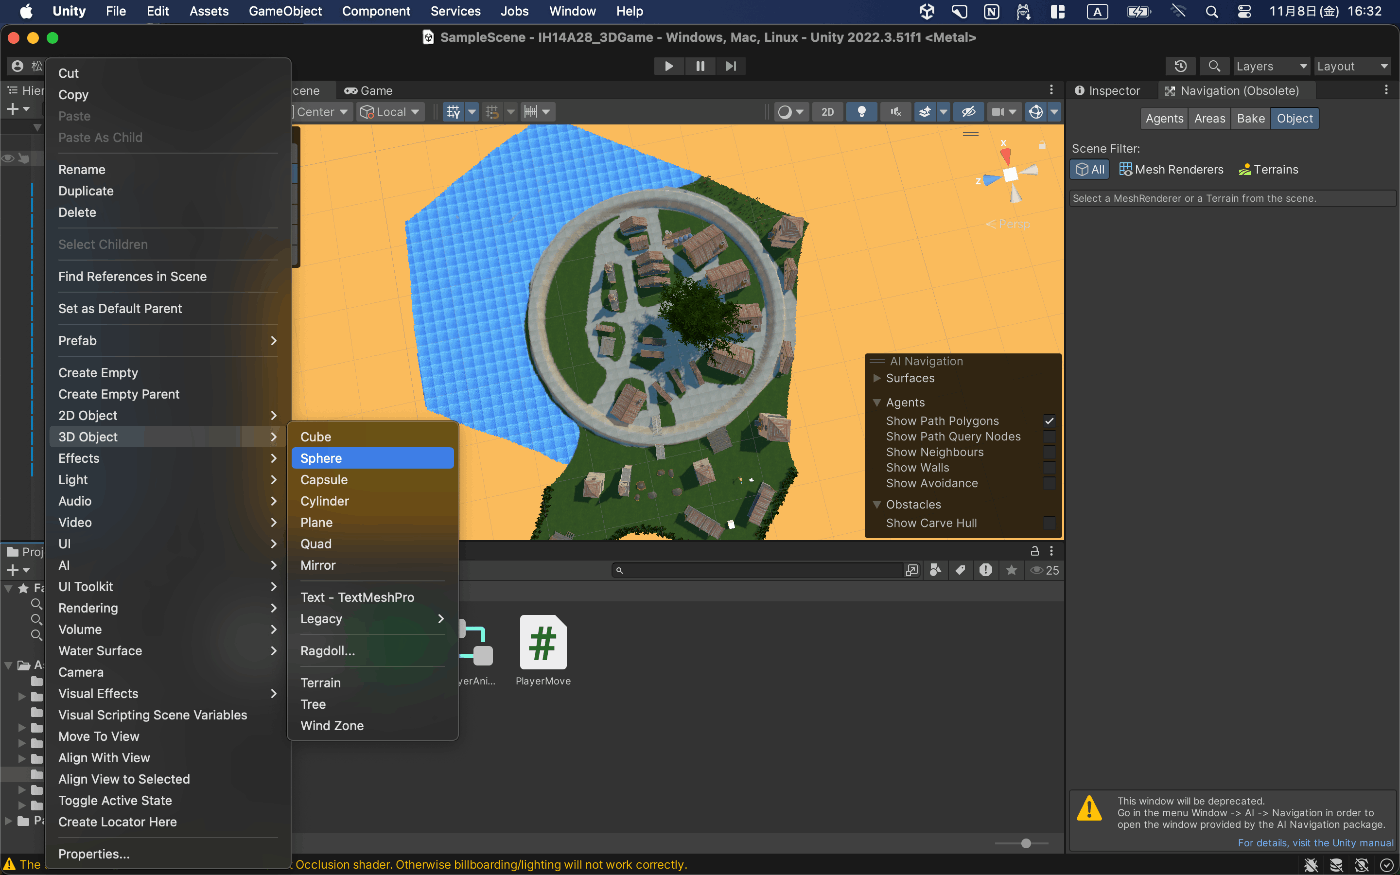
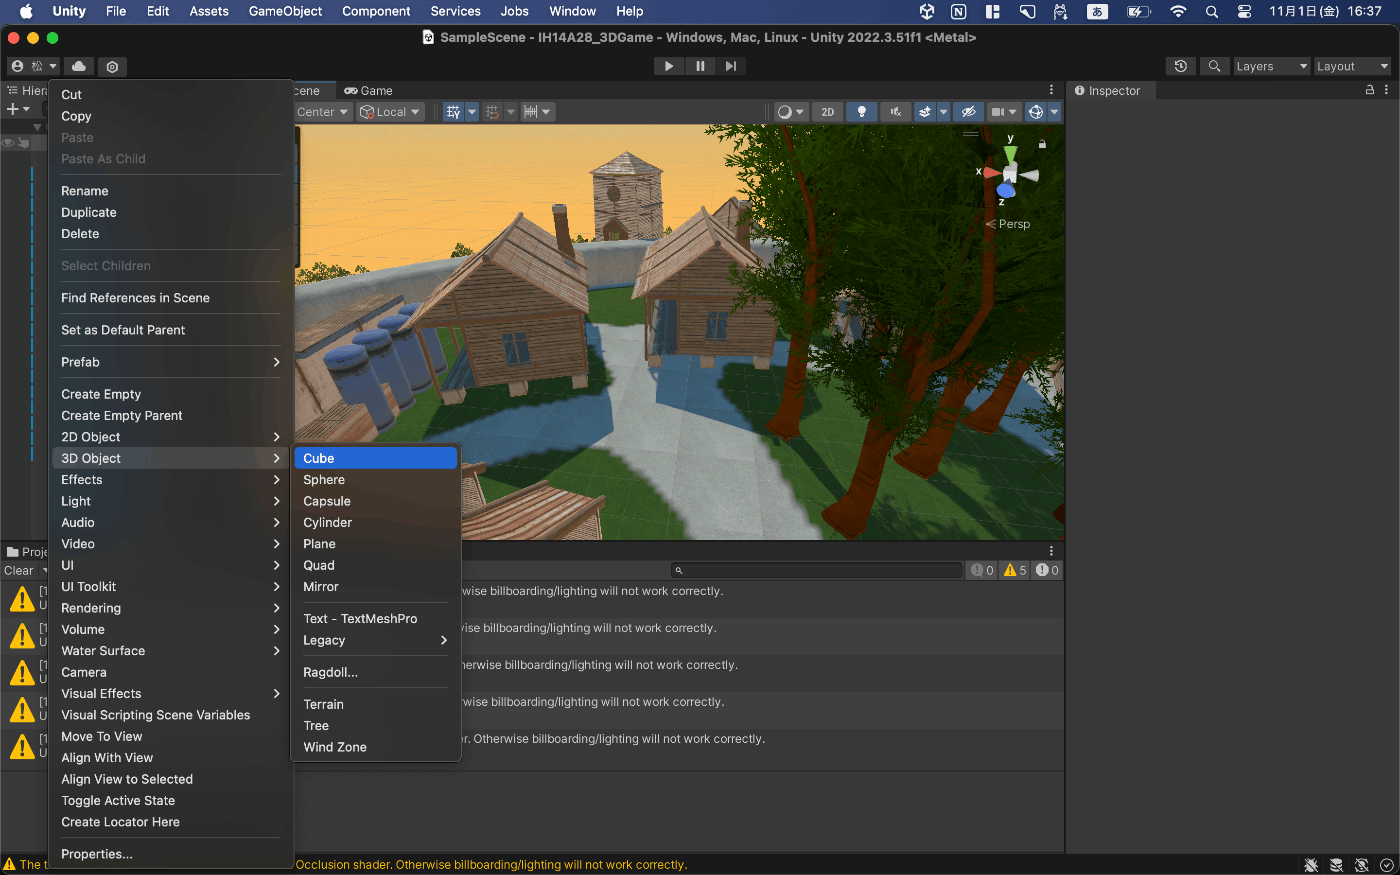
ヒエラルキーを右クリックして3Dオブジェクトからスフィアを追加します。
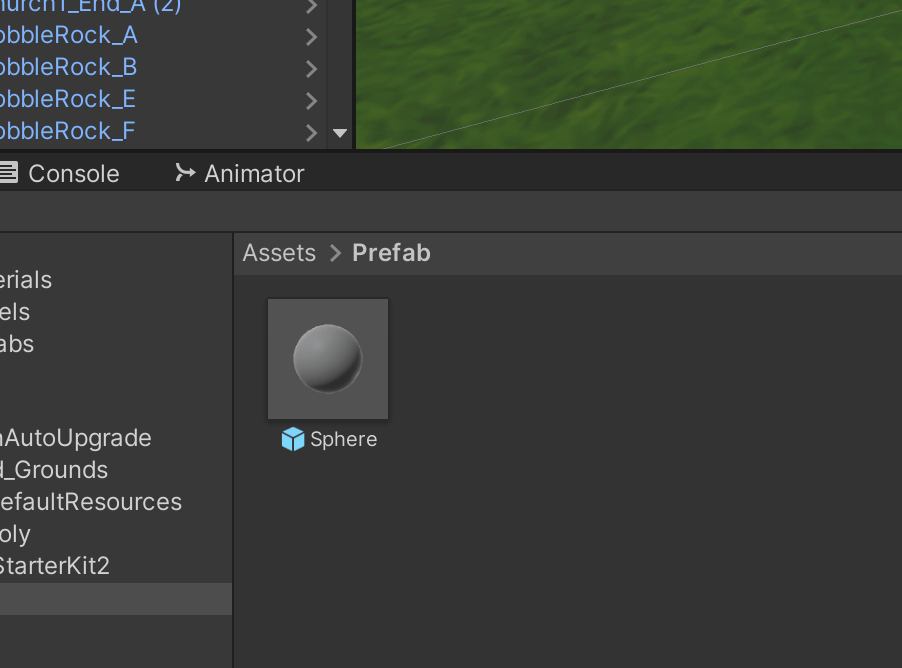
リジッドボディーを追加し、ヒエラルキーからProjectにドラッグ&ドロップしてプレファブを作ります
マウスをクリックしたら弾のコピーを作成する
using System.Collections;
using System.Collections.Generic;
using UnityEngine;

public class PlayerShot : MonoBehaviour
{
    // 弾の情報を保存
    public GameObject prefab;

    // Start is called before the first frame update
    void Start()
    {

    }

    // Update is called once per frame
    void Update()
    {
        if (Input.GetKey(KeyCode.Mouse0)) {
            Instantiate(prefab, transform.position, Quaternion.identity);
        }
    }
}
Instantiate(prefab, transform.position, Quaternion.identity);
第一引数がコピーするもの
第二引数がコピーする場所
第三引数が角度です。
キャラクターに先ほど作ったスクリプトを追加します。
そしてスクリプトにプレファブをドラッグ&ドロップで適用してあげます。

弾を飛ばすための処理を追加
    void Update()
    {
        if (Input.GetKey(KeyCode.Mouse0)) {
            GameObject copy = Instantiate(prefab, transform.position, Quaternion.identity);
            Rigidbody rb = copy.GetComponent<Rigidbody>();
            rb.AddForce(transform.forward * 100.0f, ForceMode.Impulse);
        }
    }
敵キャラクターを倒す処理を追加
ぶつかったものを削除する
public class Bullet : MonoBehaviour
{
    // 弾が何かに当たった時に呼ばれる関数
    void OnCollisionEnter(Collision collision) {
        Destroy(collision.gameObject);
    }
}
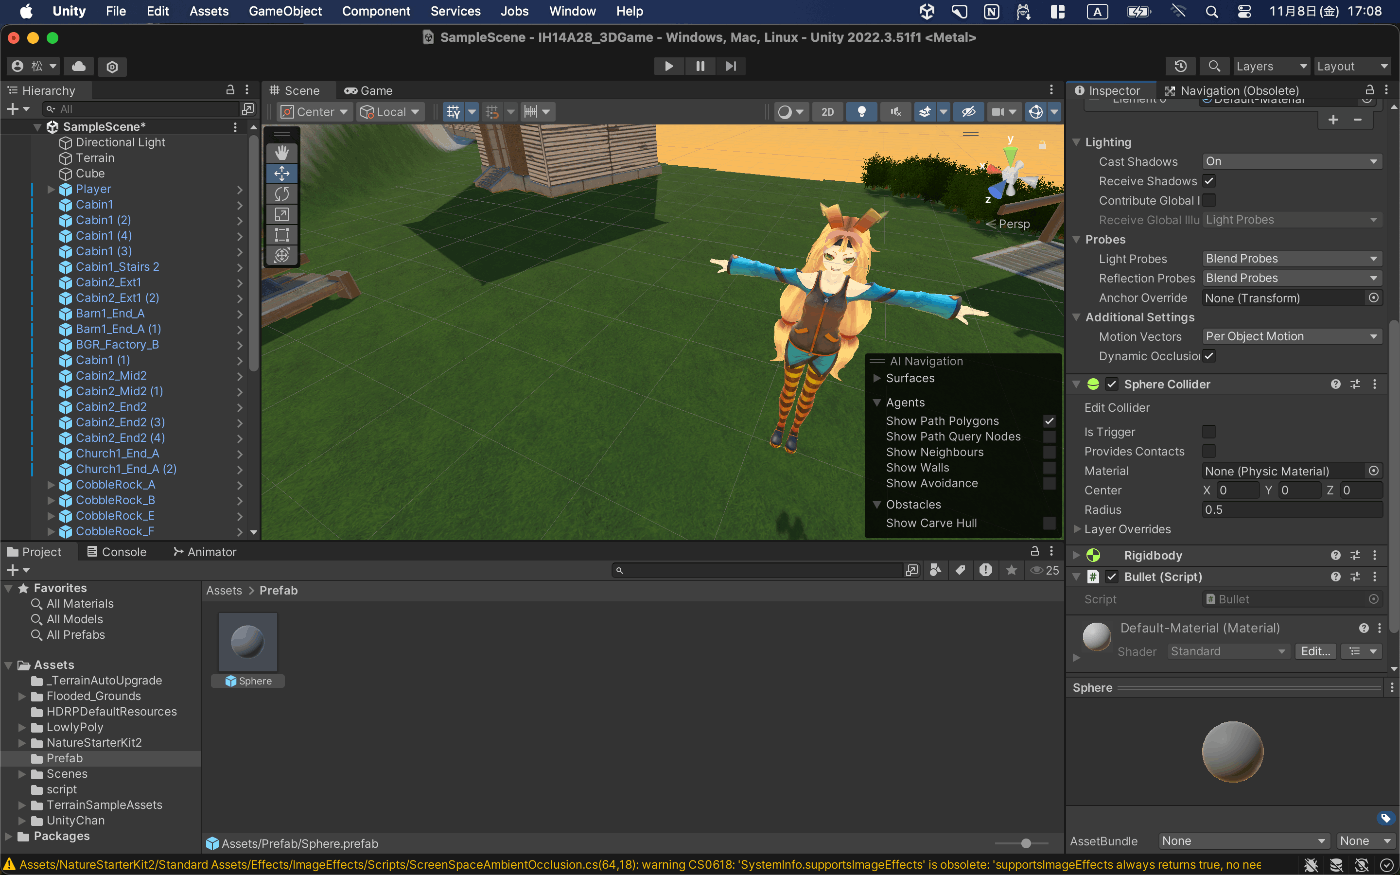
このままでは的キャラクター以外も消えてしまうので敵にタグを追加する
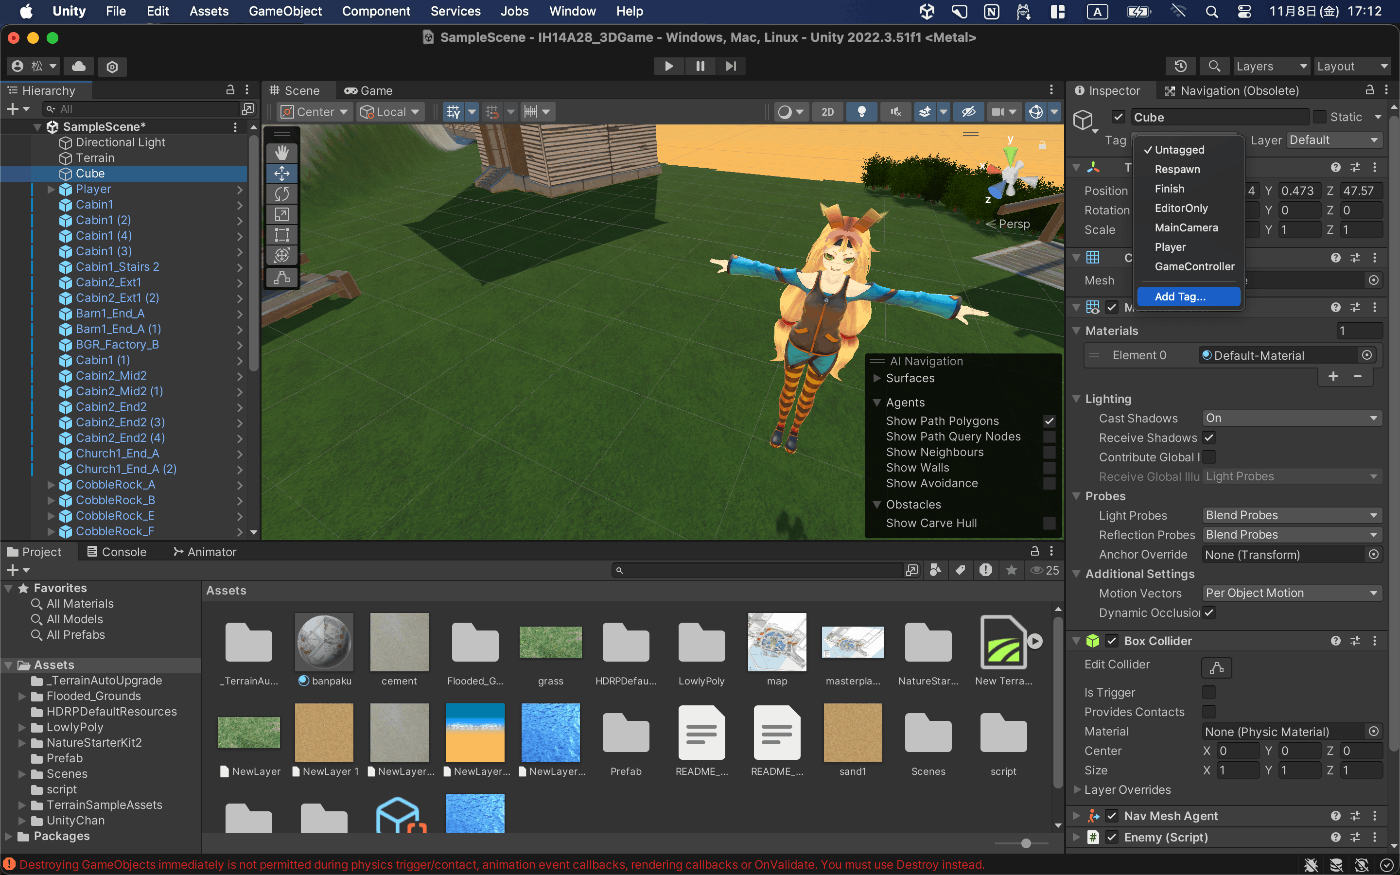
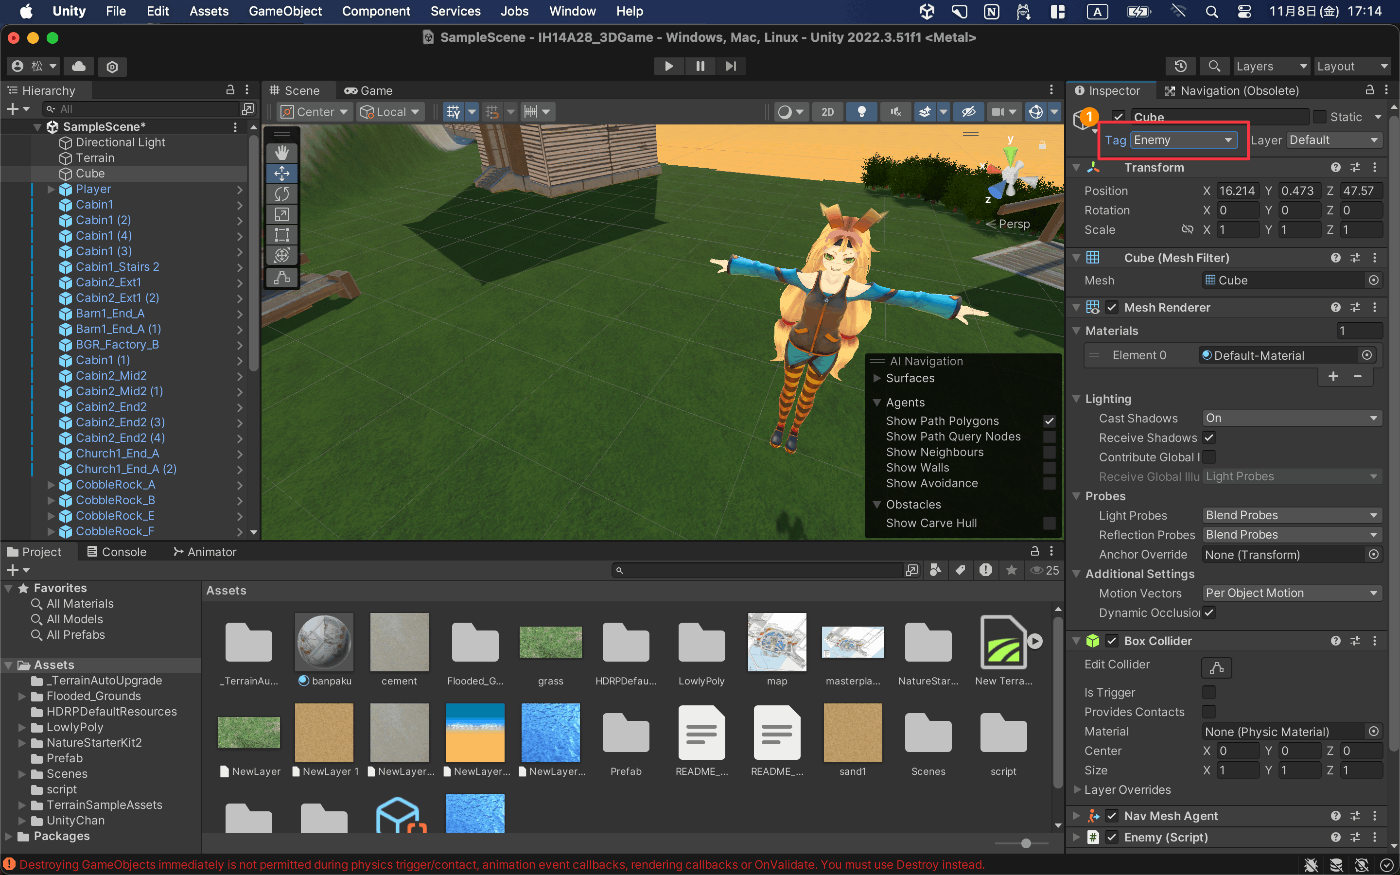
// 弾が何かに当たった時に呼ばれる関数
void OnCollisionEnter(Collision collision) {
    if (collision.gameObject.tag == "Enemy") {
        Destroy(collision.gameObject);
    }
}
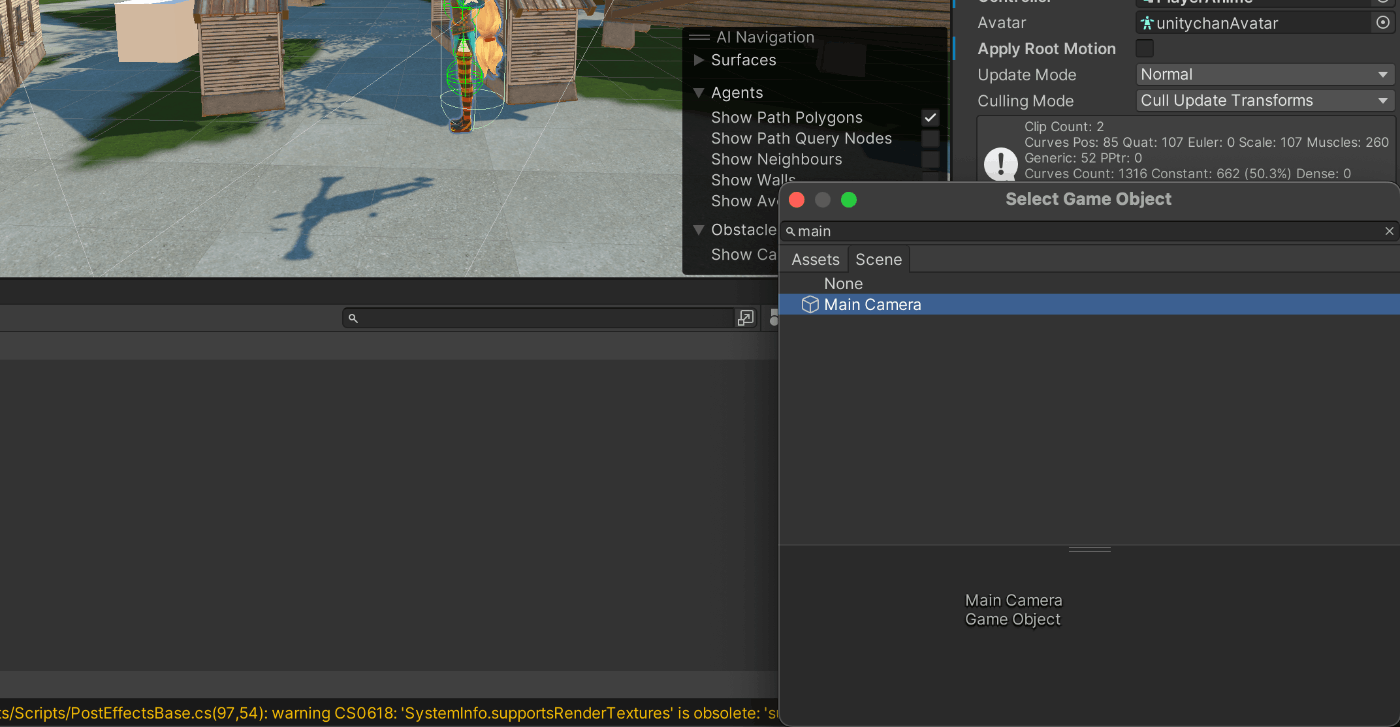
カメラの方向に向けて弾を発射する
public GameObject camera;
rb.AddForce(camera.transform.forward * 40.0f, ForceMode.Impulse);
コードを追加したらプレイヤーのインスペクターのcameraにMain Cameraをセットします
ゲームクリア画面を作成
TextMeshProをUIから作成します。
ポップアップ表示は上のボタンだけ押してから消します
最初にTextを非表示にしてから
敵を全部倒し終わったらプログラムでテキストを表示するように変更します。
// TextMeshProの機能を追加
using TMPro;

public class GameClear : MonoBehaviour
{
    TextMeshProUGUI text;
    // Start is called before the first frame update
    void Start()
    {
        text = GetComponent<TextMeshProUGUI>();
        // テキスト表示を消す
        text.enabled = false;
    }

    // Update is called once per frame
    void Update()
    {
        // 特定のタグのオブジェクトを全て取得
        GameObject[] objects = GameObject.FindGameObjectsWithTag("Enemy");

        // Enemyタグの敵が一人もいなくなった
        if (objects.Length == 0)
        {
            text.enabled = true;
        }
    }
}
Discussion