TypeScriptでWordのアドインを作成するための調査(失敗編)
目的
TypeScriptでWordのアドインを作成して、閉じられた環境でのWordの自動操作が行えるかを確認する。
環境:
node:v20.11.1
macOS 15.11
Word: バージョン 16.91 (24111020) Microsoft 365 のサブスクリプション
結論
調べた範囲だと限定された範囲での配布の要件がめんどくさそうなので調査中断
WindowsだけならVSTOとかのほうが配布については楽そう。
あるいはScriptLabの方がシンプルでいいのでは?
.NETを入れていい前提ならOpenXML SDKの方がいい。最近ではMacでもEC2でも動く
環境構築
アドイン用プロジェクトの作成
Yeoman と Office アドイン用の Yeoman ジェネレーターをインストールする
npm install -g yo generator-office
これらをインストールすることでMicrosoftOffice用のアドインプロジェクトを容易に作成できるようになる
次にアドインプロジェクトを作成する。
yo office
Choose a project typeで Office Add-in Task Pane projectを選択
Choose a script typeで TypeScriptを選択
What do you want to name your add-in?で任意のプロジェクト名。このプロジェクト名のサブフォルダが作られる
Which Office client application would you like to support? で Wordを選択する
これでサブフォルダにプロジェクト用のファイルが作られます。
参考:
実行方法
プロジェクトフォルダに移動したのち、ローカルWebサーバーを起動する
npm run dev-server
下記のコマンドを実行することでアドインを含んだWordが起動する
npm start

アドイン用のアイコンが右上に表示されるので、それをクリックするとアドインのHTMLで実装したパネルが右側に表示される。
このHTMLのソースはsrc/taskpane/taskpane.htmlが該当し、CSSとJSもそこから参照されている。
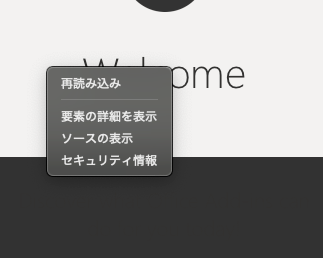
パネルを右クリックして「要素の詳細を表示」を行うことで、Webインスペクターが起動する


console.logなどの結果はここに表示される。
なお、ローカル Web サーバーを停止してアドインをアンインストールする場合は、以下のコマンドを実行する
npm stop
サンプルコード
選択箇所に文字を挿入するサンプル

export async function run() {
  return Word.run(async (context) => {
    console.log('run....')

    // 複数の要素としてテキストを挿入
    const paragraph = context.document.body.insertParagraph("", Word.InsertLocation.end);
    const rangeH = paragraph.insertText("H", Word.InsertLocation.end)
    rangeH.font.color = "red"; // "H" を赤色
    rangeH.font.size = 16
    const rangeAfter = paragraph.insertText("ello world!", Word.InsertLocation.end)
    rangeAfter.font.color = "blue"; // 残りの部分
    rangeAfter.font.size = 12

    // 変更を反映
    await context.sync();
  });
}
段落ごとのテキストを取得するサンプル

  return Word.run(async (context) => {
    const body = context.document.body;
    const paragraphs = body.paragraphs;
    paragraphs.load("items");

    await context.sync();

    console.log(`段落数: ${paragraphs.items.length}`);

    for (let i = 0; i < paragraphs.items.length; i++) {
      const paragraph = paragraphs.items[i];
      console.log(`段落 ${i + 1}: "${paragraph.text}"`);
    }
  });
文字ごとにフォントのサイズと色をコンソールログに出力するサンプル

実は文字ごとのサイズやフォントを取得する手段が見つからなくて、XMLを解析するはめになっている
export async function run() {
  return Word.run(async (context) => {
    console.log('run....')

    // 文書の本文を表すBodyオブジェクトを取得
    const body = context.document.body;

    // 本文のOOXMLを取得
    const ooxmlResult = body.getOoxml();

    // 非同期処理の同期
    await context.sync();

    // ooxmlResult.valueにOOXML文字列が入る
    const ooxmlString = ooxmlResult.value;

    console.log("OOXML:", ooxmlString);

    // DOMParserを用いてXMLとして解析
    const parser = new DOMParser();
    const xmlDoc = parser.parseFromString(ooxmlString, "application/xml");

    // 全ての<w:r>タグ(ラン)を取得
    const runs = xmlDoc.getElementsByTagNameNS("http://schemas.openxmlformats.org/wordprocessingml/2006/main", "r");

    for (let i = 0; i < runs.length; i++) {
      const run = runs[i];

      // <w:t>タグでテキストを取得(複数ある場合は結合)
      const tElems = run.getElementsByTagNameNS("http://schemas.openxmlformats.org/wordprocessingml/2006/main", "t");
      let runText = "";
      for (let j = 0; j < tElems.length; j++) {
        runText += tElems[j].textContent;
      }

      // <w:rPr>タグでフォント情報取得
      const rPr = run.getElementsByTagNameNS("http://schemas.openxmlformats.org/wordprocessingml/2006/main", "rPr")[0];
      let colorVal = "";
      let sizeVal = "";
      if (rPr) {
        const color = rPr.getElementsByTagNameNS("http://schemas.openxmlformats.org/wordprocessingml/2006/main", "color")[0];
        const sz = rPr.getElementsByTagNameNS("http://schemas.openxmlformats.org/wordprocessingml/2006/main", "sz")[0];

        // color属性やsz属性から値を抽出
        if (color && color.getAttribute("w:val")) {
          colorVal = color.getAttribute("w:val");
        }
        if (sz && sz.getAttribute("w:val")) {
          // szの値は1/2pt単位なので、例えば"24"は12ptに相当
          const halfPt = parseInt(sz.getAttribute("w:val"), 10);
          sizeVal = (halfPt / 2) + "pt";
        }
      }

      console.log(`Run ${i + 1}: Text="${runText}", Color="${colorVal}", Size="${sizeVal}"`);
    }
  });
特定の文字にコメントを付与するサンプル

export async function run() {
  return Word.run(async (context) => {
    // 検索したい文字列
    const searchText = "猫";

    // 文書全体から検索
    const searchResults = context.document.body.search(searchText, {matchCase: true, matchWholeWord: false});
    searchResults.load("items");
    await context.sync();

    for (const result of searchResults.items) {
      // 検索結果範囲にコメントを挿入
      result.insertComment("ここに『猫』という単語があります。");
    }

    await context.sync();
    console.log("指定の文字にコメントを付与しました");
  });
}
OpenAIで文章構成させて指摘事項をコメントで付与する

axiosをインストールする。
npm install --save axios
基本的にはブラウザで動くライブラリでしか使用できないので注意すること。
サンプルコードは以下の通り。ただし、エラーハンドリングなどはしていないので、文章によってはエラーが出る。
その場合は再読み込みをして再実行する
import axios from 'axios';

Office.onReady((info) => {
  if (info.host === Office.HostType.Word) {
    document.getElementById("sideload-msg").style.display = "none";
    document.getElementById("app-body").style.display = "flex";
    document.getElementById("run").onclick = run;
  }
});

export async function run() {
  return Word.run(async (context) => {
    const body = context.document.body;
    body.load("text"); // ドキュメント全体のテキストを読み込み
    const paragraphs = context.document.body.paragraphs;
    paragraphs.load("items");
    await context.sync();

    const documentText = body.text; // ドキュメント全体の内容

    // OpenAI API を呼び出してテキストを再構成
    const openAIResponse = await axios.post(
      "https://api.openai.com/v1/chat/completions",
      {
        model: "gpt-3.5-turbo",
        messages: [
          {
            role: "system",
            content: `指定した内容の誤字脱字を検出してください。
            指摘箇所は指摘内容と行、列数を指定してください
            結果はJSON形式で返却してください
            [
              {
               "originalText": "吾輩は猫です",
                 "fixText": "吾輩は猫である"
                 "message": "ですとであるが混在している",
                 "row" : 1,
                 "startCol" : 1,
                 "endCol" : 8
              }
            ]
            `,
          },
          { role: "user", content: documentText },
        ],
      },
      {
        headers: {
          Authorization: `Bearer xxxxxxxxxxxxxxxxxx`, // OpenAI API キー
          "Content-Type": "application/json",
        },
      }
    );

    const resContents = openAIResponse.data.choices[0].message.content;
    for (const item of JSON.parse(resContents)) {
      console.log(item.originalText, item.fixText, item.message, item.row, item.startCol, item.endCol);
      const searchResults = paragraphs.items[item.row-1].search(
        item.originalText, { matchCase: true }
      );
      searchResults.load("items");
      await context.sync();
      console.log(searchResults)
      if (searchResults.items.length > 0) {
        console.log("コメント挿入。");
        const range = searchResults.items[0];
        range.insertComment(`${item.message}`);
        await context.sync();
      } else {
        console.log("指定の部分文字列が見つかりませんでした。");
      }
    }

  });
}
ビルドと配布方法
限られた範囲のリリースがかなり面倒。
おそらく、最低限HTTPSサーバーが必要で、そこにnpm buildで作ったリソースを置く必要がある。
VBAの代替でやるもんじゃない。
単体テストの方法
Unitテスト用のモックライブラリはあるのでなんとかなるか?
所感
Wordでサポートされている多くの機能の操作はできるが、限られた範囲での配布のハードルが高すぎるので一時の思いつきでやるものではなさそう
参考ページ
サンプルコード
Word JavaScript API の概要
APIリファレンス
トラブルシューティング
Office アドイン開発のベスト プラクティス
Discussion