【Next.js】Apollo ServerでGraphQLサーバを起動する


概要
- @apollo/server でGraphQLサーバーを起動
- prisma でDBリソースをモデル化
- @prisma/client でGraphQLリゾルバでORMを使えるように
- @graphql-codegen でGraphQL Documentsを自動生成
- @apollo/client でGraphQLを叩く
サンプルプロジェクト
今回の記事の内容を最小限の構成で構築したnext.jsのサンプルプロジェクト
パッケージインストール
# apollo周り
npm install graphql @apollo/client @apollo/server @as-integrations/next
# prisma 周り
npm install @prisma/client prisma
# graphql-codegen 周り
npm install -D @graphql-codegen/cli @graphql-codegen/typescript @graphql-codegen/typescript-operations @graphql-codegen/typescript-react-apollo
Prisma 設定
initコマンドを実行し、prisma/schema.prisma と .envファイル を生成
npx prisma init
.envファイル はデフォルトでこのように作られるため DBプロバイダ(mysqlやpostgresql)://ユーザー名@ホスト名:ポート番号/DB名 のフォーマットで適切な値を入力
DATABASE_URL="postgresql://johndoe:randompassword@localhost:5432/mydb?schema=public"
schema.prisma は provider の変更が必要な場合は更新
generator client {
  provider = "prisma-client-js"
}

datasource db {
  provider = "mysql" // 変更が必要な場合は postgresql 等に変更
  url      = env("DATABASE_URL")
}
package.json ファイルに、DBからスキーマを取得しPrismaスキーマを更新するコマンド(prisma db pull)と、Prismaスキーマを読み取りPrismaクライアントコードを更新するコマンド(prisma generate)を追加。
(⚠️ Prisma 3.0.0 以降から prisma introspect は非推奨となり prisma db pull に移行)
{
  "scripts": {
    "dev": "next dev",
    "build": "next build",
    "start": "next start",
    "lint": "next lint",
    "prisma-db-pull": "prisma db pull",
    "prisma-generate": "prisma generate"
  },
prisma db pull を実行し、DBスキーマをPrismaスキーマに反映
npm run prisma-db-pull 実行結果
% npm run prisma-db-pull

> nextjs-with-apollo-and-prisma@0.1.0 prisma-db-pull
> prisma db pull

Prisma schema loaded from prisma/schema.prisma
Environment variables loaded from .env
Datasource "db": MySQL database "***" at "localhost:3307"

✔ Introspected 1 model and wrote it into prisma/schema.prisma in 79ms

Run prisma generate to generate Prisma Client.
↓のように schema.prisma にDBスキーマの内容がモデル化されればOK
/// This model or at least one of its fields has comments in the database, and requires an additional setup for migrations: Read more: https://pris.ly/d/database-comments
model products {
  id              Int       @id @default(autoincrement()) @db.UnsignedInt
  brand_name      String    @default("") @db.VarChar(50)
  product_name    String    @default("") @db.VarChar(100)
}
prisma-generate を実行しPrismaスキーマをPrismaクライアントコードに反映
npm run prisma-generate 実行結果
% npm run prisma-generate

> nextjs-with-apollo-and-prisma@0.1.0 prisma-generate
> prisma generate

Environment variables loaded from .env
Prisma schema loaded from prisma/schema.prisma

✔ Generated Prisma Client (v5.6.0) to ./node_modules/@prisma/client in 47ms
GraphQLスキーマ・クエリ・ミューテーション定義
src/graphql 配下にGraphQLスキーマとクエリ、ミューテーションの定義
type Product {
    id: ID!
    brand_name: String!
    product_name: String!
}

input ProductInput {
    brand_name: String!
    product_name: String!
}

type Query {
    products: [Product]
}

type Mutation {
    createProduct(input: ProductInput): Product
}
query Products {
    products {
        id
        brand_name
        product_name
    }
}
mutation createProduct($input: ProductInput!) {
    createProduct(input: $input) {
        brand_name
        product_name
    }
}
@apollo/server 設定
GraphQLサーバの起動には @as-integrations/next を利用する
(@apollo/server の公式ドキュメントでも紹介されているパッケージ)
src/pages/api/graphql.ts に @apollo/server 設定ファイルを作成
import { ApolloServer } from "@apollo/server";
import { startServerAndCreateNextHandler } from "@as-integrations/next";
import { PrismaClient } from "@prisma/client";
import { readFileSync } from "fs";
import path from "path";

const prisma = new PrismaClient();
const resolvers = {
  Query: {
    products: () => prisma.products.findMany(),
  },
  Mutation: {
    createProduct: async (_: any, args: any) => prisma.products.create({ data: args.input }),
  },
};
const schemaPath = path.join(process.cwd(), "src/graphql/schema.gql");
const typeDefs = readFileSync(schemaPath, { encoding: "utf-8" });
const server = new ApolloServer({
  resolvers,
  typeDefs,
});

export default startServerAndCreateNextHandler(server);
ポイント1: process.cwd()
ここでの注意ポイントはGraphQLスキーマの読み込み時に process.cwd() を使うこと。
ビルドされたファイルはVercel環境の別の場所に作られるため、指定したパスがずれてしまうため
process.cwd() でカレントディレクトリを取得し、ディレクトリ構造が変わっても対応できるようにする必要がある。(詳しくは↓)
ポイント2: readFileSync
readFileSync でのGraphQLスキーマファイル読み込みは @apollo/server 公式ドキュメント でも紹介している手法 & デフォルトでインストールされてる。
↓ 別の選択肢としては@graphql-tools/loadもある
import { loadSchemaSync } from '@graphql-tools/load'
import { GraphQLFileLoader } from '@graphql-tools/graphql-file-loader'

const typeDefs = loadSchemaSync(path.join(process.cwd(), "src/graphql/schema.gql"), {
  loaders: [new GraphQLFileLoader()],
})
http://localhost:3000/api/graphql からPlaygroundを起動しGraphQLサーバーが起動していることを確認できる。ここからクエリを実行しDBリソースを取得することもできる。

@graphql-codegen 設定
プロジェクト直下に @graphql-codegen 設定ファイル codegen.ts を作成
import type { CodegenConfig } from "@graphql-codegen/cli";

const config: CodegenConfig = {
  overwrite: true,
  schema: "http://localhost:3000/api/graphql",
  documents: "src/graphql/**/*.graphql",
  generates: {
    "src/graphql/generated.ts": {
      plugins: ["typescript", "typescript-operations", "typescript-react-apollo"],
    },
  },
};

export default config;
解説1: 使用プラグイン
解説2: schema field
schema: "http://localhost:3000/api/graphql"
schemaフィードは、GraphQL起動パスを指定することでGraphQLスキーマを指定することが可能
解説3: documents field
documents: "src/graphql/**/*.graphql",
- documentsフィールドは、GraphQLドキュメント(query、mutation、subscription、fragment)を指す必要がある
- クライアントサイド用のコードを生成するプラグインを使用する場合のみ必要
解説4: 出力パス
generates: {
"src/graphql/generated.ts": {
生成される型定義ファイルを指定することができる
ここでは src/graphql/generated.ts に設定
graphql-codegen --config codegen.ts を実行し型定義ファイルを作成
--config を指定することで設定ファイルを適用することができる
(コマンドを毎回叩くのは面倒なので scripts に登録すると楽)
"scripts": {
  // 省略
  "codegen": "graphql-codegen --config codegen.ts",
},
npm run codegen 実行結果
% npm run codegen

> nextjs-with-apollo-and-prisma@0.1.0 codegen
> graphql-codegen --config codegen.ts

✔ Parse Configuration
✔ Generate outputs
生成される型定義ファイル例
import { gql } from '@apollo/client';
import * as Apollo from '@apollo/client';
export type Maybe<T> = T | null;
export type InputMaybe<T> = Maybe<T>;
export type Exact<T extends { [key: string]: unknown }> = { [K in keyof T]: T[K] };
export type MakeOptional<T, K extends keyof T> = Omit<T, K> & { [SubKey in K]?: Maybe<T[SubKey]> };
export type MakeMaybe<T, K extends keyof T> = Omit<T, K> & { [SubKey in K]: Maybe<T[SubKey]> };
export type MakeEmpty<T extends { [key: string]: unknown }, K extends keyof T> = { [_ in K]?: never };
export type Incremental<T> = T | { [P in keyof T]?: P extends ' $fragmentName' | '__typename' ? T[P] : never };
const defaultOptions = {} as const;
/** All built-in and custom scalars, mapped to their actual values */
export type Scalars = {
  ID: { input: string; output: string; }
  String: { input: string; output: string; }
  Boolean: { input: boolean; output: boolean; }
  Int: { input: number; output: number; }
  Float: { input: number; output: number; }
};

export type Mutation = {
  __typename?: 'Mutation';
  createProduct?: Maybe<Product>;
};


export type MutationCreateProductArgs = {
  input?: InputMaybe<ProductInput>;
};

export type Product = {
  __typename?: 'Product';
  brand_name: Scalars['String']['output'];
  id: Scalars['ID']['output'];
  product_name: Scalars['String']['output'];
};

export type ProductInput = {
  brand_name: Scalars['String']['input'];
  product_name: Scalars['String']['input'];
};

export type Query = {
  __typename?: 'Query';
  products?: Maybe<Array<Maybe<Product>>>;
};

export type CreateProductMutationVariables = Exact<{
  input: ProductInput;
}>;


export type CreateProductMutation = { __typename?: 'Mutation', createProduct?: { __typename?: 'Product', brand_name: string, product_name: string } | null };

export type ProductsQueryVariables = Exact<{ [key: string]: never; }>;


export type ProductsQuery = { __typename?: 'Query', products?: Array<{ __typename?: 'Product', id: string, brand_name: string, product_name: string } | null> | null };


export const CreateProductDocument = gql`
    mutation createProduct($input: ProductInput!) {
  createProduct(input: $input) {
    brand_name
    product_name
  }
}
    `;
export type CreateProductMutationFn = Apollo.MutationFunction<CreateProductMutation, CreateProductMutationVariables>;

/**
 * __useCreateProductMutation__
 *
 * To run a mutation, you first call `useCreateProductMutation` within a React component and pass it any options that fit your needs.
 * When your component renders, `useCreateProductMutation` returns a tuple that includes:
 * - A mutate function that you can call at any time to execute the mutation
 * - An object with fields that represent the current status of the mutation's execution
 *
 * @param baseOptions options that will be passed into the mutation, supported options are listed on: https://www.apollographql.com/docs/react/api/react-hooks/#options-2;
 *
 * @example
 * const [createProductMutation, { data, loading, error }] = useCreateProductMutation({
 *   variables: {
 *      input: // value for 'input'
 *   },
 * });
 */
export function useCreateProductMutation(baseOptions?: Apollo.MutationHookOptions<CreateProductMutation, CreateProductMutationVariables>) {
        const options = {...defaultOptions, ...baseOptions}
        return Apollo.useMutation<CreateProductMutation, CreateProductMutationVariables>(CreateProductDocument, options);
      }
export type CreateProductMutationHookResult = ReturnType<typeof useCreateProductMutation>;
export type CreateProductMutationResult = Apollo.MutationResult<CreateProductMutation>;
export type CreateProductMutationOptions = Apollo.BaseMutationOptions<CreateProductMutation, CreateProductMutationVariables>;
export const ProductsDocument = gql`
    query Products {
  products {
    id
    brand_name
    product_name
  }
}
    `;

/**
 * __useProductsQuery__
 *
 * To run a query within a React component, call `useProductsQuery` and pass it any options that fit your needs.
 * When your component renders, `useProductsQuery` returns an object from Apollo Client that contains loading, error, and data properties
 * you can use to render your UI.
 *
 * @param baseOptions options that will be passed into the query, supported options are listed on: https://www.apollographql.com/docs/react/api/react-hooks/#options;
 *
 * @example
 * const { data, loading, error } = useProductsQuery({
 *   variables: {
 *   },
 * });
 */
export function useProductsQuery(baseOptions?: Apollo.QueryHookOptions<ProductsQuery, ProductsQueryVariables>) {
        const options = {...defaultOptions, ...baseOptions}
        return Apollo.useQuery<ProductsQuery, ProductsQueryVariables>(ProductsDocument, options);
      }
export function useProductsLazyQuery(baseOptions?: Apollo.LazyQueryHookOptions<ProductsQuery, ProductsQueryVariables>) {
          const options = {...defaultOptions, ...baseOptions}
          return Apollo.useLazyQuery<ProductsQuery, ProductsQueryVariables>(ProductsDocument, options);
        }
export function useProductsSuspenseQuery(baseOptions?: Apollo.SuspenseQueryHookOptions<ProductsQuery, ProductsQueryVariables>) {
          const options = {...defaultOptions, ...baseOptions}
          return Apollo.useSuspenseQuery<ProductsQuery, ProductsQueryVariables>(ProductsDocument, options);
        }
export type ProductsQueryHookResult = ReturnType<typeof useProductsQuery>;
export type ProductsLazyQueryHookResult = ReturnType<typeof useProductsLazyQuery>;
export type ProductsSuspenseQueryHookResult = ReturnType<typeof useProductsSuspenseQuery>;
export type ProductsQueryResult = Apollo.QueryResult<ProductsQuery, ProductsQueryVariables>;
ApolloClient 設定
src/pages/_app.tsx でApolloClientの初期設定をする (↓ 公式ドキュメントを参考)
import { ApolloClient, ApolloProvider, InMemoryCache } from "@apollo/client";
import { AppProps } from "next/app";

export const apolloClient = new ApolloClient({
  uri: "/api/graphql",
  cache: new InMemoryCache(),
});

const App = ({ Component, pageProps }: AppProps) => {
  return (
    <ApolloProvider client={apolloClient}>
      <Component {...pageProps} />
    </ApolloProvider>
  );
};

export default App;
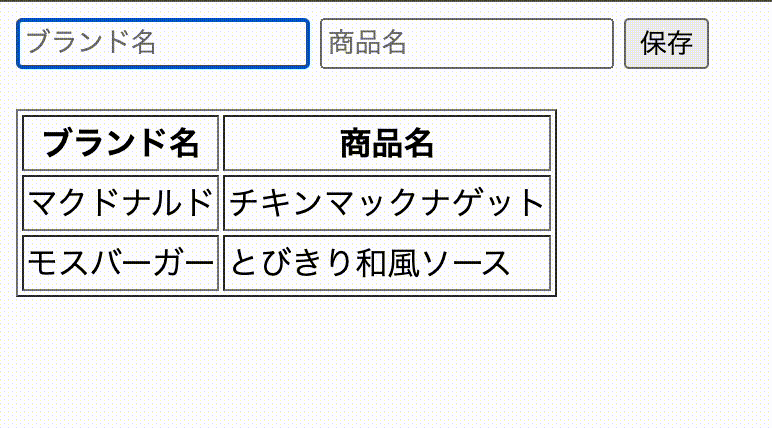
作成・一覧ページの実装
import * as React from "react";
import {apolloClient} from "@/pages/_app";
import {CreateProductDocument, Product, ProductsDocument} from "@/graphql/generated";
import {useMutation} from "@apollo/client";

const Index = () => {
  const [createProduct] = useMutation(CreateProductDocument);
  const [inputValue, setInputValue] = React.useState({
    brandName: '',
    productName: ''
  });
  const [products, setProducts] = React.useState<Product[]>([]);

  React.useEffect(() => {
    fetchProducts();
  }, []);

  const fetchProducts = () => {
    apolloClient.cache.reset();
    apolloClient.query({ query: ProductsDocument }).then((res) => {
      setProducts(res.data.products);
    });
  }

  const handleSubmit = () => {
    if(!inputValue.brandName || !inputValue.productName) alert('無効な値です');
    createProduct({
      variables: {
        input: {
          brand_name: inputValue.brandName,
          product_name: inputValue.productName,
        },
      },
    }).then(() => {
      fetchProducts();
      setInputValue({brandName: '', productName: ''})
    });
  };

  const handleChange = (event: React.ChangeEvent<HTMLInputElement>) => {
    setInputValue({
      ...inputValue,
      [event.target.name]: event.target.value
    });
  };

  return (
    <>
      <div style={{display: "flex", gap: 5, marginBottom: 20}}>
        <input name="brandName" value={inputValue.brandName} placeholder={"ブランド名"} onChange={handleChange} />
        <input name="productName" value={inputValue.productName} placeholder={"商品名"} onChange={handleChange} />
        <button onClick={handleSubmit}>保存</button>
      </div>
      <table border={1}>
        <thead>
          <tr>
            <th>ブランド名</th>
            <th>商品名</th>
          </tr>
        </thead>
        <tbody>
        {products.map((product, index) => (
          <tr key={index}>
            <td>{product.brand_name}</td>
            <td>{product.product_name}</td>
          </tr>
        ))}
        </tbody>
      </table>
    </>
  )
}

export default Index;
ポイント1: fetchProducts()
- データ作成後に再取得する際、キャッシュが有効になっていると更新されないため、取得前に毎回キャッシュを削除
-
apolloClient.queryで使うクエリは@graphql-codegenで生成したProductsDocumentを使用する
const [products, setProducts] = React.useState<Product[]>([]);

const fetchProducts = () => {
  apolloClient.cache.reset();
  apolloClient.query({ query: ProductsDocument }).then((res) => {
  setProducts(res.data.products);
  });
}
ポイント2: createProduct()
- ApolloClientのGraphQLデータを書き替えるフック
useMutationを使い@graphql-codegenで生成したCreateProductDocumentを渡す - 引数
variables.inputに入力値を渡す - データ作成後、
fetchProducts()でデータを再取得しsetInputValue({brandName: '', productName: ''})で入力フォームを初期化する
const [createProduct] = useMutation(CreateProductDocument);

const handleSubmit = () => {
  if(!inputValue.brandName || !inputValue.productName) alert('無効な値です');
  createProduct({
    variables: {
      input: {
        brand_name: inputValue.brandName,
        product_name: inputValue.productName,
      },
    },
  }).then(() => {
    fetchProducts();
    setInputValue({brandName: '', productName: ''})
  });
};
Discussion