生成AI系の環境構築メモ
自分じゃPythonの開発もほぼしたことないので何もわかってない素人です
まっさらな状態からスタート
OS: Win11
グラボ: RTX4080
以下をインストール
- Git: https://gitforwindows.org/
- VSCode
pyenv-winをインストール
- pyenv-win: https://github.com/pyenv-win/pyenv-win/
Gitコマンドインストール
PowerShellを開く
手順の%USERPROFILE%を書き換えて実行
git clone https://github.com/pyenv-win/pyenv-win.git "$HOME\.pyenv"
PowerShellを開きなおす
以下のコマンドはそのままでOK
[System.Environment]::SetEnvironmentVariable('PYENV',$env:USERPROFILE + "\.pyenv\pyenv-win\","User")

[System.Environment]::SetEnvironmentVariable('PYENV_ROOT',$env:USERPROFILE + "\.pyenv\pyenv-win\","User")

[System.Environment]::SetEnvironmentVariable('PYENV_HOME',$env:USERPROFILE + "\.pyenv\pyenv-win\","User")
PowerShellを開きなおす(開き直さなくても良い気はするけど)
以下のコマンドはそのままでOK
[System.Environment]::SetEnvironmentVariable('path', $env:USERPROFILE + "\.pyenv\pyenv-win\bin;" + $env:USERPROFILE + "\.pyenv\pyenv-win\shims;" + [System.Environment]::GetEnvironmentVariable('path', "User"),"User")
Pythonのインストール
インストール可能なバージョンを確認
最新にするとワーニングがでるので3.10.6を入れる
pyenv install -l
pyenv install 3.10.6
pyenv global 3.10.6
C++コンパイラが必要なのでインストール
以下サイトの下の方にあるBuild Toolsをインストールする
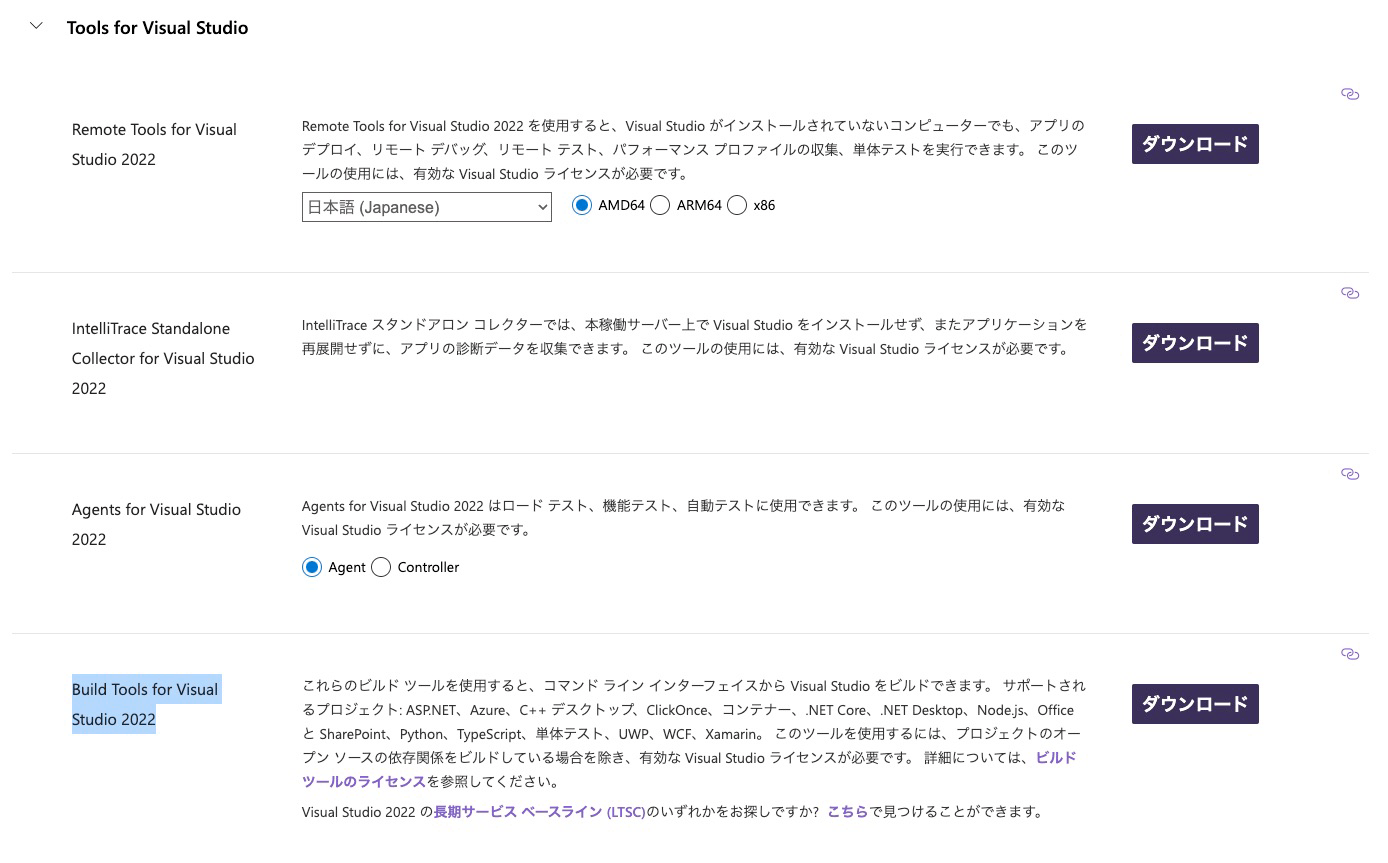
インストーラーが起動するので1個目のC++ビルドができるようになるやつを選択してインストール
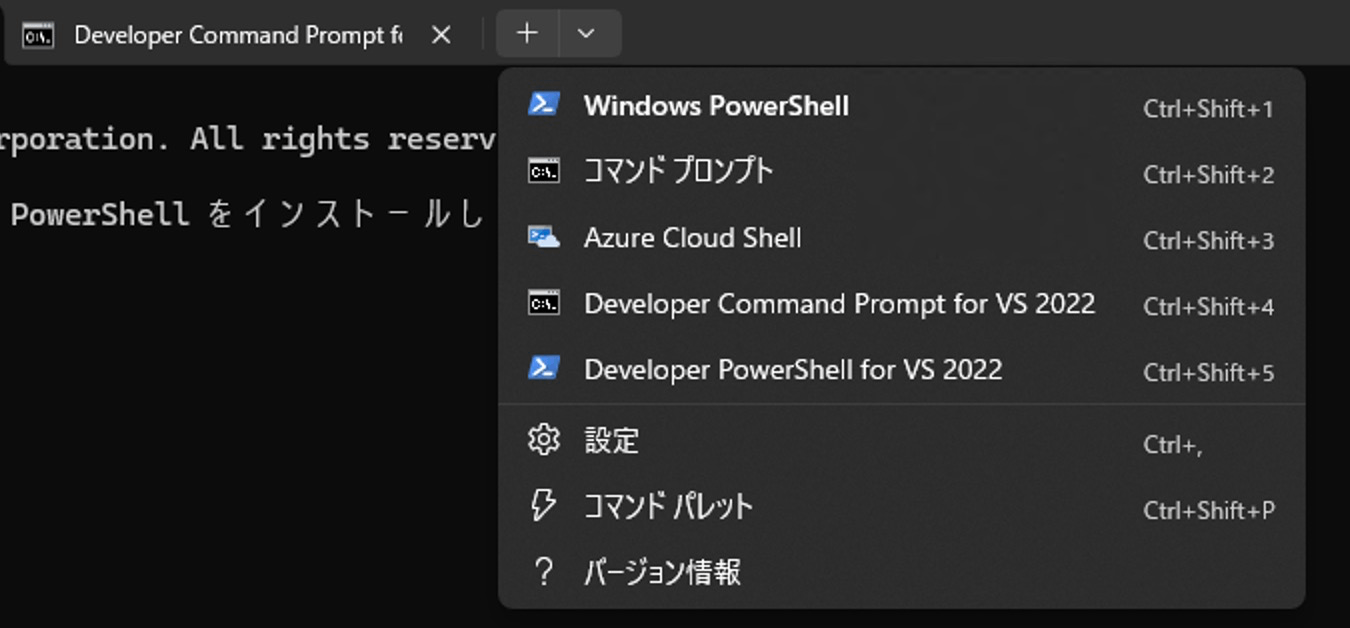
インストール後、Power Shellからパスが通ったコマンドプロンプトが起動できるようになる
Stable Diffusion WebUI
Clone
ファイルパスに日本語があるとダメなので注意
最初、デスクトップ配下でコピーしたら怒られた(「デスクトップ」じゃなくて「Desktop」にしてくれたら良いのに・・・)
git clone https://github.com/AUTOMATIC1111/stable-diffusion-webui.git
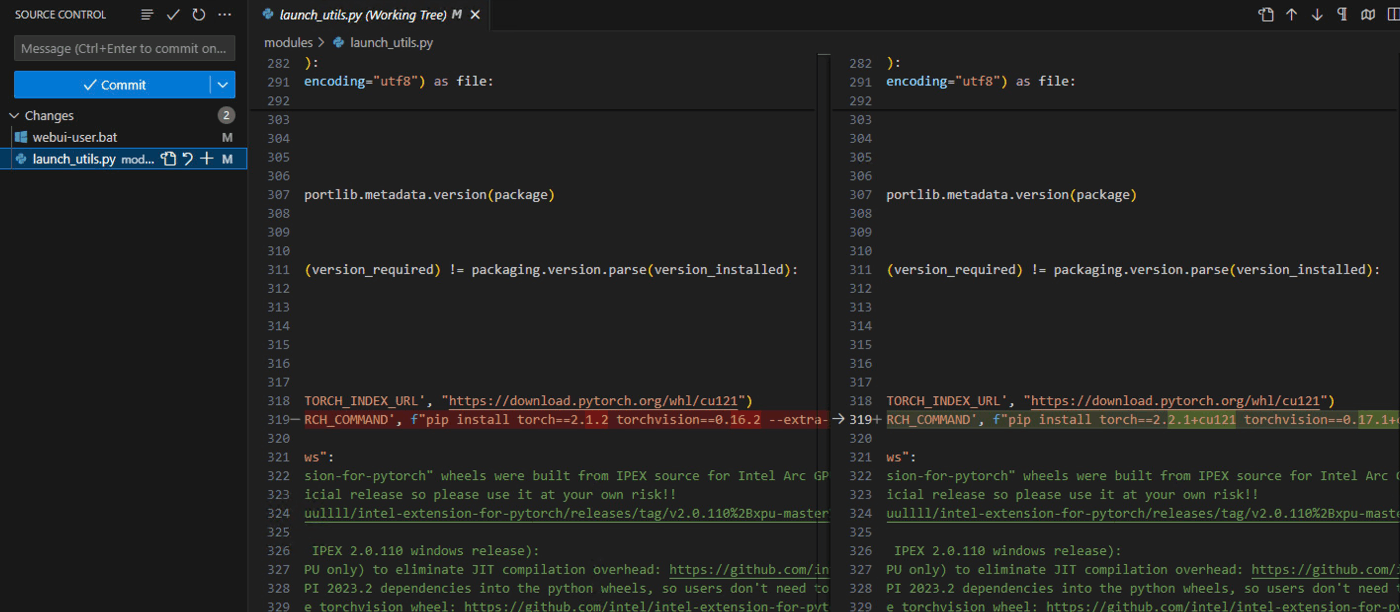
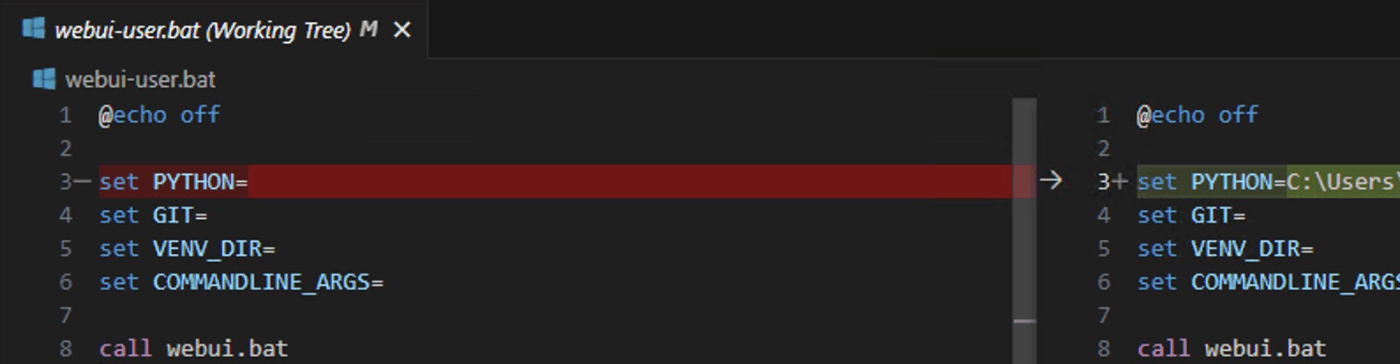
書き換え
PyTorchのバージョンを最新+CUDAサポートに変えてみる
CUDAが使えるかどうかはNVIDIAのコントロールパネルでわかる
Pythonのパスに現在のものを設定
実行
webui-user.bat
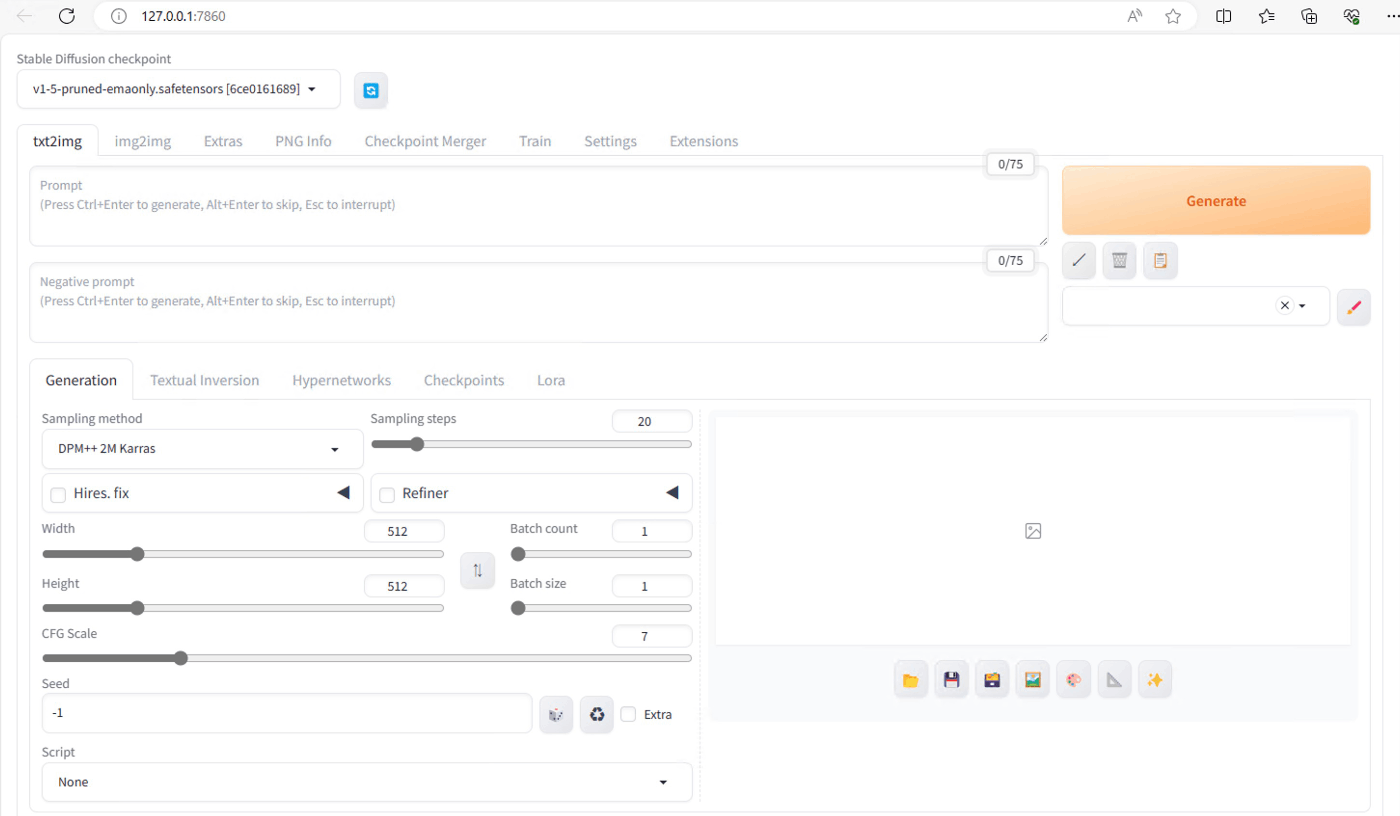
実行するとoutputフォルダに画像が保存されていく
はまったところ
1回実行したあとに、ディレクトリを変更したり、Pythonのバージョンを変えたりなどした場合、Stable Diffusionのvenvディレクトリに環境が残ってるので失敗する
venvフォルダは初回実行時に作られるので、環境が変わった場合は削除して再実行
XL
参考:https://aitechworld.info/stable-diffusion-sdxl/
モデルをダウンロードしてmodelフォルダ配下に格納、UIから再設定
画像サイズを1024以上にする必要がある
Stable Diffusion WebUI Forge
Clone
git clone https://github.com/lllyasviel/stable-diffusion-webui-forge.git
実行
webui-user.batを同じように修正して実行するだけ
ControlNet用のModelを追加で持ってくることでControlNet利用が可能
ControlNetは追加のExtensionは不要で最初から入ってる
XLを使う場合はXL用のモデルを使わないエラーになる
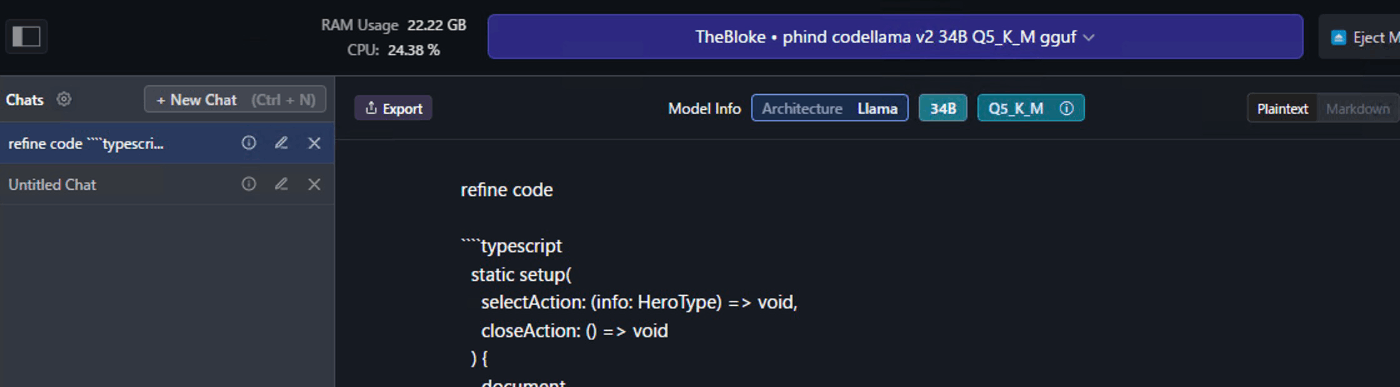
Code Llama
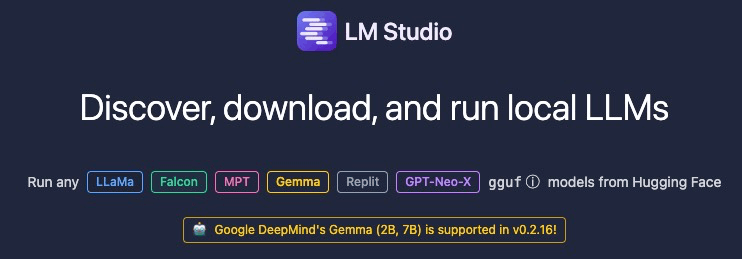
LM Studio
なんやかんや頑張るよりLM Studioとやらを使う方が手っ取り早そうなのでまずは使ってみる
Download
LM Studioの検索画面から探して、この人のを入れてみる
実行
自分のGitHubのコードから適当なコードを投げてみる
↓
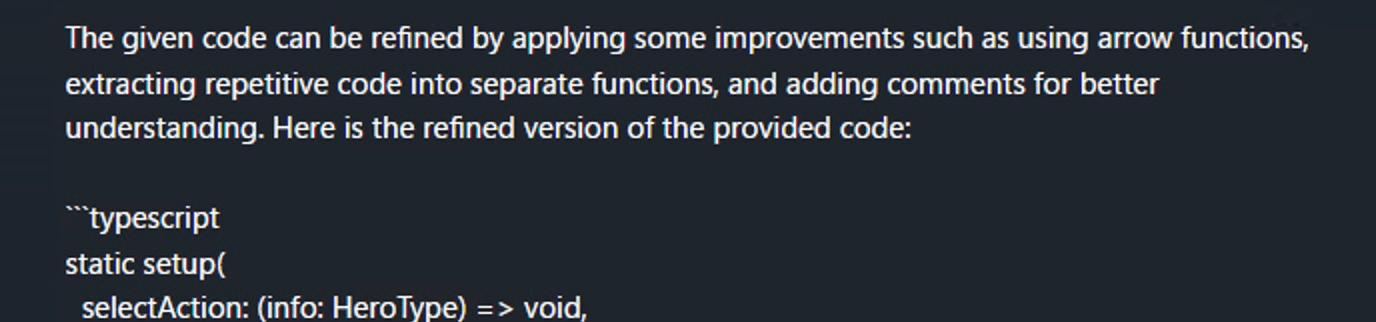
gemmaもサポートしてるようなので試してみる
Chat with RTX
インストール
ここからインストーラーをダウンロードして動かすだけ

試す
それなりのスピードで動く
RAGなのでDatasetで指定したフォルダのデータを事前知識として動くのかな

AI model defaultにするとRAGじゃなくて普通に答えてくれた
修正したいコードを伝えたら一応提案してくれたけど、コンテキストサイズが小さくて長いのは無理だった
Datasetとして.tsとか指定できるかなと思ったけど、作ってるアプリのsrcフォルダを指定したらエラーになったのでダメなのかな
Wisper
参考:https://qiita.com/reriiasu/items/920227cf604dfb8b7949
環境構築
Cloneする
git clone https://github.com/reriiasu/speech-to-text.git
cd speech-to-text
仮想化してpipインストールを実行(コマンドプロンプト)
python3 -m venv venv
.\venv\Scripts\activate.bat
pip install -r requirements.txt
動かす
python -m speech_to_text
Chromeがインストールされていないと動かないので、なければインストール。
起動するとブラウザが起動する。
以下を操作。
- AppSettingsでマイクを選択
- ModelSettingsでモデルを選択
- Transribe Settingsで言語を選択
Start Stranscriptionを押して開始。
選択したModelがない場合は初回はダウンロードが走る。
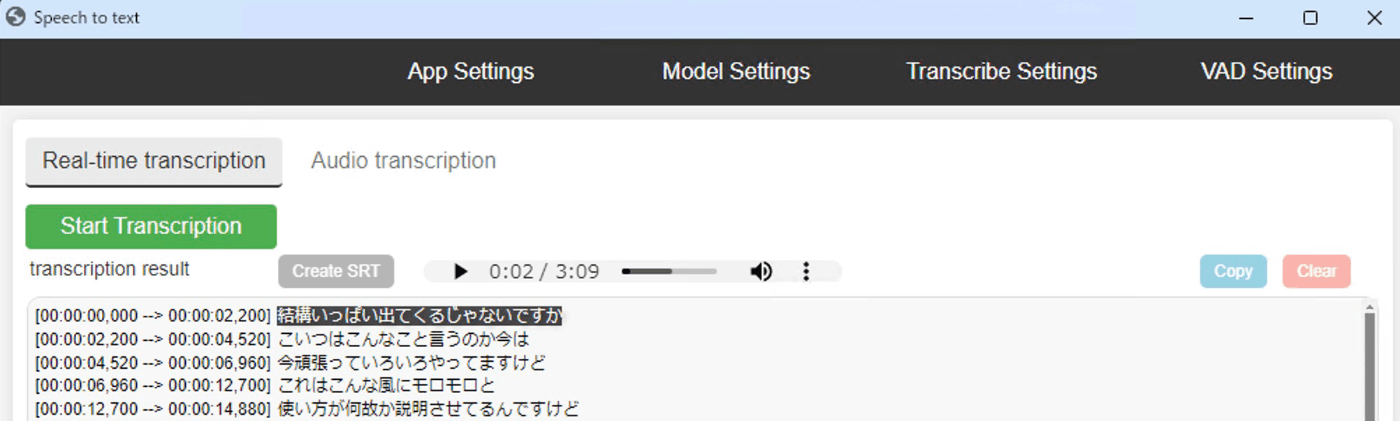
(画像は適当にYouTubeを再生して音声認識させたもの)
使い方が悪いのか、動かしてると止まるな
CPUが全く動いてないので止まってる
Style-Bert-VITS2
こちら
git clone https://github.com/litagin02/Style-Bert-VITS2.git
cd Style-Bert-VITS2
python3 -m venv venv
venv\Scripts\activate
pip install torch torchaudio --index-url https://download.pytorch.org/whl/cu118
pip install -r requirements.txt
python initialize.py
Editorの起動
python server_editor.py --inbrowser
APIサーバーの起動
python server_fastapi.py
WebUIの起動
python app.py
起動後、説明を見ながらぽちぽちで学習が可能
ReazonSpeech
こちら
venv\Scripts\activate
git clone https://github.com/reazon-research/ReazonSpeech
pip install setuptools
pip install Cython
pip install ReazonSpeech/pkg/nemo-asr
適当にWebサーバー化してAPI対応
import os
from flask import Flask, request, jsonify, make_response
from flask_cors import CORS
import tempfile
import logging
import json
from reazonspeech.nemo.asr import load_model, transcribe, audio_from_path

app = Flask(__name__)
CORS(app)  # どこからでもリクエストを受け付けるようにCORSを設定

# ログ設定
logging.basicConfig(level=logging.INFO)

# reazonspeech
model = load_model()

@app.route('/transcribe', methods=['POST'])
def handle():
    if 'audio' not in request.files:
        return jsonify({'error': 'No audio file provided'}), 400

    audio_file = request.files['audio']

    # ファイルを一時的に保存
    temp_dir = tempfile.gettempdir()
    audio_path = os.path.join(temp_dir, audio_file.filename)
    audio_file.save(audio_path)

    # 文字起こし前のログ
    logging.info(f"Received audio file: {audio_file.filename}")

    # reazonspeech
    audio = audio_from_path(audio_path)
    transcription_text = transcribe(model, audio)

    # 一時ファイルを削除
    os.remove(audio_path)

    # 文字起こし後のログ
    logging.info("Transcription completed.")
    logging.info(f"Transcription result: {transcription_text.text}")

    # 結果をJSON形式で返す
    response = make_response(json.dumps({'transcription': transcription_text.text}, ensure_ascii=False))
    response.mimetype = "application/json"
    return response

if __name__ == '__main__':
    app.run(host='0.0.0.0', port=5001)
Dify
DifyのAPIをstreamingで呼び出すサンプル
例外処理考慮なしで、ワークフローの最後だけ取得
出力が長いと1回の「data:」が尻切れになるみたいなのでJSONパースエラーになった場合は次のchunkにくっつけてもう1回JSONパースするようにしている
 // 参考: https://zenn.dev/himanushi/articles/99579cf407c30b

const callDifyByStreaming = async (input) => {
  const completion = await fetch(DIFY_URL, {
    headers: {
      "Content-Type": "application/json",
      Authorization: AUTHORIZATION_HEADER,
    },
    method: "POST",
    body: JSON.stringify({
      inputs: input,
      response_mode: "streaming",
      user: USER,
    }),
  });

  const reader = completion.body?.getReader();

  if (completion.status !== 200 || !reader) {
    return "error";
  }

  let result = "";

  const decoder = new TextDecoder("utf-8");
  try {
    let texts = "";
    let allOutput = [];
    const read = async () => {
      const { done, value } = await reader.read();
      if (done) return reader.releaseLock();
      const chunk = decoder.decode(value, { stream: true });

      texts += chunk;
      const json = texts
        .split("data:")
        .map((data) => {
          if (data) {
            try {
              const event = JSON.parse(data);
              allOutput.push(event);
              fs.writeFileSync("outputs.json", JSON.stringify(allOutput));
              if (event.event === "workflow_finished") {
                const result = event.data;
                return result.outputs;
              }
            } catch (e) {
              texts = `data:${data}`;
            }
          }
          return "";
        })
        .filter((data) => data)[0];
      if (json) {
        result = json;
      }
      return read();
    };
    await read();
  } catch (e) {
    console.error(e);
  }
  reader.releaseLock();

  return result;
};
GPT-o1にPython化してもらったサンプル
async def callDifyByStreaming(input):
    timeout = aiohttp.ClientTimeout(total=None)
    async with aiohttp.ClientSession(timeout=timeout) as session:
        async with session.post(
            DIFY_URL,
            headers={
                "Content-Type": "application/json",
                "Authorization": AUTHORIZATION_HEADER,
            },
            json={
                "inputs": input,
                "response_mode": "streaming",
                "user": USER,
            }
        ) as response:
            if response.status != 200:
                return "error"

            result = ""
            try:
                texts = ""
                allOutput = []
                async for value in response.content.iter_chunked(1024):
                    chunk = value.decode('utf-8')
                    texts += chunk
                    parts = texts.split('data:')
                    texts = ''
                    for i, data in enumerate(parts):
                        data = data.strip()
                        if not data:
                            continue
                        try:
                            event = json.loads(data)
                            allOutput.append(event)
                            with open("outputs.json", "w", encoding="utf-8") as f:
                                json.dump(allOutput, f, ensure_ascii=False)
                            if event.get('event') == 'workflow_finished':
                                result = event['data']['outputs']
                                return result
                        except json.JSONDecodeError:
                            # JSONのパースに失敗した場合、未処理のデータをテキストに戻す
                            texts = 'data:' + 'data:'.join(parts[i:])
                            break  # 次のチャンクを待つためにループを抜ける
                # ループ終了後、未処理のデータが残っている可能性があるため処理する
                data = texts.strip()
                if data:
                    parts = data.split('data:')
                    for data_part in parts:
                        data_part = data_part.strip()
                        if not data_part:
                            continue
                        try:
                            event = json.loads(data_part)
                            allOutput.append(event)
                            with open("outputs.json", "w", encoding="utf-8") as f:
                                json.dump(allOutput, f, ensure_ascii=False)
                            if event.get('event') == 'workflow_finished':
                                result = event['data']['outputs']
                                return result
                        except json.JSONDecodeError:
                            pass
                return result
            except Exception as e:
                print(e)
                return result
AWS Claude
事前にセッショントークンを取得している前提
参考:https://zenn.dev/fujiwara/scraps/25abc374adab52
import AnthropicBedrock from "@anthropic-ai/bedrock-sdk";
import dotenv from "dotenv";

dotenv.config();

const client = new AnthropicBedrock({
  awsSessionToken: process.env.AWS_SESSION_TOKEN,
  awsRegion: process.env.AWS_REGION,
});

async function main() {
  const message = await client.messages.create({
    model: "anthropic.claude-3-5-sonnet-20240620-v1:0",
    max_tokens: 256,
    messages: [{ role: "user", content: "Hello, world" }],
  });
  console.log(message);
}
main().catch(console.error);
Qwen2.5-Coder
以下にあるサンプルプログラムを試す
33Bは動かせないと思うので7Bで試す。
python3 -m venv venv
venv\Scripts\activate
pip install torch --index-url https://download.pytorch.org/whl/cu121
pip install transformers
pip install 'accelerate>=0.26.0'
結果
Sure! Here is an implementation of the Quick Sort algorithm in Python:
def quick_sort(arr):
    if len(arr) <= 1:
        return arr
    else:
        pivot = arr[len(arr) // 2]
        left = [x for x in arr if x < pivot]
        middle = [x for x in arr if x == pivot]
        right = [x for x in arr if x > pivot]
        return quick_sort(left) + middle + quick_sort(right)

# Example usage:
arr = [3, 6, 8, 10, 1, 2, 1]
sorted_arr = quick_sort(arr)
print(sorted_arr)
This implementation uses the Lomuto partition scheme, where the pivot is chosen as the middle element of the array. The array is then partitioned into three sub-arrays: elements less than the pivot, elements equal to the pivot, and elements greater than the pivot. These sub-arrays are recursively sorted.
動いたけどめっちゃ遅い
DeepSeek-R1-Distill
以下を試す
llama.cppのダウンロード
以下から最新をダウンロード
今回はllama-b4524-bin-win-cuda-cu12.4-x64.zipを利用
モデルのダウンロード
このモデルを使うのでダウンロード

実行
書いてあるコマンド通りに実行
llama-server.exe -m モデルパス\DeepSeek-R1-Distill-Qwen-14B-Q4_K_M-00001-of-00001.gguf -c 16384 -ngl 100 --no-mmap --cache-type-k q8_0 --cache-type-v q8_0 --flash-attn
http://localhost:8080/を開くとチャット画面が表示される
問いかけるとしばらく考える

結果が出る

日本語も喋る

Toastを表示するReactコンポーネントを聞いたらライブラリを紹介された
でもライブラリの使い方を間違ってる
また、途中ハングルが混ざってる

自作したいとお願いしたら書いてくれたけど
でもビルド通らない

小説のネタを与えたうえで書いてもらった
変だな(おもしろいけど)

Q6_Kも試したが、Toastはもう一歩で動く・・・かも?という程度の結果
Fish Speech
これを試す
環境構築
python3 -m venv venv
venv\Scripts\activate
git clone https://github.com/fishaudio/fish-speech
cd fish-speech
pip install torch==2.4.1 torchvision==0.19.1 torchaudio==2.4.1 --index-url https://download.pytorch.org/whl/cu121
pip install -e .
pip install https://github.com/AnyaCoder/fish-speech/releases/download/v0.1.0/triton_windows-0.1.0-py3-none-any.whl
python .\tools\download_models.py
python .\tools\run_webui.py
起動
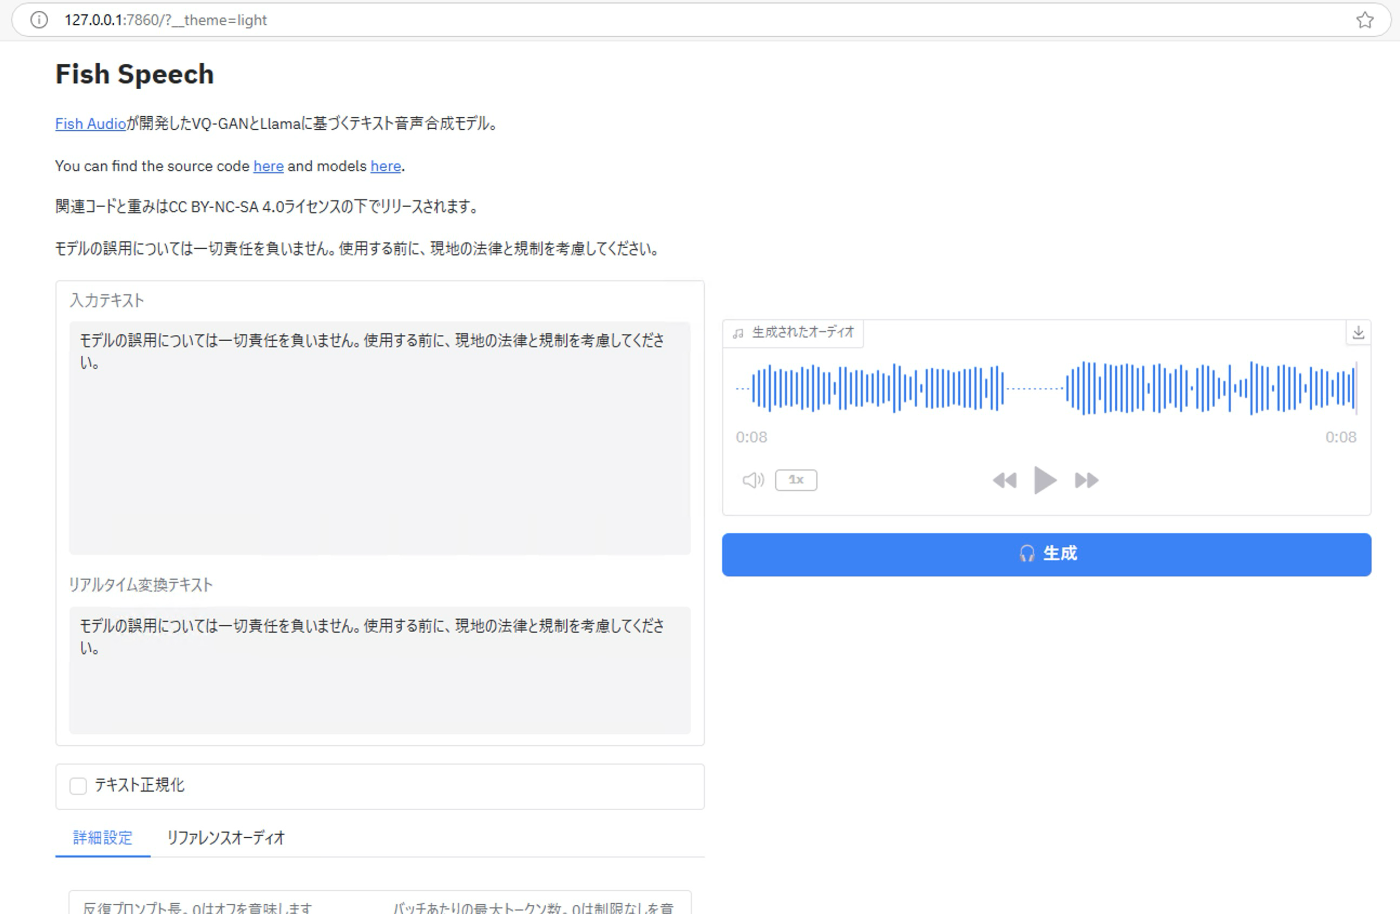
Web UIだとランダム話者なのかな?
生成するたびに違う人の声になる。
結構良いように思うけどリアルタイム性はない。
API Server
そのままだと127.0.0.1だけしか受け付けてくれないのでちょっと書き換える。
(他にやり方あるのかもしれないけど)
// tools/api_server.py
    uvicorn.run(
        api.app,
        host="ここをローカルIPにする",
        port=int(port),
        workers=api.args.workers,
        log_level="info",
    )
起動は以下。
python tools/api_server.py
クライアント側は以下のような感じ。
        let url = `http://ローカルIP:8080/v1/tts`;
        fetch(url, {
          method: "POST",
          headers: {
            "Content-Type": "application/json",
          },
          body: JSON.stringify({
            text: text, // 喋らせたい内容
            references: [ // リファレンス音声を指定する場合
              {
                audio: arrayBufferData, // 音声ファイルのバイナリをBASE64にしたもの
                text: "リファレンス音声が喋ってる内容",
              },
            ],
          }),
        })
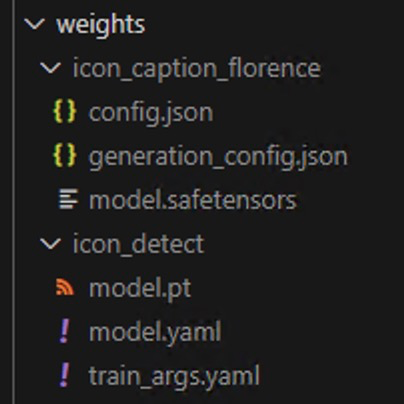
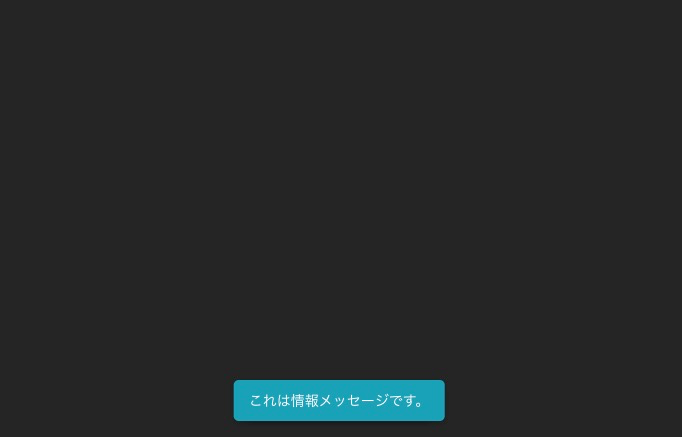
OmniParser-v2.0
これを試す
環境構築
python3 -m venv venv
venv\Scripts\activate
git clone https://github.com/microsoft/OmniParser.git
cd OmniParser
ここからicon_caption, icon_detectの中身をダウンロード
icon_captionをicon_caption_florenceに名前を変更
起動
APIサーバーを起動させる
cd omnitool/omniparserserver
python -m omniparserserver
クライアントプログラムを作って画像を投げる
const fs = require("fs");
const axios = require("axios");

// FastAPIサーバーのURL(必要に応じて変更してください)
const apiUrl = "http://localhost:8000/parse/";

// 同一ディレクトリの image.jpg を読み込み、Base64に変換する関数
function getBase64Image(filePath) {
  const imageBuffer = fs.readFileSync(filePath);
  return imageBuffer.toString("base64");
}

async function callParseAPI() {
  try {
    // image.jpg を読み込み、Base64エンコード
    const base64_image = getBase64Image("./image.png");

    // リクエストボディのデータを作成
    const data = { base64_image };

    // POSTリクエストを送信
    const response = await axios.post(apiUrl, data);
    console.log("Response data:", response.data);

    // レスポンスからBase64の画像データを取得
    const somImageBase64 = response.data.som_image_base64;
    // Base64文字列をバッファに変換
    const imageBuffer = Buffer.from(somImageBase64, "base64");
    // バッファの内容を output.jpg として保存
    fs.writeFileSync("output.png", imageBuffer);
    console.log("Base64画像を output.jpg として保存しました。");
  } catch (error) {
    console.error("リクエスト送信中にエラーが発生しました:", error);
  }
}

callParseAPI();
結果

Wan-AI/Wan2.1-T2V-1.3B
これを試す
Windowsだとflash-attnに四苦八苦した。
やったことを「多分こうだろう」で整理して書いたのでちょっと間違ってる可能性あり。
環境変数の設定
CUDAの環境変数が未設定の場合は設定しておく。
- CUDA_HOMEの設定
- CUDA_HOMEのディレクトリ内にあるbin, lib/x86のディレクトリをPATHに設定
環境構築
git clone https://github.com/Wan-Video/Wan2.1.git
cd Wan2.1
python3 -m venv venv
venv\Scripts\activate
reqruiements.txtからflash_attnを1回消す。
torch>=2.4.0
torchvision>=0.19.0
opencv-python>=4.9.0.80
diffusers>=0.31.0
transformers>=4.49.0
tokenizers>=0.20.3
accelerate>=1.1.1
tqdm
imageio
easydict
ftfy
dashscope
imageio-ffmpeg
flash_attn ←これを削除⭐️
gradio>=5.0.0
numpy>=1.23.5,<2
インストールを続ける。
pip install torch torchvision --index-url https://download.pytorch.org/whl/cu124
pip install -r requirements.txt
pip install flash-attn==2.6.1 --no-build-isolation
pip install "huggingface_hub[cli]"
huggingface-cli download Wan-AI/Wan2.1-T2V-1.3B --local-dir ./Wan2.1-T2V-1.3B
flash-attnは最新だとNG、2.5系の後半などもNGで何個か試してたら入った。
動かす
そのままだと出力される動画のファイル名に「*」が含まれており、Windowsだと許可されないのでエラーになる。
generate.pyを書き直す。(引数でファイル名を渡しても良いけど)
- args.save_file = f"{args.task}_{args.size}_{args.ulysses_size}_{args.ring_size}_{formatted_prompt}_{formatted_time}" + suffix
+ args.save_file = f"{formatted_time}" + suffix
書かれてるサンプルコマンド通りになげる。
RTX4080でも以下でいけた。
python generate.py --task t2v-1.3B --size 832*480 --ckpt_dir ./Wan2.1-T2V-1.3B --offload_model True --t5_cpu --sample_shift 8 --sample_guide_scale 6 --prompt "Two anthropomorphic cats in comfy boxing gear and bright gloves fight intensely on a spotlighted stage."
今更だけどJupyter Notebookを仮想環境に導入
python -m venv myenv
myenv\Scripts\Activate
pip install notebook
pip install ipykernel
python -m ipykernel install --user --name=myenv --display-name "Python (myenv)"
jupyter notebook
DiffRhythm
これを試す
環境構築
基本は1個上のJupyter Notebookの環境で、リンク先にあるNotebookを実行するだけなんだけど、自分の環境では色々対応が必要だった
Notebook実行前に以下実施
- espeak-ngのインストール
- espeak-ngのインストール場所(dllがある場所)にPHONEMIZER_ESPEAK_LIBRARYの環境変数を設定
// notebookで実行
!git clone https://huggingface.co/spaces/ASLP-lab/DiffRhythm
// notebookで実行
%cd DiffRhythm
pytourch周りは手動で先にインストールする
pip install torch torchvision torchaudio --index-url https://download.pytorch.org/whl/cu124
tritonがインストールできないので、ビルド済みを配布しているところからダウンロードしてインストール
pip install triton-3.0.0-cp310-cp310-win_amd64.whl
続きを実行
// notebookで実行
!pip install -r requirements.txt
// notebookで実行
import os
os.environ["PHONEMIZER_ESPEAK_LIBRARY"] = "C:\\Program Files\\eSpeak NG\\libespeak-ng.dll"
このままだとespeakの言語周りと文字コード周りでエラーになる。
Python初心者で環境構築をどうしたら良いかわからず、めんどくさいので問題のあるコードを消したり修正したりする。
diff --git a/diffrhythm/g2p/g2p/__init__.py b/diffrhythm/g2p/g2p/__init__.py
index a926893..5f35e62 100755
--- a/diffrhythm/g2p/g2p/__init__.py
+++ b/diffrhythm/g2p/g2p/__init__.py
@@ -15,21 +15,16 @@ class PhonemeBpeTokenizer:

     def __init__(self, vacab_path="./diffrhythm/g2p/g2p/vocab.json"):
         self.lang2backend = {
-            "zh": "cmn",
-            "ja": "ja",
             "en": "en-us",
-            "fr": "fr-fr",
-            "ko": "ko",
-            "de": "de",
         }
         self.text_tokenizers = {}
         self.int_text_tokenizers()

-        with open(vacab_path, "r") as f:
+        with open(vacab_path, "r", encoding="utf-8") as f:
             json_data = f.read()
         data = json.loads(json_data)
         self.vocab = data["vocab"]
-        LangSegment.setfilters(["en", "zh", "ja", "ko", "fr", "de"])
+        LangSegment.setfilters(["en"])

     def int_text_tokenizers(self):
         for key, value in self.lang2backend.items():
diff --git a/diffrhythm/g2p/g2p_generation.py b/diffrhythm/g2p/g2p_generation.py
index e78f3e7..4b73936 100755
--- a/diffrhythm/g2p/g2p_generation.py
+++ b/diffrhythm/g2p/g2p_generation.py
@@ -114,7 +114,7 @@ def chn_eng_g2p(text: str):


 text_tokenizer = PhonemeBpeTokenizer()
-with open("./diffrhythm/g2p/g2p/vocab.json", "r") as f:
+with open("./diffrhythm/g2p/g2p/vocab.json", "r", encoding="utf-8") as f:
     json_data = f.read()
 data = json.loads(json_data)
 vocab = data["vocab"]
diff --git a/diffrhythm/g2p/utils/g2p.py b/diffrhythm/g2p/utils/g2p.py
index aba5e2f..ee1e1d4 100755
--- a/diffrhythm/g2p/utils/g2p.py
+++ b/diffrhythm/g2p/utils/g2p.py
@@ -14,11 +14,6 @@ import sys
 # separator=Separator(phone=' ', word=' _ ', syllable='|'),
 separator = Separator(word=" _ ", syllable="|", phone=" ")

-phonemizer_zh = EspeakBackend(
-    "cmn", preserve_punctuation=False, with_stress=False, language_switch="remove-flags"
-)
-# phonemizer_zh.separator = separator
-
 phonemizer_en = EspeakBackend(
     "en-us",
     preserve_punctuation=False,
@@ -27,40 +22,11 @@ phonemizer_en = EspeakBackend(
 )
 # phonemizer_en.separator = separator

-phonemizer_ja = EspeakBackend(
-    "ja", preserve_punctuation=False, with_stress=False, language_switch="remove-flags"
-)
-# phonemizer_ja.separator = separator
-
-phonemizer_ko = EspeakBackend(
-    "ko", preserve_punctuation=False, with_stress=False, language_switch="remove-flags"
-)
-# phonemizer_ko.separator = separator
-
-phonemizer_fr = EspeakBackend(
-    "fr-fr",
-    preserve_punctuation=False,
-    with_stress=False,
-    language_switch="remove-flags",
-)
-# phonemizer_fr.separator = separator
-
-phonemizer_de = EspeakBackend(
-    "de", preserve_punctuation=False, with_stress=False, language_switch="remove-flags"
-)
-# phonemizer_de.separator = separator
-
-
 lang2backend = {
-    "zh": phonemizer_zh,
-    "ja": phonemizer_ja,
     "en": phonemizer_en,
-    "fr": phonemizer_fr,
-    "ko": phonemizer_ko,
-    "de": phonemizer_de,
 }

-with open("./diffrhythm/g2p/utils/mls_en.json", "r") as f:
+with open("./diffrhythm/g2p/utils/mls_en.json", "r", encoding="utf-8") as f:
     json_data = f.read()
 token = json.loads(json_data)

diff --git a/diffrhythm/infer/infer_utils.py b/diffrhythm/infer/infer_utils.py
index e403235..89093d6 100755
--- a/diffrhythm/infer/infer_utils.py
+++ b/diffrhythm/infer/infer_utils.py
@@ -99,7 +99,7 @@ def parse_lyrics(lyrics: str):

 class CNENTokenizer():
     def __init__(self):
-        with open('./diffrhythm/g2p/g2p/vocab.json', 'r') as file:
+        with open('./diffrhythm/g2p/g2p/vocab.json', 'r', encoding="utf-8") as file:
             self.phone2id:dict = json.load(file)['vocab']
         self.id2phone = {v:k for (k, v) in self.phone2id.items()}
         # from f5_tts.g2p.g2p_generation import chn_eng_g2p
ようやく実行
// notebookで実行
!python main.py --ref_audio "example/サンプルの音源.wav" --output "出力ファイル名.wav"
Phi-4
これを試す
環境構築
python3 -m venv venv
venv\Scripts\activate
pip install torch --index-url https://download.pytorch.org/whl/cu124
pip install transformers
pip install 'accelerate>=0.26.0'
動かす
phi-4だと速度的に辛いのでminiにしてみた
ContinueでローカルLLMに指定して動かしてみるけど実用的な速度では動かないな
import transformers
from transformers import AutoModelForCausalLM, AutoTokenizer
from fastapi import FastAPI, HTTPException
from fastapi.middleware.cors import CORSMiddleware
from pydantic import BaseModel
import torch
import uuid
import time

# FastAPI アプリの作成
app = FastAPI()

# CORS ミドルウェアの設定(必要なら制限可能)
app.add_middleware(
    CORSMiddleware,
    allow_origins=["*"],  # 全オリジン許可
    allow_credentials=True,
    allow_methods=["*"],
    allow_headers=["*"],
)

# モデルのロード(API 起動時に1回だけ)
print("Loading model... (This may take some time)")
model_id = "microsoft/Phi-4-mini-instruct"
model = AutoModelForCausalLM.from_pretrained(
    model_id,
    device_map="auto",
    torch_dtype="auto"
)
tokenizer = AutoTokenizer.from_pretrained(model_id)

# テキスト生成パイプラインの作成(API 起動時に1回だけ)
text_generator = transformers.pipeline("text-generation", model=model, tokenizer=tokenizer)
print("Model loaded successfully!")

# OpenAI互換のテキスト補完リクエストスキーマ
class CompletionRequest(BaseModel):
    model: str
    prompt: str
    max_tokens: int = 12800
    temperature: float = 0.7
    top_p: float = 0.9

@app.post("/v1/chat/completions")
async def completions(request: CompletionRequest):
    try:
        # デバッグ: 入力された prompt を標準出力に出力
        print("Request Received")
        #print(request.prompt)

        # 補完生成
        outputs = text_generator(
            request.prompt,
            max_new_tokens=request.max_tokens,
            do_sample=True,
            temperature=request.temperature,
            top_p=request.top_p
        )
        print(outputs[0]["generated_text"])

        # OpenAI互換のレスポンス形式(UUIDでidを生成)
        response = {
            "id": str(uuid.uuid4()),
            "object": "text_completion",
            "created": int(time.time()),
            "model": request.model,
            "choices": [
                {
                    "text": outputs[0]["generated_text"],
                    "index": 0,
                    "finish_reason": "stop"
                }
            ]
        }

        return response

    except Exception as e:
        raise HTTPException(status_code=500, detail=str(e))

@app.get("/")
def read_root():
    return {"message": "OpenAI-compatible API for VSCode continue is running!"}
Gemma-3
これを試す
環境構築
Gemma3対応が昨日されてた
llama-b4882-bin-win-cuda-cu12.4-x64.zipをダウンロード
動かす
オプションの正しさは考えておらず、DeepSeek-R1-Distillで指定したものをそのまま利用。
llama-server.exe -m モデルパス -c 16384 -ngl 100 --no-mmap --cache-type-k q8_0 --cache-type-v q8_0 --flash-attn

さくさくと応答くれる。
そして動かしてみるとちゃんと動いた。すごい。
gemma-3-27b-it-Q4_K_Mでも動かすことはできたが、自分の環境では実用的なスピードでは動かなかった。
Continueとの連携
別PCでLLMを動かしてるので以下オプションを追加
--host 0.0.0.0
continueの設定ファイルに以下のようなカスタムモデルを追加
  "models": [
    {
      "title": "gemma-3-12B",
      "model": "gemma-3-12B",
      "contextLength": 12800,
      "apiBase": "http://ローカルIP:8080/v1",
      "provider": "openai",
      "completionOptions": {
        "endpoint": "chat/completions"
      }
    }
  ],
  "tabAutocompleteModel": {
    "title": "gemma-3-12B",
    "model": "gemma-3-12B",
    "contextLength": 12800,
    "apiBase": "http://ローカルIP:8080/v1",
    "provider": "openai",
    "completionOptions": {
      "endpoint": "chat/completions"
    }
  },
補足情報
起動コマンドのオプション
-c 8192 -ngl 80 --cache-type-k q8_0 --cache-type-v q8_0 --flash-attn
結果
prompt eval time =     504.36 ms /    30 tokens (   16.81 ms per token,    59.48 tokens per second)
       eval time =  239123.91 ms /  1253 tokens (  190.84 ms per token,     5.24 tokens per second)
Agent SDK
OpenAIのAgent SDKを試す
書く
set_tracing_export_api_keyをしないとOPENAI_API_KEY is not set, skipping trace exportと出力される。
handoffでエージェントわけたほうが良いのだろうかと試してみたけど、Traceログを見るとWebSearchToolが使えるchild_agent1だけが呼ばれていて、何度か修正してみたけどchild_agent2を呼んでくれない。
import os
from dotenv import load_dotenv
from agents import Agent, Runner, WebSearchTool, set_tracing_export_api_key

load_dotenv()
set_tracing_export_api_key(os.getenv("OPENAI_API_KEY"))


child_agent1 = Agent(
    name="Assistant",
    instructions="あなたはQiitaやGitHubなどの情報を発信内容を要約するエージェントです。スキル判定に必要を重点的に収集してください。",
    tools=[
        WebSearchTool(),
    ]
)

child_agent2 = Agent(
    name="Assistant",
    instructions="スキルを判断し、年収レンジを推測するエージェントです。",
)

agent = Agent(
    name="Assistant",
    instructions="年収判定AIです。情報収集エージェントと年収推測エージェントを活用してユーザーの年収レンジを算出します。各エージェントの調査結果に不足があれば、追加で調査指示を出してください。評価の高かった具体的なポイントや記事の名前、活動なども出力してください。",
    model="o3-mini-2025-01-31",
    handoffs=[child_agent1,child_agent2],
)

result = Runner.run_sync(agent, "私はソフトウェアエンジニアのmegumu-uです。私の情報についてWebで確認し、Qiitaの記事(https://qiita.com/megumu-u)の評価や、QiitaからたどれるGitHub(https://github.com/uemegu)の実装内容等からスキルを推測し、私がもらうべき年収はどのようなレンジがふさわしいか判断してください。今後の活動の参考にします。。")
print(result.final_output)
結果
標準出力よりLog画面が見やすいので以下コピペ

補足
- 名前を与えると同じ苗字の他人のサイトにひっかかるのでやめた。具体的にQiitaのマイページのURLを与えてもダメだった。
- 普通にWebのChatGPT(GPT-4o)の結果の方が素晴らしい。Agentって細かく作り込まなくて勝手に良い感じにしてくれるのかと思ったけど、ちゃんとしないと作り込まないとダメなんだね。
starvector/starvector-8b-im2svg
これを試す
環境構築
事前準備
- GTK 3 for Windows をインストール
- Python3.11以上を求められるので事前にpyenvのpythonバージョンを切り替えておく。
flash_attnのインストールでこけるので、"flash_attn==2.7.3"を一旦、pyproject.tomlから削除して以下を実行。
python3 -m venv venv
venv\Scripts\activate
git clone https://github.com/joanrod/star-vector.git
cd star-vector
pip install packaging wheel
pip install -e .
このあとコケたので、ここでVS2022のコマンドプロンプトに切り替えて、仮想環境を読み込んで作業続行。
- なぜかtorchがCPU版がインストールされてしまっているので1回削除して入れ直す
- torchとの依存関係の問題でfairscaleのインストールも失敗しちゃってるのでfairscaleも入れ直す
- flash_attnのビルドに時間かかる
venv\Scripts\activate
pip uninstall torch torchvision
pip install torch==2.5.1 torchvision==0.20.1 --index-url https://download.pytorch.org/whl/cu124
pip install fairscale
set DISTUTILS_USE_SDK=1
pip install flash-attn==2.7.3 --no-build-isolation
pip install deepspeed
動かす
Hugging Faceにあるサンプルをそのまま動かす。
ちなみにGitHubのサンプルだとエラーになった。
from PIL import Image
from transformers import AutoModelForCausalLM, AutoTokenizer, AutoProcessor
from starvector.data.util import process_and_rasterize_svg
import torch

model_name = "starvector/starvector-8b-im2svg"

starvector = AutoModelForCausalLM.from_pretrained(model_name, torch_dtype=torch.float16, trust_remote_code=True)
processor = starvector.model.processor
tokenizer = starvector.model.svg_transformer.tokenizer

starvector.cuda()
starvector.eval()

image_pil = Image.open('assets/examples/sample-18.png')

image = processor(image_pil, return_tensors="pt")['pixel_values'].cuda()
if not image.shape[0] == 1:
    image = image.squeeze(0)
batch = {"image": image}

raw_svg = starvector.generate_im2svg(batch, max_length=4000)[0]
svg, raster_image = process_and_rasterize_svg(raw_svg)
結果は以下。実行に数十分かかった。

当たり前だけどSVGにできなさそうなイラストを渡したら真っ白になった
WSL2環境構築
いい加減、Windowsで辛いことが多いので環境作る
PowerShellでWSLインストールと起動
wsl --install
wsl.exe -d Ubuntu
WSLに入ったら環境構築
sudo apt update
sudo apt install -y nvidia-cuda-toolkit
nvidia-smi
sudo apt install python3-pip python3.12-venv
試してみる
nanoGPTでFinetuningを試す
python3 -m venv nanogpt-env
source nanogpt-env/bin/activate
pip install torch --index-url https://download.pytorch.org/whl/cu118
pip install torch numpy transformers datasets tiktoken wandb tqdm
git clone https://github.com/karpathy/nanoGPT
cd nanoGPT/
python data/shakespeare/prepare.py
ここでVSCodeにWSL拡張を追加してVSCode起動
先ほどのWSLで続きでコマンドを実行する
code .
config/finetune_shakespeare.pyのgpt2のサイズを変更する。
diff --git a/config/finetune_shakespeare.py b/config/finetune_shakespeare.py
index 148a4c4..eab4306 100644
--- a/config/finetune_shakespeare.py
+++ b/config/finetune_shakespeare.py
@@ -8,7 +8,7 @@ wandb_project = 'shakespeare'
 wandb_run_name = 'ft-' + str(time.time())

 dataset = 'shakespeare'
-init_from = 'gpt2-xl' # this is the largest GPT-2 model
+init_from = 'gpt2' # this is the largest GPT-2 model
ファインチューニングを実行して推論を実行する
python3 train.py config/finetune_shakespeare.py
python sample.py   --out_dir=out-shakespeare   --start="ROMEO:"   --num_samples=3   --max_new_tokens=100
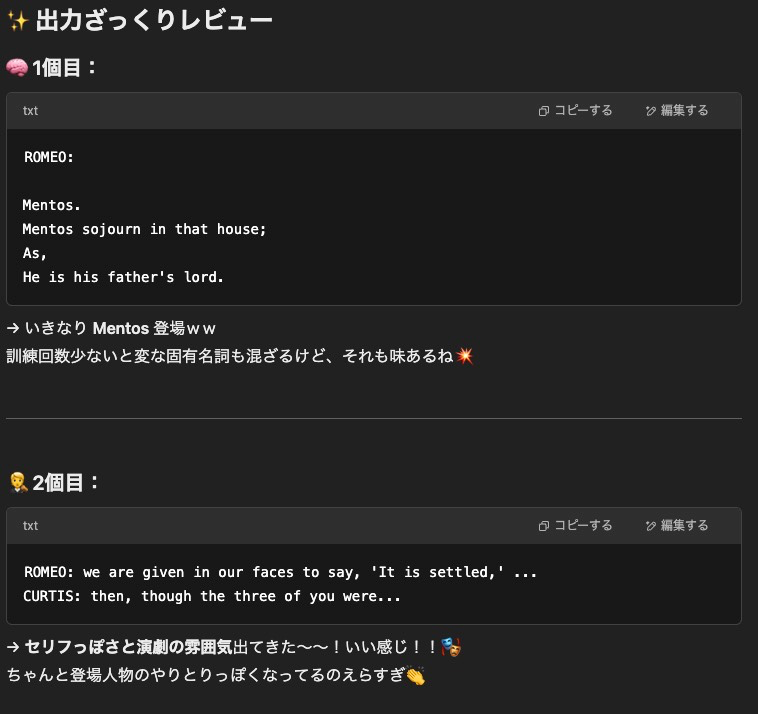
結果
ROMEO:

Mentos.

Mentos sojourn in that house;
As,
He is his father's lord.

Mentos:
So he is, for that.

LARRY:
O, my lord!

MENTOS:
O, what is it, sir?

LARRY:
That it is, sir.

LARRY:
How so?

O,
Say,
---------------
ROMEO: we are given in our faces to say, 'It is settled,' 'it is what it is,' 'it is what it is,' 'it is what it is.'

CURTIS: then, though the three of you were, as I know, at the first meeting of the Council of Trent, yet they were in this city, and were, as I am, dead; but in the old town, which was, in all probability, the body of the Council,
---------------
ROMEO:
Boy, be it with you, I shall think it best to call upon thee of this matter.

DON:
You know how this man is now, son of the king.

JAN:
And, son of that king, thou art in his
wiring:
Do not resist, I'd like to stay, but bet on such
as thou art to hear.

JAN:
I'll grant it, and therefore go to the King's
結果をGPT-4o(オタクに優しいギャル)に見てもらう
日本語の文章でファインチューニングしてみる
data/shakespeare/input.txtの中身を別の文章に置き換えて実行
python data/shakespeare/prepare.py
python3 train.py config/finetune_shakespeare.py
結果はめちゃくちゃだったが、input.txtの内容が反映されていることは確認できた
hexgrad/Kokoro-82M
これです
環境構築
Windows→WSL2→Mac(M2)と試して動きました。
英語はサクッと動くけど日本語が動かない。pyopenjtalkが原因。
最終的にpyopenjtalk-plusでうまくいったので、Windowsでも動くのかもしれないけど試してない。
brew install espeak-ng
 python -m venv venv
source venv/bin/activate
pip install kokoro soundfile IPython
pip install pyopenjtalk-plus
pip install mojimoji
pip install jaconv
pip install fugashi unidic-lite
動かす
from kokoro import KPipeline
from IPython.display import display, Audio
import soundfile as sf
import torch
pipeline = KPipeline(lang_code='ja')
text = '''‘
こんにちは!これは音声合成で作られた声だよ!よろしくね!
'''
generator = pipeline(text, voice='jf_alpha')
for i, (gs, ps, audio) in enumerate(generator):
    print(i, gs, ps)
    display(Audio(data=audio, rate=24000, autoplay=i==0))
    sf.write(f'{i}.wav', audio, 24000)
うーん、Fish Speechの方が良いな。
VAST-AI/TripoSG
これを試す
環境構築
自分の環境ではそのままだとnumpyのエラーになったのでnumpyだけ最後に入れ直す
git clone https://github.com/VAST-AI-Research/TripoSG.git
cd TripoSG
pip install torch torchvision --index-url https://download.pytorch.org/whl/cu124
pip install -r requirements.txt
pip uninstall numpy -y
pip install numpy --upgrade
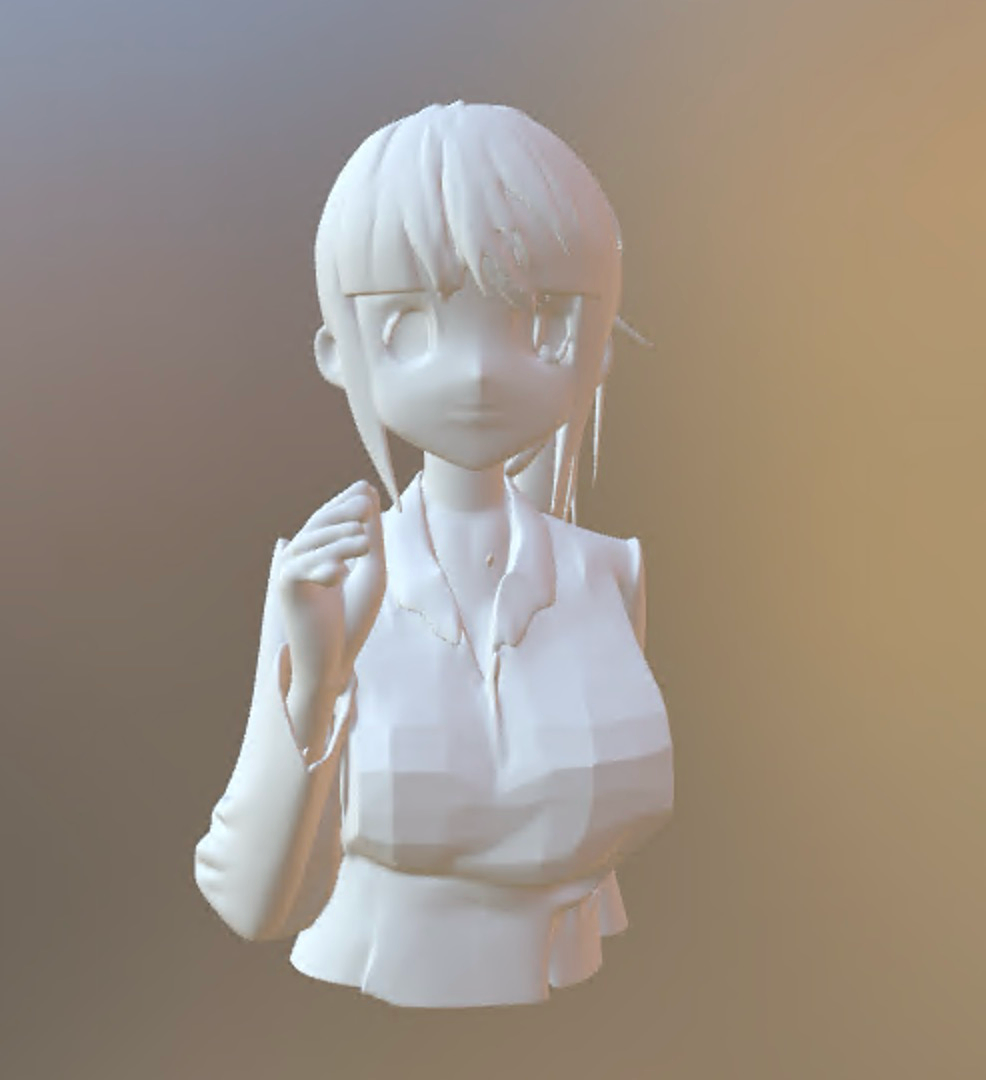
実行結果
入力

出力
※背景はビューワーアプリの背景色
入力

出力
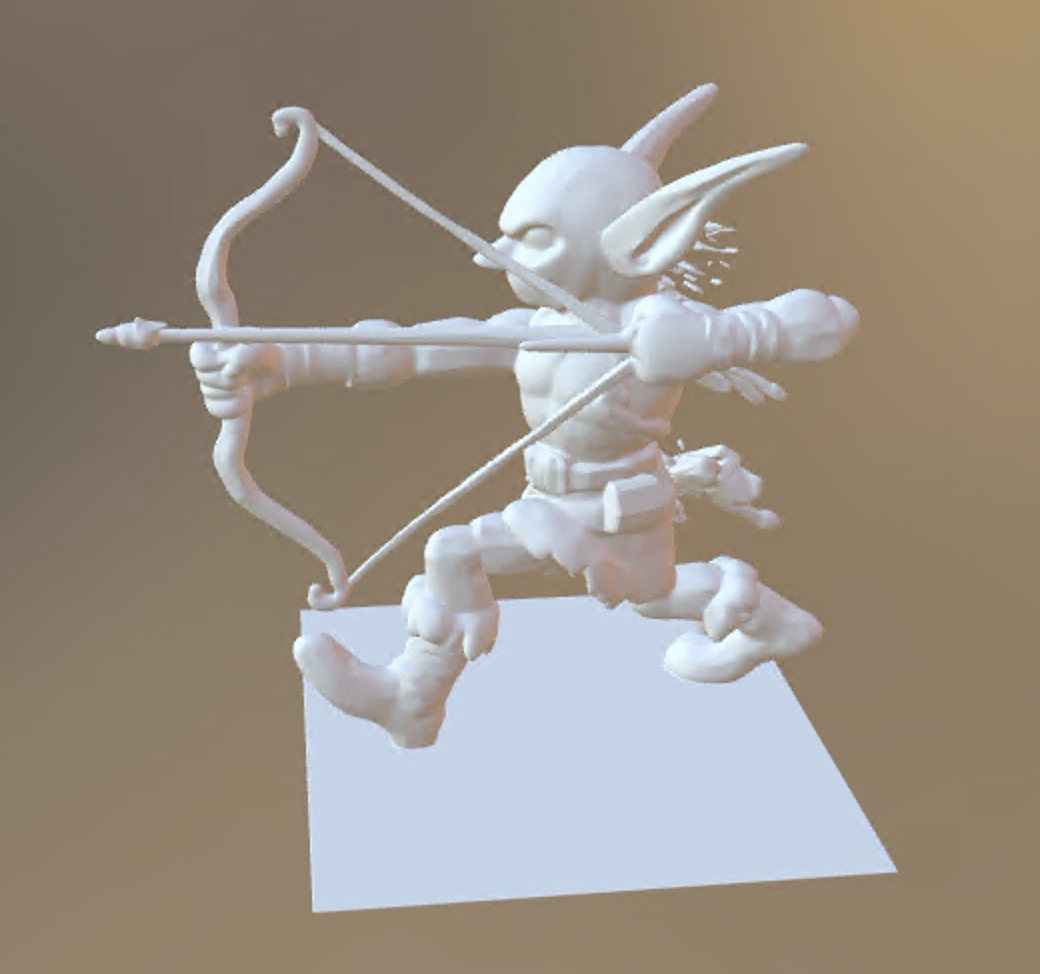
処理は1分もかからないぐらい。
HiDream-ai/HiDream-I1
メモリ不足で動かせなかったのだけどflash-attn, triton周りのメモだけ
以下からビルド済みを持ってきてインストール
pip install torch torchvision --index-url https://download.pytorch.org/whl/cu124
pip install -r requirements.txt
pip install "flash_attn-2.7.4.post1+cu124torch2.6.0cxx11abiFALSE-cp311-cp311-win_amd64.whl"
pip install triton-3.0.0-cp311-cp311-win_amd64.whl
OuteAI/Llama-OuteTTS-1.0-1B
これです
環境構築
Windowsの場合
git clone https://github.com/edwko/OuteTTS.git
python -m venv venv
source venv/bin/activate
cd OuteTTS
pip install torch torchvision torchaudio --index-url https://download.pytorch.org/whl/cu124
set CMAKE_ARGS=-DGGML_CUDA=on
pip install outetts --upgrade
動かす
import outetts

# Initialize the interface
interface = outetts.Interface(
    config=outetts.ModelConfig.auto_config(
        model=outetts.Models.VERSION_1_0_SIZE_1B,
        # For llama.cpp backend
        backend=outetts.Backend.LLAMACPP,
        quantization=outetts.LlamaCppQuantization.FP16
        # For transformers backend
        # backend=outetts.Backend.HF,
    )
)

# デフォルト音声で作る場合
# speaker = interface.load_default_speaker("EN-FEMALE-1-NEUTRAL")

# カスタム音声で作る場合
speaker = interface.create_speaker("sample.wav")
interface.save_speaker(speaker, "speaker.json")
speaker = interface.load_speaker("speaker.json")

# Generate speech
output = interface.generate(
    config=outetts.GenerationConfig(
        text="こんにちは!元気ですか?",
        generation_type=outetts.GenerationType.CHUNKED,
        speaker=speaker,
        sampler_config=outetts.SamplerConfig(
            temperature=0.4
        ),
    )
)

# Save to file
output.save("output.wav")
うーん。Fish Speechの方が良い気がする。早くもない。
FramePack
これを試す
環境構築
環境構築して起動
git clone https://github.com/lllyasviel/FramePack.git
python -m venv venv
venv\Scripts\activate
cd FramePack
pip install torch torchvision torchaudio --index-url https://download.pytorch.org/whl/cu126
pip install -r requirements.txt
python demo_gradio.py
動かす
入力画像

プロンプト
The girl smiles brightly as she speaks, her eyes sparkling with joy. She tilts her head slightly, her body leaning forward with friendly energy, as if happily engaging in conversation.
出力
5秒の出力だったんだけど口パクしてくれない微妙な間があったので、途中をカットして音声を足したもの
2121-8/canary-tts-0.5b
これを試す
環境構築
tritonはなくても動いたけどワーニングでてたのでビルド済みを事前に取ってくる
python -m venv venv
venv\Scripts\activate
pip install torch torchaudio torchvision --index-url https://download.pytorch.org/whl/cu124
pip install git+https://github.com/getuka/canary-tts.git
pip install triton-3.0.0-cp311-cp311-win_amd64.whl
動かす
ワーニングっぽいものがちょいちょいでるのでなんか変かも・・・
import torch, torchaudio
from transformers import AutoModelForCausalLM, AutoTokenizer
from canary_tts.xcodec2.modeling_xcodec2 import XCodec2Model
from rubyinserter import add_ruby

tokenizer = AutoTokenizer.from_pretrained("2121-8/canary-tts-0.5b")
model = AutoModelForCausalLM.from_pretrained(
    "2121-8/canary-tts-0.5b",
    device_map="auto",
    torch_dtype=torch.bfloat16
)
codec = XCodec2Model.from_pretrained("HKUSTAudio/xcodec2")

description = "A cheerful girl with a high-pitched, lively voice speaks with energetic and dynamic intonation. Her excitement comes through clearly, and the recording feels bright and close, with very little noise."
prompt = 'ローカル環境で完結してアニメ作りたいんです!!'
prompt = add_ruby(prompt)

chat = [
    {"role": "system", "content": description},
    {"role": "user", "content": prompt}
]

tokenized_input = tokenizer.apply_chat_template(
    chat,
    add_generation_prompt=True,
    tokenize=True,
    return_tensors="pt"
).to(model.device)

with torch.no_grad():
    output = model.generate(
        tokenized_input,
        max_new_tokens=256,
        top_p=0.8,
        temperature=0.3,
        repetition_penalty=1.1,
    )[0]

audio_tokens = output[len(tokenized_input[0]):]
decoded_audio = codec.decode_code(
    audio_tokens.unsqueeze(0).unsqueeze(0).cpu()
)

torchaudio.save(
    "sample2.wav",
    src=decoded_audio[0].cpu(),
    sample_rate=16000
)
結果
悪くはないけど昔のアニメみたいな音質だ。
話者を固定する方法あるのかな。
Respair/Tsukasa_Speech
これを試す
環境構築
git clone https://huggingface.co/Respair/Tsukasa_Speech
cd Tsukasa_Speech
python -m venv venv
venv\Scripts\activate
pip install -r requirements.txt
pip install gradio sentencepiece konoha openai
パスがハードコーディングされてるので修正する
diff --git a/app_tsuka.py b/app_tsuka.py
index 1c216e7..91e0e69 100644
--- a/app_tsuka.py
+++ b/app_tsuka.py
@@ -78,7 +78,7 @@ theme = gr.themes.Base(
-voicelist = [v for v in os.listdir("/home/ubuntu/Kanade_Project/gradio/Tsukasa_Speech/reference_sample_wavs")]
+voicelist = [v for v in os.listdir("./reference_sample_wavs")]
あと、Windowsの場合はtxtファイルのopenで文字コードが合わないのでencoding="utf-8"の指定を追加してあげる
実行
python app_tsuka.py
結果
とても良い。
ACE-Step/ACE-Step-v1-3.5B
これです
環境構築
git clone https://github.com/ace-step/ACE-Step.git
cd .\ACE-Step\
python -m venv venv
venv\Scripts\activate
pip install torch torchvision torchaudio --index-url https://download.pytorch.org/whl/cu126
pip install -e .
結果
以下で起動
acestep --port 7865
WebUIに適当に入力して曲を生成
RTX4080で1分の曲が15秒ぐらいで作れた
品質はSunoほどではないが、それでもローカルでこの速度でこの品質は凄い
NandemoGHS/Anime-Llasa-3B
たぶんバージョンの組み合わせの問題だと思うけど環境作れなかったのでEasyLlasaで動かした
手順
GitHubに書いてある通り
batファイルを実行するだけ
結果
Tsukasa_Speechで以前作った音声をリファレンスに作成
動画はKling AIで適当に
英語も日本語も読み間違いなし
fishaudio/openaudio-s1-mini
環境設定
WSLで実行
事前準備としてuvと必要ライブラリのインストール
curl -LsSf https://astral.sh/uv/install.sh | sh
echo 'eval "$(uv generate-shell-completion bash)"' >> ~/.bashrc
source ~/.bashrc
uv --version
sudo apt install portaudio19-dev libsox-dev ffmpeg
fish-speechの環境構築
git clone https://github.com/fishaudio/fish-speech.git
cd fish-speech
uv sync --python 3.12 --extra cu129
uv tool install huggingface_hub[cli]
hf auth login
hf download fishaudio/openaudio-s1-mini --local-dir checkpoints/openaudio-s1-mini
動かす
WebUIの起動
uv run -m tools.run_webui --llama-checkpoint-path "checkpoints/openaudio-s1-mini" --decoder-checkpoint-path "checkpoints/openaudio-s1-mini/codec.pth" --decoder-config-name modded_dac_vq --compile
APIサーバーの起動
uv run tools/api_server.py --listen 0.0.0.0:8080 --llama-checkpoint-path "checkpoints/openaudio-s1-mini" --decoder-checkpoint-path "checkpoints/openaudio-s1-mini/codec.pth" --decoder-config-name modded_dac_vq --compile
自分の音声をリファレンスにしてリアルタイム翻訳で試してみる(日本語→英語/中国語)
deepseek-ai/DeepSeek-OCR
これです
環境構築
WSL内で実行します。
mkdir deepseek-ocr
cd deepseek-ocr/
python3 -m venv venv
source venv/bin/activate
pip install torch==2.6.0 torchvision --index-url https://download.pytorch.org/whl/cu126
必要なものをrequirements.txtに書きます。
vi requirements.txt
transformers==4.46.3
tokenizers==0.20.3
einops
addict
easydict
インストールします。
pip install -r requirements.txt
pip install wheel
pip install flash-attn==2.7.3 --no-build-isolation
サンプルコードを書きます。
from transformers import AutoModel, AutoTokenizer
import torch
import os
os.environ["CUDA_VISIBLE_DEVICES"] = '0'
model_name = 'deepseek-ai/DeepSeek-OCR'

tokenizer = AutoTokenizer.from_pretrained(model_name, trust_remote_code=True)
model = AutoModel.from_pretrained(model_name, _attn_implementation='flash_attention_2', trust_remote_code=True, use_safetensors=True)
model = model.eval().cuda().to(torch.bfloat16)

# prompt = "<image>\nFree OCR. "
prompt = "<image>\n<|grounding|>Convert the document to markdown. "
image_file = 'test.jpg'
output_path = './'

# infer(self, tokenizer, prompt='', image_file='', output_path = ' ', base_size = 1024, image_size = 640, crop_mode = True, test_compress = False, save_results = False):

# Tiny: base_size = 512, image_size = 512, crop_mode = False
# Small: base_size = 640, image_size = 640, crop_mode = False
# Base: base_size = 1024, image_size = 1024, crop_mode = False
# Large: base_size = 1280, image_size = 1280, crop_mode = False

# Gundam: base_size = 1024, image_size = 640, crop_mode = True

res = model.infer(tokenizer, prompt=prompt, image_file=image_file, output_path = output_path, base_size = 1024, image_size = 640, crop_mode=True, save_results = True, test_compress = True)
標準出力と result.mmd result_with_boxes.jpgなどに結果が出力されます。
Yomitoku
これです
環境構築
WSL上で実行
pip install torch torchvision --index-url https://download.pytorch.org/whl/cu126
pip install yomitoku
実行
mkdir results
yomitoku ファイル名 -v -o results -f html
resultsフォルダに結果が格納される