Ruby用2D描画ライブラリの比較とサンプル


比較
| Gosu | Processing | Ruby 2D | Ruby/SDL2 | |
|---|---|---|---|---|
| 抽象度 | 中 | 高 | 高 | 低 |
| 座標基点 | 左上 | 自由 | 左上 | 左上 |
| ベース | SDL2 | SDL2 | SDL2 | |
| テンプレートメソッドパターン | ○ | ○ | ○ | |
| 表示優先度管理 | ○ | ○ | ||
| フォント内蔵 | ○ | ○ | ○ | |
| 円の描画 | ○ | ○ |
以下は、ほぼ同じ処理をそれぞれで書いた例[1]
gosu
brew install sdl2
gem i gosu
require "gosu"

class App < Gosu::Window
  class << self
    def show
      new.show
    end
  end

  def initialize
    # https://www.rubydoc.info/gems/gosu/Gosu/Window#initialize-instance_method
    super 800, 600

    # https://www.rubydoc.info/gems/gosu/Gosu/Window#caption-instance_method
    self.caption = "(gosu)"

    # https://www.rubydoc.info/gems/gosu/Gosu%2FFont:initialize
    @font = Gosu::Font.new(20)

    @frame_count = 0
  end

  # https://www.rubydoc.info/gems/gosu/Gosu/Window#update-instance_method
  def update
    @frame_count += 1
  end

  def draw
    # https://www.rubydoc.info/gems/gosu/Gosu/Font#draw_text-instance_method
    @font.draw_text("#{@frame_count} #{Gosu.fps}", 0, 0, 0)

    # https://www.rubydoc.info/gems/gosu/Gosu#draw_rect-class_method
    Gosu.draw_rect(width * 0.25, height * 0.25, width * 0.5, height * 0.5, Gosu::Color::BLUE)

    # https://www.rubydoc.info/gems/gosu/Gosu#draw_line-class_method
    Gosu.draw_line(0, 0, Gosu::Color::WHITE, width, height, Gosu::Color::RED)
  end

  # https://www.rubydoc.info/gems/gosu/Gosu/Window#button_down-instance_method
  def button_down(id)
    super

    if id == Gosu::KB_ESCAPE || id == Gosu::KB_Q
      close
    end
  end

  show
end
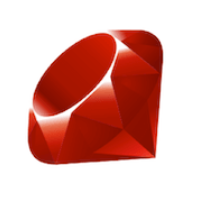
テンプレートメソッドパターンになっていて update と draw が毎フレーム呼ばれる。適宜使い分けろってことかと思ったが update 内で描画すると怒られるあたりもしっかりとした設計がうかがえる。
draw_line では両端にそれぞれ異なる色を指定するとグラデーションがかかる。draw_line の (x2, y2) のピクセルは描画されなくてちょっとはまった。ドキュメントには委譲先の OpenGL の Line の挙動が怪しいのでデバッグ以外で draw_line を使うなと書いてあった。
Gosu::Color.new で色を作る場合は非透明度を指定できる。
次が致命的な問題点でバッファフリップ後の塗り潰しが「黒固定のハードコーディング」になっている。これは多くの人にとって困る事態ではないかと思われる。それを改善する PR もあったが却下されていた。その点について作者に伺ったところ「必要であれば再度自分で draw_rect すればよい」とのこと。draw_rect は高速なのでパフォーマンスにまったく影響がないそう。とはいえ、この方法ではクリエイティブコーディングでよく用いられる、画面を半透明で描画し続けることで残像を残すブラー効果を表現できない。その点についても伺ったが「残像用のオブジェクトを毎フレーム全部描画すればよい」という回答だった。いやいや、さすがにそれで納得する人はいないでしょう。
Processing
gem i processing
require "processing"
using Processing

setup do
  setTitle "Processing"
  size 800, 600
end

draw do
  background 0

  fill(0, 0, 255)
  rect width * 0.25, height * 0.25, width * 0.5, height * 0.5

  stroke 255, 255, 255
  line 0, 0, width - 1, height - 1

  fill(255, 255, 255)
  textSize 16
  textAlign(LEFT, TOP)
  text "#{frameCount} #{frameRate.round}", 0, 0, 0, 0
end
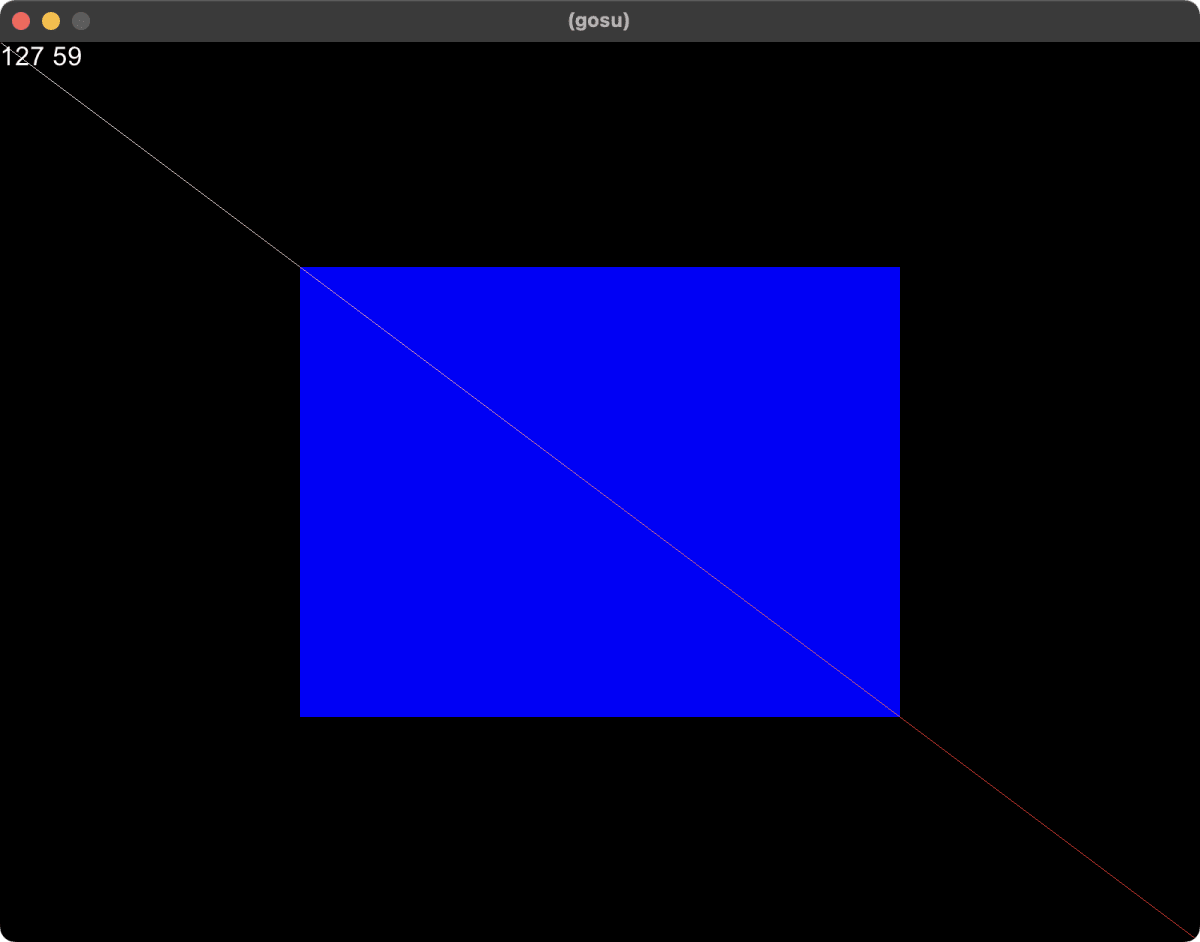
Java を経由しないため起動が速い。
Processing 全般に言えることだけどクラスで書かせてほしい。
Ruby 2D
brew install sdl2
gem i ruby2d
require "ruby2d"

class App
  include Ruby2D::DSL

  def call
    # https://www.ruby2d.com/learn/window/#setting-attributes
    set title: "(Ruby 2D)"
    set width: 800, height: 600

    frame_count = 0

    update do
      # 描画オブジェクトたちをぶっ殺す (超重要)
      # ただしこのような使い方をフレームワーク開発者は推奨してないと思われる
      clear

      # https://www.ruby2d.com/learn/window/#getting-attributes
      w, h = get(:width), get(:height)

      # https://www.ruby2d.com/learn/text/
      objects_count = DSL.window.instance_variable_get(:@objects).count
      text = [frame_count, get(:fps), objects_count] * " "
      text_object = Text.new(text, x: 0, y: 0)

      # https://www.ruby2d.com/learn/shapes/#rectangles
      rectangle_object = Rectangle.new(
        x: w * 0.25, y: h * 0.25,
        width: w * 0.5, height: h * 0.5,
        color: "blue", z: 0)

      # https://www.ruby2d.com/learn/shapes/#lines
      line_object = Line.new(
        x1: 0, y1: 0,
        x2: w - 1, y2: h - 1,
        color: "white", z: 0)

      if false
        # 直接描画する場合はこのようにすればよいのかと思ったが canvas も同様にオブジェクトだった
        # また text を canvas に描画する方法は用意されていない
        canvas = Canvas.new(width: w, height: h)

        canvas.fill_rectangle(
          x: w * 0.25, y: h * 0.25,
          width: w * 0.5, height: h * 0.5,
          color: "blue")

        canvas.draw_line(
          x1: 0, y1: 0,
          x2: w - 1, y2: h - 1,
          color: "white")
      end

      frame_count += 1
    end

    # https://www.ruby2d.com/learn/input/#keyboard
    on :key_down do |event|
      if event.key == "escape" || event.key == "q"
        close
      end
    end

    render do
      if true
        text = "Textにはshowオプションがあるため描画命令として使える"
        Text.new(text, x: 0, y: 50, show: false).send(:render)
      end

      if false
        # Rectangle には show オプションがない
        Rectangle.new(x: 0, y: 0, width: 32, height: 32, color: "blue", show: false).send(:render)
      end

      if true
        text = "自力でテキストを描画する場合"
        x, y = 0, 80
        color = "white"
        texture = Text.create_texture(text)
        vertices = Vertices.new(x, y, texture.width, texture.height, 0)
        texture.draw(vertices.coordinates, vertices.texture_coordinates, Color.new(color))
      end

      if true
        # クラスメソッドの draw を使えば描画オブジェクトを生成せずに描画できる
        # しかし Text.draw は用意されていない
        Rectangle.draw(x: 0, y: get(:height) - 64, width: 64, height: 64, color: [Color.new("green").to_a] * 4)
      end
    end

    show
  end

  new.call
end
まずドキュメント類のサンプルがすべてトップレベルで記述する手続き型になっていて辛い。BASICから移行する人にはとっつきやすいかもしれないが、ほとんどの人はクラスとして書きたいのではなかろうか。とはいえソースを読むとトップレベルで include Ruby2D::DSL していたので、クラス内で同様にしてみたところクラス内でも使うことができた。それとは別にRuby2D::Windowを継承する方法もちゃんとあるようだ。
描画方法について。描画するために Rectangle.new などとインスタンスを生成する方式に驚いた。これは描画というより Rectangle オブジェクトの生成を意味する。生成すると自動的に内部の objects 配列に追加される。z値による表示優先度を管理するならそれは普通の仕組みだがなんとその描画オブジェクトは objects から除去するまで生きている。なので update ブロック内で rectangle_object.x を更新すると動いたりする。
これが扱いにくい場合は Canvas のインスタンス経由で描画することもできるが、なんということか、Canvas 自体がまた描画オブジェクトになっており、objects に登録される。
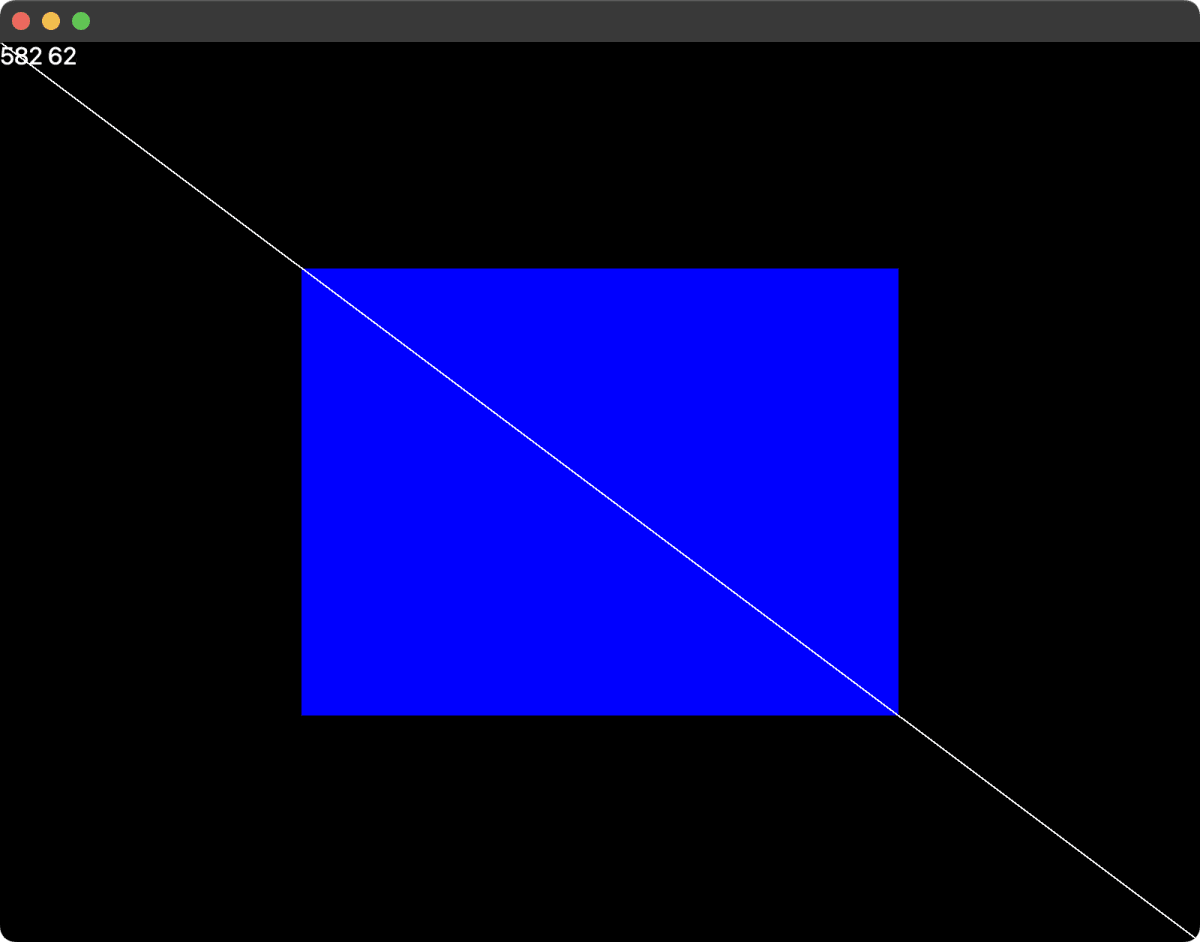
自力で描画する方法として、show: false として描画オブジェクトを生成した場合は objects に登録されないので自分で object.send(:render) を呼べばいいと気づいた。しかし、描画オブジェクトによって show オプションの有無がばらばらで意味がなかった。たとえば、 Text.new には show オプションが利くが Rectangle.new で指定するとエラーになる。
また別の案としてクラスメソッドの draw を使えば描画オブジェクトを生成せずに描画できることに気づいたが、なぜか Text.draw は用意されていない。この辺、何か設計がちぐはぐしている。クラスメソッドの draw を使った場合、色の指定が抽象化されておらず [r, g, b, a] を頂点の数だけ指定しなればならないというのも使い勝手が良いとは言えない。
最終的には「描画オブジェクトの生成」を「一度きりの描画命令の発行」と考えて update に入った直後、または render 内で clear (objects.clear 相当) するのがよさそう。描画するためにインスタンス生成するのは無駄に思えるかもしれないけど表示優先度を管理しようとなると結局同じことになる。とはいえ、おそらくこのような使い方を Ruby 2D の作者は推奨していないだろう。
Ruby/SDL2
brew install sdl2 sdl2_ttf
gem i ruby-sdl2
require "sdl2"

class App
  def call
    SDL2.init(SDL2::INIT_EVERYTHING)

    # https://ohai.github.io/ruby-sdl2/doc-en/SDL2/Window.html#create-class_method
    # https://ohai.github.io/ruby-sdl2/doc-en/SDL2/Window/Flags.html
    window = SDL2::Window.create("(Ruby/SDL2)", SDL2::Window::POS_CENTERED, SDL2::Window::POS_CENTERED, 800, 600, 0)

    # https://ohai.github.io/ruby-sdl2/doc-en/SDL2/Window.html#create_renderer-instance_method
    # https://ohai.github.io/ruby-sdl2/doc-en/SDL2/Renderer/Flags.html
    renderer = window.create_renderer(-1, SDL2::Renderer::Flags::ACCELERATED|SDL2::Renderer::Flags::ACCELERATED)

    if true
      # https://ohai.github.io/ruby-sdl2/doc-en/SDL2/TTF.html#init-class_method
      SDL2::TTF.init

      # https://ohai.github.io/ruby-sdl2/doc-en/SDL2/TTF.html#open-class_method
      font = SDL2::TTF.open("/Library/Fonts/Ubuntu.ttf", 20)
    end

    if true
      fps = 0
      fps_counter = 0
      old_ticks = SDL2.get_ticks
    end

    frame_count = 0

    loop do
      # https://ohai.github.io/ruby-sdl2/doc-en/SDL2/Event.html#poll-class_method
      while ev = SDL2::Event.poll
        case ev
        when SDL2::Event::Quit
          exit
        when SDL2::Event::KeyDown
          if ev.sym == SDL2::Key::ESCAPE || ev.sym == SDL2::Key::Q
            exit
          end
        end
      end

      # https://ohai.github.io/ruby-sdl2/doc-en/SDL2/Renderer.html#clear-instance_method
      renderer.draw_color = [0, 0, 0]
      renderer.clear

      # https://ohai.github.io/ruby-sdl2/doc-en/SDL2/Renderer.html#fill_rect-instance_method
      renderer.draw_color = [0, 0, 255]
      w, h = window.size
      rect = SDL2::Rect.new(w * 0.25, h * 0.25, w * 0.5, h * 0.5)
      renderer.fill_rect(rect)

      # https://ohai.github.io/ruby-sdl2/doc-en/SDL2/Renderer.html#draw_line-instance_method
      renderer.draw_color = [255, 255, 255]
      renderer.draw_line(0, 0, w - 1, h - 1)

      if font
        text = "#{frame_count} #{fps}"
        font_color = [255, 255, 255]
        surface = font.render_blended(text, font_color)
        texture = renderer.create_texture_from(surface)
        rect = SDL2::Rect.new(0, 0, *font.size_text(text))
        renderer.copy(texture, nil, rect)
      end

      if true
        fps_counter += 1
        v = SDL2.get_ticks
        t = v - old_ticks
        if t >= 1000
          fps = fps_counter
          old_ticks = v
          fps_counter = 0
        end
      end

      frame_count += 1

      # https://ohai.github.io/ruby-sdl2/doc-en/SDL2/Renderer.html#present-instance_method
      renderer.present
    end
  end

  new.call
end
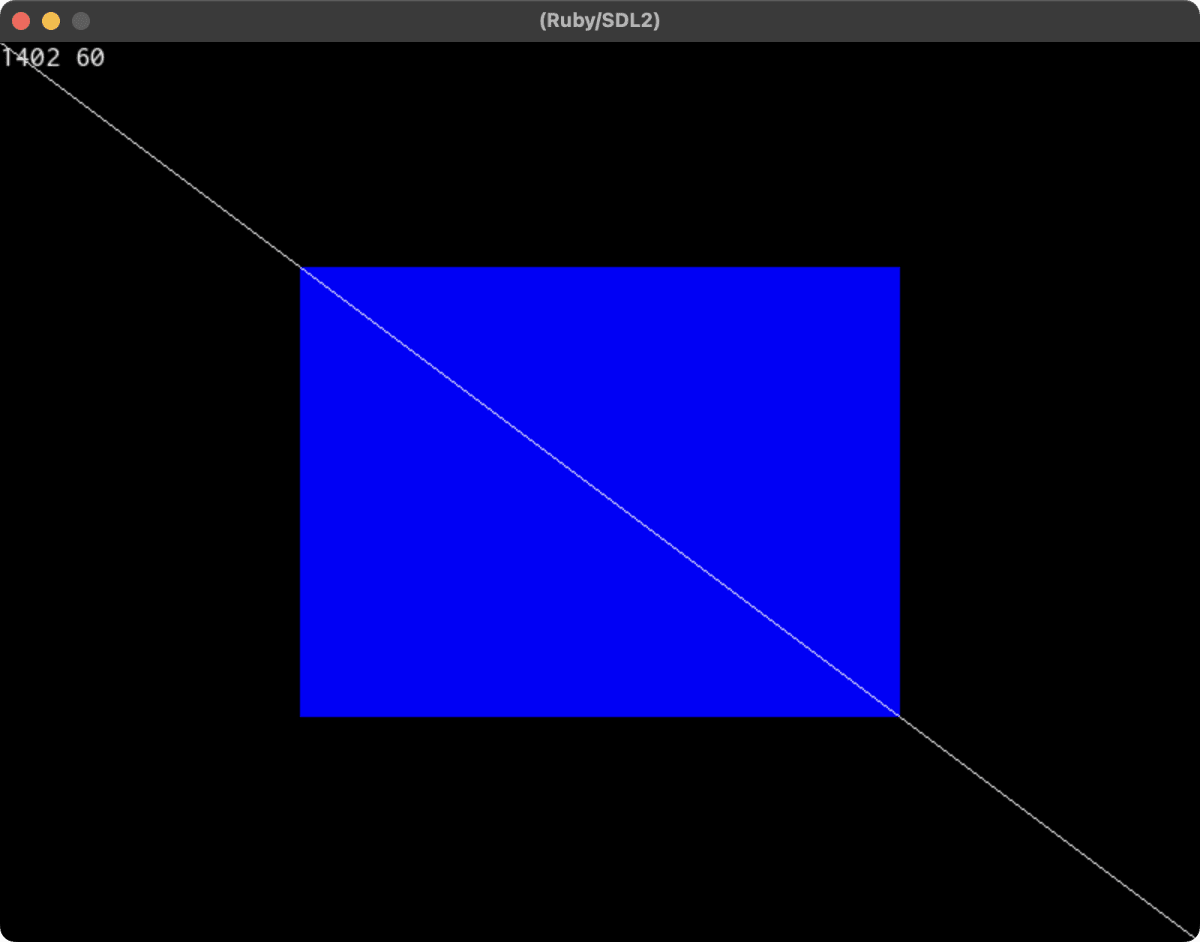
最低限のことをやるとしても結構なコードを書くことになるがその分細かいところまで制御できる。
図形を描く命令が少ないのが難点で「四角形の枠」「塗り潰した四角形」「1ドット」「1ドット幅の線」しか用意されていない。「円」「曲線」「塗り潰した矢印」などを描くには別途 SDL2_gfx を入れればいいらしいが、そもそもバインディングしてくれないと Ruby から使えないのだった。
図形を描く別の方法として OpenGL もある。Ruby/SDL2 のライブラリ内に含まれているサンプルの中にあったこの方法を使えば図形も楽に書けるようだが、今度は OpenGL に特化した独特の知識が必要になってくるのでこれはこれで大変そう。なお、そのサンプルを実際に動かしてみたところPCとの相性の問題なのかフレームレートが不安定だった。
[WIP] Ruby/GTK4
gem i gtk4
require "gtk4"

application = Gtk::Application.new("com.github.xxx.hello", :default_flags)
application.signal_connect "activate" do |app|
  window = Gtk::ApplicationWindow.new(app)
  window.set_default_size 800, 600
  window.title = "(Title)"

  label = Gtk::Label.new("Hello World")
  window.child = label
  window.show
end

application.run
その他
本家 Processing 2 系の Ruby バインディング
もうメンテしてないらしく JRubyArt を使えとドキュメントに書いてあった。
本家 Processing 3 系の Ruby バインディング
gem install jruby_art
k9 --install
としたあと ~/.jruby_art/config.yml の JRUBY を false にして
cd ~/k9_samples/contributed
k9 -r jwishy.rb
とすればサンプルが動いたけど起動が遅すぎる。一応、k9 -w jwishy.rb として watch モードにすれば変更は瞬時に反映される。
-
あえて手続き型で書いている ↩︎
Discussion