⛰️
パーリンノイズ生成ライブラリ perlin_noise gem の使い方
いちばん簡単な使い方
require "perlin_noise"
noise = Perlin::Noise.new(1)
noise[0.01]  # => 0.505004826794
noise[0.02]  # => 0.510037257216
noise[0.03]  # => 0.515121258026
- 第一引数に次元数を指定する
- 0.0..1.0 の範囲で返ってくる
- しかし、ほとんどの値は中央付近に分布する (調整方法あり)
- 位置の値はそれ自体よりも間隔が感覚的に重要になる
- 0.1 間隔 → 起伏が強め
- 0.01 間隔 → ちょうどいいくらい
- 0.001 間隔 → かなりなめらか
- ノイズというより波形と表現した方が合っているような気がする
2次元の場合
noise = Perlin::Noise.new(2)
noise[0.01, 0.01]      # => 0.49849334098480735
noise[0.02, 0.02]      # => 0.49702264996355916
noise[0.03, 0.03]      # => 0.495620893799757
noise[0.04] rescue $!  # => #<ArgumentError: Invalid coordinates>
- 1次元のときと同じ要領でいける
- つまり何次元でもいける
- 第一引数と
#[]への引数の数を合わせること
コントラストを上げる
noise = Perlin::Noise.new(1)
v = noise[0.01]  # => 0.4950049253
c = v
c = Perlin::Curve::CUBIC.call(c)  # => 0.4925076372119325
c = Perlin::Curve::CUBIC.call(c)  # => 0.4887622969929636
c = Perlin::Curve::CUBIC.call(c)  # => 0.4831462838178697
c = Perlin::Curve::CUBIC.call(c)  # => 0.47472900024709724
c = Perlin::Curve::CUBIC.call(c)  # => 0.462125777675654
中央付近に分布してしまう値の差を広げることを、作者のドキュメントでは「コントラストを上げる」と表現している。求めた値を Perlin::Curve::CUBIC に通すたびに差が広がっていくのがわかる。上のコードを簡潔にすると、
5.times.inject(v, &Perlin::Curve::CUBIC) # => 0.462125777675654
と書けるので、それで別にいいのだけど、作者のほうでもショートカットを用意してくれている。
contrast = Perlin::Curve.contrast(Perlin::Curve::CUBIC, 5)
contrast.call(v)  # => 0.462125777675654
どちらを使ってもいい。
範囲を -0.5..+0.5 に調整する
0.0..1.0 を -0.5..+0.5 に補正する場合、
noise = Perlin::Noise.new(1)
noise[0.01] - 0.5  # => 0.00500482679400005
とする。またコントラスト調整する場合はコントラスト調整を先に行う点に注意する。
Bad
v = noise[0.01] - 0.5             # => 0.00500482679400005
v = Perlin::Curve::CUBIC.call(v)  # => 7.489414899555933e-05
Good
v = noise[0.01]                         # => 0.505004826794
v = Perlin::Curve::CUBIC.call(v) - 0.5  # => 0.00750698946628181
合成とは?
noise = Perlin::Noise.new(1)
v = 0
# 大きな波
v += noise[0.01] - 0.5  # => -0.004995074699999991
# 小さな波
v += noise[0.1] - 0.5   # => -0.050715074699999974
スケールの異なる波形を合成(といっても足しているだけ)すると大きな波のなかに小さな波が表われるようになる。
可視化する
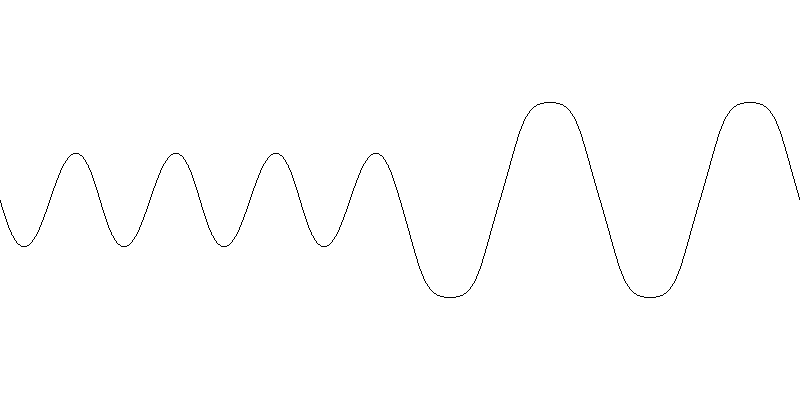
波形の想像が難しいときは可視化する。
コード
require "perlin_noise"
require "gosu"

width    = 800
height   = 400
edge     = width
scale    = 0.02
contrast = 3

noise = Perlin::Noise.new(1)
step = width.ceildiv(edge.pred)
contrast_fn = Perlin::Curve.contrast(Perlin::Curve::CUBIC, contrast)

image = Gosu.render(width, height) do
  from = nil
  edge.times do |x|
    y = noise[x * scale]
    y = contrast_fn[y] - 0.5
    color = Gosu::Color.from_hsv(0, 0, 0.0)
    to = V[x * step, height * 0.5 + y * height * 0.5]
    if from
      Gosu.draw_line(*from, color, *to, color)
    end
    from = to
  end
end

image.save("images/visualize.png")
リアルな山を表現する

波形を合成すると凸凹した稜線を表現できる。
コード
require "perlin_noise"
require "gosu"

width    = 800
height   = 600
edge     = width
scale    = 0.02
contrast = 2

noise = Perlin::Noise.new(1)
step = width.ceildiv(edge.pred)
contrast = Perlin::Curve.contrast(Perlin::Curve::CUBIC, 0)

from = nil
image = Gosu.render(width, height) do
  from1 = nil
  edge.times do |x|
    y = 0.0

    # 大きな間隔の波
    v = noise[x * 0.01]
    v = 2.times.inject(v, &Perlin::Curve::CUBIC) - 0.5
    y += v

    # 小さな間隔の波
    v = noise[x * 0.06]
    v = (0.times.inject(v, &Perlin::Curve::CUBIC) - 0.5) * 0.2
    y += v

    color = Gosu::Color.from_hsv(0, 0, 0.0)
    to = V[x * step, height * 0.5 + y * height * 0.5]
    if from1
      Gosu.draw_line(*from1, color, *to, color)
    end
    from1 = to
  end
end

image.save("images/mountain.png")
テクスチャを生成する
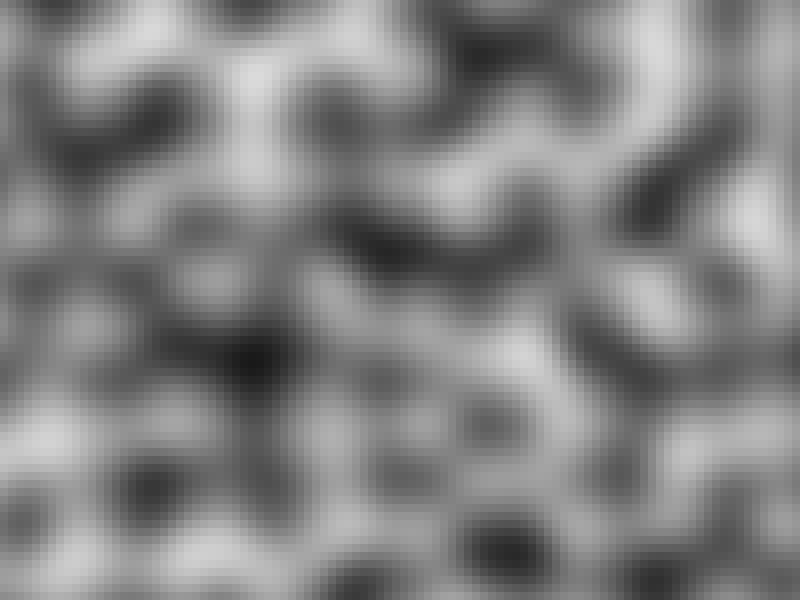
黒と白は必ず中間色を経由しているのがわかる。
コード
require "perlin_noise"
require "gosu"

width    = 800
height   = 600
size     = 8
scale    = 0.08
contrast = 1

noise = Perlin::Noise.new(2)
image = Gosu.render(width, height) do
  height.ceildiv(size).times do |y|
    width.ceildiv(size).times do |x|
      v = noise[x * scale, y * scale]
      v = contrast.times.inject(v, &Perlin::Curve::CUBIC)
      color = Gosu::Color.from_hsv(0, 0, v)
      Gosu.draw_rect(x * size, y * size, size, size, color)
    end
  end
end

image.save("images/texture.png")
RPGのマップを生成する

波形を高さと見なして色に変換する。
コード
require "perlin_noise"
require "gosu"

width    = 800
height   = 600
size     = 16
scale    = 0.08
contrast = 5

noise = Perlin::Noise.new(2)
image = Gosu.render(width, height) do
  height.ceildiv(size).times do |y|
    width.ceildiv(size).times do |x|
      v = noise[scale * x, scale * y]
      v = contrast.times.inject(v, &Perlin::Curve::CUBIC)
      case
      when v <= 0.1
        h = 180
      when v <= 0.9
        h = 60
      else
        h = 120
      end
      color = Gosu::Color.from_hsv(h, 0.4, 1.0)
      Gosu.draw_rect(x * size, y * size, size, size, color)
    end
  end
end

image.save("images/map.png")
地場を確認する
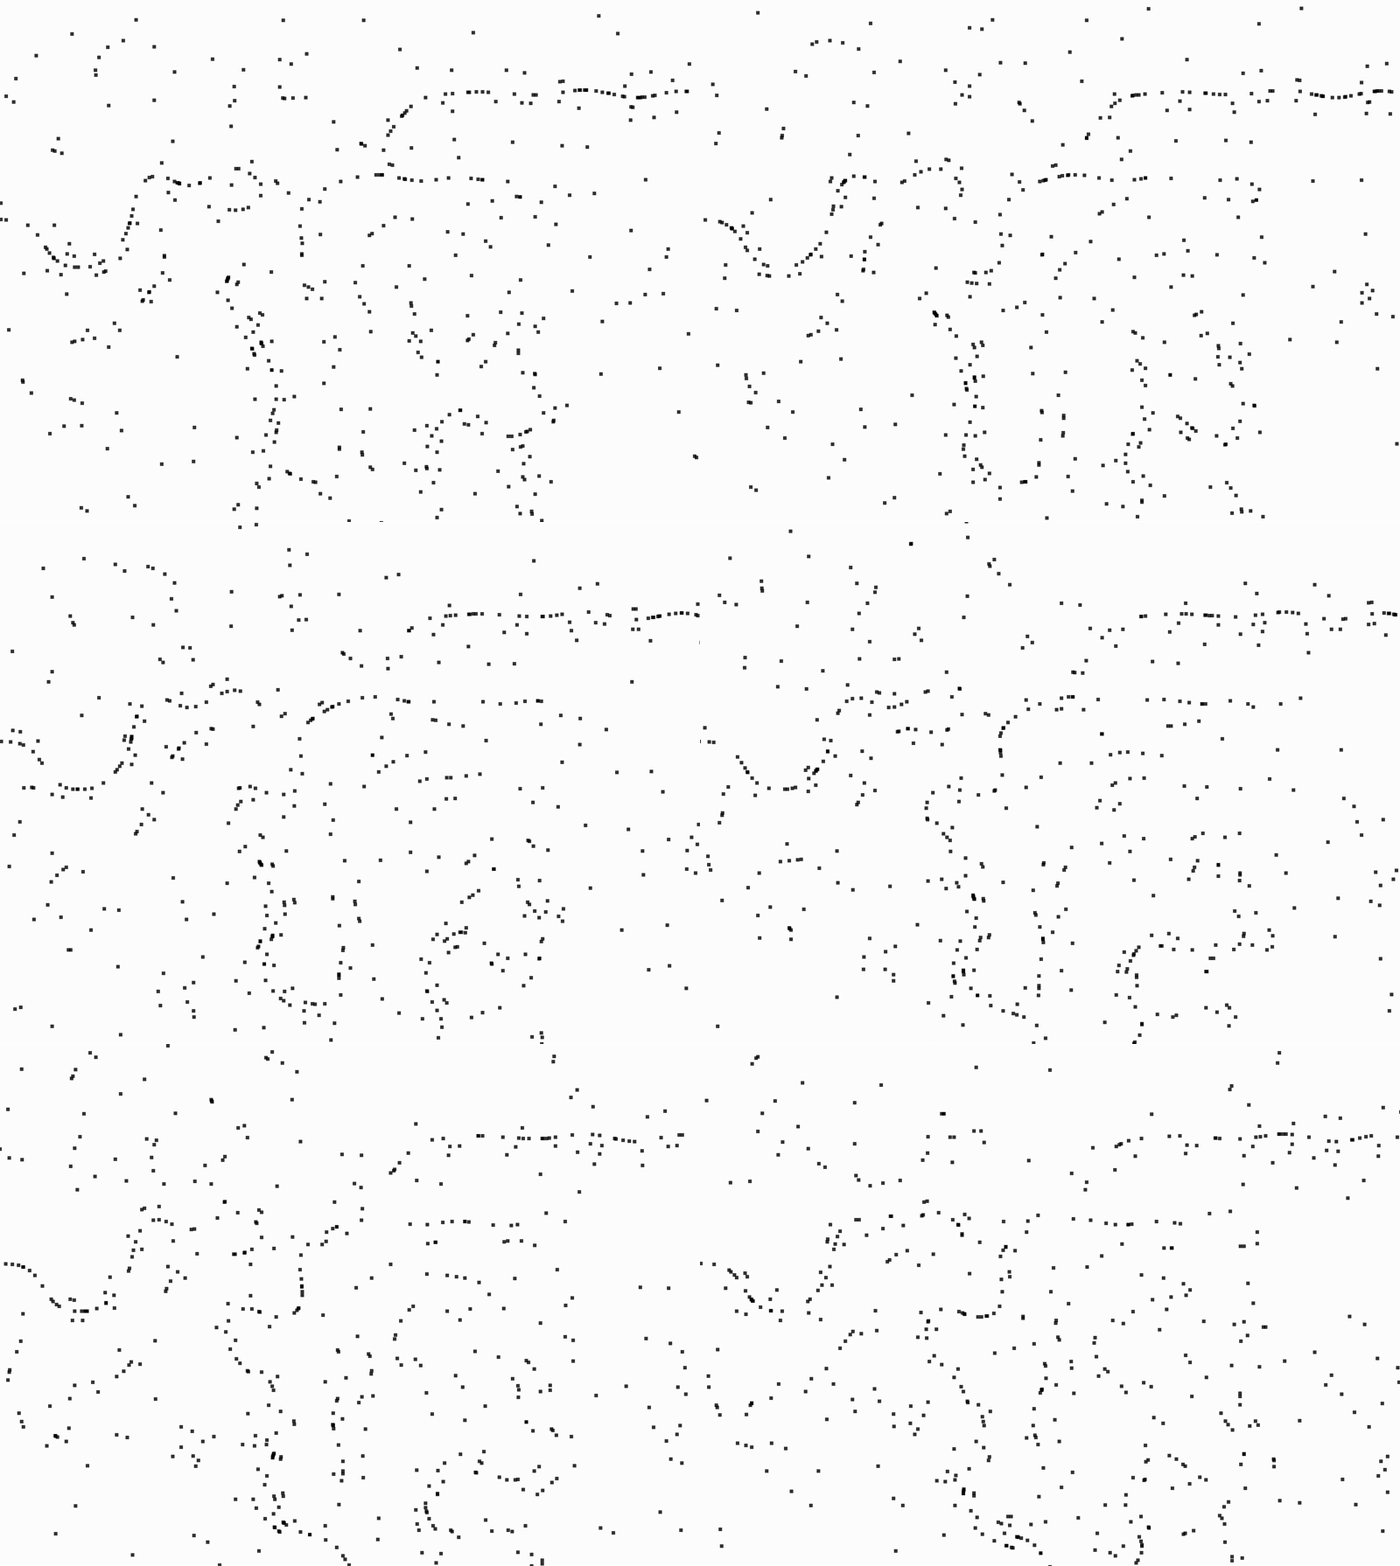
二次元のノイズを使えば座標から向きがわかる。
コード
require "perlin_noise"

class WaterFlea
  def initialize
    @location = V.rand * $app.window_wh
  end

  def draw
    v = @location * 0.01
    angle = $app.noise[*v] * 100.0
    @location += V.from_angle(angle)
    if @location.x >= $app.window_wh.x || @location.x < 0 || @location.y >= $app.window_wh.y || @location.y < 0
      @location = V.rand * $app.window_wh
    end
    $app.point_draw(@location, radius: 2)
  end
end

class App < Base
  attr_accessor :noise

  def initialize
    super

    @noise = Perlin::Noise.new(2, interval: 1024)
    @water_fleas = 500.times.collect { WaterFlea.new }
  end

  def draw
    super

    @water_fleas.each(&:draw)
  end

  show
end
微生物を動かす

ランダムとは違って意思を持っているように見えなくもない。
コード
require "perlin_noise"

class WaterFlea
  def initialize
    @location = $app.window_wh * 0.5
    @velocity = V.zero
    @noise_offset = V.rand * 10000.0
    @noise_scale = 0.005
    @generation = 0
  end

  def draw
    if $app.mode == 0
      values = *(@noise_offset + @generation * @noise_scale).collect do |e|
        $app.noise[e] - 0.5
      end
      acceleration = V[*values] * 0.1
    else
      acceleration = V.rand(-1.0..1.0)
    end
    @velocity += acceleration
    @velocity = @velocity.clamp_length_max(2.0)
    @location += @velocity
    @location = @location.modulo($app.window_wh)
    $app.point_draw(@location, radius: 2)
    @generation += 1
  end
end

class App < Base
  attr_accessor :noise
  attr_accessor :mode

  def initialize
    super

    @noise = Perlin::Noise.new(1, interval: 1024)
    @mode = 0
    reset
  end

  def reset
    @water_fleas = 100.times.collect { WaterFlea.new }
  end

  def button_down(id)
    super

    case id
    when Gosu::KB_R
      reset
    when Gosu::KB_Z
      @mode = @mode.next.modulo(2)
    end
  end

  def draw
    super

    @water_fleas.each(&:draw)
  end

  show
end


Discussion