Aptos Move 環境構築 ~ Aptos Move Analyzer のインストール~
Mac版です。現状 TypeScript SDK のインストール場所と、Aptos Move を指定するために --features "address32" を付けるのが正解かどうかが少し怪しい。
はじめに
新しい言語やブロックチェーンなどを学ぶときはドキュメントをただ読むのではなく簡単なアプリをチュートリアルで作りながら学ぶのが一番です。Aptos Move だと公式が出してるこの辺。
これらを始めるには上記でも説明されているように Aptos CLI, Aptos SDK, IDE(VSCodeならプラグイン)をインストールせねばなりませんが、これらが地味にわかりにくく、日本語の解説もなかったので記事を書きます。
Steps
- Install the Aptos CLI following these instructions.
- Install the Aptos SDK (Typescript) following these instructions
- IDE options:
- We recommend using the IntelliJ Community (Free Version) IDE with the Move language Plug-in.
- If you prefer to use VSCode, we recommend the Move Syntax Extension.
- If you prefer a browser-based dev environment, Remix IDE is a no-setup tool with a graphical interface for developing Move modules.
Let's 環境構築
Aptos CLI
最も王道かと思われる homebrew を使ったインストールコマンド。
    brew update        # Gets the latest updates for packages
    brew install aptos # Installs the Aptos CLI
Aptos SDK (TypeScript)
SDK は各プロジェクトにインストールすればいいと思っていたが、インストールしろと書いているのでとりあえず自分のPCのルート(私で言うと /User/takuya)にインストールしておいた。
cd ~
pnpm install @aptos-labs/ts-sdk
もし普段 npm や yarn を使っていて pnpm が入ってない方はこちらからインストール。これも brew か npm を使って(pnpmを)インストールするのが安定すると思う。
VSCode プラグイン
Aptos としては IDE (Integrated Development Editor)は IntelliJ IDE を推奨していたが、普段から使い慣れている VSCode にプラグインを入れて使うことにする。
- move-analyzer
- Move Syntax (これは上記の依存プラグインとして同時インストールされる)
肝心の move-analyzer プラグインのインストールがわかりにくいのだが、結論 Rust のパッケージマネージャー cargo を使った方法が逆にわかりやすいと思った。
Aptos Move language のドキュメントから遷移する Webページではダウンロード版(precompiled binaries)が推奨されているが
1.Download binary files for the corresponding platform from aptos-move-analyzer-releases-pages.
2.Rename it to aptos-move-analyzer.
3.Make sure aptos-move-analyzer can be found in your PATH environment.
https://marketplace.visualstudio.com/items?itemName=MoveBit.aptos-move-analyzer
と言われても、どこに aptos-move-analyzer を配置するのか迷うし、フォルダーをリネームするのか、中のexeファイルをリネームするのかわからない。また一般的な usr/local/bin 配下に置くとしてもフォルダーをこの中に置くのは違和感がある。そもそも .zshrc などを編集して自力でPATHを通す作業も地味に難しい。
そこで VSCode上の Move Analyzer の説明に記載されている、carge (Rust のパッケージマネージャー) を使ったやり方の方がシンプルだと思った。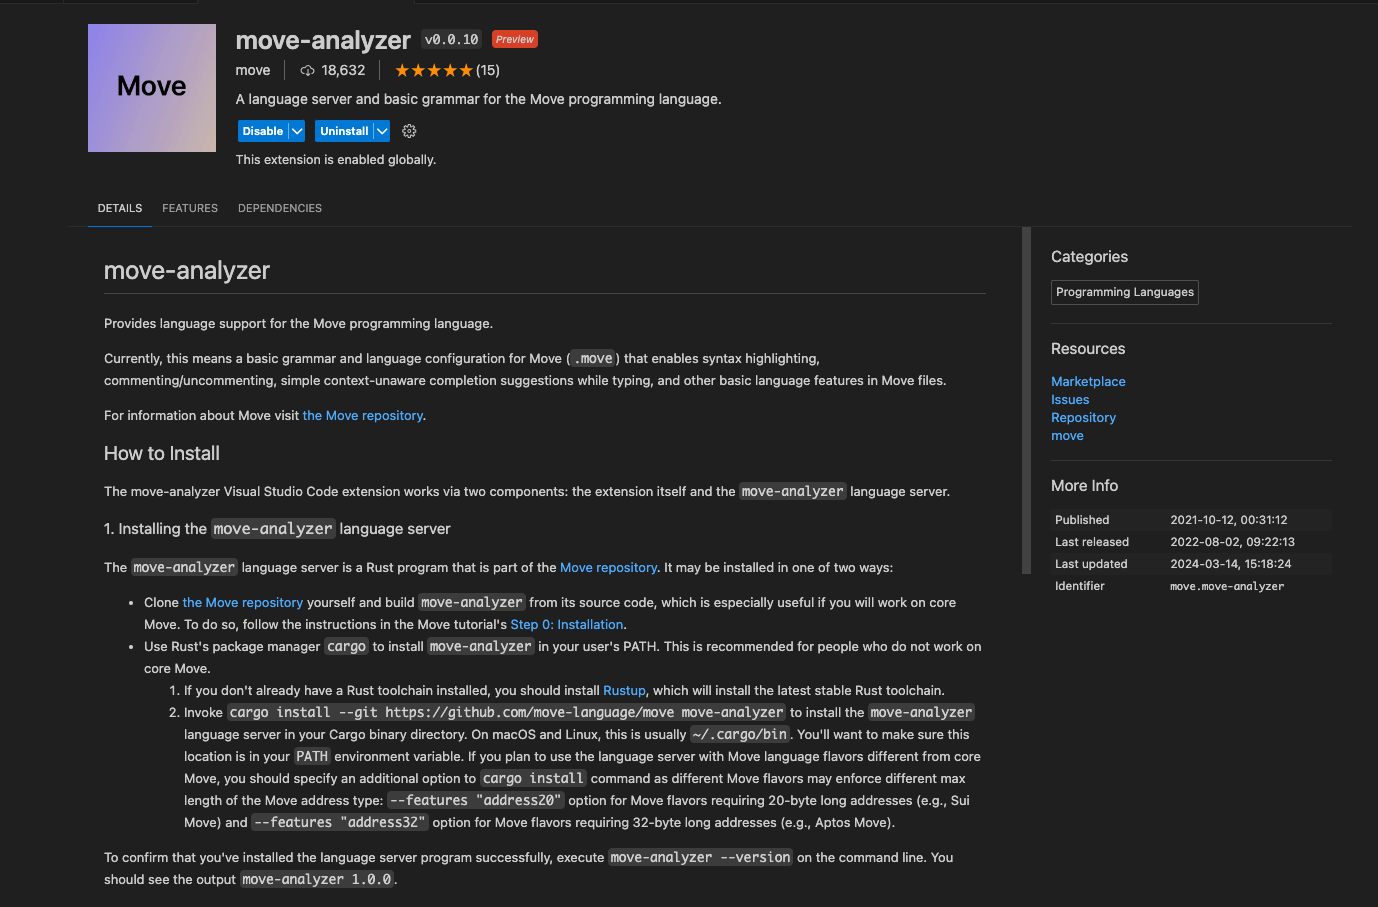
Move 言語自体(Core)を開発しないのであれば、2番目に書かれている方法でいい。
Use Rust's package manager cargo to install move-analyzer in your user's PATH. This is recommended for people who do not work on core Move.
- If you don't already have a Rust toolchain installed, you should install Rustup, which will install the latest stable Rust toolchain.
- Invoke
cargo install --git https://github.com/move-language/move move-analyzerto install themove-analyzerlanguage server in your Cargo binary directory. On macOS and Linux, this is usually~/.cargo/bin. You'll want to make sure this location is in yourPATHenvironment variable.
If you plan to use the language server with Move language flavors different from core Move, you should specify an additional option tocargo installcommand as different Move flavors may enforce different max length of the Move address type:--features "address20"option for Move flavors requiring 20-byte long addresses (e.g., Sui Move) and--features "address32"option for Move flavors requiring 32-byte long addresses (e.g., Aptos Move).
まず 1. Rustup をインストールするのはいいとして、2のコマンドでもし Aptos Move を使いたいなら以下のように --features "address32" オプションを付けないといけない。
cargo install --features "address32" --git https://github.com/move-language/move move-analyzer
プラグインの説明にもあるように move-analyzer --version コマンドを打って、バージョン情報が返ってくれば成功。
参考リンク
ちなみにMove Analyzer ではなく Move におすすめされているIDE「IntelliJ IDE」のVSCodeプラグイン Move Language を使っている例も。
いや、aptos-move-analyzer というのが別にあるので、こっちに従って環境構築すべきっぽい