全社的に ESLint 設定を共有する
会社として JavaScript や Typescript を使っているプロダクトがある場合、Linter として ESLint を使用していることが多いと思います。
そして、そういったプロダクトが複数ある時、その ESLint の設定をそれぞれのプロダクト毎に別の設定を使うことはあまり無いと思います。
その時、どうやって会社で共有していくのか、という話をこちらの記事で紹介させていただきます。
Shareable Configs とは
ESLint には、Shareable Configs という ESLint の設定をシェアするための書き方があります。
こちらを使用することで、簡単に npm パッケージとして設定をシェアできます。
作り方は簡単で、以下のように index.js を ESLint 設定をそのまま書き、それを npm publish するという流れです。
module.exports = {
  "rules": {
    "semi": [2, "always"],
  }
}
{
  "name": "@example-inc/eslint-config-js",
  "version": "0.1.0",
  "description": "Shared eslint config for JavaScript",
  "main": "index.js"
}
分割して管理する
上記の例では、JavaScript 用でパッケージを切り出しています。
例えば、@example-inc/eslint-config として、Next プロジェクト用で用意しても問題無く使用できます。
しかし、それだと、React 単体で使用したい場合などに無駄に設定されてしまいます。
そのため、以下のように細かく分割し、プロジェクトでそれを組み合わせるような形が綺麗です。
@example-inc/eslint-config-js@example-inc/eslint-config-react@example-inc/eslint-config-typescript@example-inc/eslint-config-next
React のプロジェクトであれば、以下のように組み合わせます。
@example-inc/eslint-config-js@example-inc/eslint-config-react
そして、TypeScript に対応するなら、以下を追加します。
@example-inc/eslint-config-typescript
GitHub Packages を使用する
eslint-config 程度であれば、公開しても問題無いですが、会社内の Private な Package を用意したい時があります。
その時、以下の記事に記載されているように、npm に @example-inc の公開パッケージで、GitHub Packages に @example-inc の非公開パッケージとはできません。
GitHub Packages を使用すれば、GitHub の認証情報をそのまま使用できるため、npm の認証情報を管理する手間がかからず便利です。
そのため、会社関係の npm パッケージは、公開・非公開問わず、統一的に GitHub Packages で管理することをおすすめします。
公開する
今回は、会社として、Next.js や React、TypeScript が技術スタックである前提で進めさせていただきます。
適宜細かいところは、会社の技術スタックに合わせてください。
eslint-config-js
以下 2 点のファイルと、適宜状況に合わせて README.md と LICENSE ファイルを作成してください。
module.exports = {
  "rules": {
    "semi": [2, "always"],
  },
}
{
  "name": "@example-inc/eslint-config-js",
  "version": "0.1.0",
  "description": "Shared eslint config for JavaScript",
  "main": "index.js",
  "publishConfig": {
    "registry": "https://npm.pkg.github.com/"
  },
  "peerDependencies": {
    "eslint": ">= 8"
  }
}
こちらは、特にややこしいところはありません。
publishConfig 部分で、npm ではなく、GitHub Packages を指定しています。
ここで、eslint-config を公開したく無い場合は、"access": "restricted", を追加しましょう。
また、js としているので、react/hook-use-state とかは含めない方が良いかと思います。
eslint-config-react
以下のように、plugins や parserOptions を指定しても上手く動作するみたいです。
module.exports = {
  "plugins": [
    "react",
  ],
  "parserOptions": {
    "ecmaFeatures": {
      "jsx": true
    }
  },
  "rules": {
    "jsx-quotes": [
      "error",
      "prefer-double"
    ],
    "react/hook-use-state": "error",
  },
}
ここで、plugins として指定しているパッケージは、dependencies として指定する必要があります。
{
  "name": "@example-inc/eslint-config-react",
  "version": "0.1.0",
  "description": "Shared eslint config for React",
  "main": "index.js",
  "publishConfig": {
    "registry": "https://npm.pkg.github.com/"
  },
  "dependencies": {
    "eslint-plugin-react": "^7.29.4"
  },
  "peerDependencies": {
    "eslint": ">= 8"
  }
}
eslint-config-typescript
以下のように、parser も指定できます。
extends もできますが、extends のみ指定する場合は、peerDependencies として追加しておく必要があるみたいです。
今回の場合は、plugins としても指定しているので、dependencies で問題ありません。
module.exports = {
  "root": true,
  "parser": "@typescript-eslint/parser",
  "plugins": [
    "import",
    "@typescript-eslint"
  ],
  "extends": [
    "plugin:@typescript-eslint/recommended",
    "plugin:import/typescript"
  ],
  "rules": {
    "import/order": [
      "error",
      {
        "newlines-between": "always"
      }
    ],
    "@typescript-eslint/consistent-type-imports": "error",
  }
}
{
  "name": "@example-inc/eslint-config-typescript",
  "version": "0.1.0",
  "description": "Shared eslint config for Typescript",
  "main": "index.js",
  "publishConfig": {
    "registry": "https://npm.pkg.github.com/"
  },
  "dependencies": {
    "@typescript-eslint/eslint-plugin": "^5.17.0",
    "@typescript-eslint/parser": "^5.17.0",
    "eslint-plugin-import": "^2.25.4"
  },
  "peerDependencies": {
    "eslint": ">= 8"
  }
}
eslint-config-next
Next.js 用だけ、他の eslint-config の集合 + next/core-web-vitals みたいな感じにしてみます。
module.exports = {
  "extends": [
    "next/core-web-vitals",
    "@example-inc/eslint-config-js",
    "@example-inc/eslint-config-react",
    "@example-inc/eslint-config-typescript"
  ]
}
先程説明した、extends のみなら、peerDependencies とする必要があります。
これは、ESLint が eslint-config 内の extends から dependencies を見にいってくれないからみたいです。
{
  "name": "@example-inc/eslint-config-next",
  "version": "0.1.0",
  "description": "Set of shared eslint config for Next.js",
  "main": "index.js",
  "publishConfig": {
    "registry": "https://npm.pkg.github.com/"
  },
  "peerDependencies": {
    "@example-inc/eslint-config-js": ">= 0.1",
    "@example-inc/eslint-config-react": ">= 0.1",
    "@example-inc/eslint-config-typescript": ">= 0.1",
    "eslint": ">= 8",
    "eslint-config-next": ">= 12"
  }
}
自動で公開する
後は、公開をいちいち手動でやっていくのは面倒なので、GitHub Actions を使用して、タグを切ったら publish するようにします。
以下の GitHub Actions ファイルを作成し、以下の手順を行えば、後は公開が行われる仕組みです。
-
package.jsonのバージョンを更新して(e.g.0.1.0)、commit & push する git tag 0.1.0git push origin 0.1.0
name: Publish to GitHub Package Registry

on:
  push:
    tags:
      - '*'

jobs:
  auto-release:
    runs-on: ubuntu-latest
    steps:
      - uses: actions/checkout@v3

      - name: Release
        uses: softprops/action-gh-release@v1
        with:
          generate_release_notes: true
          draft: false
        env:
          GITHUB_TOKEN: ${{ secrets.GITHUB_TOKEN }}

  publish:
    needs: auto-release
    runs-on: ubuntu-latest
    permissions:
      contents: read
      packages: write
    steps:
      - uses: actions/checkout@v3

      - uses: actions/setup-node@v3.1.1
        with:
          node-version: 16
          registry-url: https://npm.pkg.github.com/

      - run: npm publish
        env:
          NODE_AUTH_TOKEN: ${{ secrets.GITHUB_TOKEN }}
公開されると、以下のようにレポジトリページの右側に表示されます。
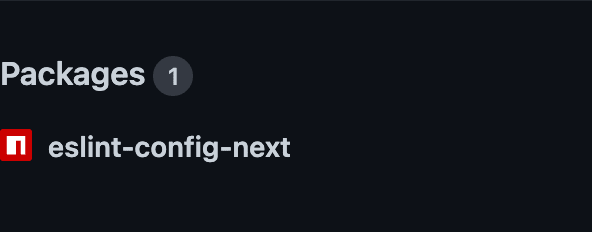
また、組織のページから、Packages へ移動すると、以下のように追加されています。

使用方法
使用方法は、npm 等で上記のパッケージをインストールし、Next.js 用の eslint-config と同様に、以下のように extends で指定します。
$ npm i -D @example-inc/eslint-config-js @example-inc/eslint-config-react
---
root: true
extends:
  - "@example-inc/eslint-config-js"
  - "@example-inc/eslint-config-react"
非公開パッケージの場合
公開設定にしているため、そのままインストールできるとは思いますが、もしかすると、401 エラー等でインストールできないこともあります。
特に、非公開設定にしている場合は、以下の設定が必ず必要になります。
以下のように .npmrc を作成してください。
Yarn を使用している場合でも、.npmrc を読みに行ってくれます。
//npm.pkg.github.com/:_authToken=${GPR_READ_PACKAGES_TOKEN}
@example-inc:registry="https://npm.pkg.github.com"
少し面倒ですが、以下の手順で Personal Access Token を作成し、環境変数として定義してください。
- https://github.com/settings/tokens/new へアクセスする
-
read:packagesのみをチェックして、Generate tokenをクリックする - 生成されたトークンをコピーして、以下のコマンドで環境変数として
exportする
$ export GPR_READ_PACKAGES_TOKEN=your_token
後は、問題無くインストールできるかと思います。
シェルを切り替えた時は、再度上記のトークンを export する必要があります。
こちらの設定は、そのプロジェクトに関わる全てのユーザーが個別で行う必要があります。
むしろ、トークンを共有するのはセキュリティ的に良くないので、それぞれで作成・管理するようにしてください。
最後に
extends や plugins での dependencies の指定方法が変化する辺りが非常にややこしいです。
これらの環境を整備しているときに、ESLint の挙動がすごく不安定だったので、同じように作成しても何か別の問題が起こる可能性があります。
基本的には、検索したら解決策が出てきたり、パッケージマネージャを npm から Yarn に変更することで解決したりしました。
そういった欠点を差し置いても、プロジェクト自体の eslintrc ファイルを非常に簡潔にできる点が良いと感じました。
こちらの記事が参考になれば幸いです。
Discussion