🌟
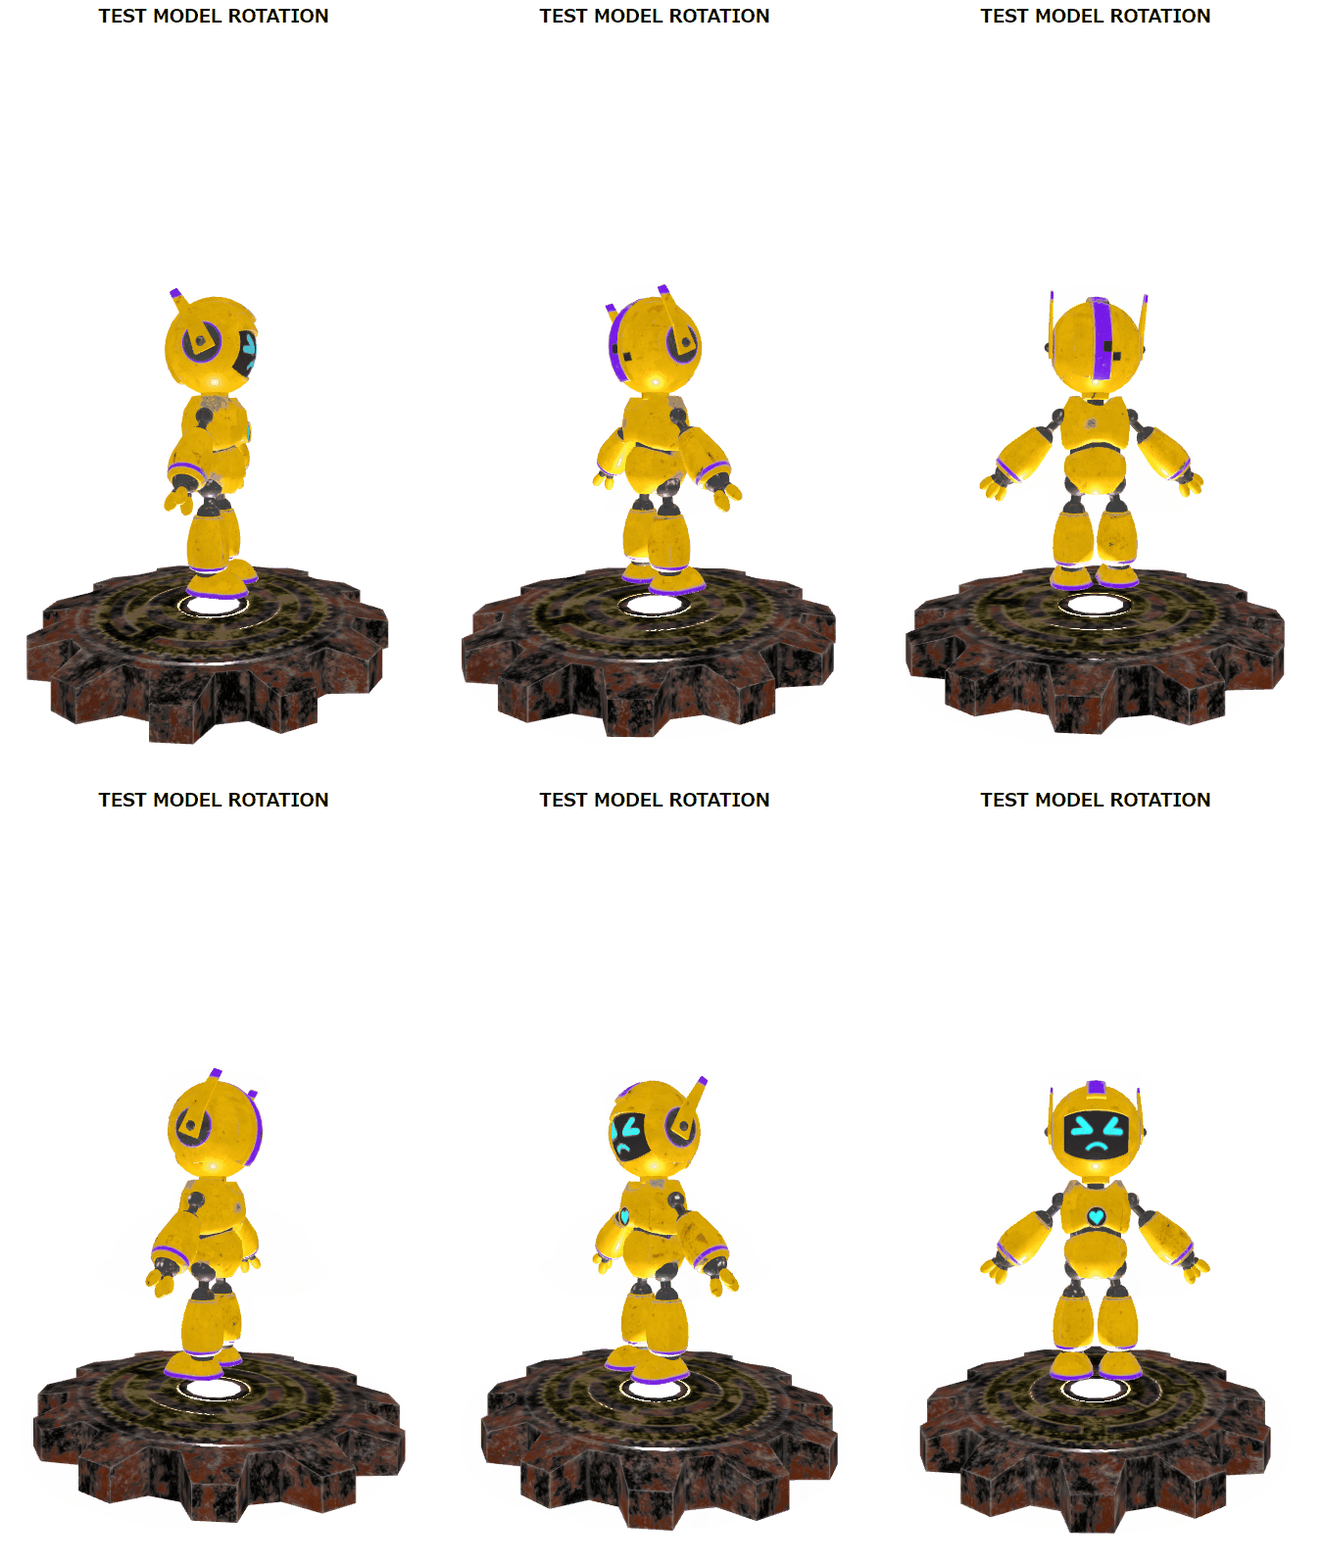
Three.js で複数のglTFモデルを読み込む。
Three.js について、忘れないうちにまとめた個人の備忘録です。
3Dアニメーション デモGIF

ソースコード
import { useEffect, useRef} from 'react';
import './App.css';
import * as THREE from 'three';
import { GLTFLoader } from 'three/examples/jsm/loaders/GLTFLoader.js';

function App() {

const  ref: React.RefObject<HTMLCanvasElement> = useRef<HTMLCanvasElement>(null);

  useEffect(() => {

    // canvas size settings [px]
    // FIX: 名称変更 カメラVIEW -> canvasのサイズ
    const cameraViewSize = {
      width: 1000,
      height: 800,
    }

    //scene
    const scene: THREE.Scene = new THREE.Scene();

    //camera
    const camera: THREE.PerspectiveCamera = new THREE.PerspectiveCamera(
      75, //視野角
      cameraViewSize.width / cameraViewSize.height, //アスペクト比
      0.1, //near 奥行き表示領域の最小値
      1000 //far 奥行き表示領域の最大値
    );
    camera.position.set(0, 5, 13);

    //renderer
    const renderer: THREE.WebGLRenderer = new THREE.WebGLRenderer({
      canvas: ref.current??undefined, //canvasの指定
      antialias: true, //アンチエイリアス
      alpha: true, //背景を透過する
    });
    renderer.setSize(cameraViewSize.width, cameraViewSize.height);

    //model load
    //モデルの格納場所は/pulic/models/を新規作成して格納する。
    //ダウンロード後、解凍した.zipファイルの中身をすべて格納する。

    //ロボットモデルのロードと表示位置の設定
    let gltf_model_robot:THREE.Group;
    const gltfloader: GLTFLoader = new GLTFLoader();
    gltfloader.load('models/robot/scene.gltf', (gltf) => {
      gltf_model_robot = gltf.scene;
      scene.add(gltf_model_robot);
      gltf_model_robot.position.set(0, 1, 0); //表示が歯車の上に来るように調整
      gltf_model_robot.scale.set(1.5,1.5,1.5); //大きさの調整
    });

    //歯車モデルのロードと表示位置の設定
    let gltf_model_gear:THREE.Group;
    const gltfloader2: GLTFLoader = new GLTFLoader();
    gltfloader2.load('models/gear/scene.gltf', (gltf) => {
      gltf_model_gear =gltf.scene;
      scene.add(gltf_model_gear);
      gltf_model_gear.rotation.z = Math.PI / 2; //歯車の向きを調整
      gltf_model_gear.scale.set(7,5,5.5); //奥行きが出るように表示を調整
    });

    //light
    const ambientLight: THREE.AmbientLight = new THREE.AmbientLight(0xffffff, 5); //周囲光
    scene.add(ambientLight);
    const pointLight: THREE.PointLight = new THREE.PointLight(0xffffff, 100); //一点光
    scene.add(pointLight);

    //grid (表示位置の調整用)
    // const gridHelper: THREE.GridHelper = new THREE.GridHelper(100, 100);
    // scene.add(gridHelper);

    //Animation
    const animate = () => {
      //GLTFモデルのロードがおわってからアニメーションを開始するためにif文を追加
      if (gltf_model_robot && gltf_model_gear) {
        gltf_model_robot.rotation.y += 0.02; //左回転
        gltf_model_gear.rotation.y -= 0.01; //右回転
      }
      renderer.render(scene, camera);
      requestAnimationFrame(animate);
    };

    animate();

    //Test cube
    // const geometry: THREE.BoxGeometry = new THREE.BoxGeometry(1, 1, 1);
    // const material: THREE.MeshBasicMaterial = new THREE.MeshBasicMaterial({ color: 0x00ff00 });
    // const cube: THREE.Mesh = new THREE.Mesh(geometry, material);
    // scene.add(cube);

  }, []);

  return (
    <>
      <div className='main'>
        <h3>TEST MODEL ROTATION</h3>
        <canvas ref={ref}/>
      </div>
    </>
  )
}

export default App
body {
    margin: 0;
    padding: 0;
}

.main {
    position: absolute;
    width: 100%;
    height: 100%;
    text-align: center;
    line-height:0;
}
お借りしたglTFモデル
ロボットモデル
Model Information
- title: Robot
- source: https://sketchfab.com/3d-models/robot-d129be6351904825af790cbcb452c5c7
- author: HyliGun174 (https://sketchfab.com/HyliGun174)
歯車モデル
Model Information
- title: Steampunk Gear
- source: https://sketchfab.com/3d-models/steampunk-gear-816749e8e343492f9dab0cd94cd94507
- author: Darren McNerney 3D (https://sketchfab.com/DarrenMcnerney3D)


Discussion