PySide6にてQPlainTextEdit内のPythonコードをハイライト表示
これは何?
QPlainTextEdit内のPythonコードをハイライト表示できるようにした記録です。
おまけとして
- フォントをHackGenに変更した画面の表示
- QPlainTextEdit内の編集時に、Tabキーでスペースを4つ挿入する方法
を後ろの方に記述しております。
PySide6にて、グラフ表示を行う以下のアプリを作成したところ、Pythonコードなのに表示が白一色で見づらいなと思ったので実装してみました。
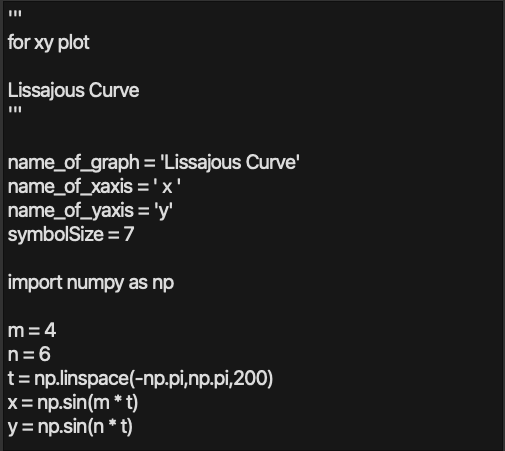
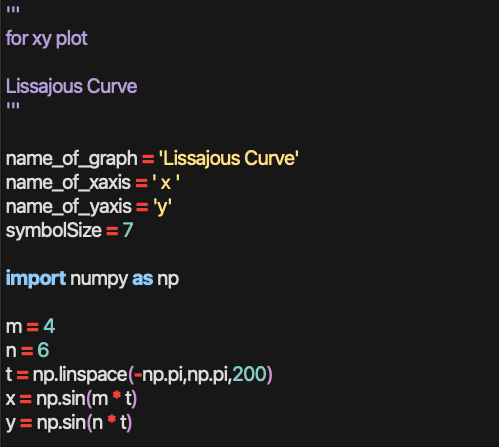
ということで、本記事は、テキスト領域を以下のようにハイライト表示するまでの記録です。
本記事にて紹介するのは、pyqtgraphのライブラリに依存した方法になります。
ご注意ください。
結論
まずは結論です。
my_modulesフォルダを作成して、python:syntax_highlighter.pyを以下のとおり作成します。__init__.pyも忘れずに。
コード
import keyword
import re

import pyqtgraph as pg
from pyqtgraph.Qt import QtCore, QtGui, QtWidgets

QRegularExpression = QtCore.QRegularExpression

QFont = QtGui.QFont
QTextCharFormat = QtGui.QTextCharFormat
QColor = QtGui.QColor
QSyntaxHighlighter = QtGui.QSyntaxHighlighter

def charFormat(color, style='', background=None):
    """
    Return a QTextCharFormat with the given attributes.
    """
    _color = QColor()
    if type(color) is not str:
        _color.setRgb(color[0], color[1], color[2])
    else:
        _color.setNamedColor(color)

    _format = QTextCharFormat()
    _format.setForeground(_color)
    if 'bold' in style:
        _format.setFontWeight(QFont.Weight.Bold)
    if 'italic' in style:
        _format.setFontItalic(True)
    if background is not None:
        _format.setBackground(pg.mkColor(background))

    return _format


class LightThemeColors:

    Red = "#B71C1C"
    Pink = "#FCE4EC"
    Purple = "#4A148C"
    DeepPurple = "#311B92"
    Indigo = "#1A237E"
    Blue = "#0D47A1"
    LightBlue = "#01579B"
    Cyan = "#006064"
    Teal = "#004D40"
    Green = "#1B5E20"
    LightGreen = "#33691E"
    Lime = "#827717"
    Yellow = "#F57F17"
    Amber = "#FF6F00"
    Orange = "#E65100"
    DeepOrange = "#BF360C"
    Brown = "#3E2723"
    Grey = "#212121"
    BlueGrey = "#263238"


class DarkThemeColors:

    Red = "#F44336"
    Pink = "#F48FB1"
    Purple = "#CE93D8"
    DeepPurple = "#B39DDB"
    Indigo = "#9FA8DA"
    Blue = "#90CAF9"
    LightBlue = "#81D4FA"
    Cyan = "#80DEEA"
    Teal = "#80CBC4"
    Green = "#A5D6A7"
    LightGreen = "#C5E1A5"
    Lime = "#E6EE9C"
    Yellow = "#FFF59D"
    Amber = "#FFE082"
    Orange = "#FFCC80"
    DeepOrange = "#FFAB91"
    Brown = "#BCAAA4"
    Grey = "#EEEEEE"
    BlueGrey = "#B0BEC5"


LIGHT_STYLES = {
    'keyword': charFormat(LightThemeColors.Blue, 'bold'),
    'operator': charFormat(LightThemeColors.Red, 'bold'),
    'brace': charFormat(LightThemeColors.Purple),
    'defclass': charFormat(LightThemeColors.Indigo, 'bold'),
    'string': charFormat(LightThemeColors.Amber),
    'string2': charFormat(LightThemeColors.DeepPurple),
    'comment': charFormat(LightThemeColors.Green, 'italic'),
    'self': charFormat(LightThemeColors.Blue, 'bold'),
    'numbers': charFormat(LightThemeColors.Teal),
}


DARK_STYLES = {
    'keyword': charFormat(DarkThemeColors.Blue, 'bold'),
    'operator': charFormat(DarkThemeColors.Red, 'bold'),
    'brace': charFormat(DarkThemeColors.Purple),
    'defclass': charFormat(DarkThemeColors.Indigo, 'bold'),
    'string': charFormat(DarkThemeColors.Amber),
    'string2': charFormat(DarkThemeColors.DeepPurple),
    'comment': charFormat(DarkThemeColors.Green, 'italic'),
    'self': charFormat(DarkThemeColors.Blue, 'bold'),
    'numbers': charFormat(DarkThemeColors.Teal),
}
class PythonHighlighter(QSyntaxHighlighter):
    """Syntax highlighter for the Python language.
    """
    # Python keywords
    keywords = keyword.kwlist

    # Python operators
    operators = [
        r'=',
        # Comparison
        r'==', r'!=', r'<', r'<=', r'>', r'>=',
        # Arithmetic
        r'\+', r"-", r'\*', r'/', r'//', r'%', r'\*\*',
        # In-place
        r'\+=', r'-=', r'\*=', r'/=', r'\%=',
        # Bitwise
        r'\^', r'\|', r'&', r'~', r'>>', r'<<',
    ]

    # Python braces
    braces = [
        r'\{', r'\}', r'\(', r'\)', r'\[', r'\]',
    ]

    def __init__(self, document):
        super().__init__(document)

        # Multi-line strings (expression, flag, style)
        self.tri_single = (QRegularExpression("'''"), 1, 'string2')
        self.tri_double = (QRegularExpression('"""'), 2, 'string2')

        rules = []

        # Keyword, operator, and brace rules
        rules += [(r'\b%s\b' % w, 0, 'keyword')
                  for w in PythonHighlighter.keywords]
        rules += [(o, 0, 'operator')
                  for o in PythonHighlighter.operators]
        rules += [(b, 0, 'brace')
                  for b in PythonHighlighter.braces]

        # All other rules
        rules += [
            # 'self'
            (r'\bself\b', 0, 'self'),

            # 'def' followed by an identifier
            (r'\bdef\b\s*(\w+)', 1, 'defclass'),
            # 'class' followed by an identifier
            (r'\bclass\b\s*(\w+)', 1, 'defclass'),

            # Numeric literals
            (r'\b[+-]?[0-9]+[lL]?\b', 0, 'numbers'),
            (r'\b[+-]?0[xX][0-9A-Fa-f]+[lL]?\b', 0, 'numbers'),
            (r'\b[+-]?[0-9]+(?:\.[0-9]+)?(?:[eE][+-]?[0-9]+)?\b', 0, 'numbers'),

            # Double-quoted string, possibly containing escape sequences
            (r'"[^"\\]*(\\.[^"\\]*)*"', 0, 'string'),
            # Single-quoted string, possibly containing escape sequences
            (r"'[^'\\]*(\\.[^'\\]*)*'", 0, 'string'),

            # From '#' until a newline
            (r'#[^\n]*', 0, 'comment'),
        ]
        self.rules = rules
        self.searchText = None

    @property
    def styles(self):
        app = QtWidgets.QApplication.instance()
        app.setProperty('darkMode', True)
        return DARK_STYLES if app.property('darkMode') else LIGHT_STYLES

    def highlightBlock(self, text):
        """Apply syntax highlighting to the given block of text.
        """
        # Do other syntax formatting
        rules = self.rules.copy()
        for expression, nth, format in rules:
            format = self.styles[format]

            for n, match in enumerate(re.finditer(expression, text)):
                if n < nth:
                    continue
                start = match.start()
                length = match.end() - start
                self.setFormat(start, length, format)

        self.applySearchHighlight(text)
        self.setCurrentBlockState(0)

        # Do multi-line strings
        in_multiline = self.match_multiline(text, *self.tri_single)
        if not in_multiline:
            in_multiline = self.match_multiline(text, *self.tri_double)

    def match_multiline(self, text, delimiter, in_state, style):
        """Do highlighting of multi-line strings.

        =========== ==========================================================
        delimiter   (QRegularExpression) for triple-single-quotes or
                    triple-double-quotes
        in_state    (int) to represent the corresponding state changes when
                    inside those strings. Returns True if we're still inside a
                    multi-line string when this function is finished.
        style       (str) representation of the kind of style to use
        =========== ==========================================================
        """
        # If inside triple-single quotes, start at 0
        if self.previousBlockState() == in_state:
            start = 0
            add = 0
        # Otherwise, look for the delimiter on this line
        else:
            match = delimiter.match(text)
            start = match.capturedStart()
            # Move past this match
            add = match.capturedLength()

        # As long as there's a delimiter match on this line...
        while start >= 0:
            # Look for the ending delimiter
            match = delimiter.match(text, start + add)
            end = match.capturedEnd()
            # Ending delimiter on this line?
            if end >= add:
                length = end - start + add + match.capturedLength()
                self.setCurrentBlockState(0)
            # No; multi-line string
            else:
                self.setCurrentBlockState(in_state)
                length = len(text) - start + add
            # Apply formatting
            self.setFormat(start, length, self.styles[style])
            # Highlighting sits on top of this formatting
            # Look for the next match
            match = delimiter.match(text, start + length)
            start = match.capturedStart()

        self.applySearchHighlight(text)

        # Return True if still inside a multi-line string, False otherwise
        if self.currentBlockState() == in_state:
            return True
        else:
            return False

    def applySearchHighlight(self, text):
        if not self.searchText:
            return
        expr = f'(?i){self.searchText}'
        palette: QtGui.QPalette = app.palette()
        color = palette.highlight().color()
        fgndColor = palette.color(palette.ColorGroup.Current,
                                  palette.ColorRole.Text).name()
        style = charFormat(fgndColor, background=color.name())
        for match in re.finditer(expr, text):
            start = match.start()
            length = match.end() - start
            self.setFormat(start, length, style)
フォルダ構成は以下のとおりです。
% tree my_modules
my_modules
├── __init__.py
└── syntax_highlighter.py
起動するファイルにて、先ほどのモジュールをロードし
from my_modules.syntax_highlighter import *
MainWindowの定義に
        # ハイライト表示
        self.hl = PythonHighlighter(self.codeView.document())
を追記します。
下調べ
さて、どこから手をつけようかと考えていたところ、ふとpyqtgraphのdemoの画面はpython用にハイライトされていることに気づきました。
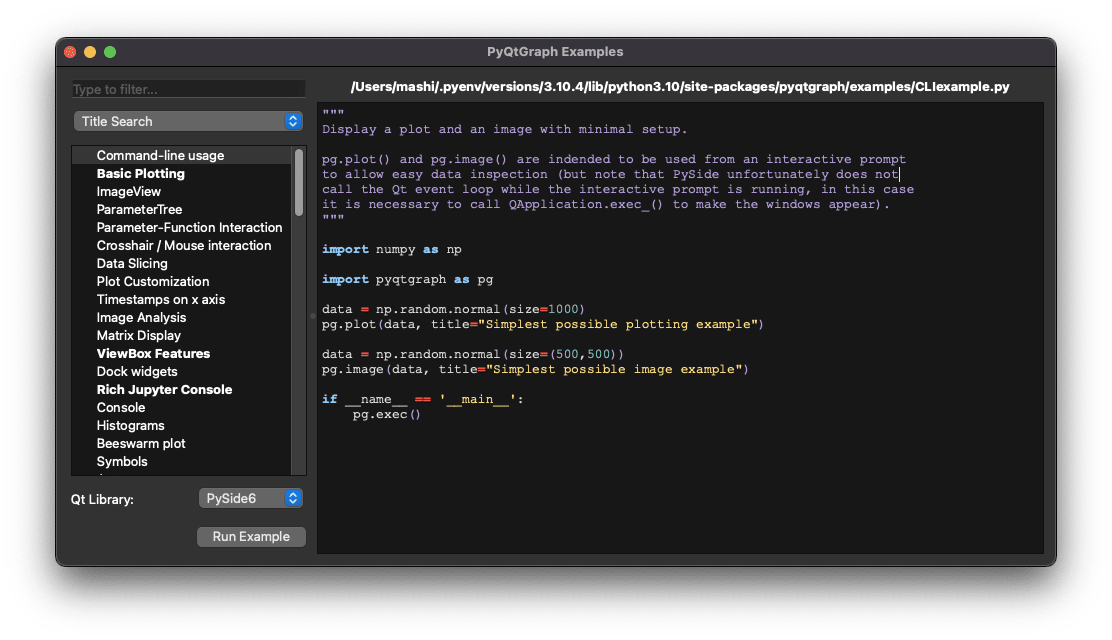
早速、コードをみてみましょう。
まず、起動する手順を確認して、実行されるコードを見つけます。
demoの起動は、
% python
Python 3.10.4 (main, Jun 27 2022, 20:02:56) [Clang 13.1.6 (clang-1316.0.21.2.5)] on darwin
Type "help", "copyright", "credits" or "license" for more information.
>>> import pyqtgraph.examples
>>> pyqtgraph.examples.run()
とするので、
>>> pyqtgraph.examples.__path__
['/Users/mashi/.pyenv/versions/3.10.4/lib/python3.10/site-packages/pyqtgraph/examples']
としてモジュールのありかを探します。
examplesのフォルダの中身をみても、examples.pyはないので、__init__.pyを確認すると
% cat __init__.py
from .ExampleApp import main as run
となっていますので、examples.run()で、実行されるのがExampleAppであることがわかります。
そんなこんなでExampleAppを調べてみると、
# based on https://github.com/art1415926535/PyQt5-syntax-highlighting
となっておりまして、PyQt5のハイライト機能をベースとしているとわかります。
早速みてみましょう。
のsyntax_pars.pyをみると
from PyQt5.QtCore import QRegExp
となっています。
PySide6では、QRegExpは以下のとおり削除されていますので
PyQt5ベースだと移植が大変そうです。
一方で、pyqtgraphのexamplesの方をみると
import re
となっており、すでに移植されているもよう。すばらしい。
ExampleAppの実行に必要なファイルは
exampleLoaderTemplate_generic.py
utils.py
のようです。
適当なフォルダに、この3つのファイルをコピーして実行してみます。
% python ExampleApp.py                                                                                                                            [~/Dropbox/00_works/portfolio/git/draw_awesome_graph/examples][main]
Traceback (most recent call last):
  File "/Users/mashi/Dropbox/00_works/portfolio/git/draw_awesome_graph/examples/ExampleApp.py", line 532, in showFile
    text = self.getExampleContent(fn)
  File "/Users/mashi/Dropbox/00_works/portfolio/git/draw_awesome_graph/examples/ExampleApp.py", line 544, in getExampleContent
    with open(filename, "r") as currentFile:
FileNotFoundError: [Errno 2] No such file or directory: '/Users/mashi/Dropbox/00_works/portfolio/git/draw_awesome_graph/examples/CLIexample.py'
いろいろと怒られますが、起動しました。
ためしに、コードが表示される部分にpythonのコードをペーストしてみましょう。
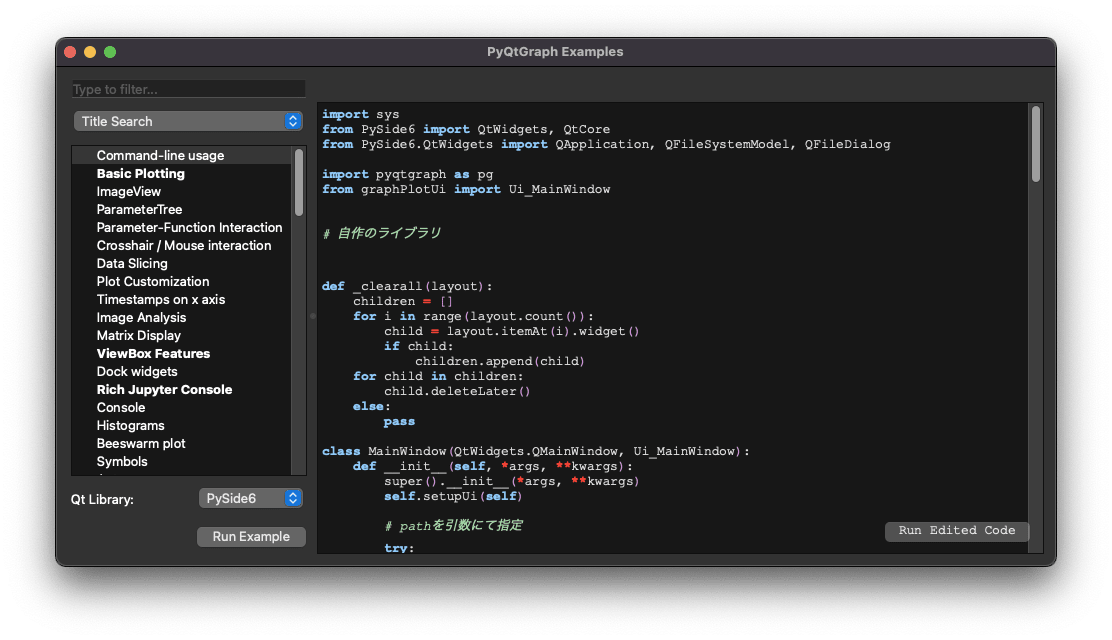
おー、問題なくハイライトされました。では、最低限必要な部分を洗い出します。
まず、3つのファイルを確認すると
exampleLoaderTemplate_generic.pyは、
# Form implementation generated from reading ui file '../pyqtgraph/examples/exampleLoaderTemplate.ui'
#
# Created by: PyQt6 UI code generator 6.2.2
#
# WARNING: Any manual changes made to this file will be lost when pyuic6 is
# run again.  Do not edit this file unless you know what you are doing.
とあるので、ui用のファイルだということがわかります。
テキスト表示には、QPlainTExtEditウィジェットが使用されていると思われるので、該当箇所を探しますと
        self.codeView = QtWidgets.QPlainTextEdit(self.layoutWidget1)
        font = QtGui.QFont()
        font.setFamily("Courier New")
        self.codeView.setFont(font)
        self.codeView.setObjectName("codeView")
        self.verticalLayout.addWidget(self.codeView)
というコードが見つかりました。
このコードから、ExampleApp.pyではcodeViewという名前で呼ばれていることがわかります。
次に、utils.pyを確認しますと
from argparse import Namespace
from collections import OrderedDict

# Avoid clash with module name
examples_ = OrderedDict([
    ('Command-line usage', 'CLIexample.py'),
    ('Basic Plotting', Namespace(filename='Plotting.py', recommended=True)),
    ('ImageView', 'ImageView.py'),
    ('ParameterTree', 'parametertree.py'),
    ('Parameter-Function Interaction', 'InteractiveParameter.py'),
以下、略
となっておりまして、ファイル表示に関するライブラリでありハイライトには無関係であることがわかります。
実装
下調べが終わったので、実装します。
あれこれコードを確認して
MainWindowの定義に
        # ハイライト表示
        self.hl = PythonHighlighter(self.codeView.document())
そして、関係しそうなクラスをピックアップしてライブラリとします。
% mkdir my_modules
% cd my_modules
% touch __init__.py
ファイル名は、syntax_highlighter.pyとしました。
基本的に必要なクラスをコピペしただけですが、
app = QtWidgets.QApplication.instance()
のあとに
app.setProperty('darkMode', True)
を追加しました。
完成図
実行すると、以下の画面となり
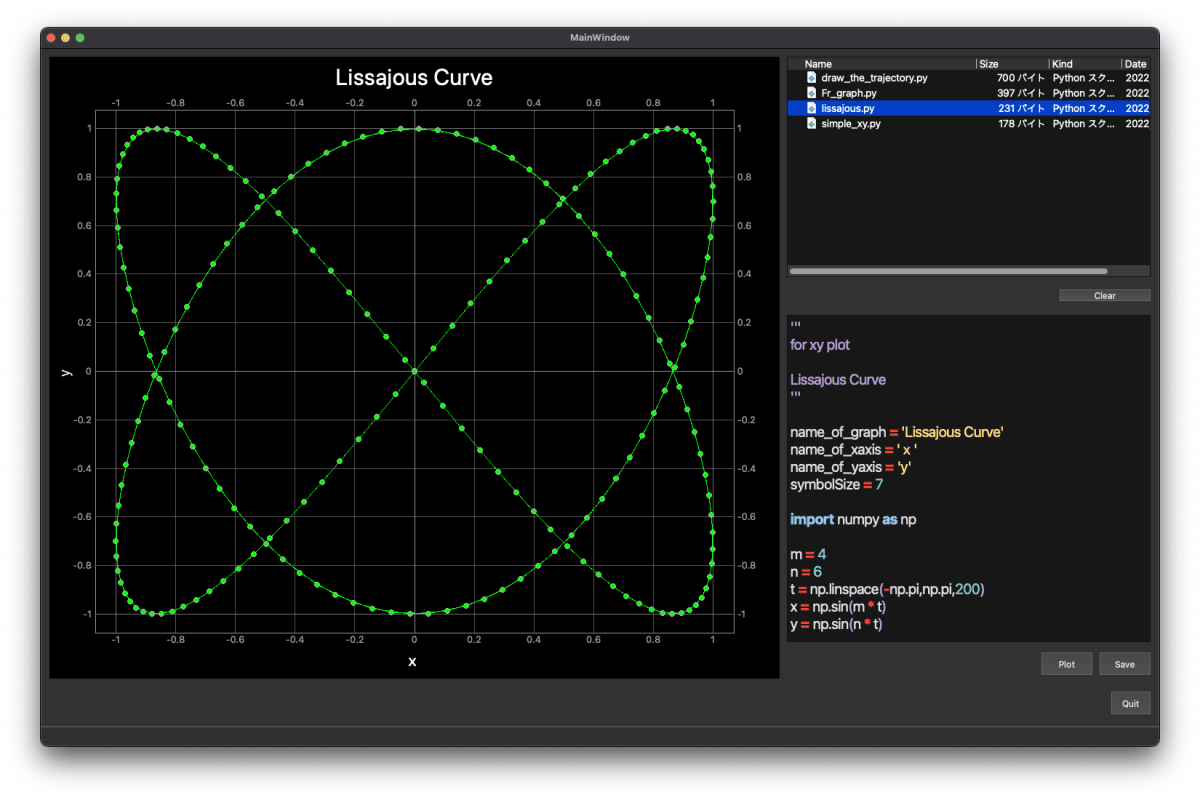
問題なく表示されています。
この勢いで、地図表示でも同じようにやってみます。
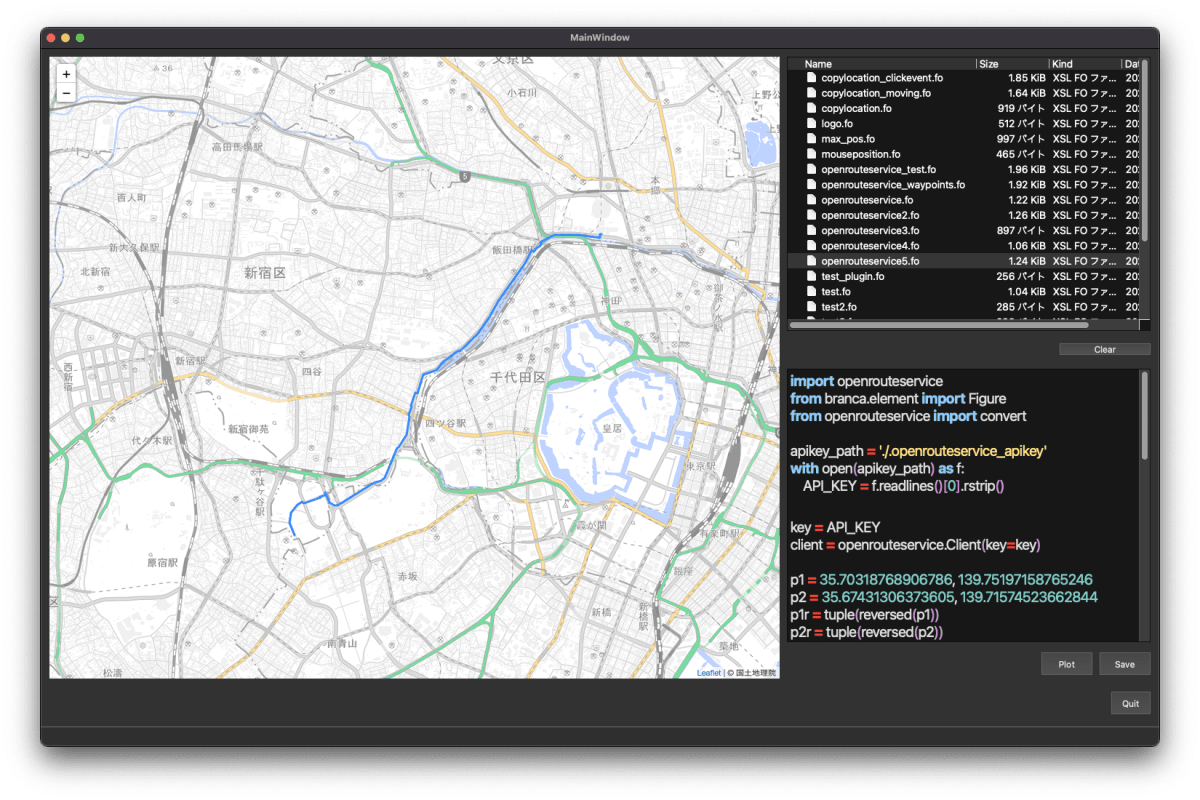
おー。あたりまえですが、うれしいものです。
おまけ(フォントをさらに見やすくする)
ついでにフォントをHackGen35 Consoleにしてみました。

うん。とても見やすくて良い感じです。
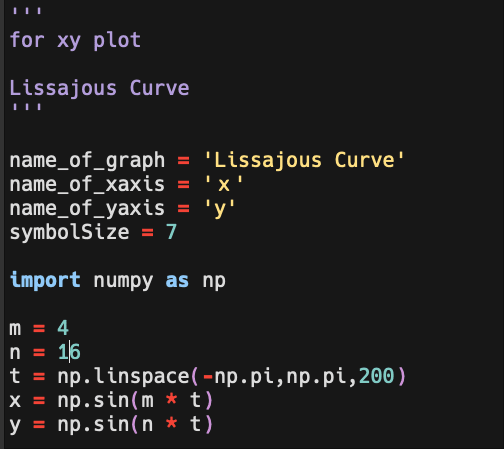
カーソルが写り込んでいるのはご愛敬ですな。気づきませんでした。
おまけ2(Tabキーで、スペースを4つ挿入)
編集時にTabキーを押した際に、スペースを4つ挿入するようにします。

コードは、こんな感じです。
# Key Event
from PySide6.QtCore import Qt
PySide6.QtCoreからQtをインポートしまして、MainWindowに
self.codeView.installEventFilter(self)
を記載します。それから、以下の関数を定義して完了です。
    def eventFilter(self, obj, event):
        if event.type() == QtCore.QEvent.KeyPress and obj is self.codeView:
            if event.key() == Qt.Key_Tab and self.codeView.hasFocus():
                # Special tab handling
                tc = self.codeView.textCursor()
                tc.insertText("    ")
                return True
            else:
                return False
        return False
イベントに関しては、こちらのドキュメントが参考になります。
Discussion