🌏
【Flutter】translatorについて
はじめに
translatorという翻訳パッケージが存在していたため試してみました。
使用用途は現状見出せていませんが、
英語のreading中などに、わからない単語があったらサッと翻訳できたらいいなぁー
と思い立ったのが発端です。
(ChromeやSafariを使用すれば部分翻訳も可能なので、そちらを使用することが多いかなとわ思いますが、気になったので触ってみました。)
概要
パッケージ
実装
class TranslateWidget extends StatefulWidget {
const TranslateWidget({Key? key}) : super(key: key);
State<TranslateWidget> createState() => _TranslateWidgetState();
}
class _TranslateWidgetState extends State<TranslateWidget> {
late String text = '';
late String translationText = '';
/// 入力した内容を一時的に保持
Future<void> _onChanged(String value) async {
text = value;
setState(() {});
}
  Future<void> translation() async {
    // GoogleTranslatorインスタンス生成
    final translator = GoogleTranslator();
    // translateを使用して、
    // 第一引数に翻訳対象の文言、
    // 第二引数に言語コードを指定
    final translation = await translator.translate(text, to: 'en');
    translationText = translation.text;
    setState(() {});
  }
Widget build(BuildContext context) {
return SizedBox(
height: 500,
child: Padding(
padding: const EdgeInsets.all(8.0),
child: Column(
children: [
Text(
translationText,
style: const TextStyle(fontSize: 22, color: Colors.black),
),
const SizedBox(height: 16),
TextFormField(
maxLines: 1,
decoration: InputDecoration(
hintText: '翻訳する文言を記載ください',
focusedBorder: OutlineInputBorder(
borderRadius: BorderRadius.circular(16),
borderSide: const BorderSide(
color: Colors.grey,
width: 1.0,
),
),
labelText: '翻訳',
labelStyle: const TextStyle(
fontSize: 12,
color: Colors.grey,
),
floatingLabelStyle: const TextStyle(fontSize: 12),
enabledBorder: OutlineInputBorder(
borderRadius: BorderRadius.circular(16),
borderSide: const BorderSide(
color: Colors.grey,
width: 1.0,
),
),
),
onChanged: _onChanged,
),
const SizedBox(height: 8),
ElevatedButton(
onPressed: () => translation(),
style:
ElevatedButton.styleFrom(backgroundColor: Colors.blueAccent),
child: const Text(
'翻訳',
style: TextStyle(
fontWeight: FontWeight.w600,
),
),
)
],
),
),
);
}
}

解説
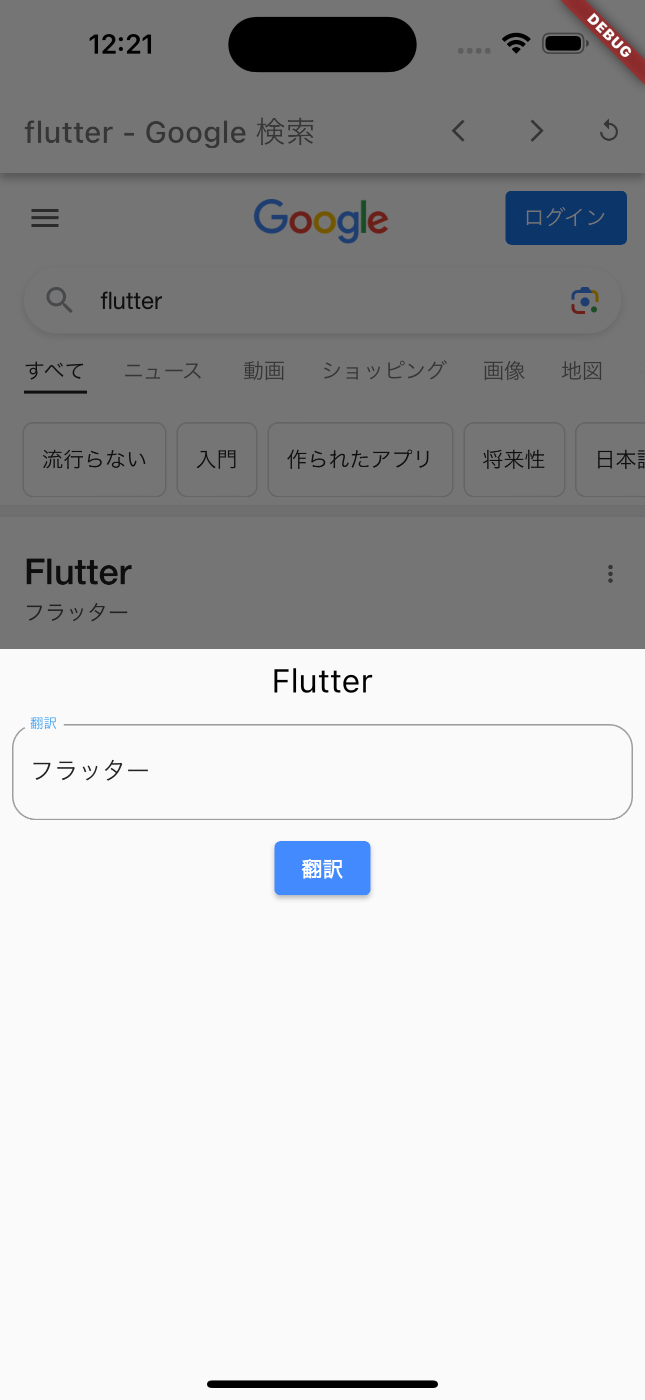
今回はshowModalBottomSheet内の要素として実装しています。
翻訳機能としては以下の部分が対象。
Future<void> translation() async {
// GoogleTranslatorインスタンス生成
final translator = GoogleTranslator();
// translateを使用して、
// 第一引数に翻訳対象の文言、
// 第二引数に言語コードを指定
final translation = await translator.translate(text, to: 'en');
translationText = translation.text;
setState(() {});
}
-
GoogleTranslatorにて、Google翻訳APIを使用するためのオブジェクトを生成 -
translator.translateにて、翻訳対象の文言をtoにて指定した言語で翻訳を実行します-
to以外にfrom引数があり、翻訳対象の文言の言語コードを指定することにより、より詳細に翻訳を行うことが可能です。
-
まとめ
比較的簡単に翻訳機能を使用することができました。
翻訳機能としては、Google翻訳とdeepl翻訳が比較されることが多いと思います。
今回紹介したパッケージは、Google翻訳APIを使用しており、
deepl翻訳を使用したい場合は、以下のパッケージも存在しているとのことなので、興味がある方はぜひ試してみてください。
参考


Discussion